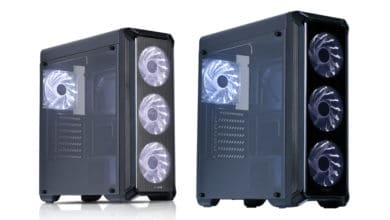
MSI has been active in the housing market for several years and has made a name for itself there. Now MSI brings again a new case to the market and extends its product range. The new case reminds optically of their top model MPG Sekira 500X. Now the question is how good this model is in comparison – will the dragon remain a visual eye-catcher in the case market, or will it lose its RBG colors completely? For you we have tested the MSI MPG SEKIRA 100R.
Specifications
| Supported mainboards | E-ATX / ATX / M-ATX / Mini ITX |
| Dimensions (LxHxW) | 420 x 215 x 475 mm |
| Connections | 2 x USB 3.2 Gen 1 Type A / 1 x USB 3.2 Gen 2 Type C / HD Audio / Mic |
| Drives | 2 x 2.5″, 2 x 3.5″ with 2.5″ combo tray |
| Supported graphics cards | up to 340 mm |
| Supported CPU coolers | to 170 mm |
| Power supply | Standard ATX, up to 250 mm (without 3.5″ HDD bay) |
| Fan support | Front: 3 x 120 mm or 2 x 140 mm (3 x 120mm ARGB Fan included) Top: 2 x 120 mm or 2 x 140 mm Back: 1 x 120 mm (1 x 120 mm ARGB Fan included) |
| Radiator support | front: up to 360 mm Top: up to 240 mm Back: up to 120 mm |
| Price | € 122.90 * |


Scope of delivery
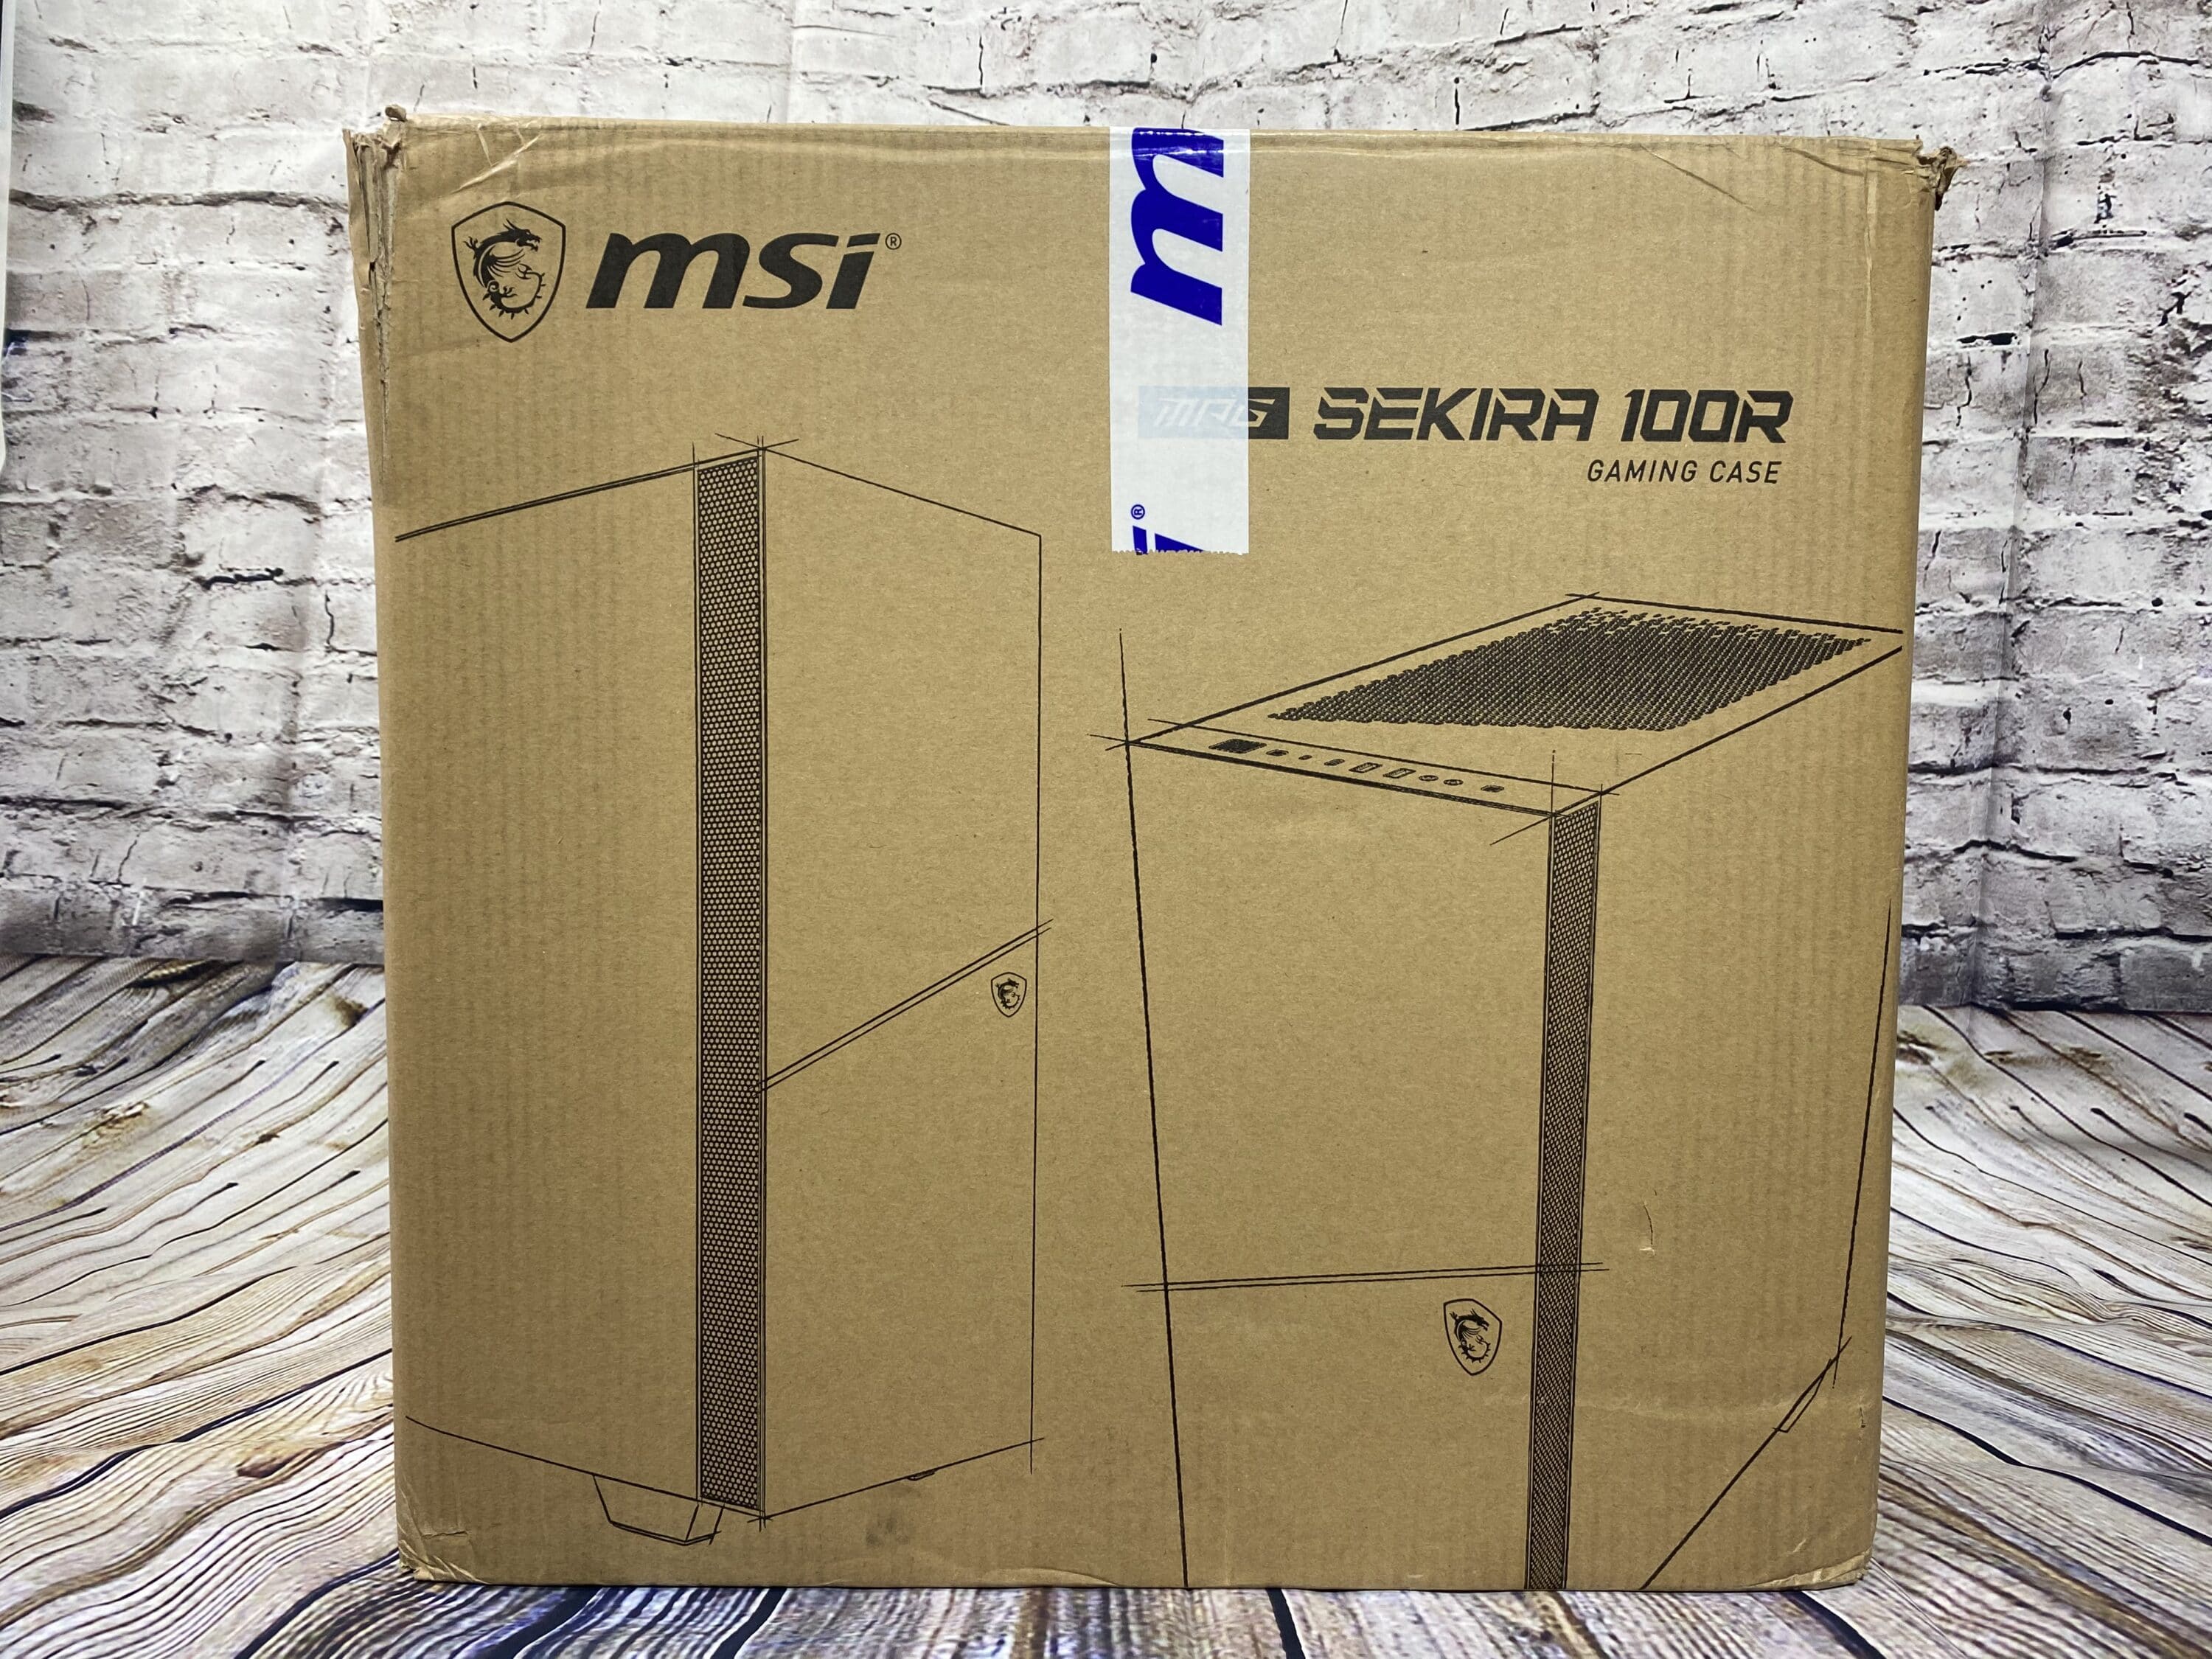
The case arrives in a standard brown cardboard box. Outside one sees immediately which case it concerns, since the product name and a picture of the case are there on it. In addition one finds there also all important specifications. The case has been secured from the inside with styrofoam and a transparent plastic foil and is thus protected from delivery damages.

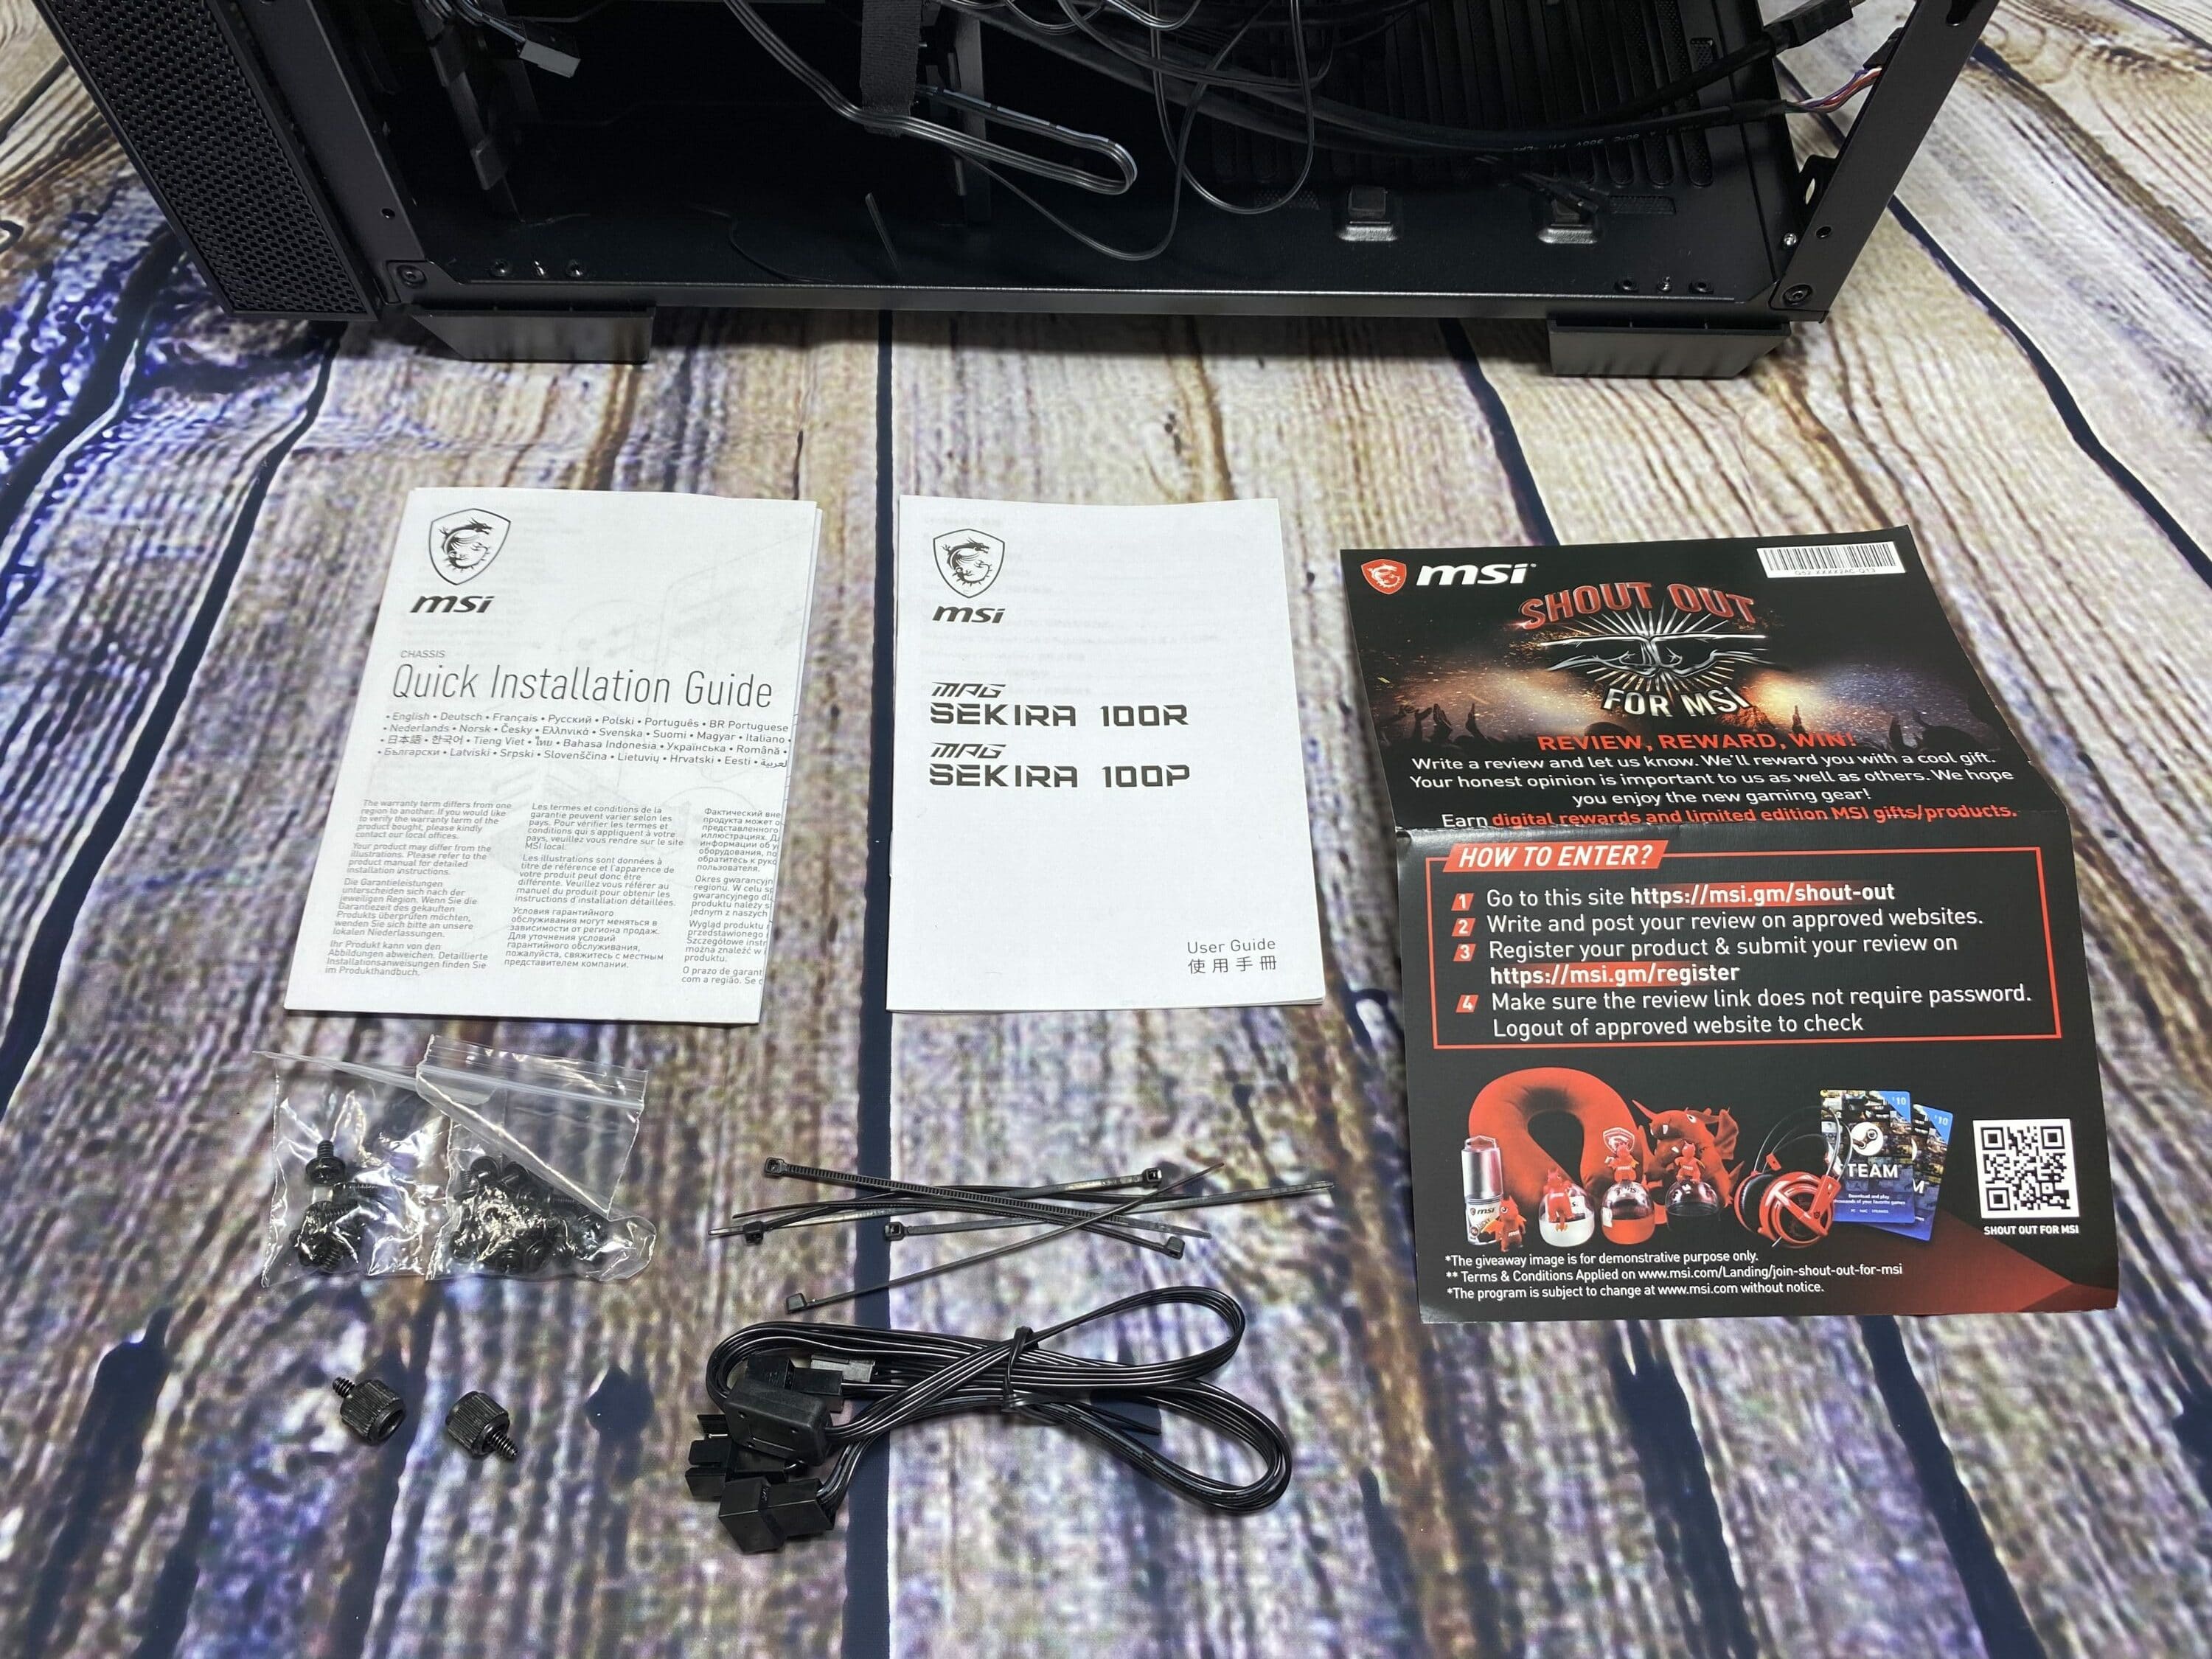
The case contains a “Quick Installation Guide”, “MPG SEKIRA 100R User Guide”, screws, cable ties, 3-pin extension cable and advertising. Four ARGB fans from MSI are included, which are mounted on the case from the beginning and are connected to an RGB controller located on the back of the case. It is nice that all cables that are inside the case are held by velcro fasteners at the back. All existing cables are pre-sorted and you can immediately start mounting your own hardware. At this point we would have liked to have more velcro fasteners for additional cables as an extension. In addition, you have a good first overview of everything, which simplifies things.
Outside impression
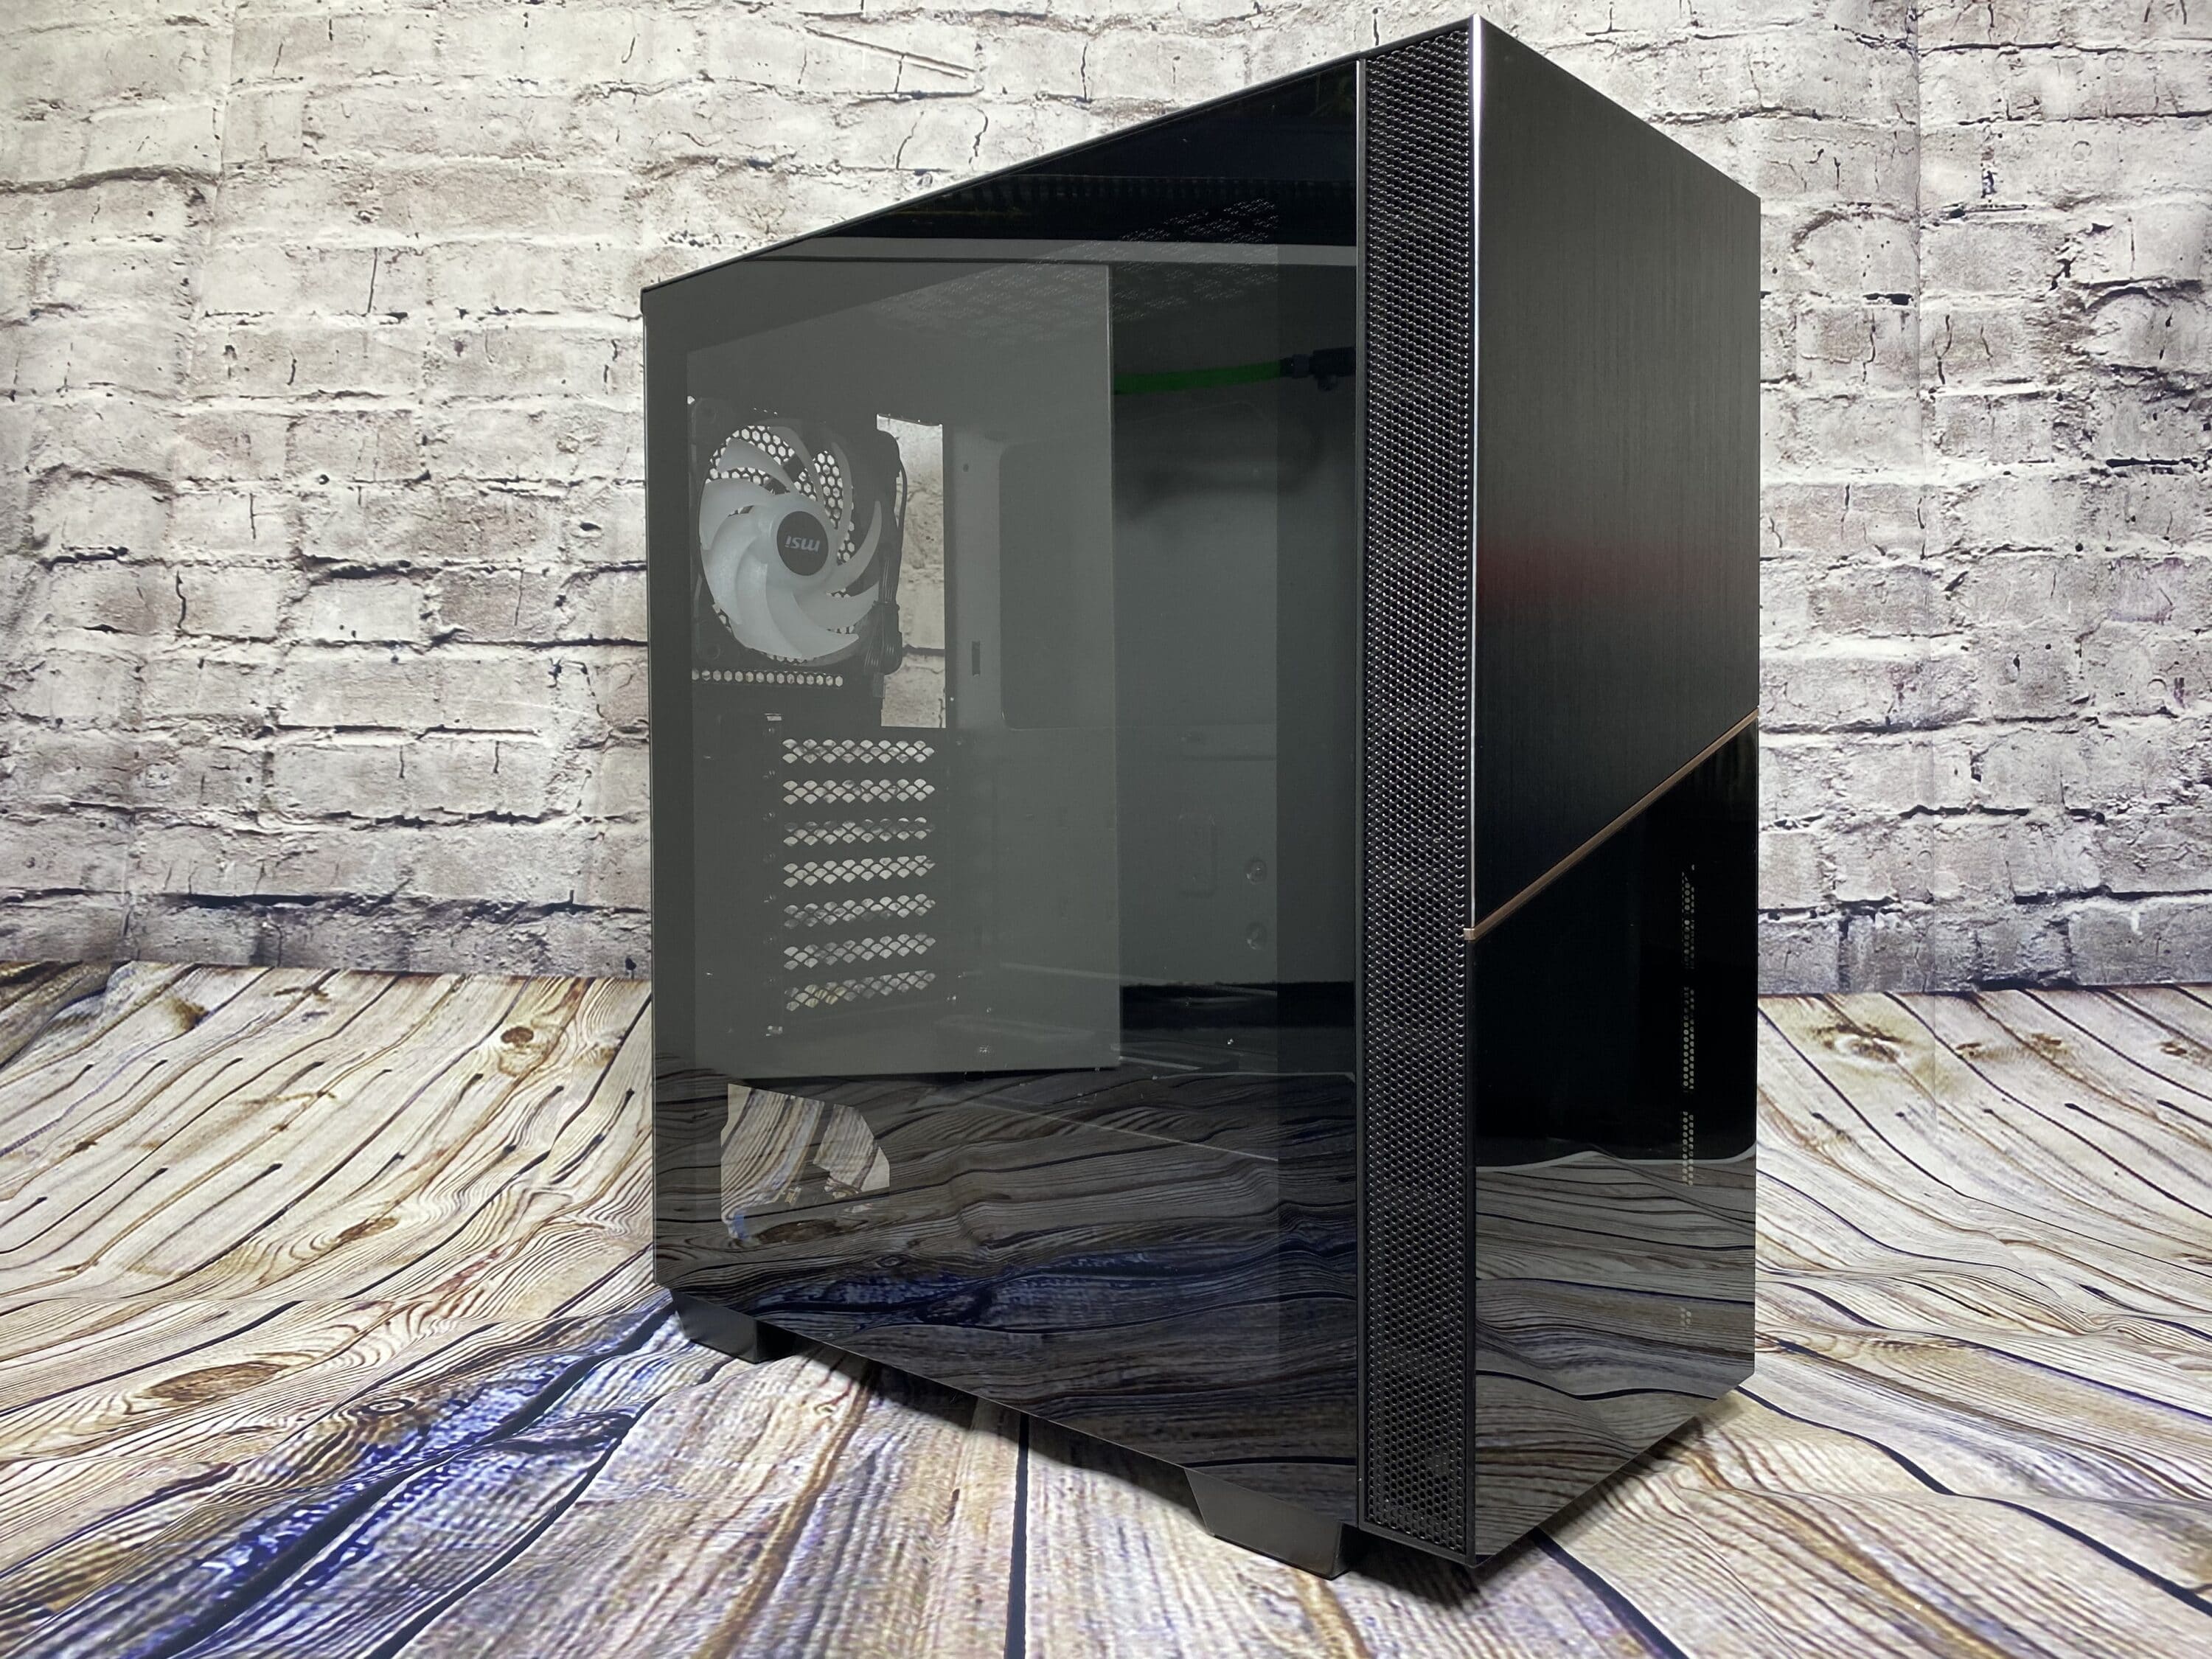
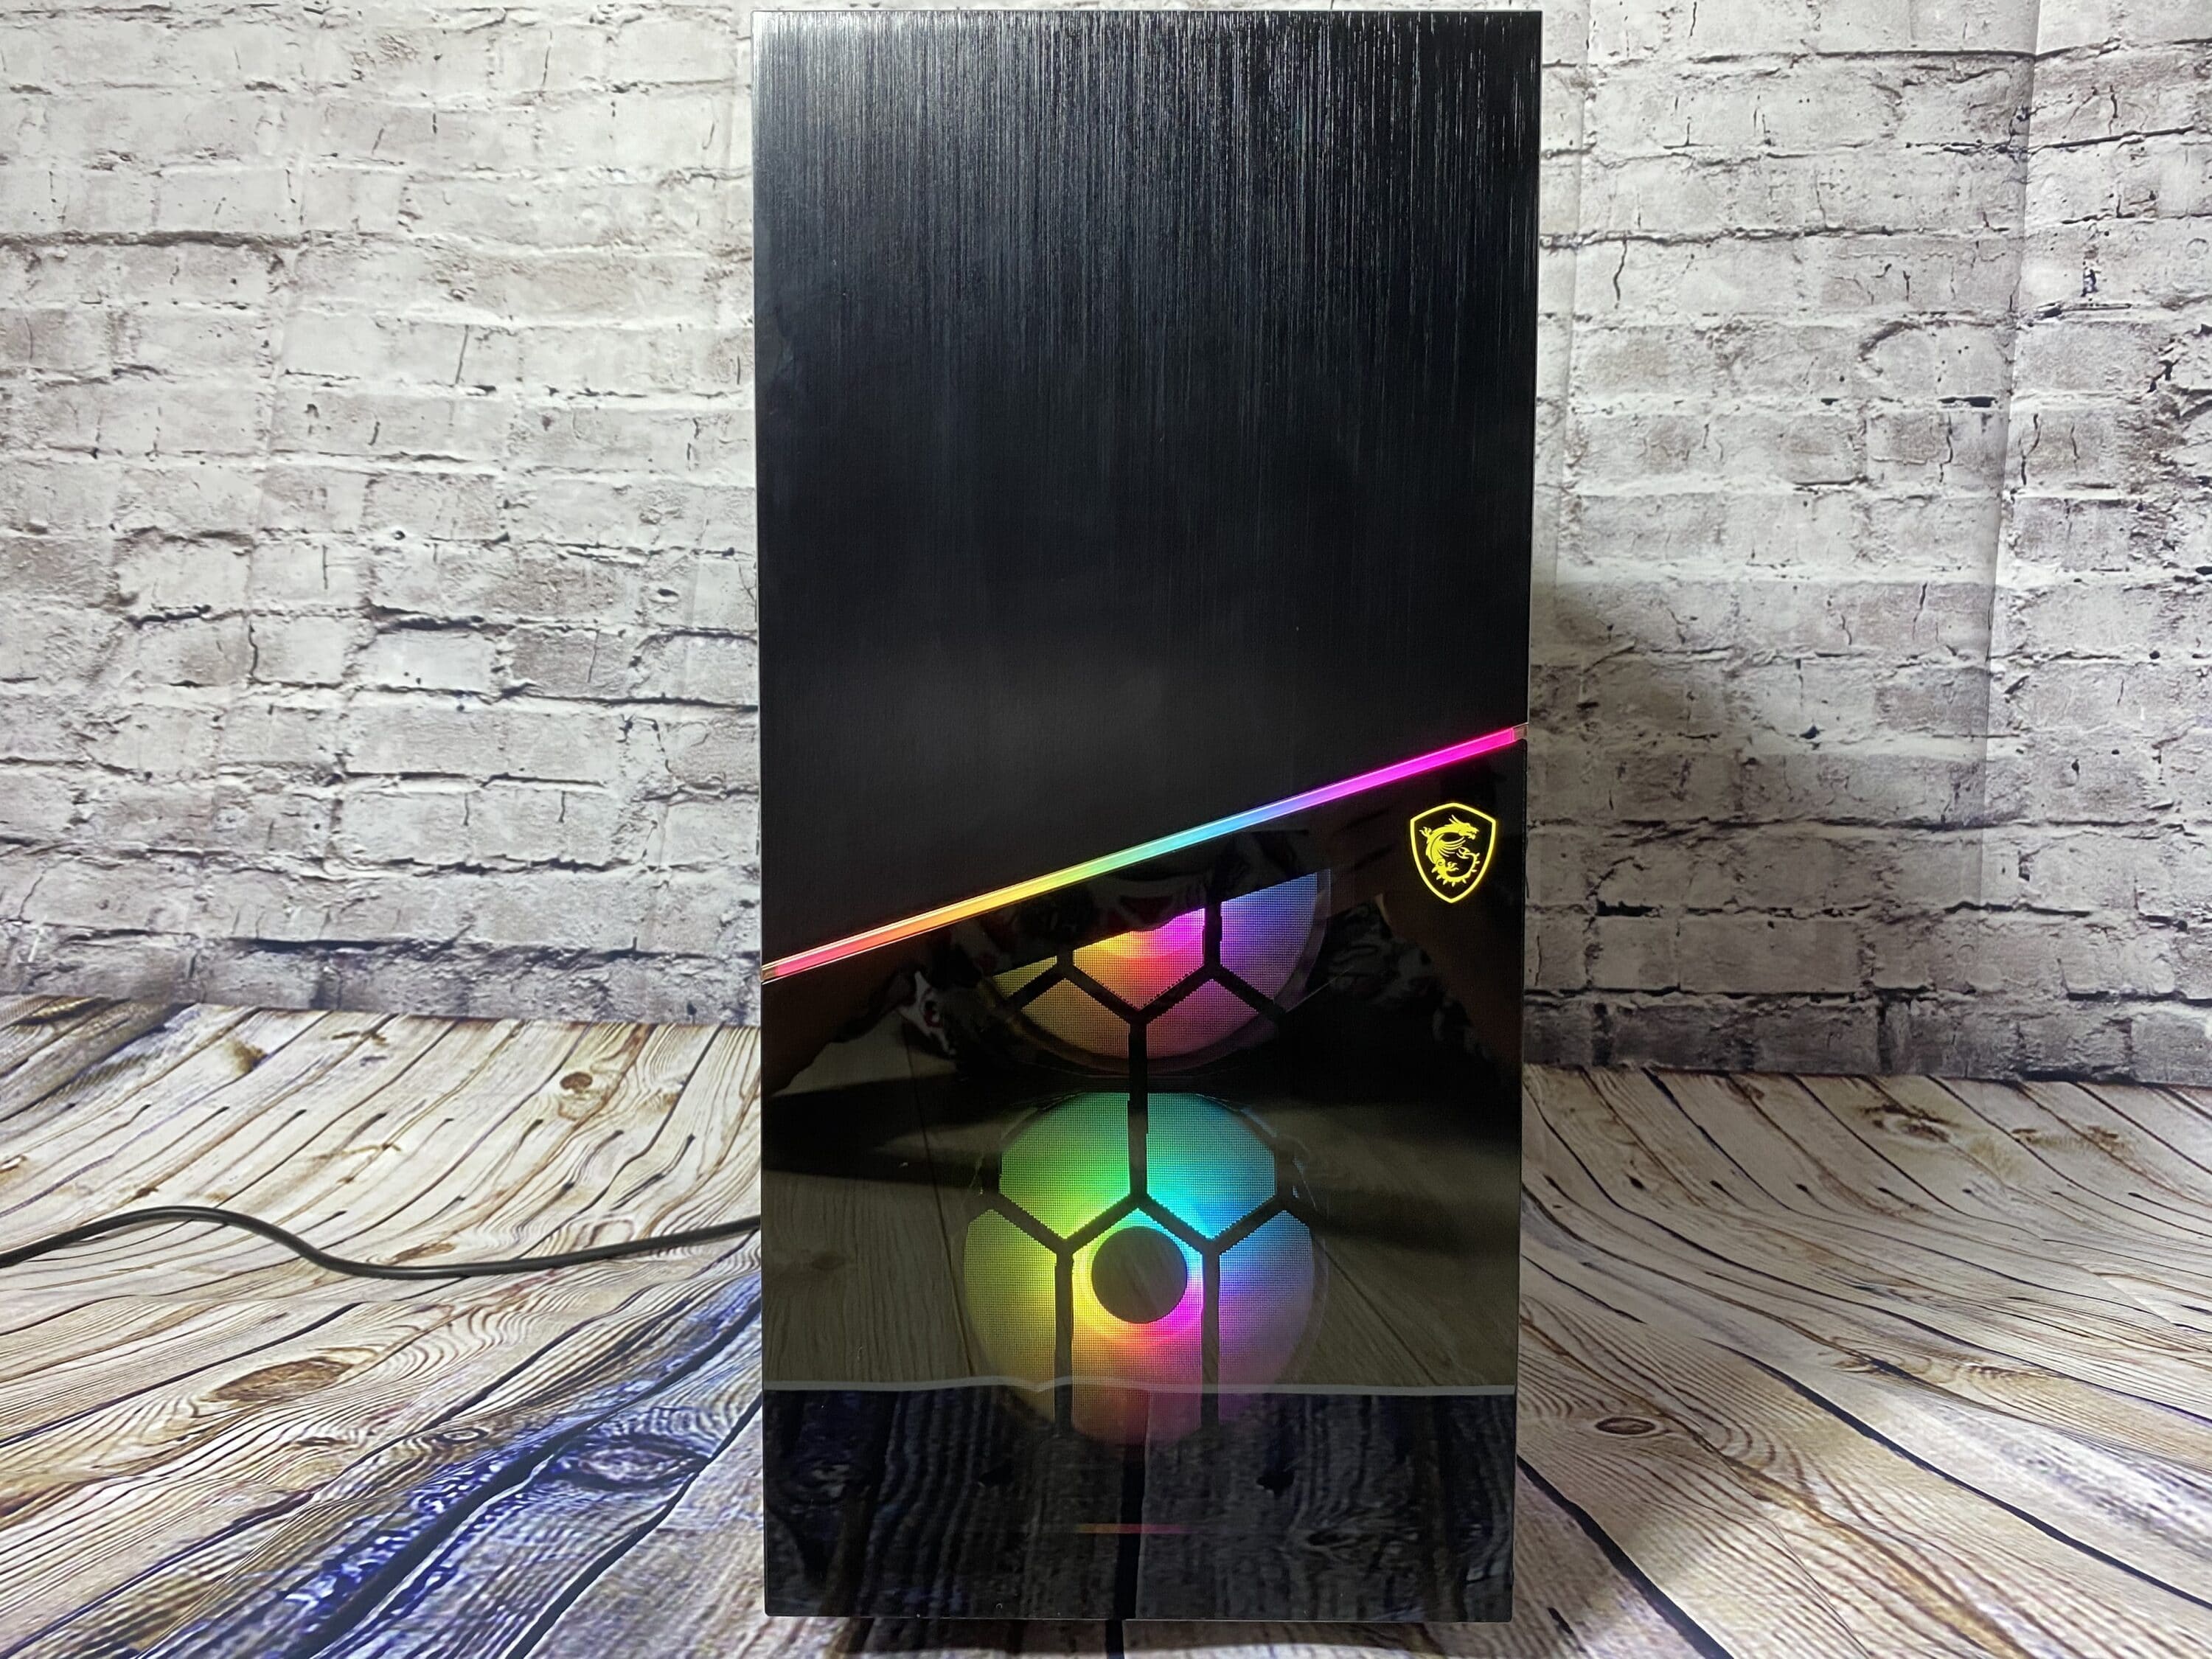
From MSI you’re used to a lot of quality, so you can see that when you look at the case for the first time. From the front, the case makes a solid impression. The front is made of black brushed aluminum and glass, separated by an RGB bar – that looks very successful. The glass is well workmanship and the fans behind it make an elegant impression thanks to the honeycomb dust collector. The front panel can also be removed with a powerful jerk forward. It is attached with a plug system, which works very well, because everything simply snaps into place and is also fixed in the holder. The dust filter can also be easily removed by pulling it off to the side. Unfortunately, there is no foam insulation at this point, but this should not be necessary because the gaps are all very flush and tight.
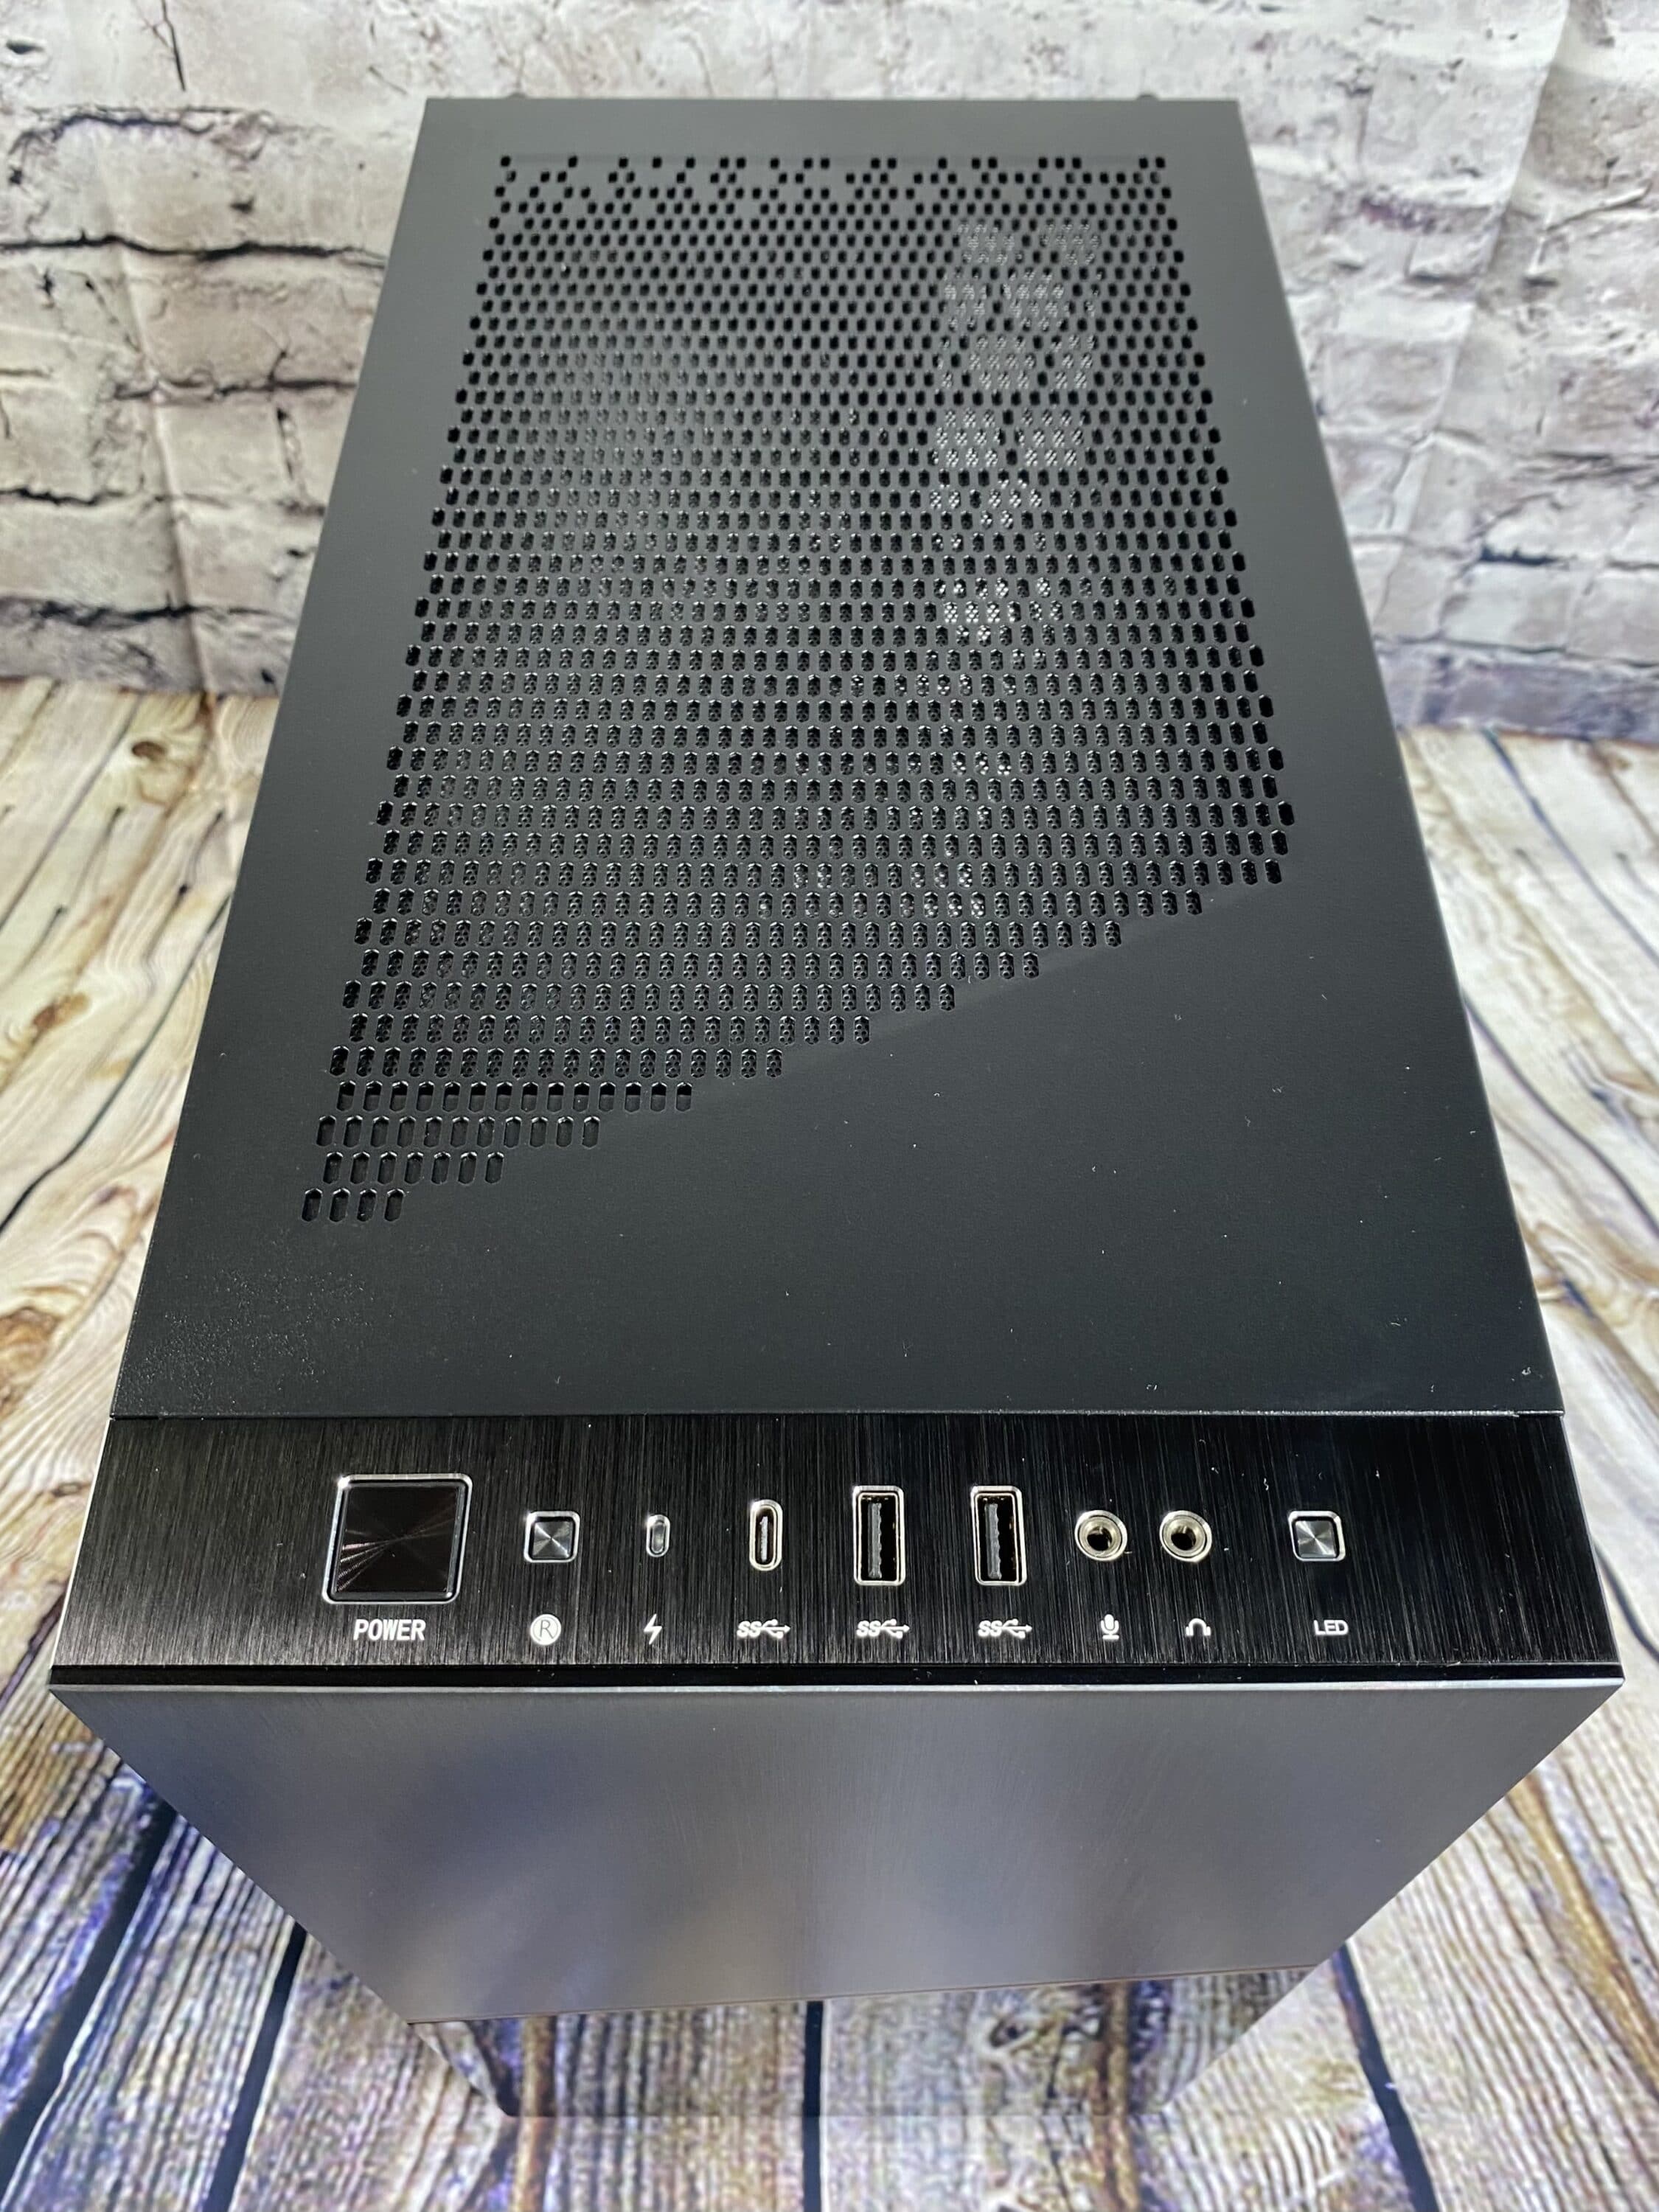
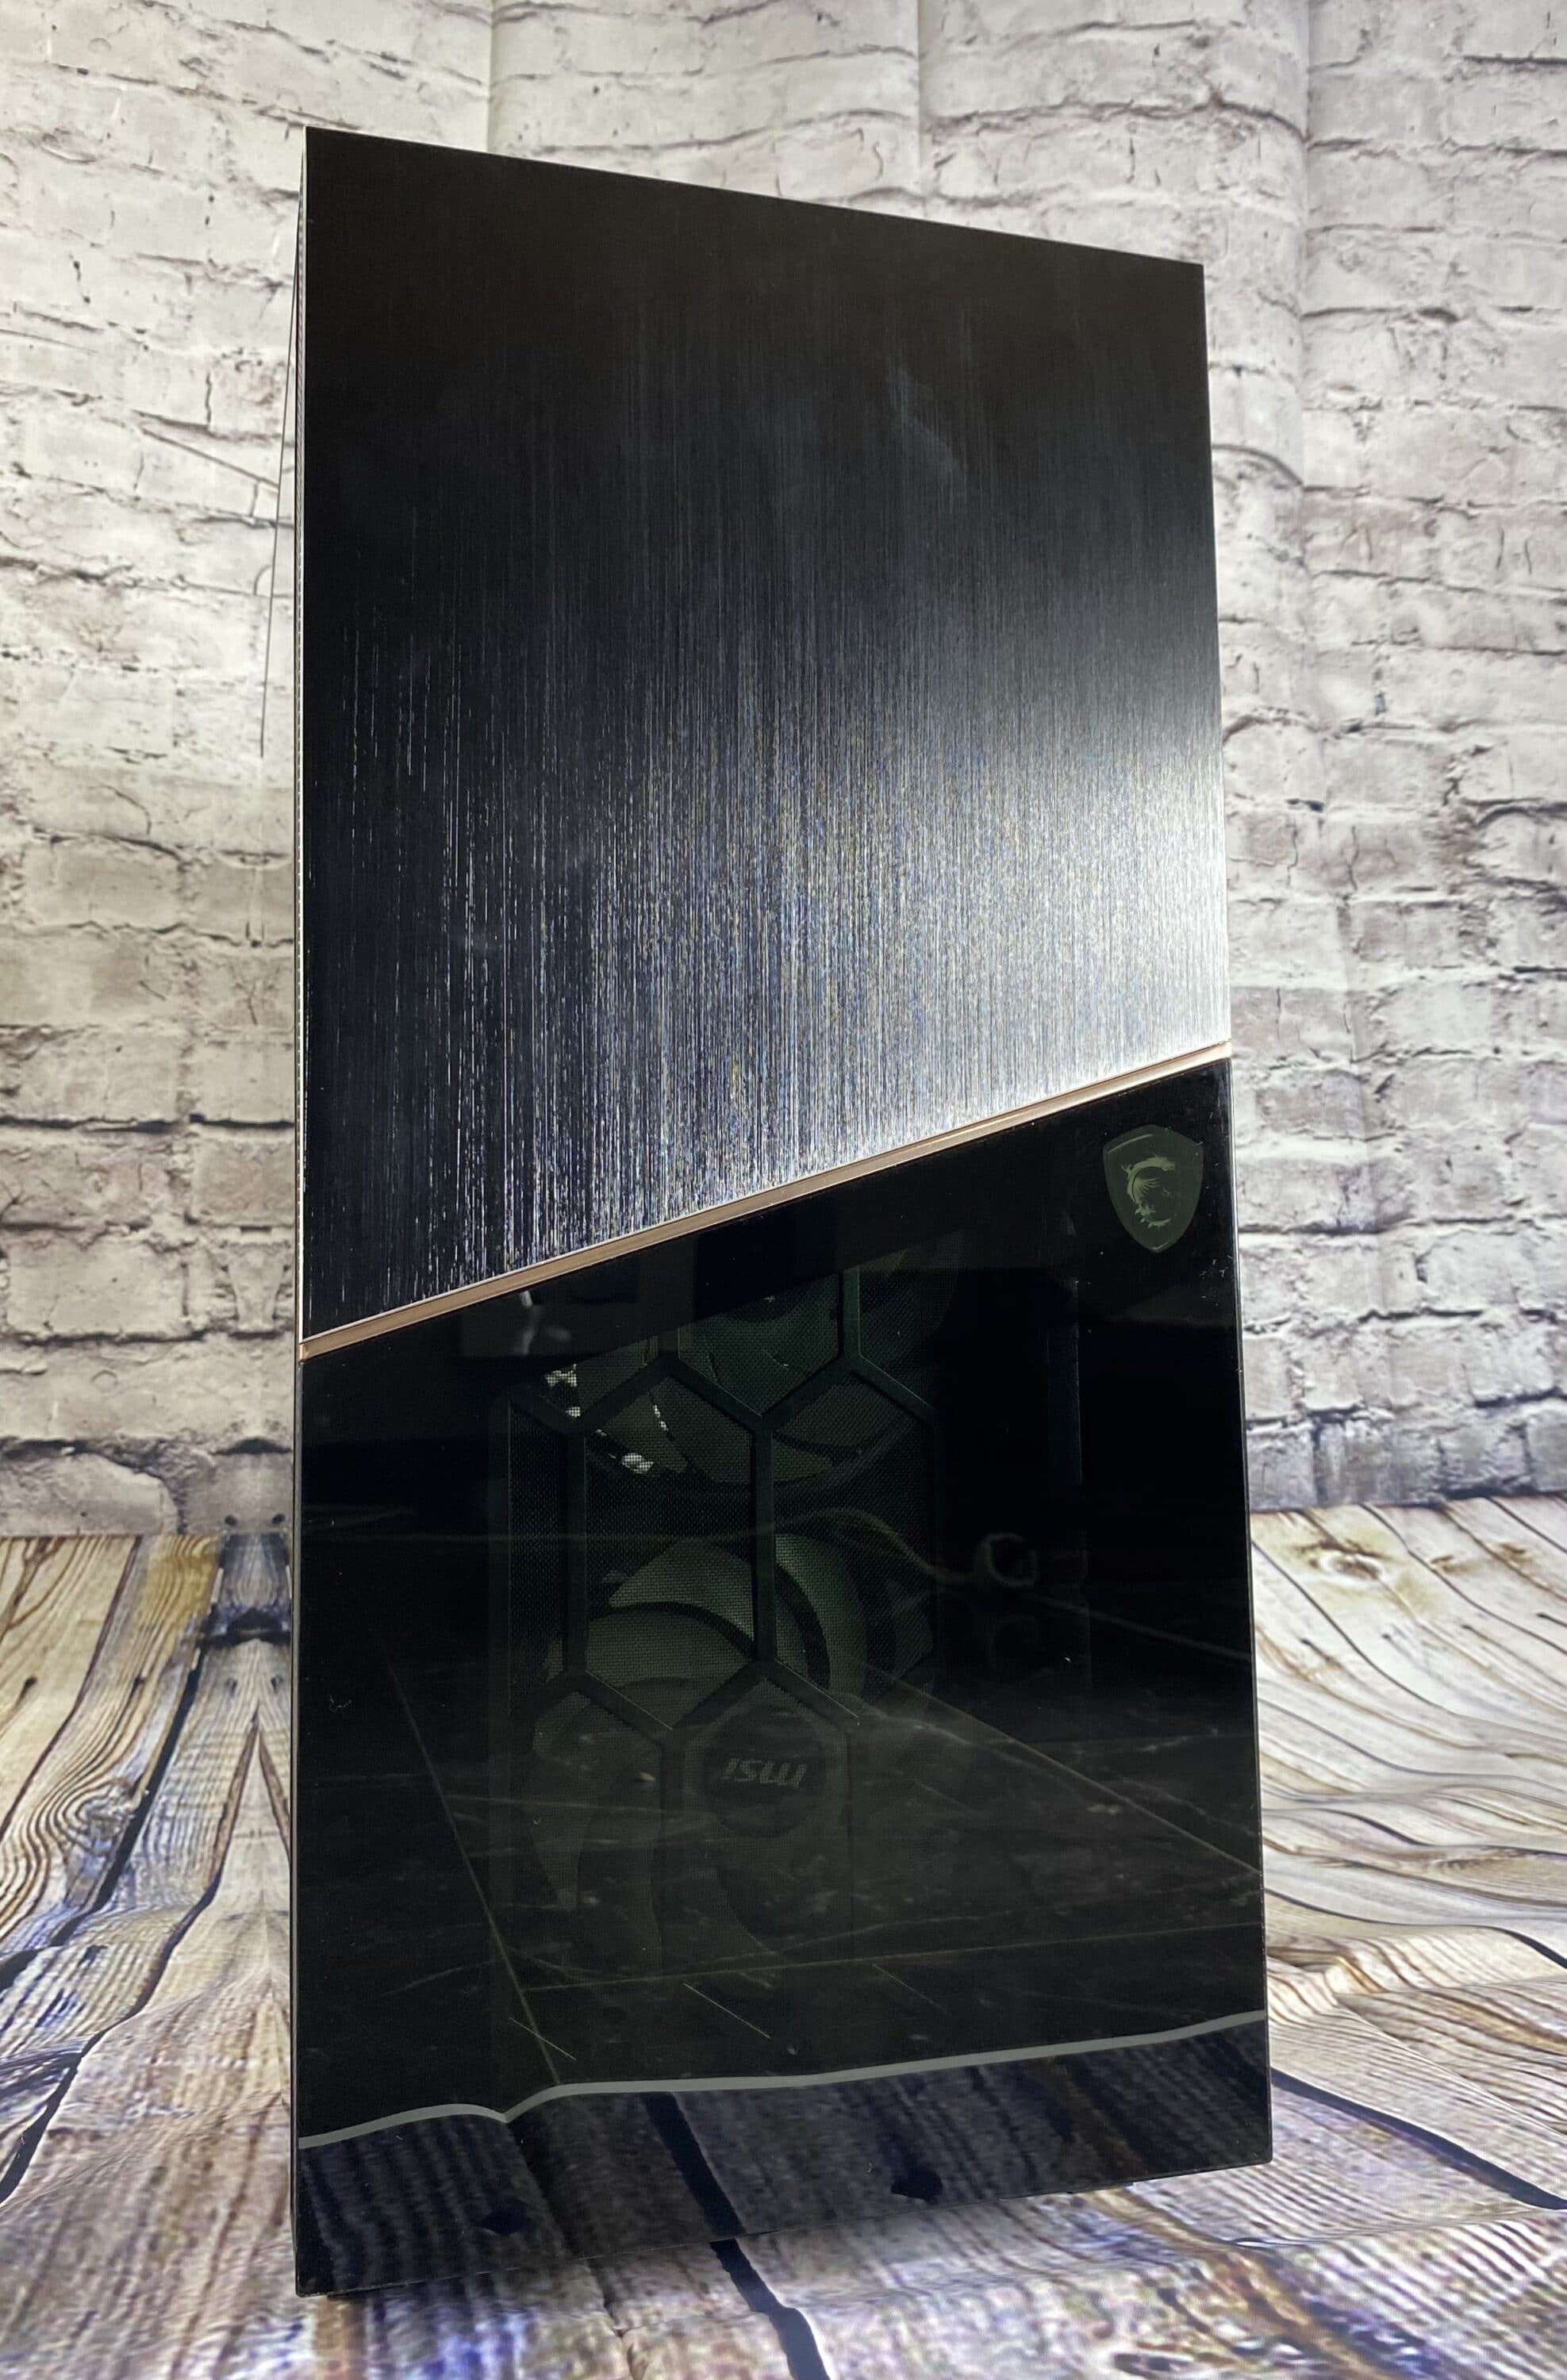
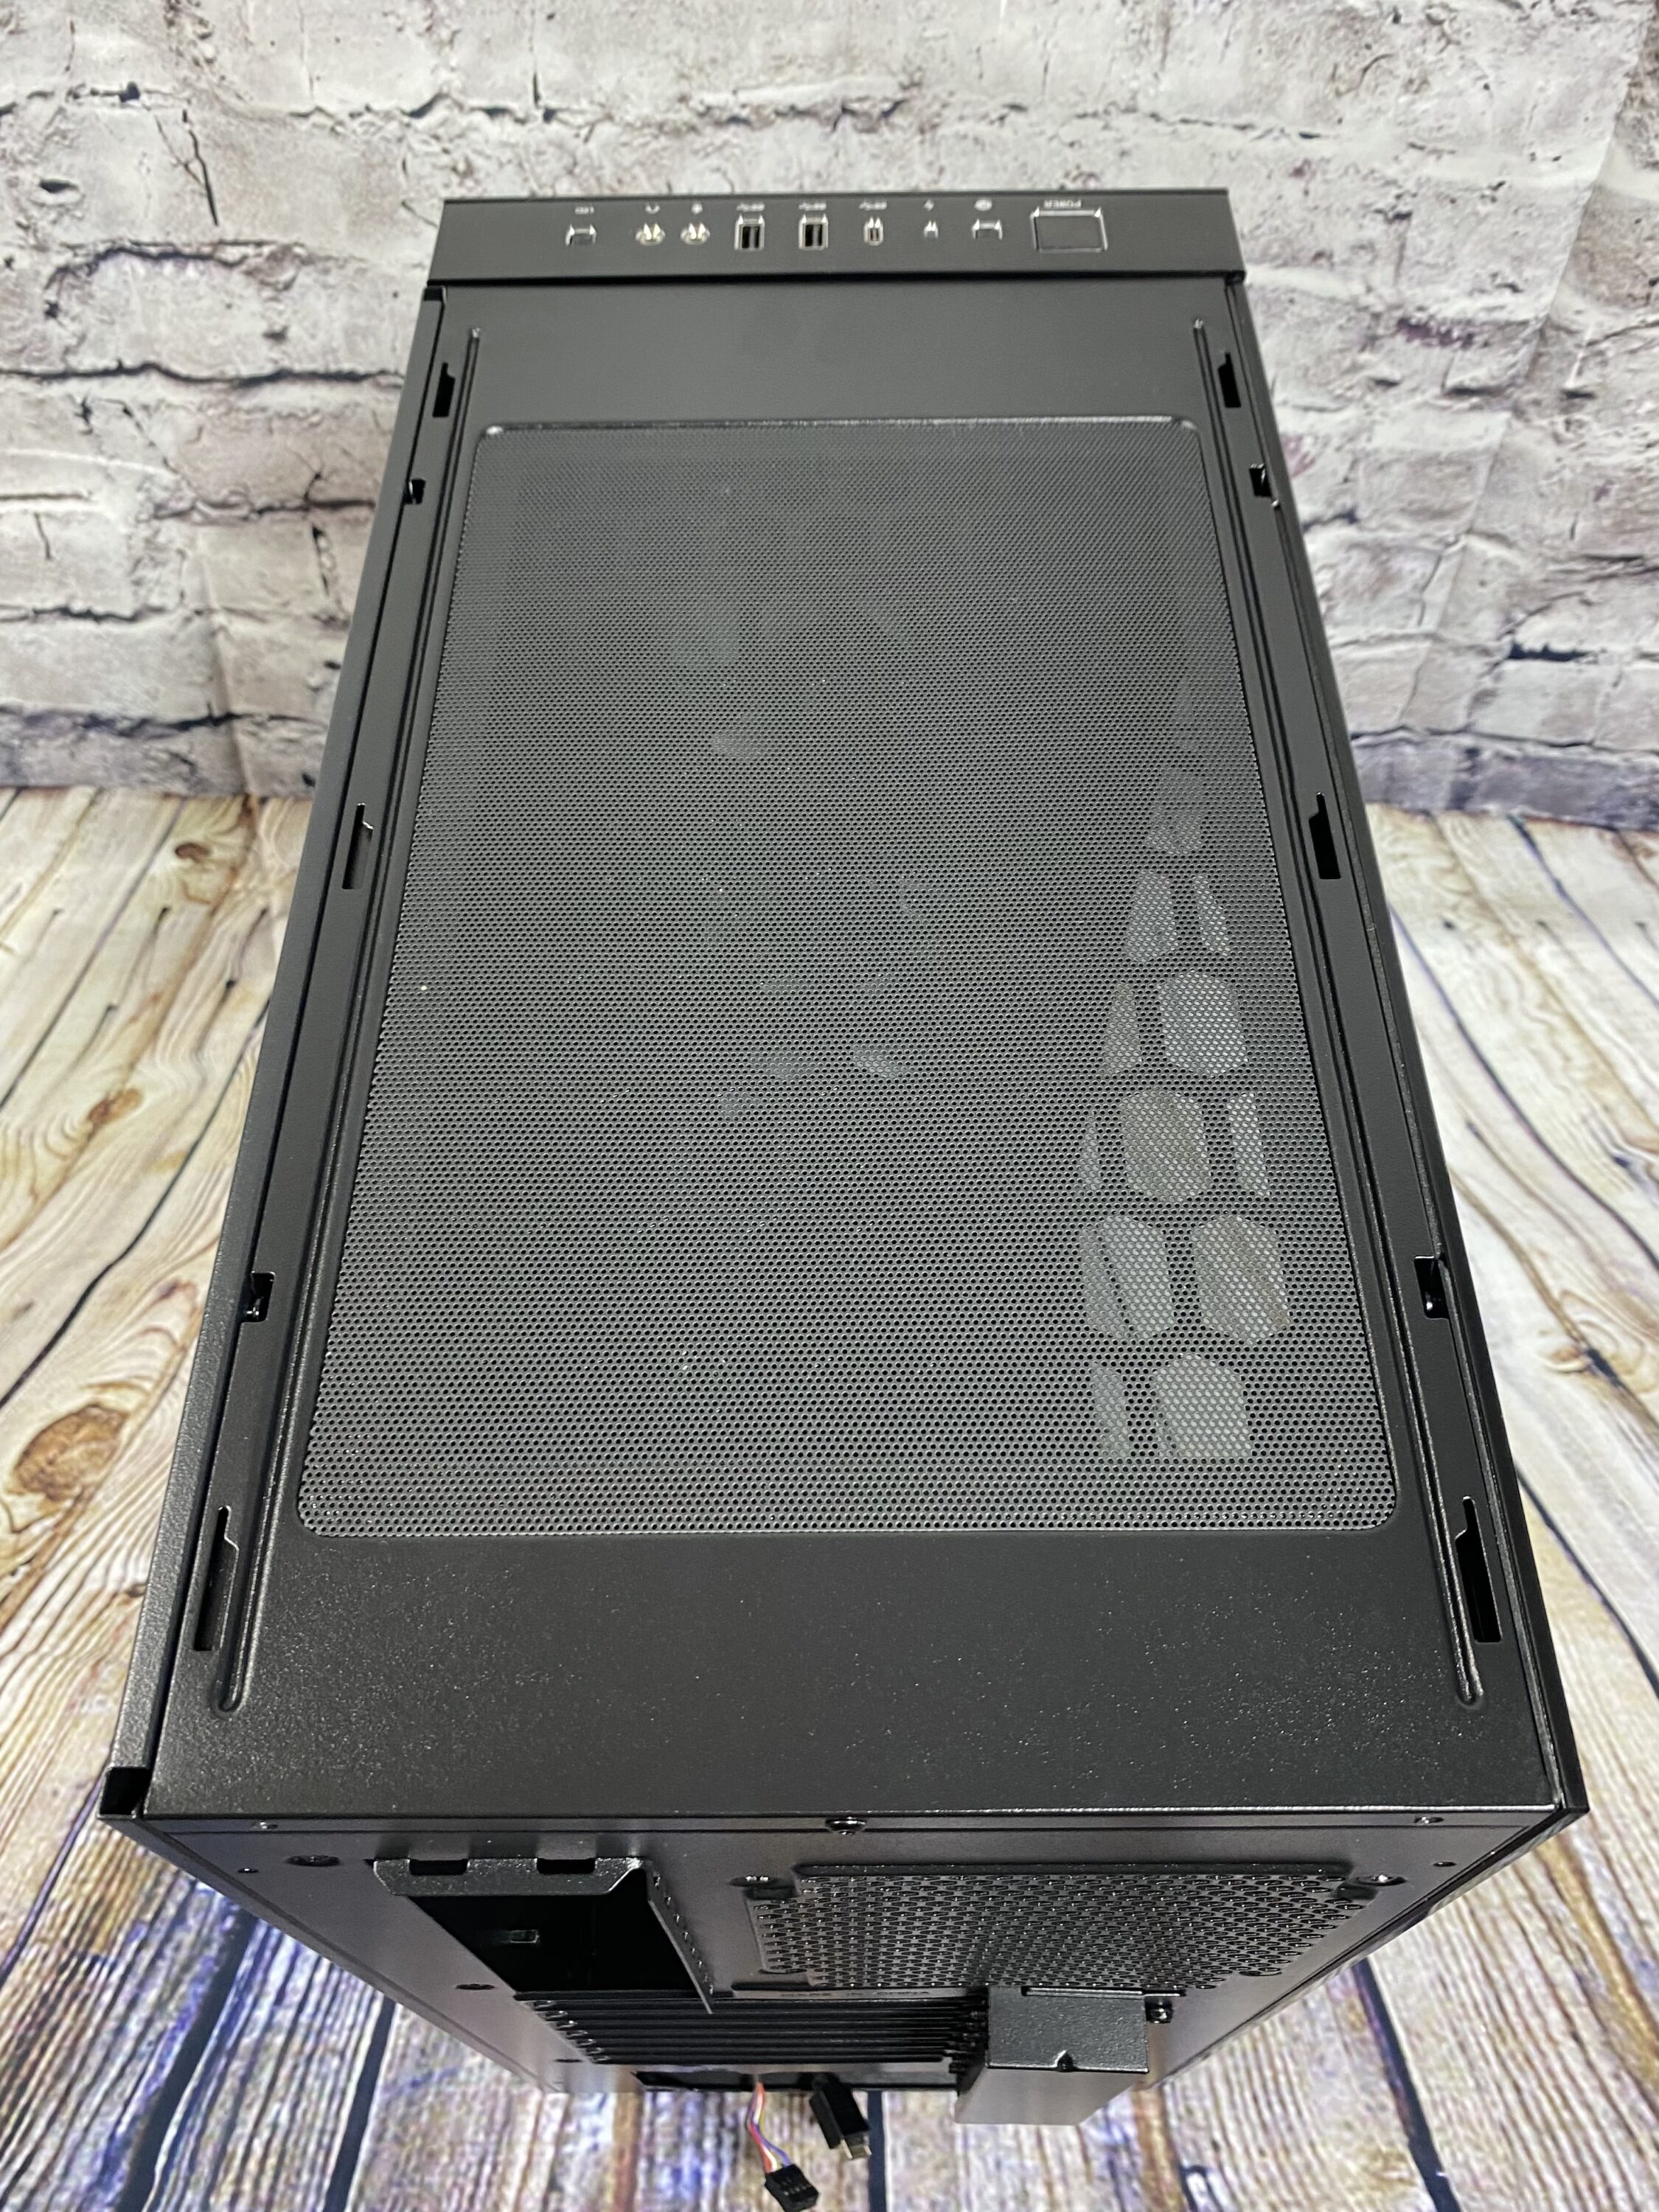
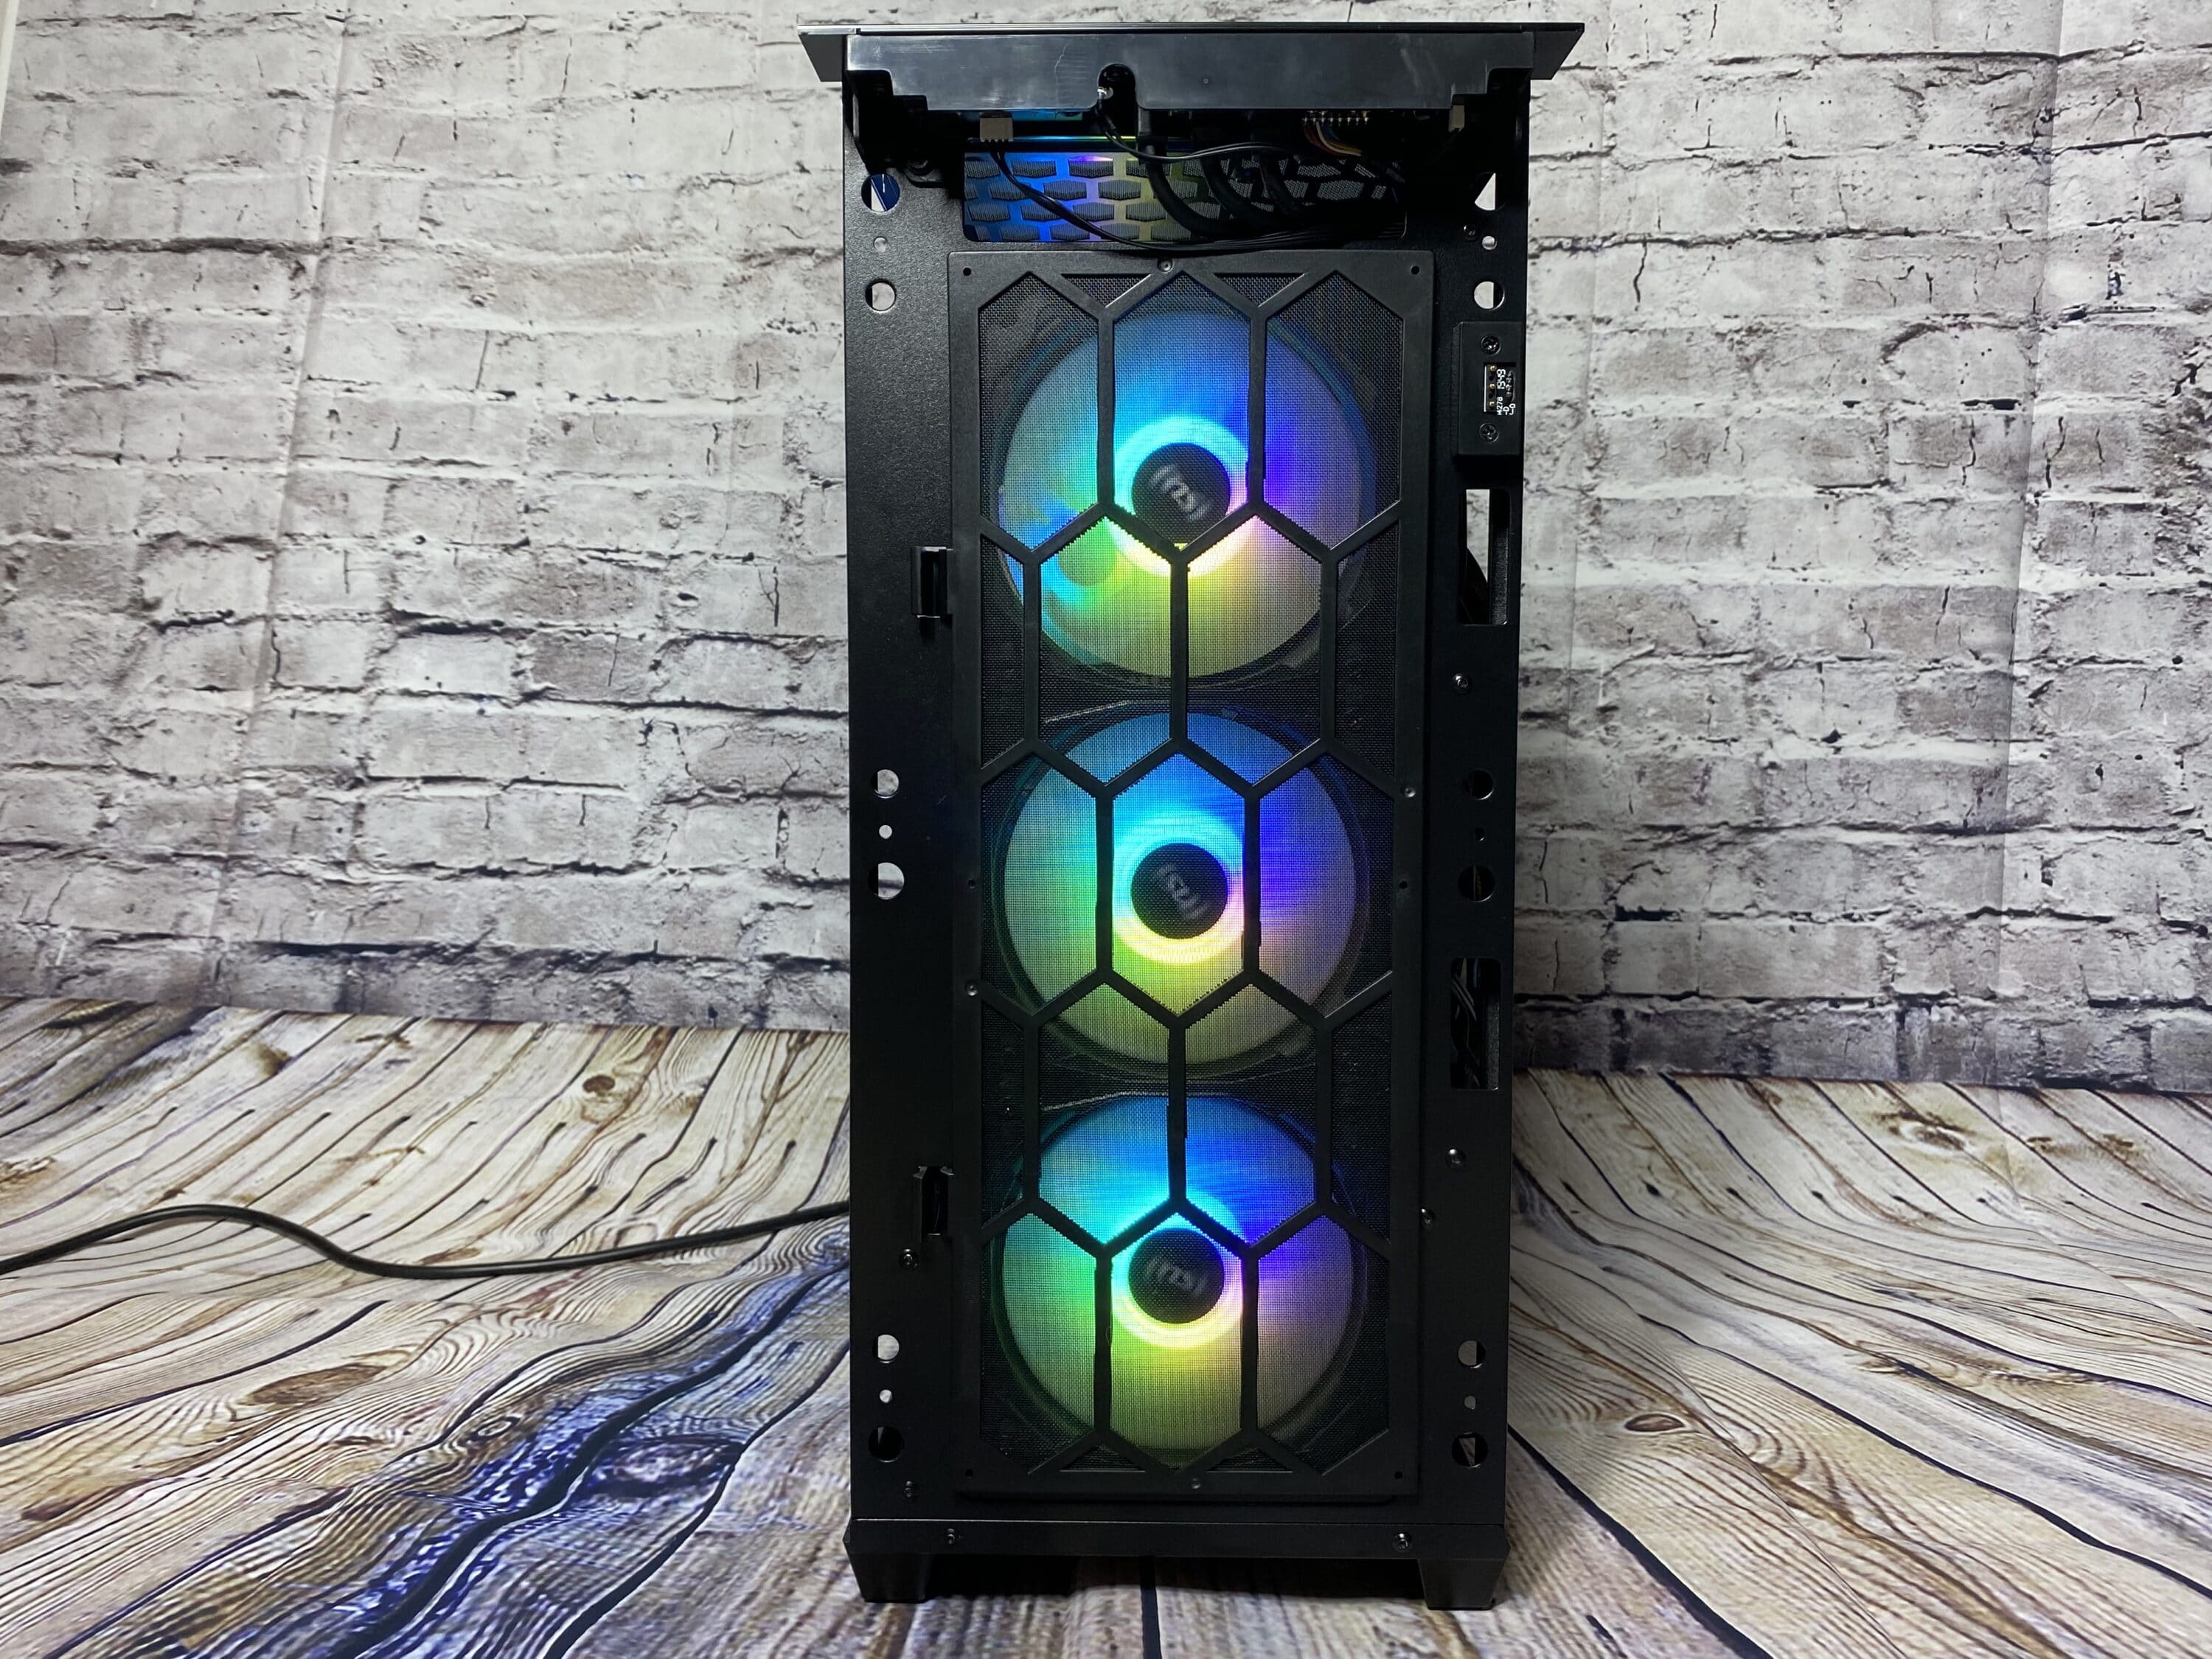
The solid design continues at the top. The buttons and connections are located at the front of the case. You will find a power button, reset button, power LED, USB-C port, two USB-A ports, microphone jack, speaker jack and a button to change the RGB lighting of the case. All buttons are easy to operate individually and do not hook or clasp anywhere. At the top there is also another ventilation slot for two additional fans. Here you can also find another grid pattern, which has been punched a little bit down. Between the inside of the case and the outside cover there is also another dust filter. Unfortunately there is no glass plate at this point, as it can be found on the MPG Sekira 500X. But the airflow is better here.
If you look at the glass side of the case, you will notice that you can get a very good view of the inside of the case. Basically, the case looks very flush here. The ventilation slit on the right side of the front panel, which is open on both sides, is big enough to let some cooling air into the case. Unlike the MPG Sekira 500X, there is no wide ventilation slot at the top. Here the glass has been well workmanship and is supported by foam on the inside for insulation on the sides.
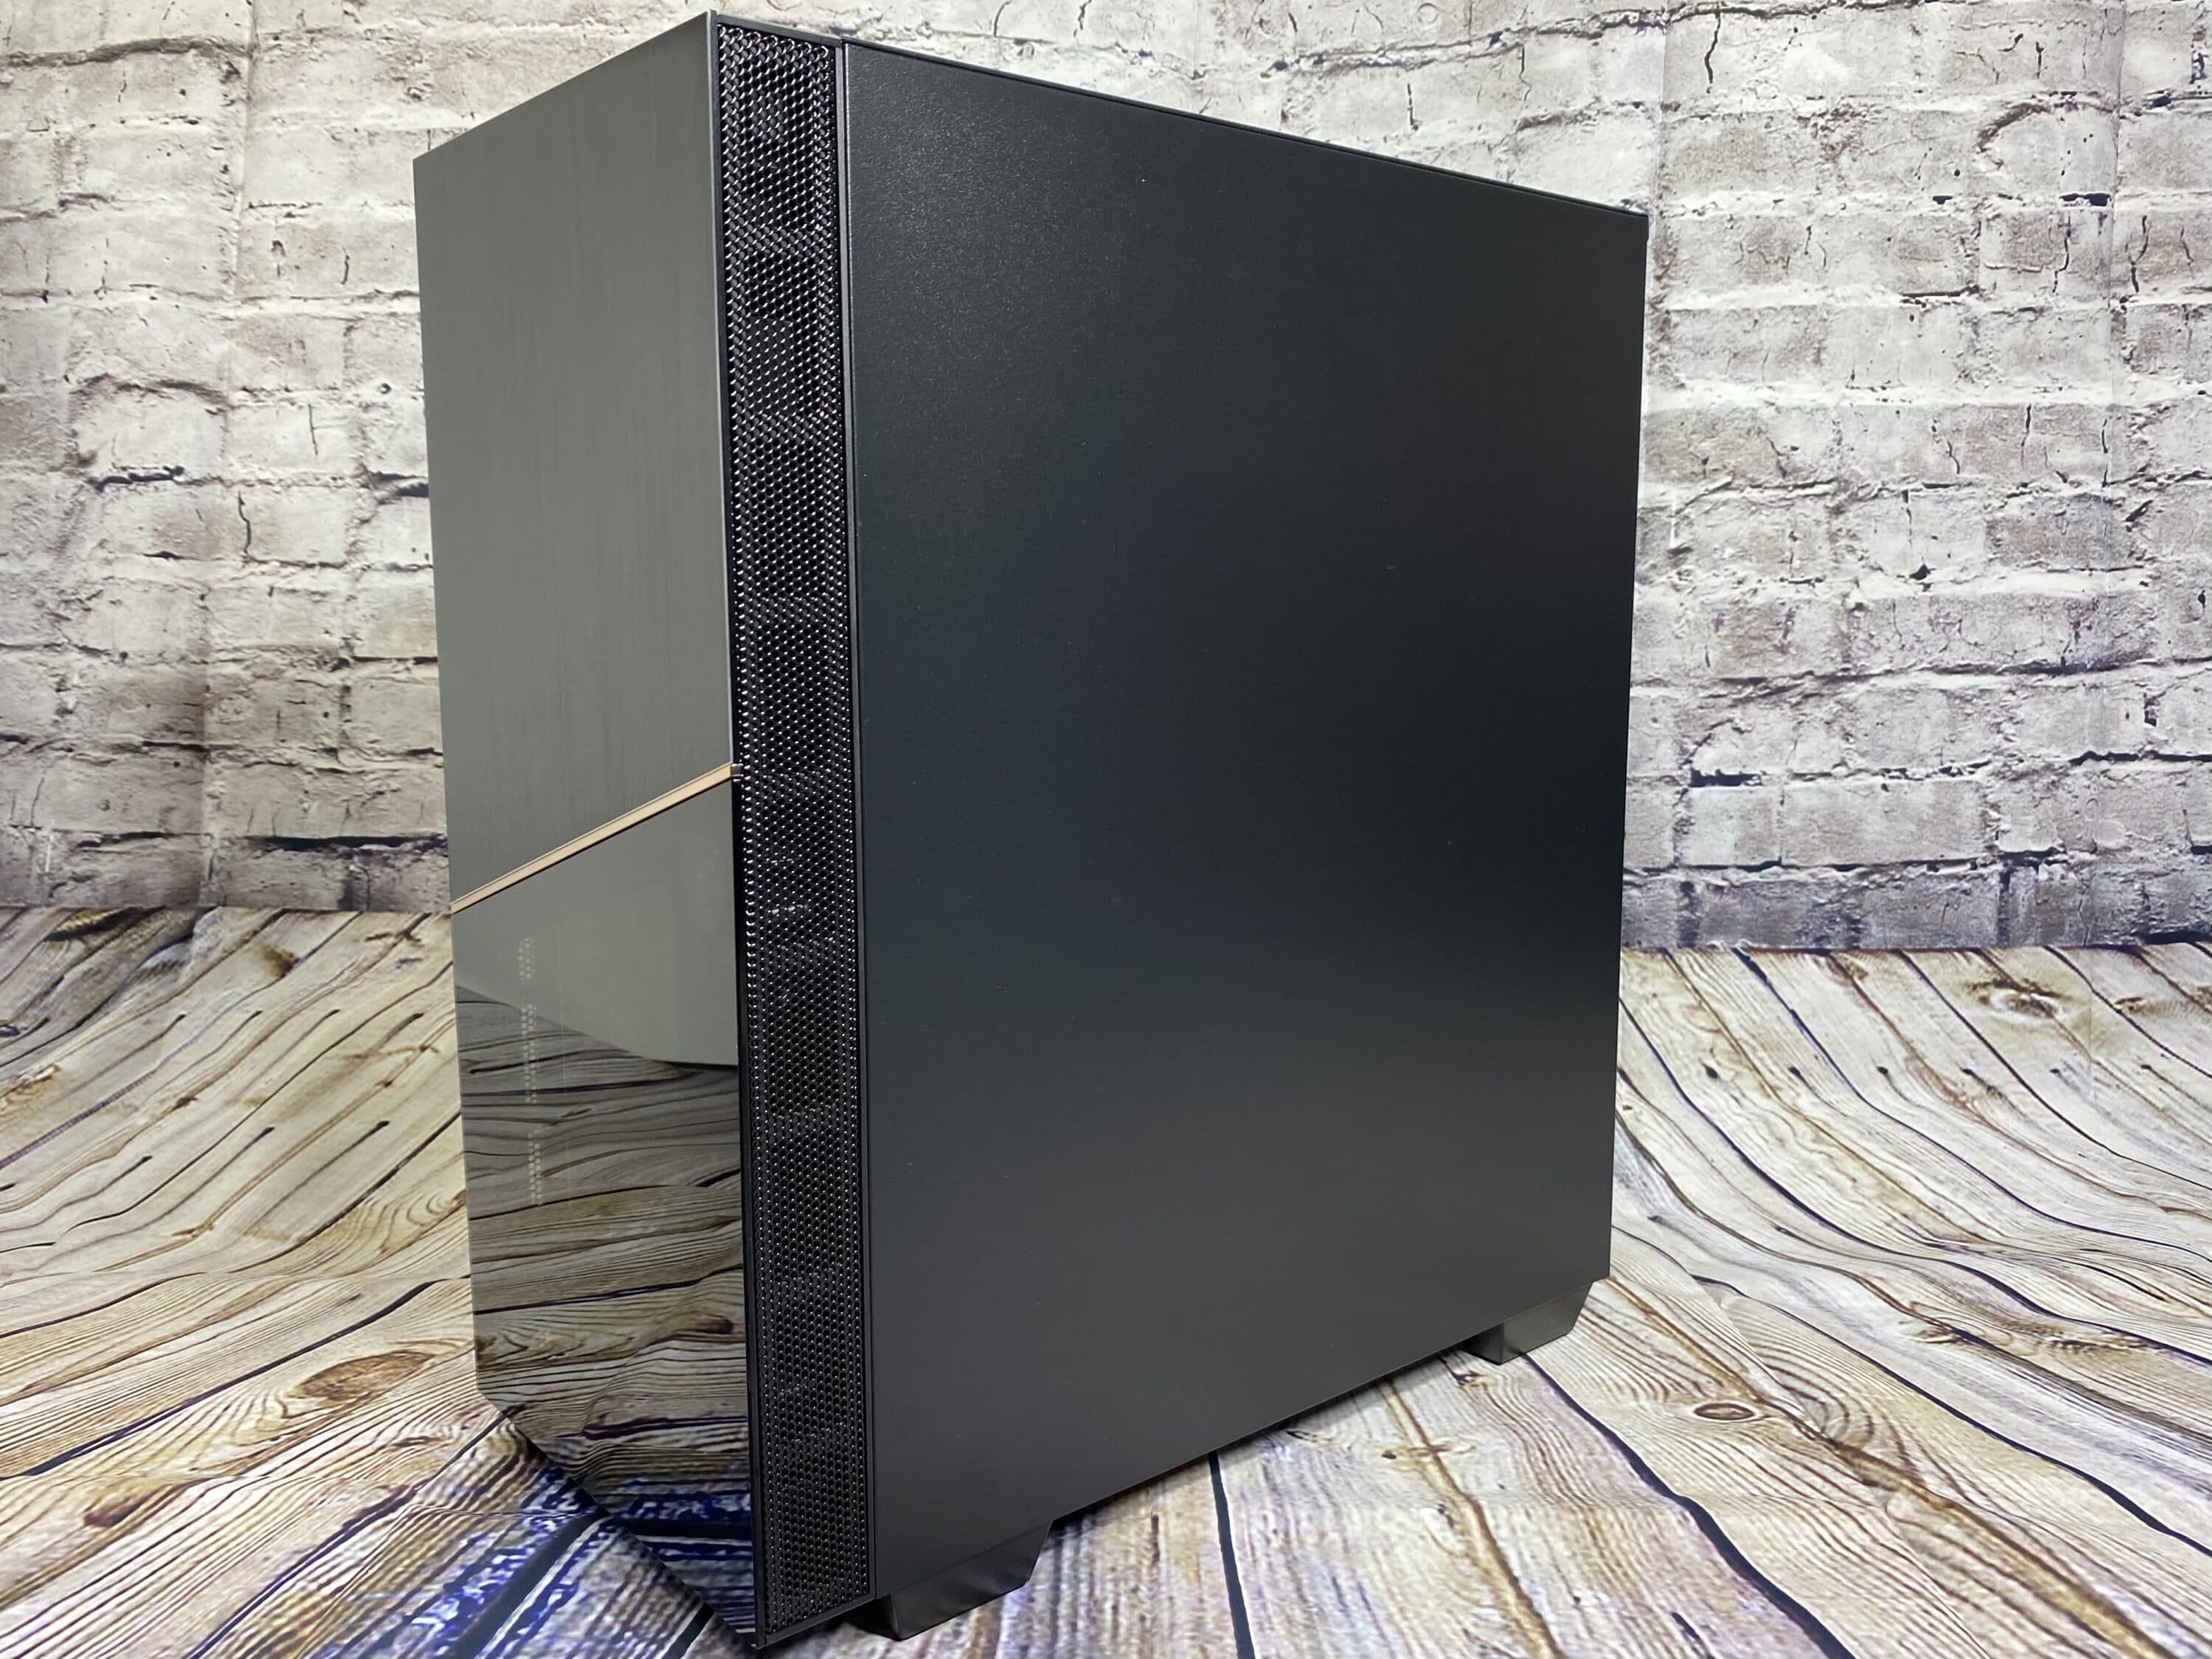
There is nothing exciting to find on the opposite side of the case. The case is closed completely straight and flush at this point, without an opening. The two side plates can be removed by unscrewing the top screwed-on top plate towards the top. This is done by simply pushing the side plates upwards. The provided brackets appear solid and also the brackets on the side plates have been sufficiently and well workmanship. For the MPG Sekira 500X we find hinges at this point.
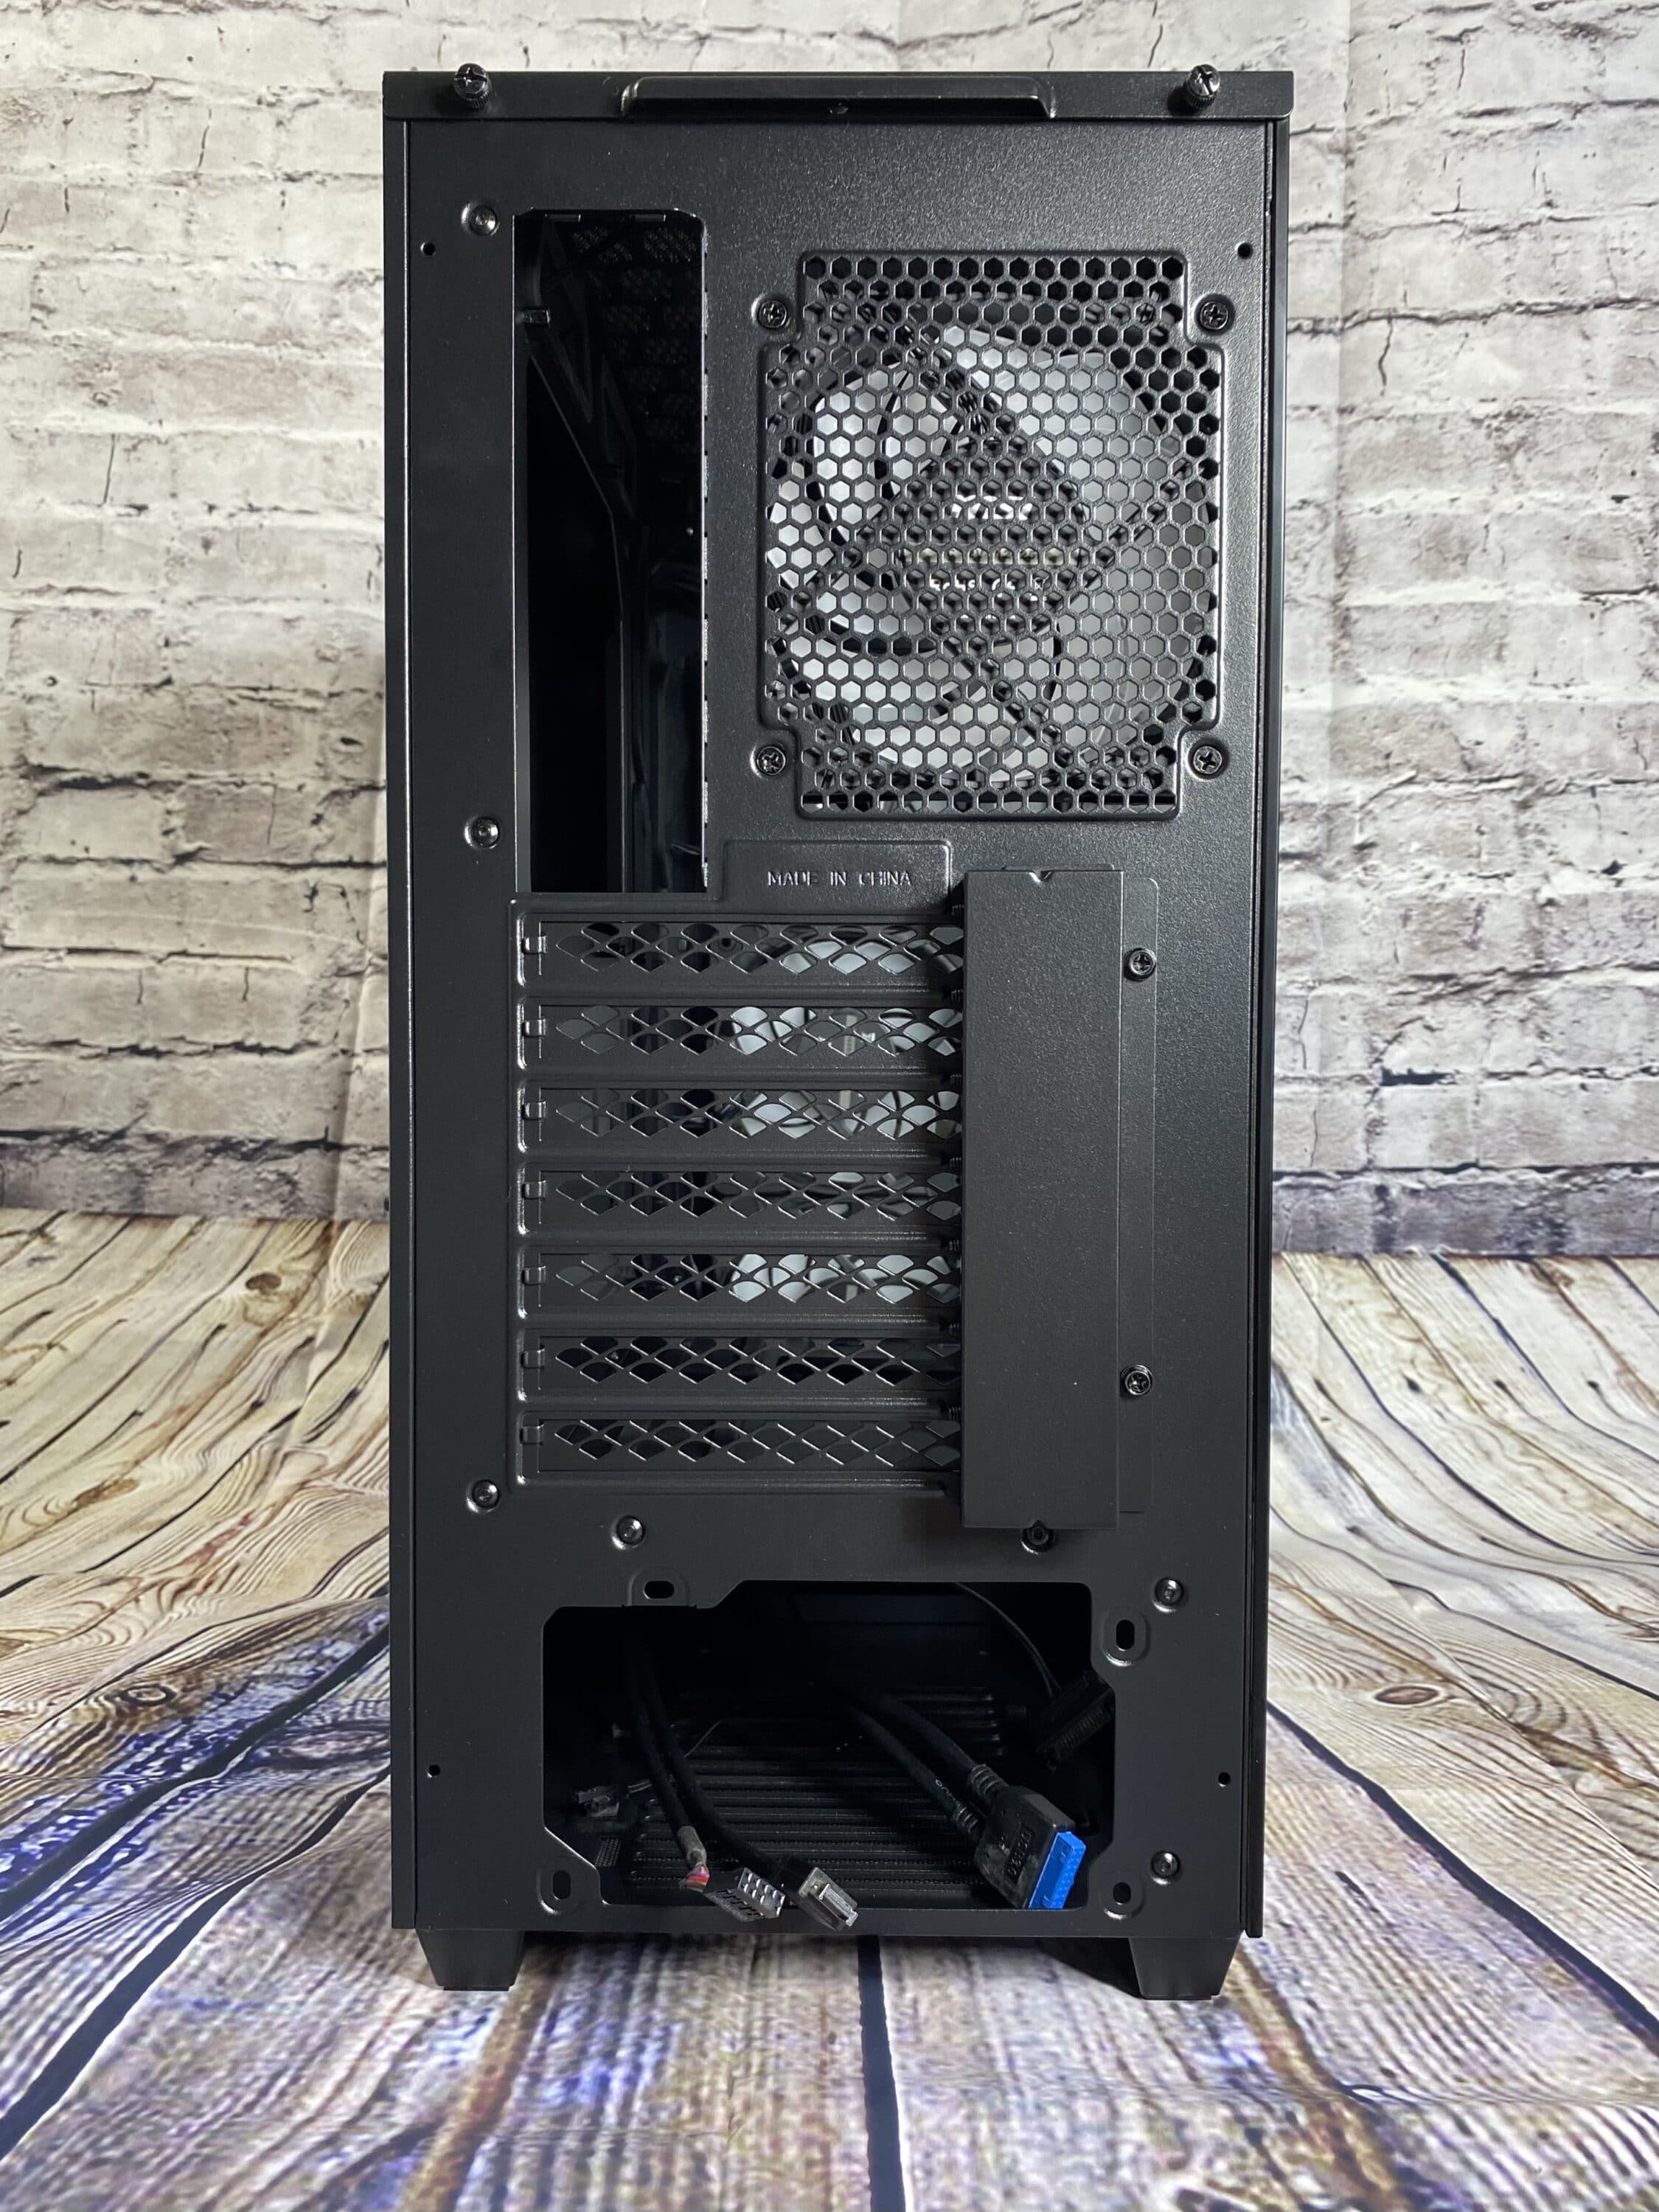
On the back, as with any case, there are the usual openings for the mainboard, power supply, fan and PCIe slots. The ventilation slots for the fan and the rails at the PCI slots are equipped with different grid patterns. The cover of the PCI slots looks a bit big and could have been a bit smaller, but realistically it makes no difference.
On the bottom side are the feet, which are made of solid plastic. These were screwed to the case from below and have a rubber coating. Again, there is a dust filter, but the workmanship is much cheaper. The dust filter is only clamped between aluminum rails at the case and thus fastened, but that is sufficient at this place.
Inside impression
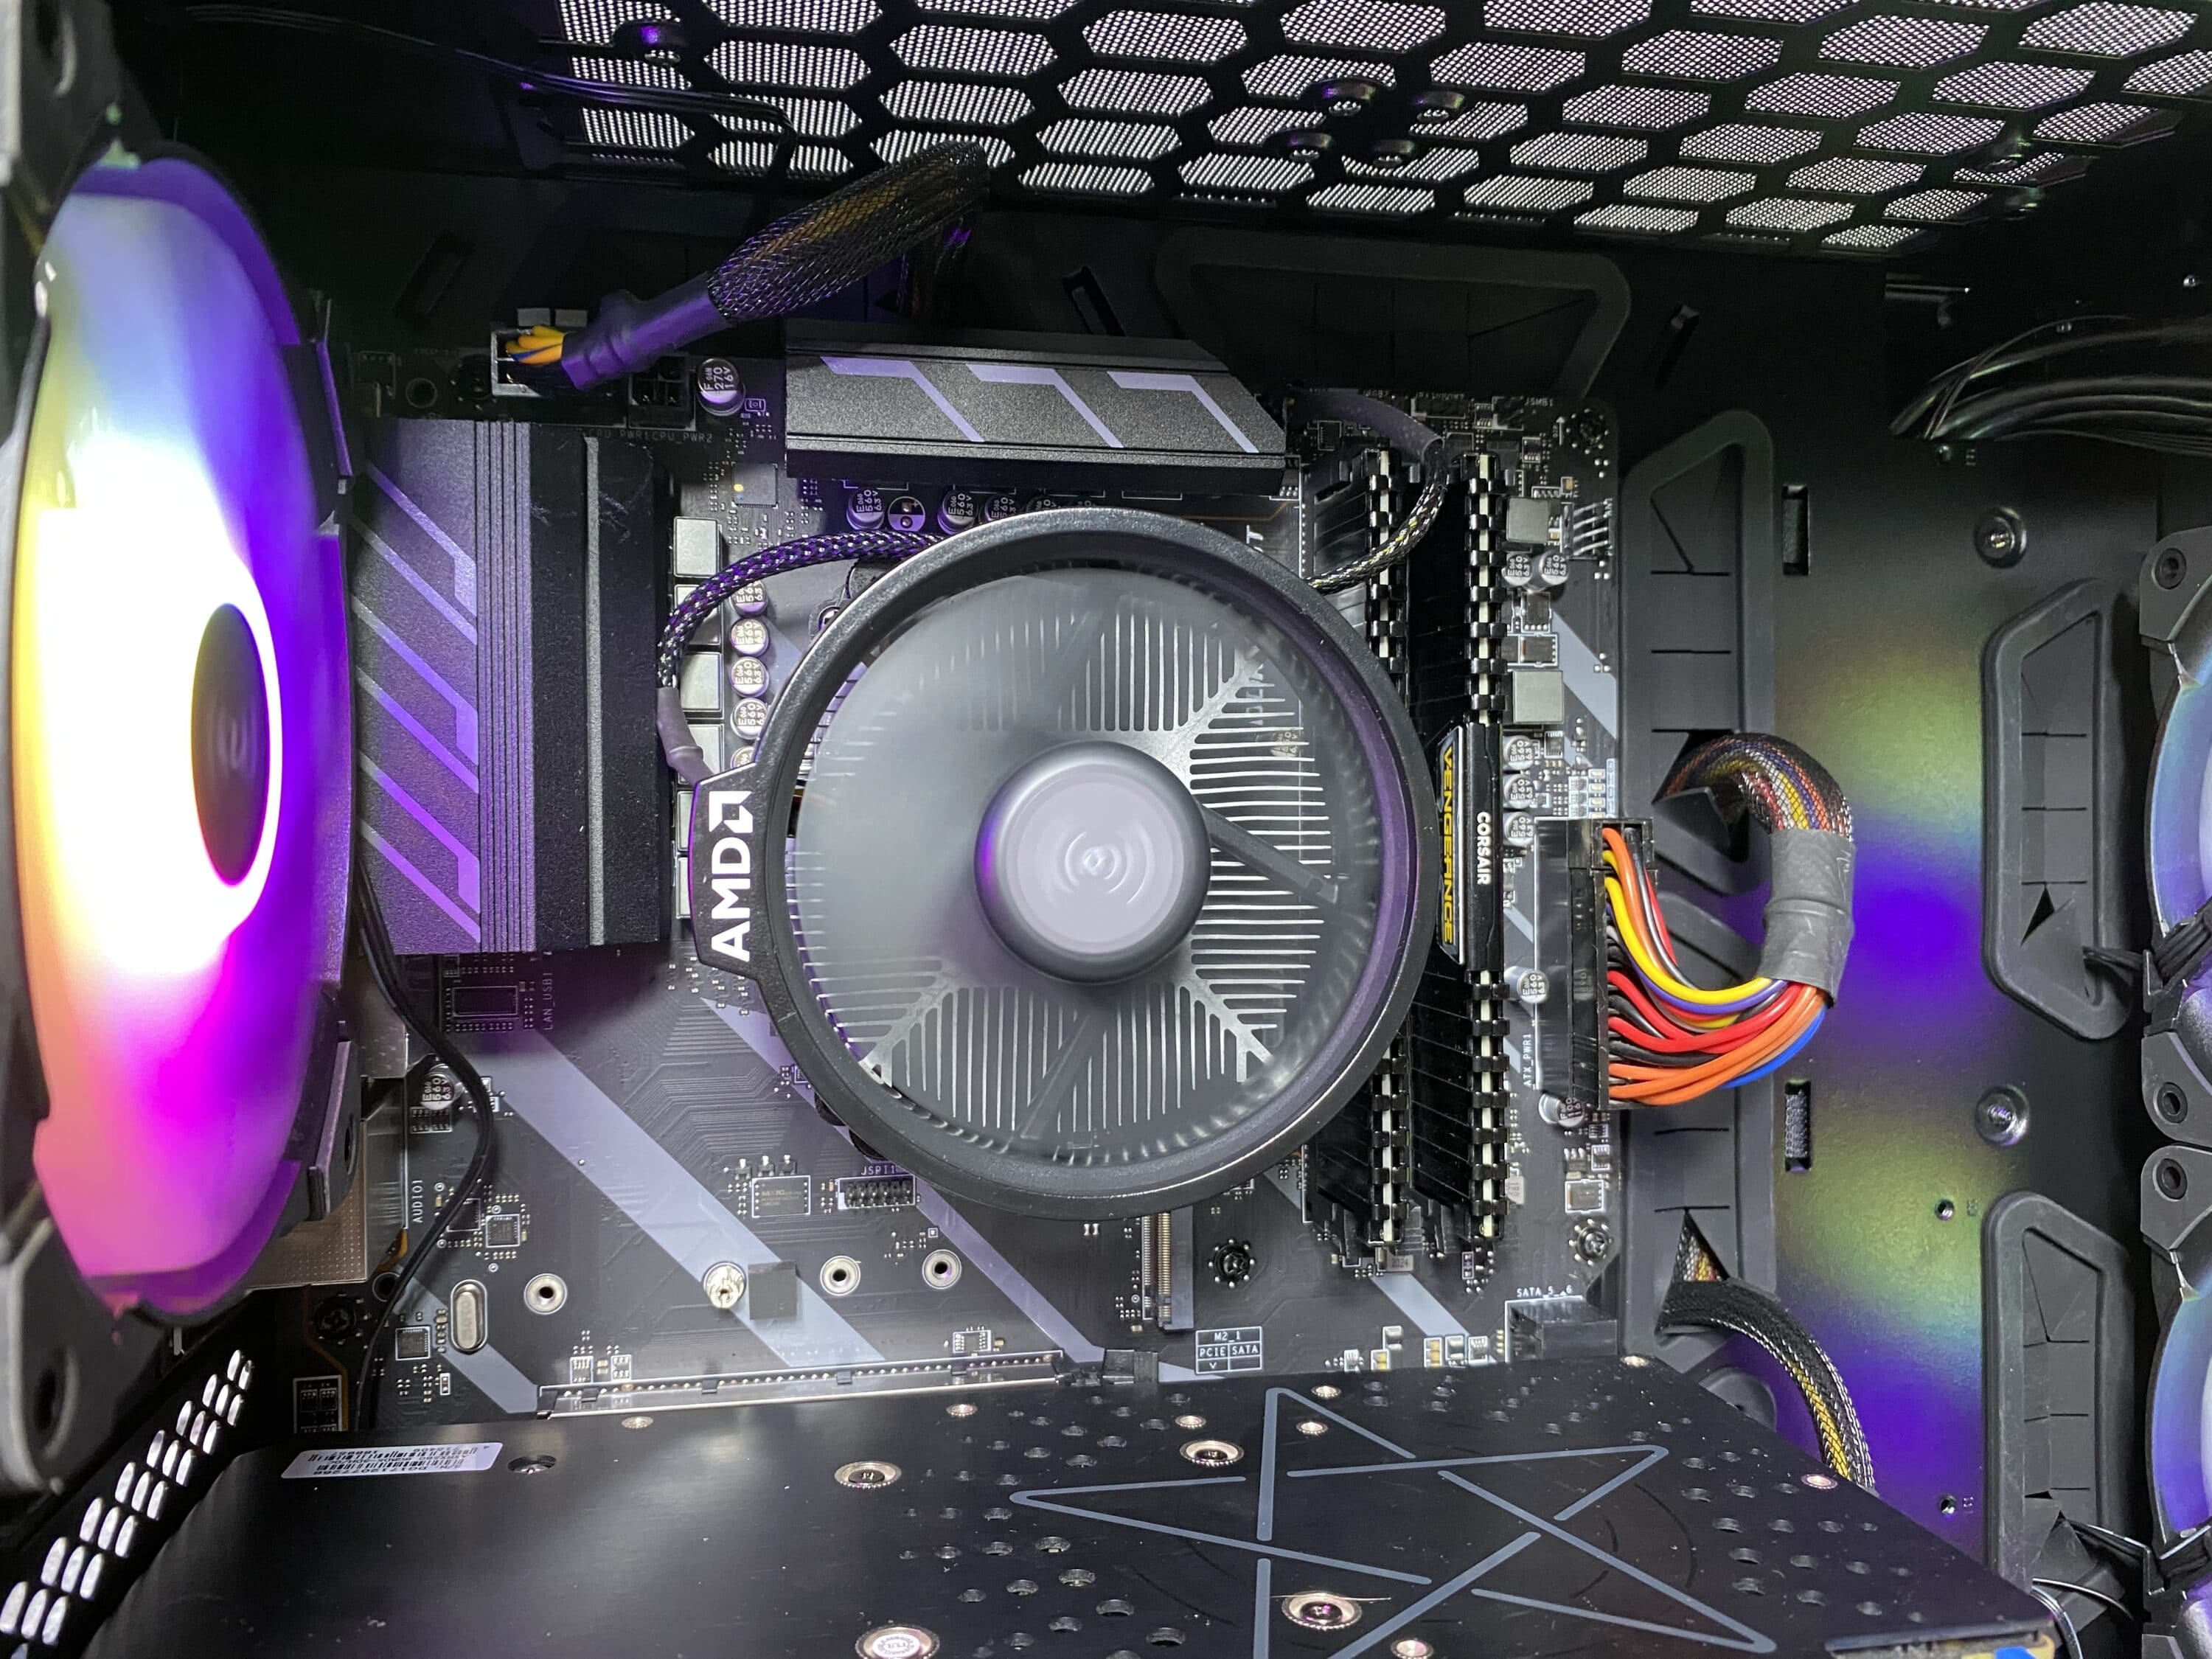
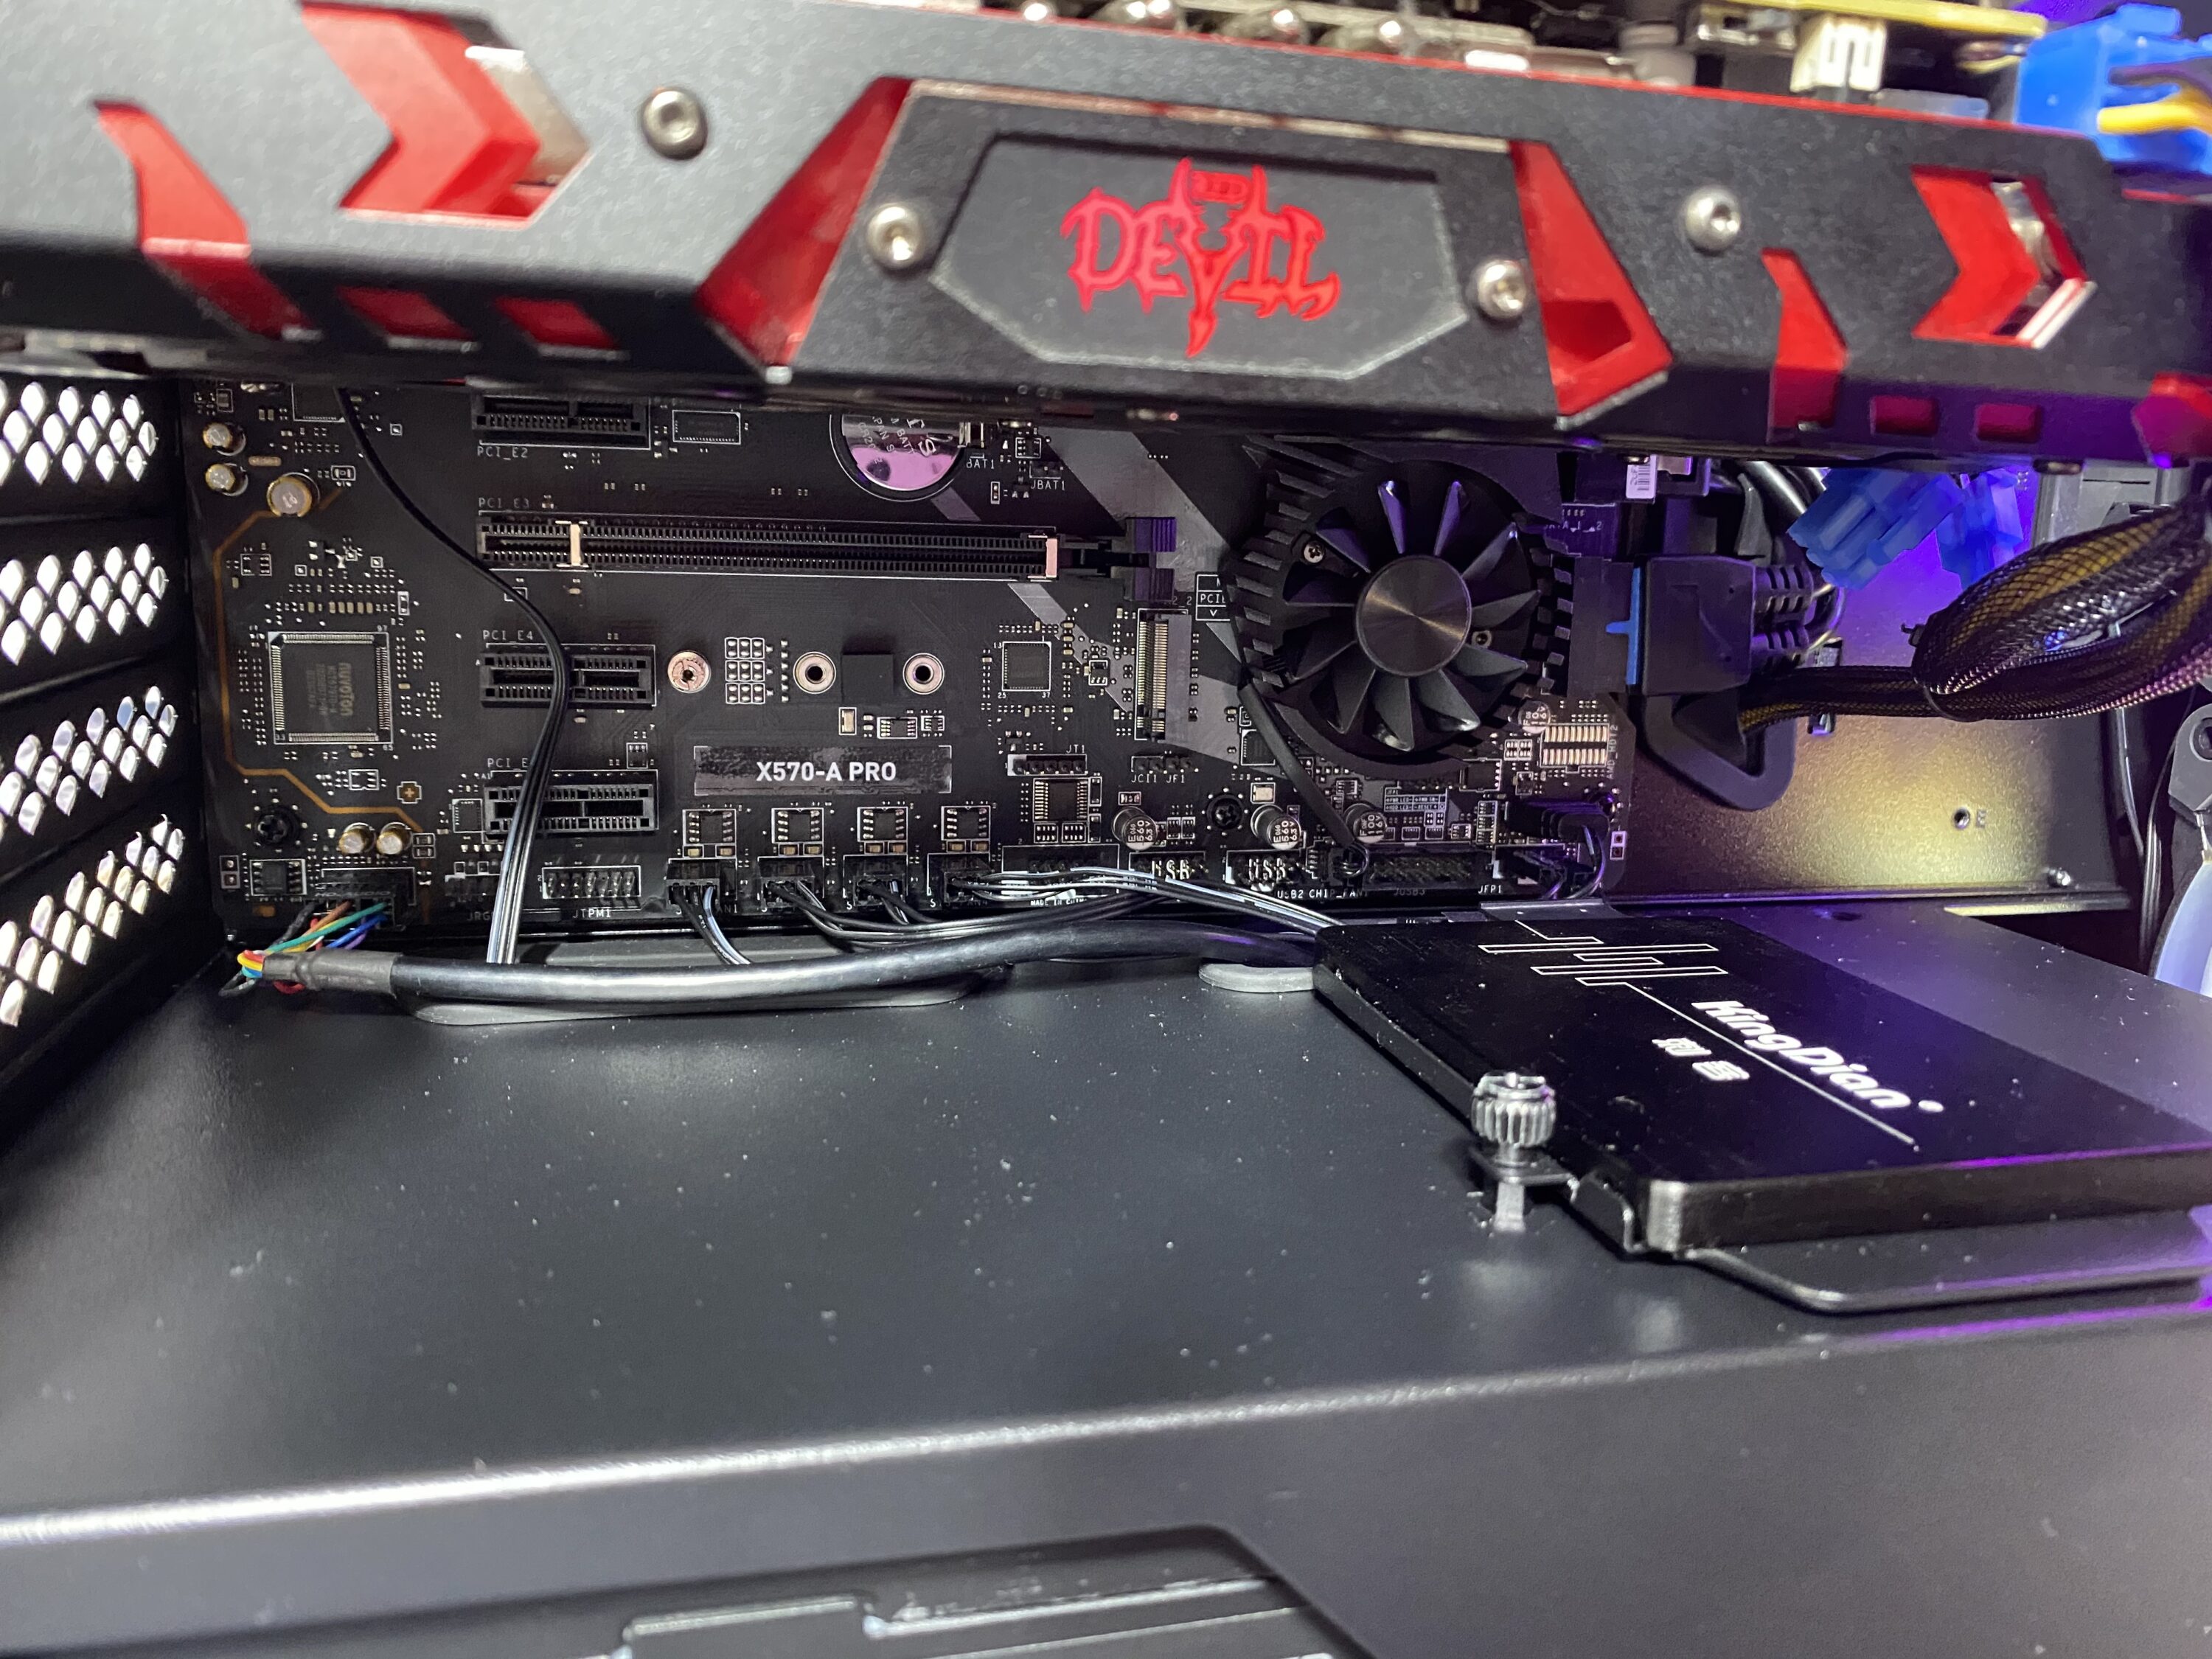
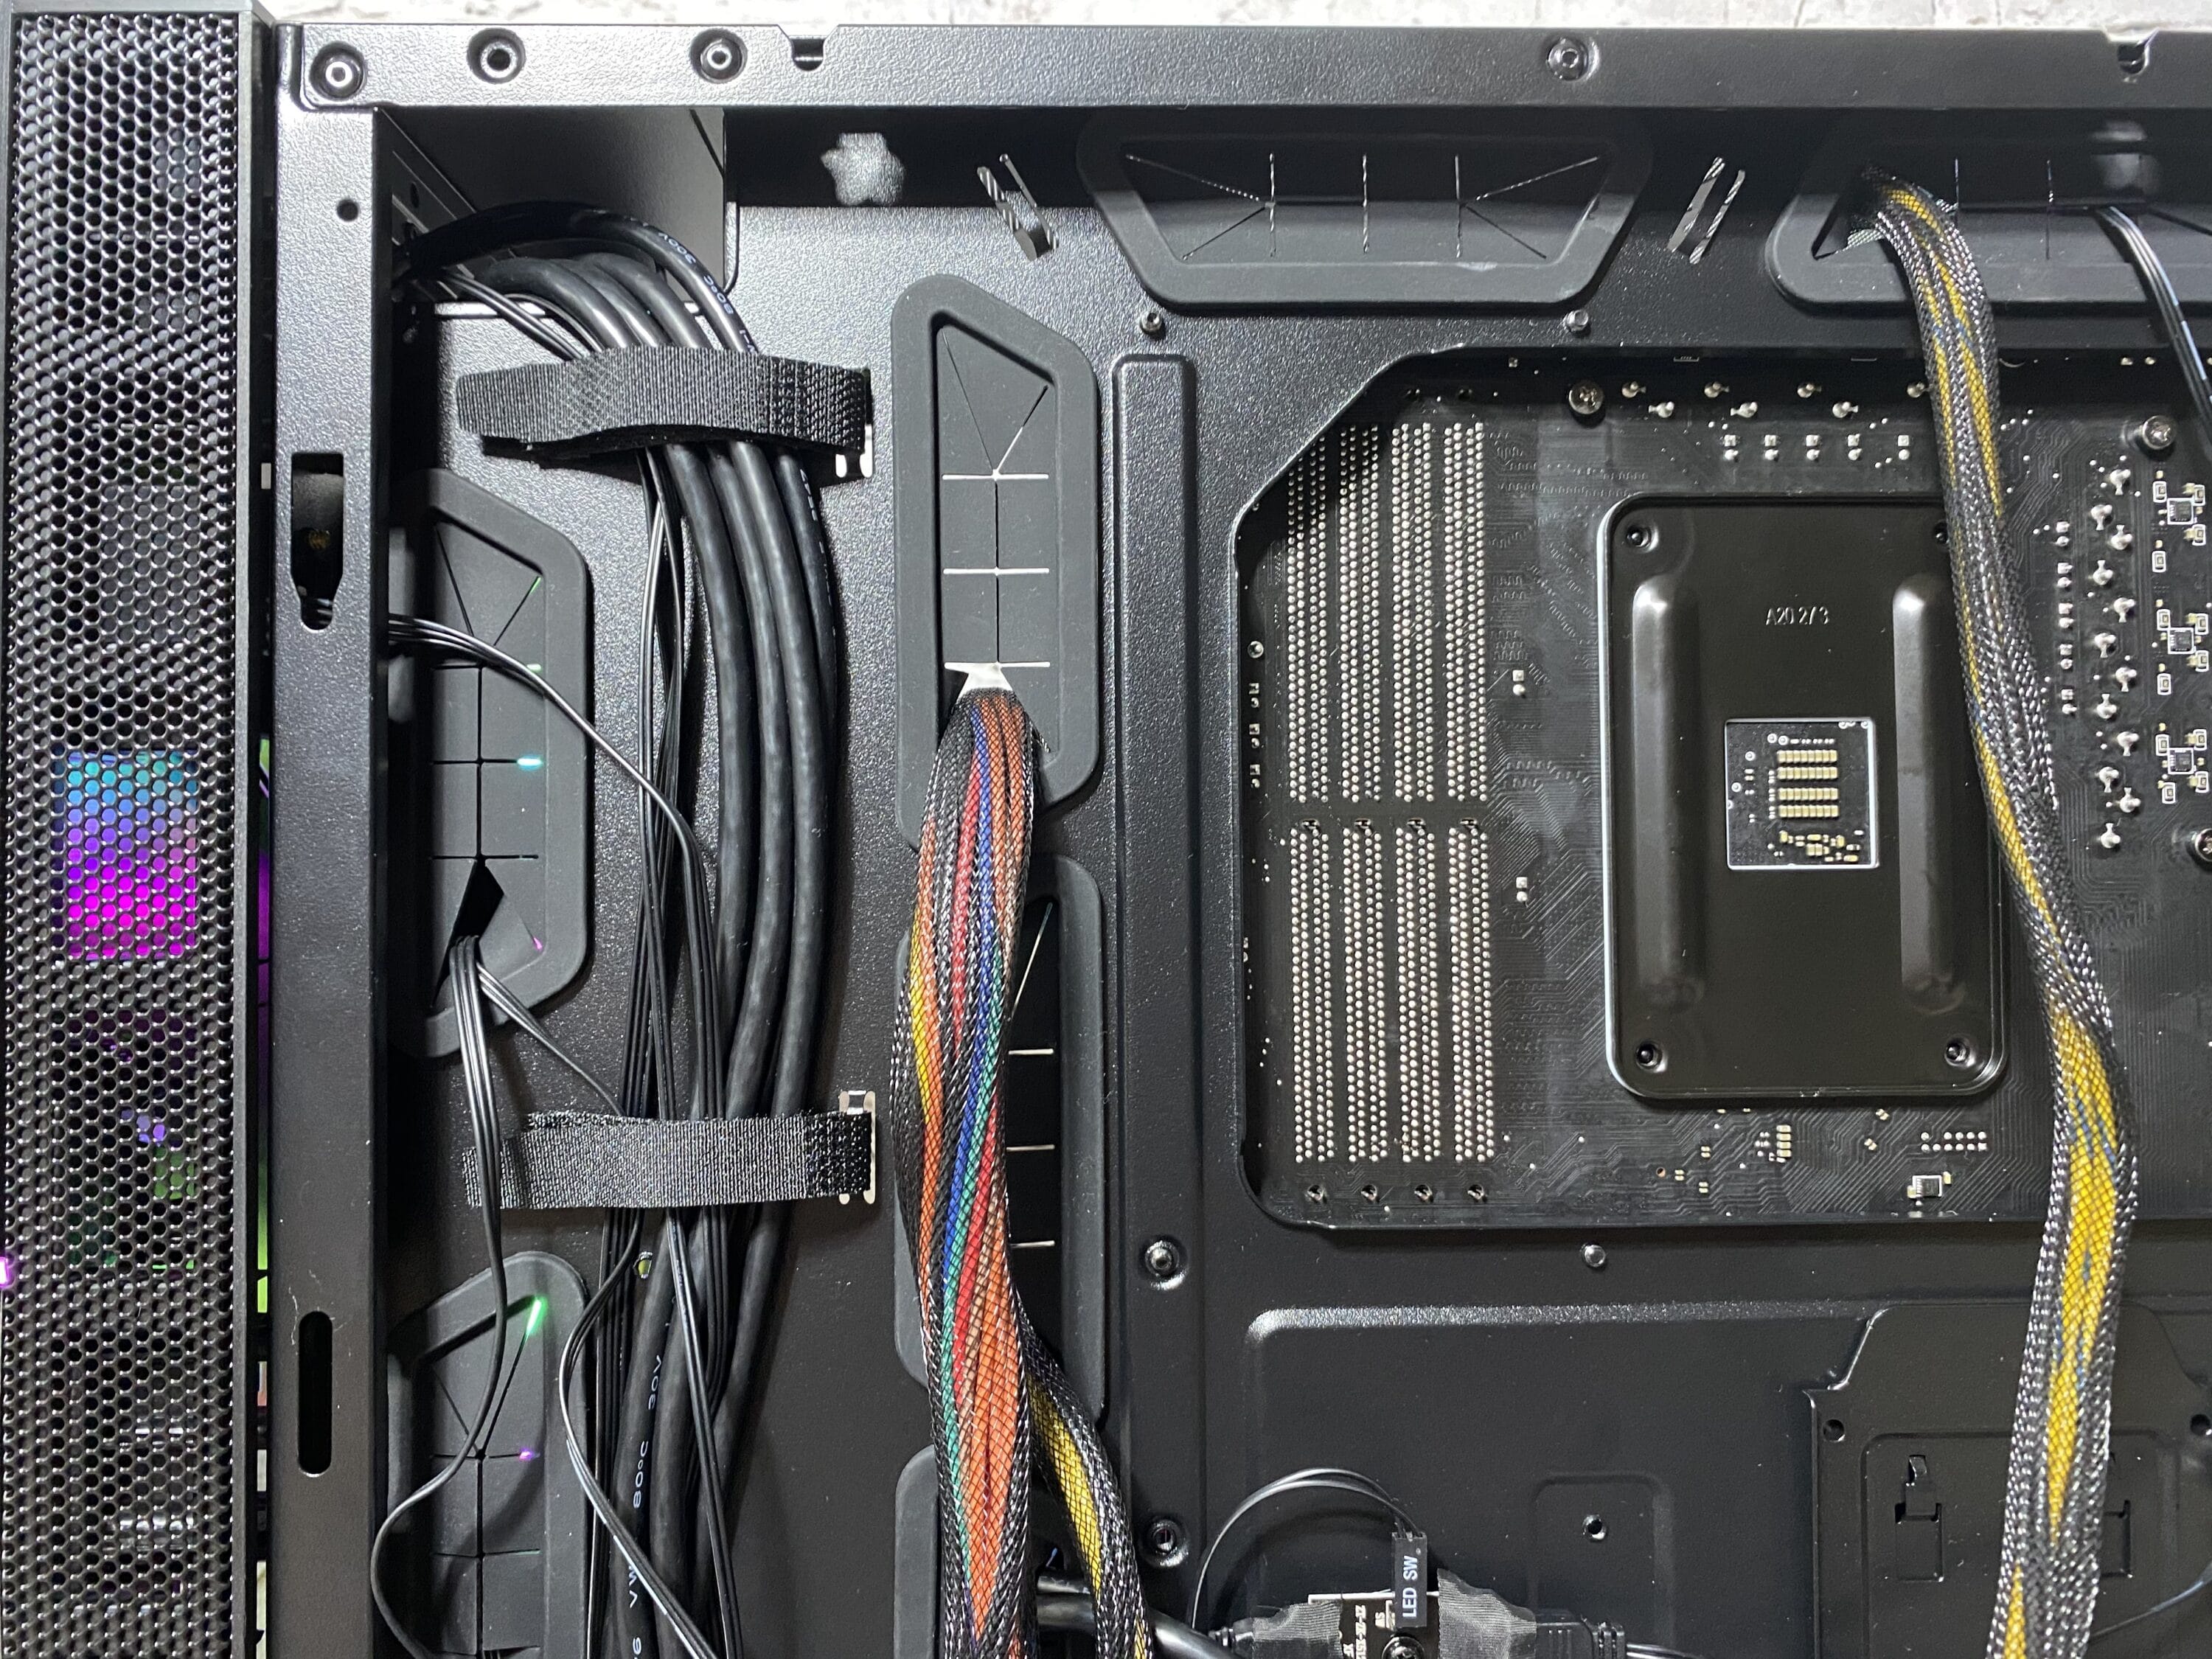
If you look around inside the case, you will find a standard design. At the bottom there is a cover for the power supply and for the optional HDD slot. On the side it is open with a slot for the power supply and MSI was additionally punched there. Simple, but looks very solid and well workmanship. On the right is a cutout for a 360 mm radiator. On the top of the cover there are also two cut-outs for the cable guide, which are rounded off with rubber, and a holder for a 2.5″ SSD. The rubber covers are closed on the inside and thus serve not only as protection against sharp edges, but also as privacy screens.

At the rear part of the case a fan was already premounted. This was also fixed solidly to the case. In addition the PCI slot covers can’t be moved in the holder very noticeably, they are also firmly fixed and have a quite good workmanship.
In the middle you can see not only enough space for your own mainboard, but also another seven cable channels, which are located around the mainboard. These were also all surrounded with a rubber jacket to cover the sharp edges of the openings – very nice! But in the upper right corner MSI did not use any other rubber sheathing and also used a different opening shape. Here you could also have made a horizontal cutout in the same way as on the left. There should not be any difference in the airflow at this point either.

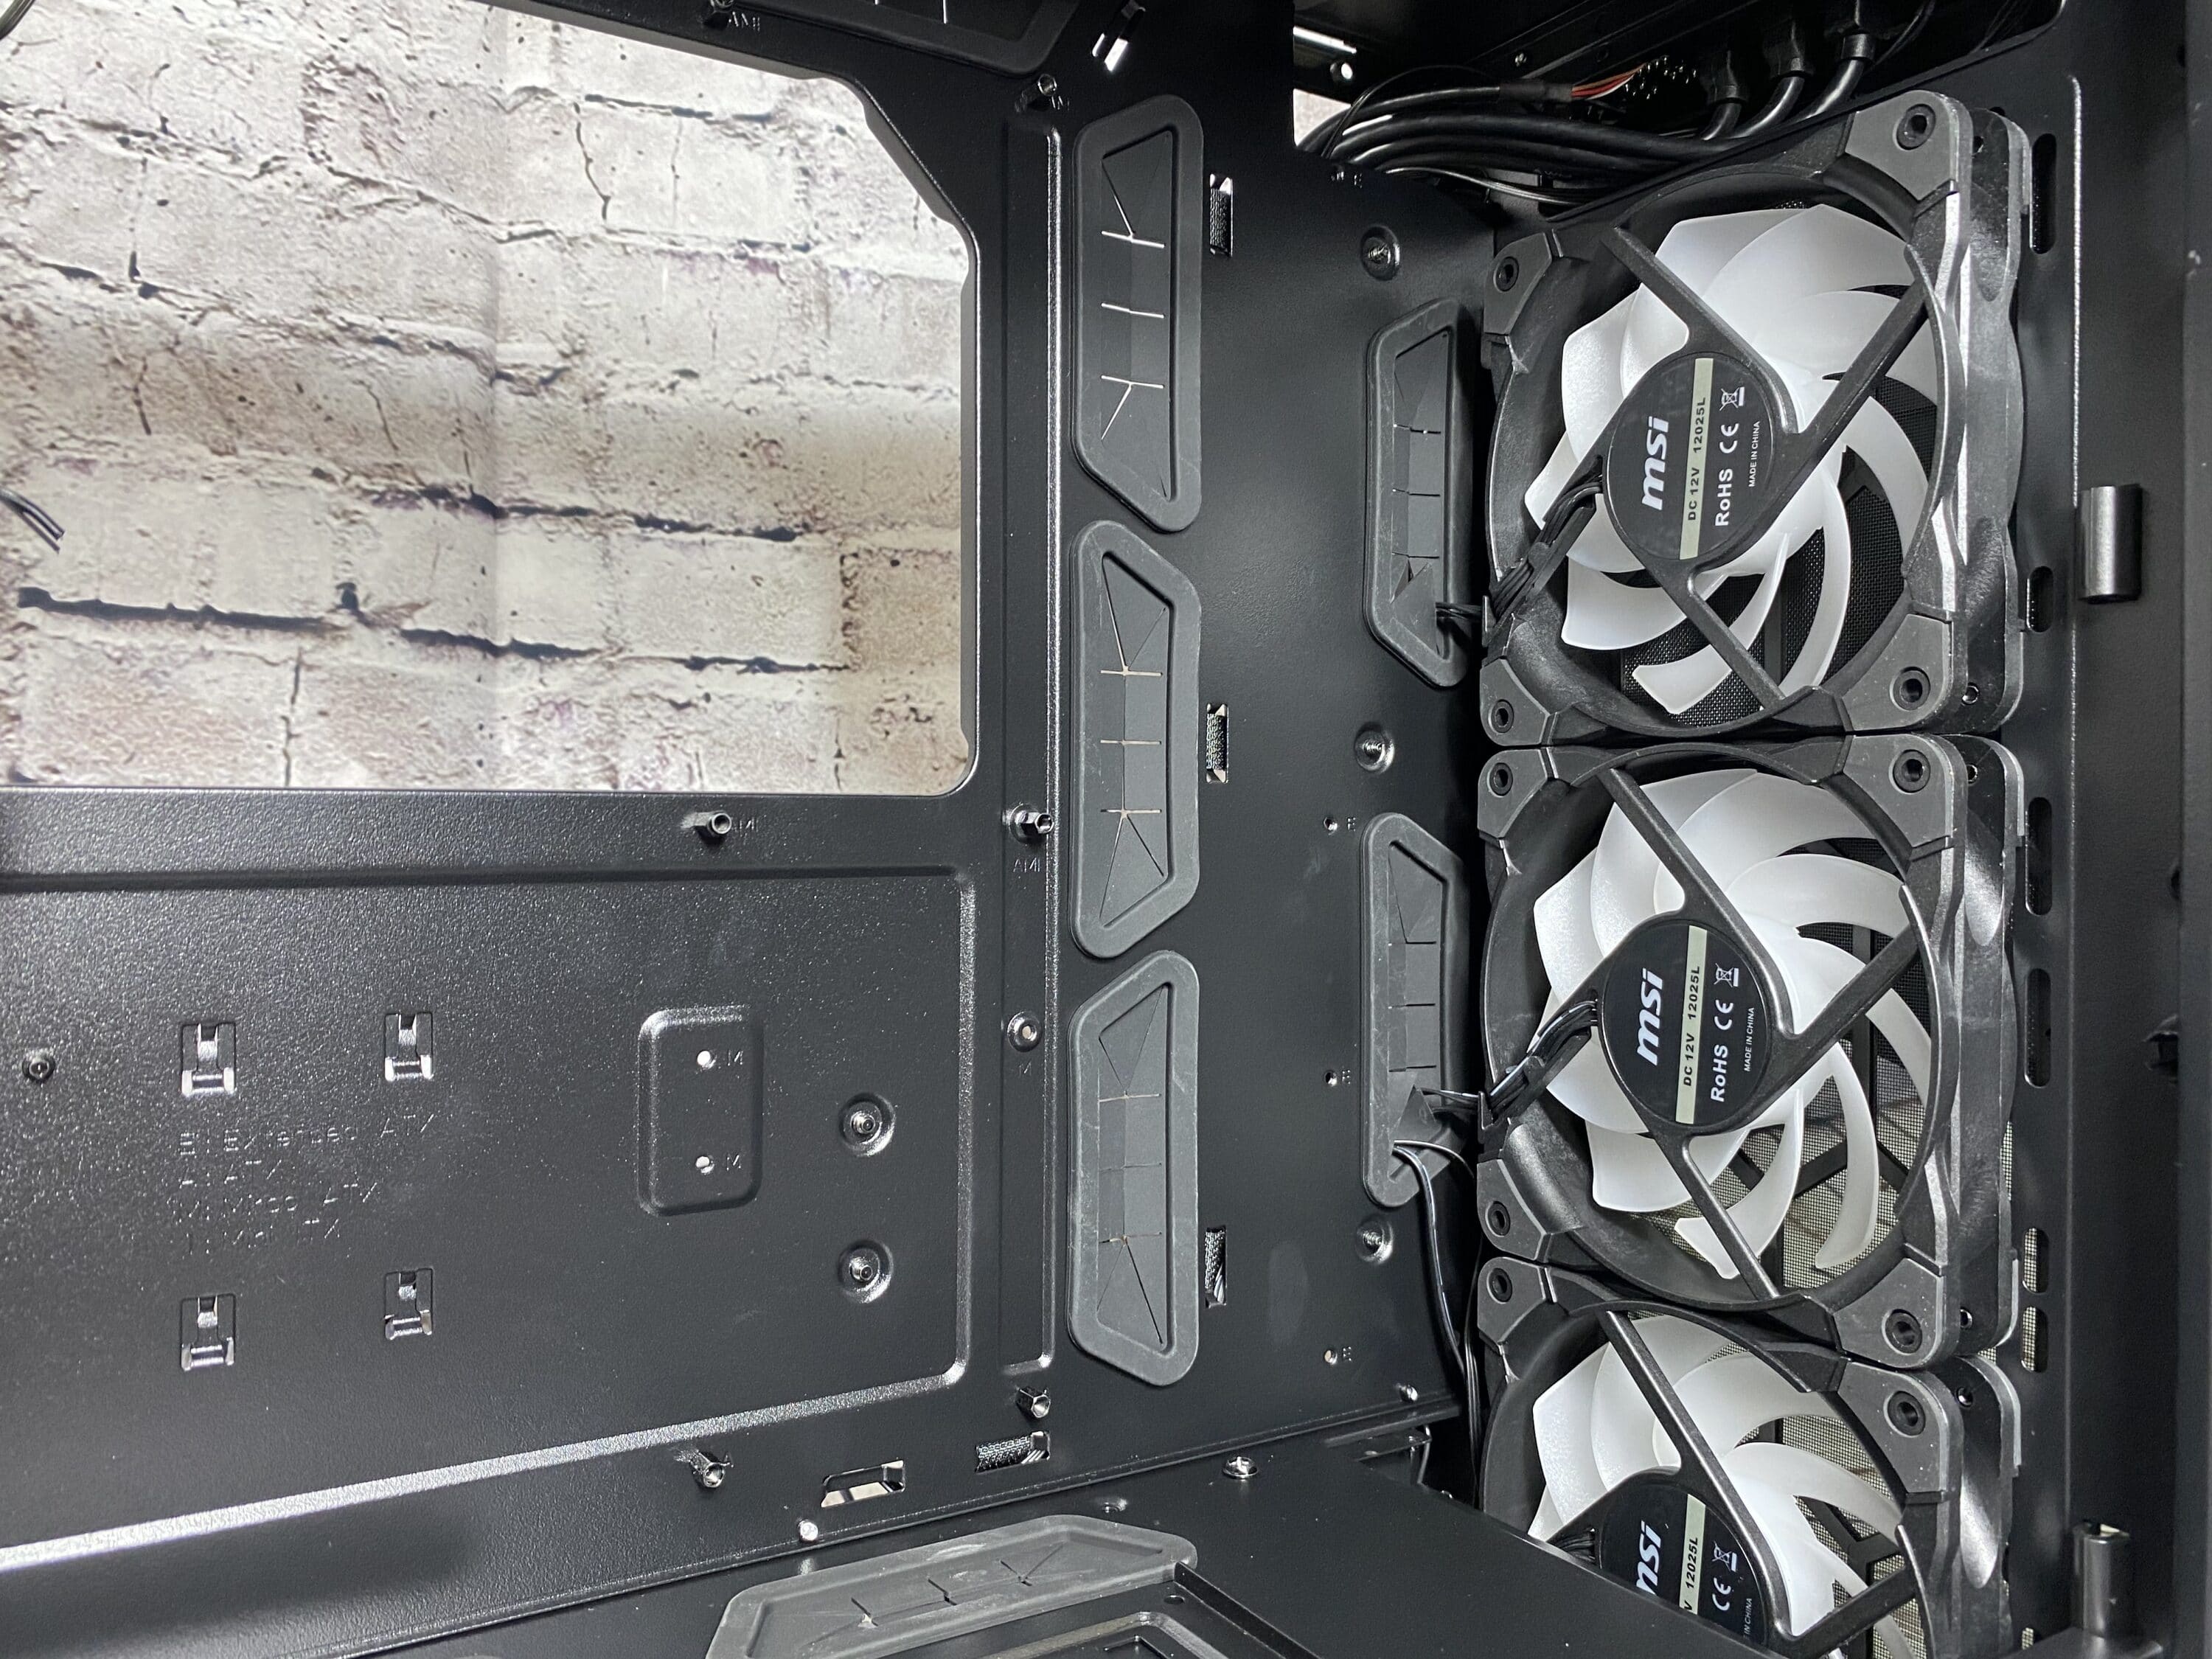
Also the fans on the front panel are all preinstalled and do not need to be tightened again. The power cables have already been professionally plugged through the existing cable guides and only need to be connected to the power supply.
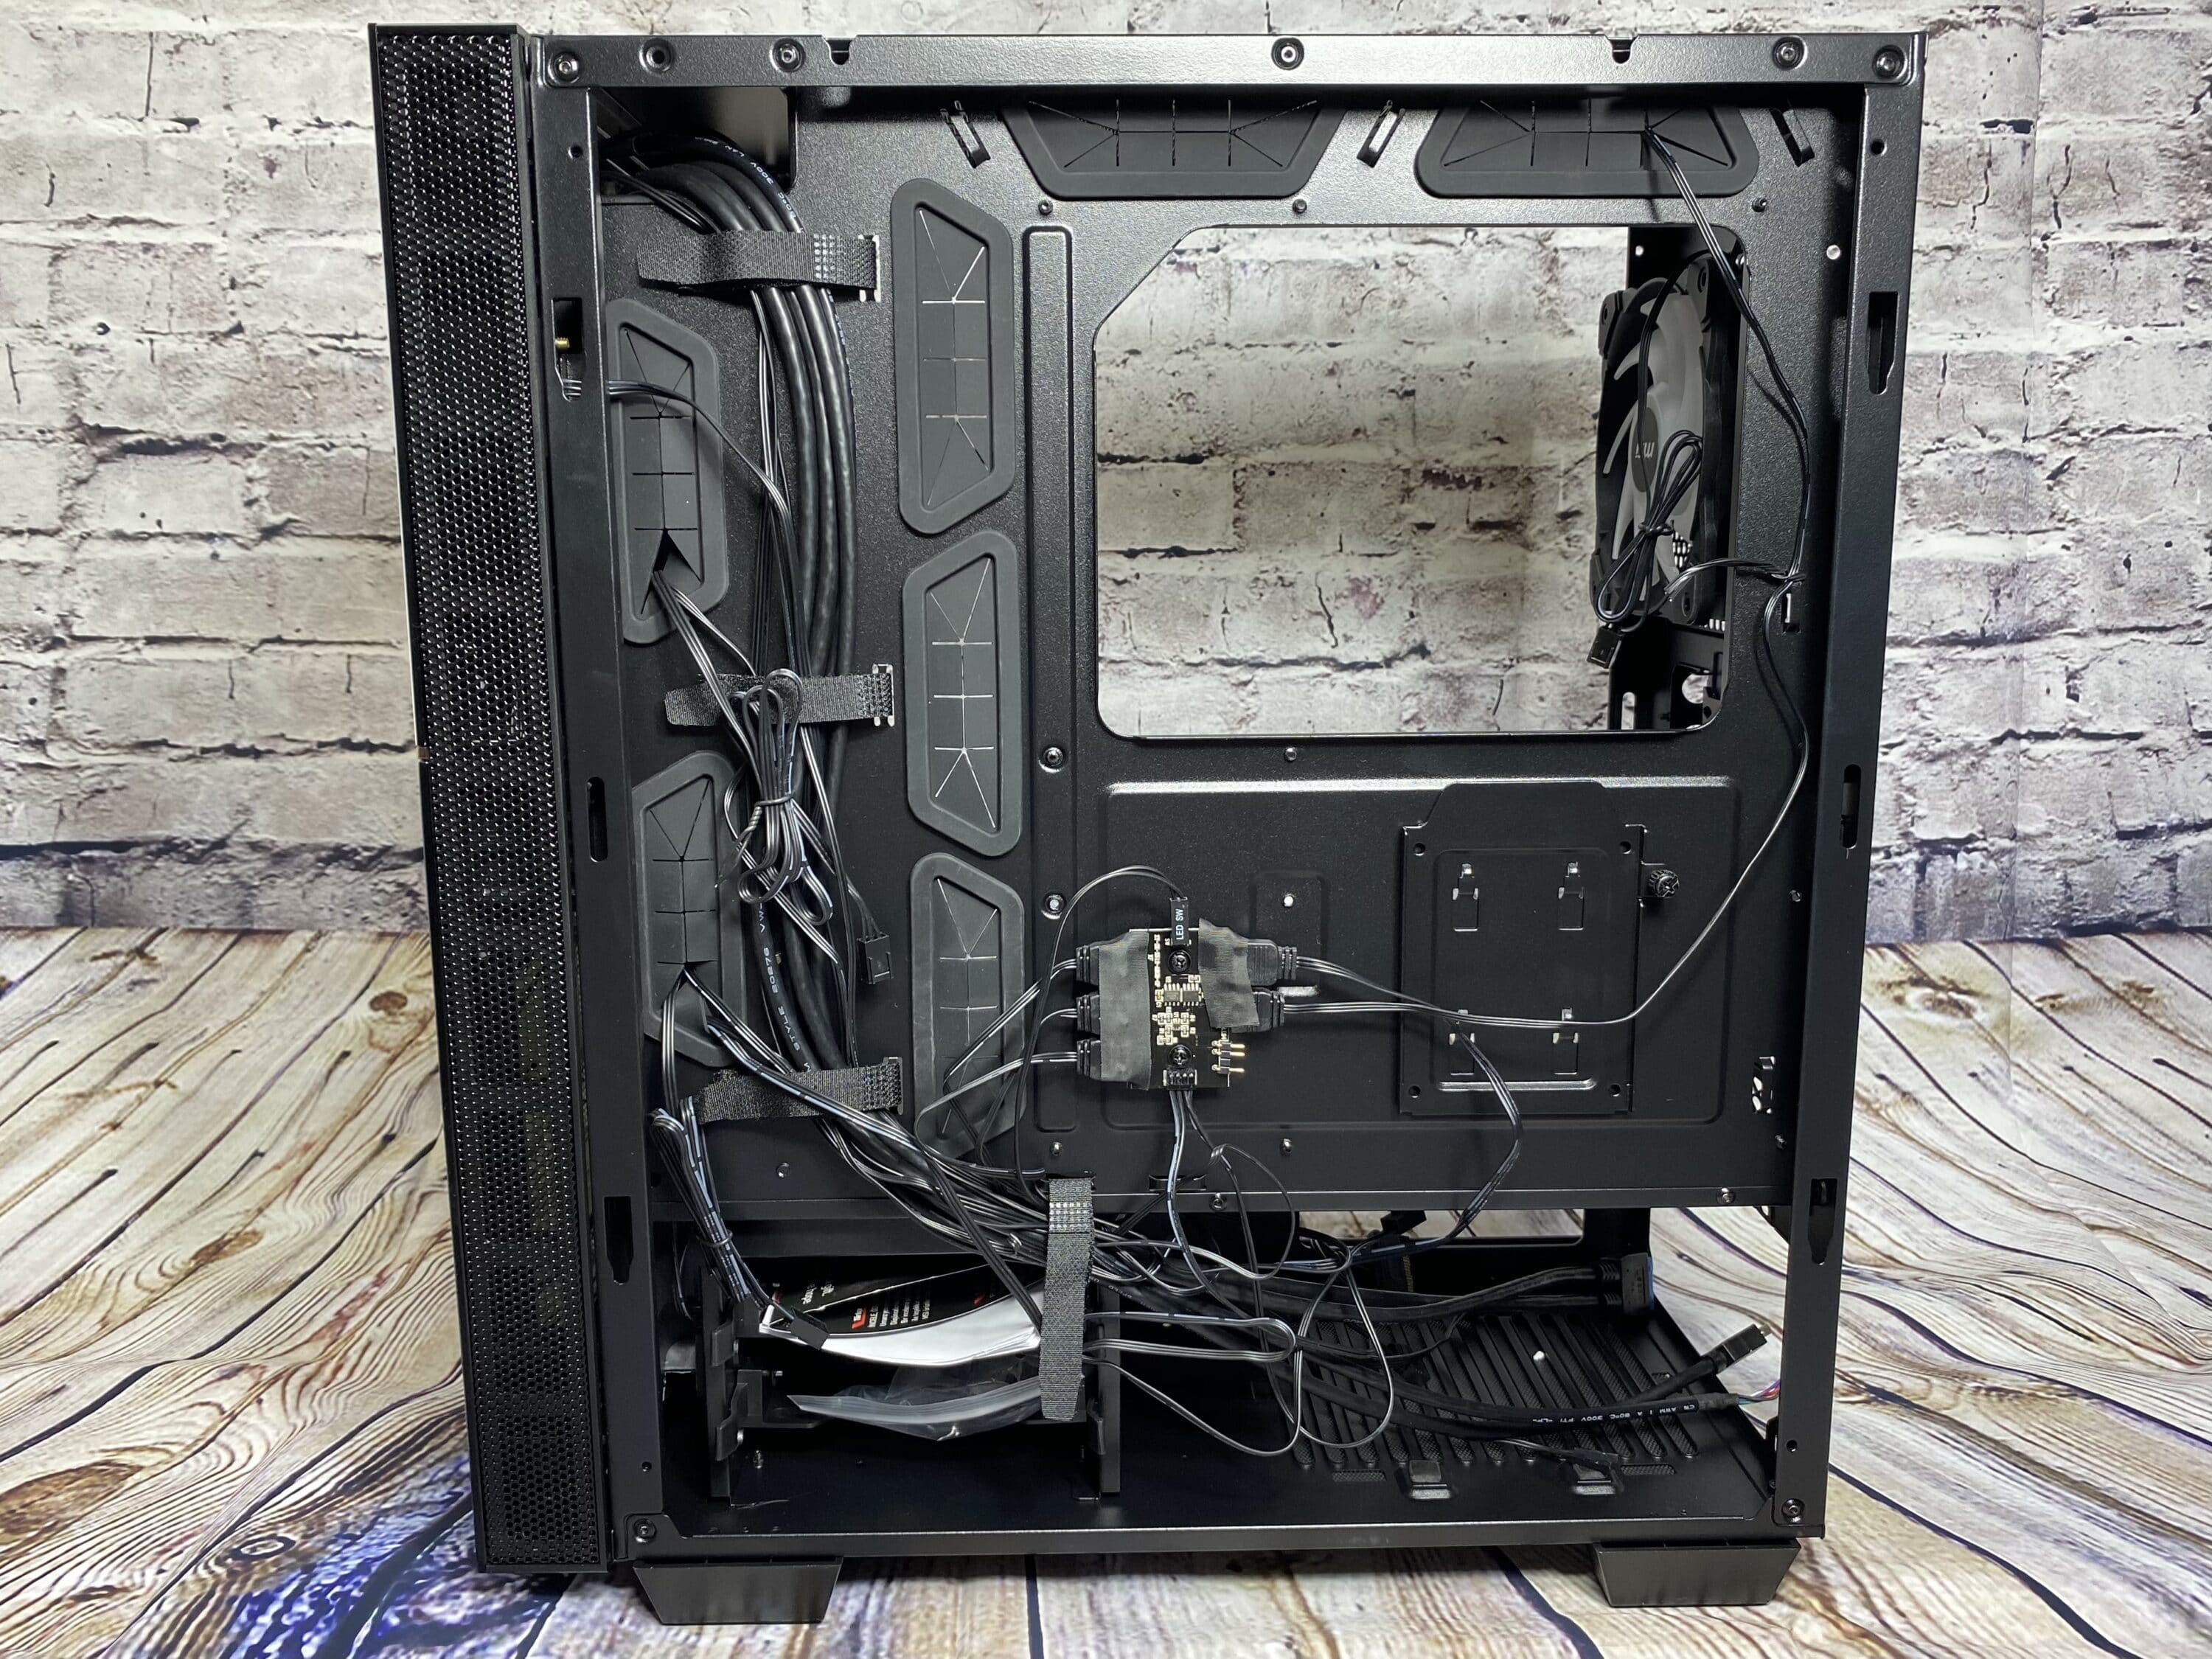
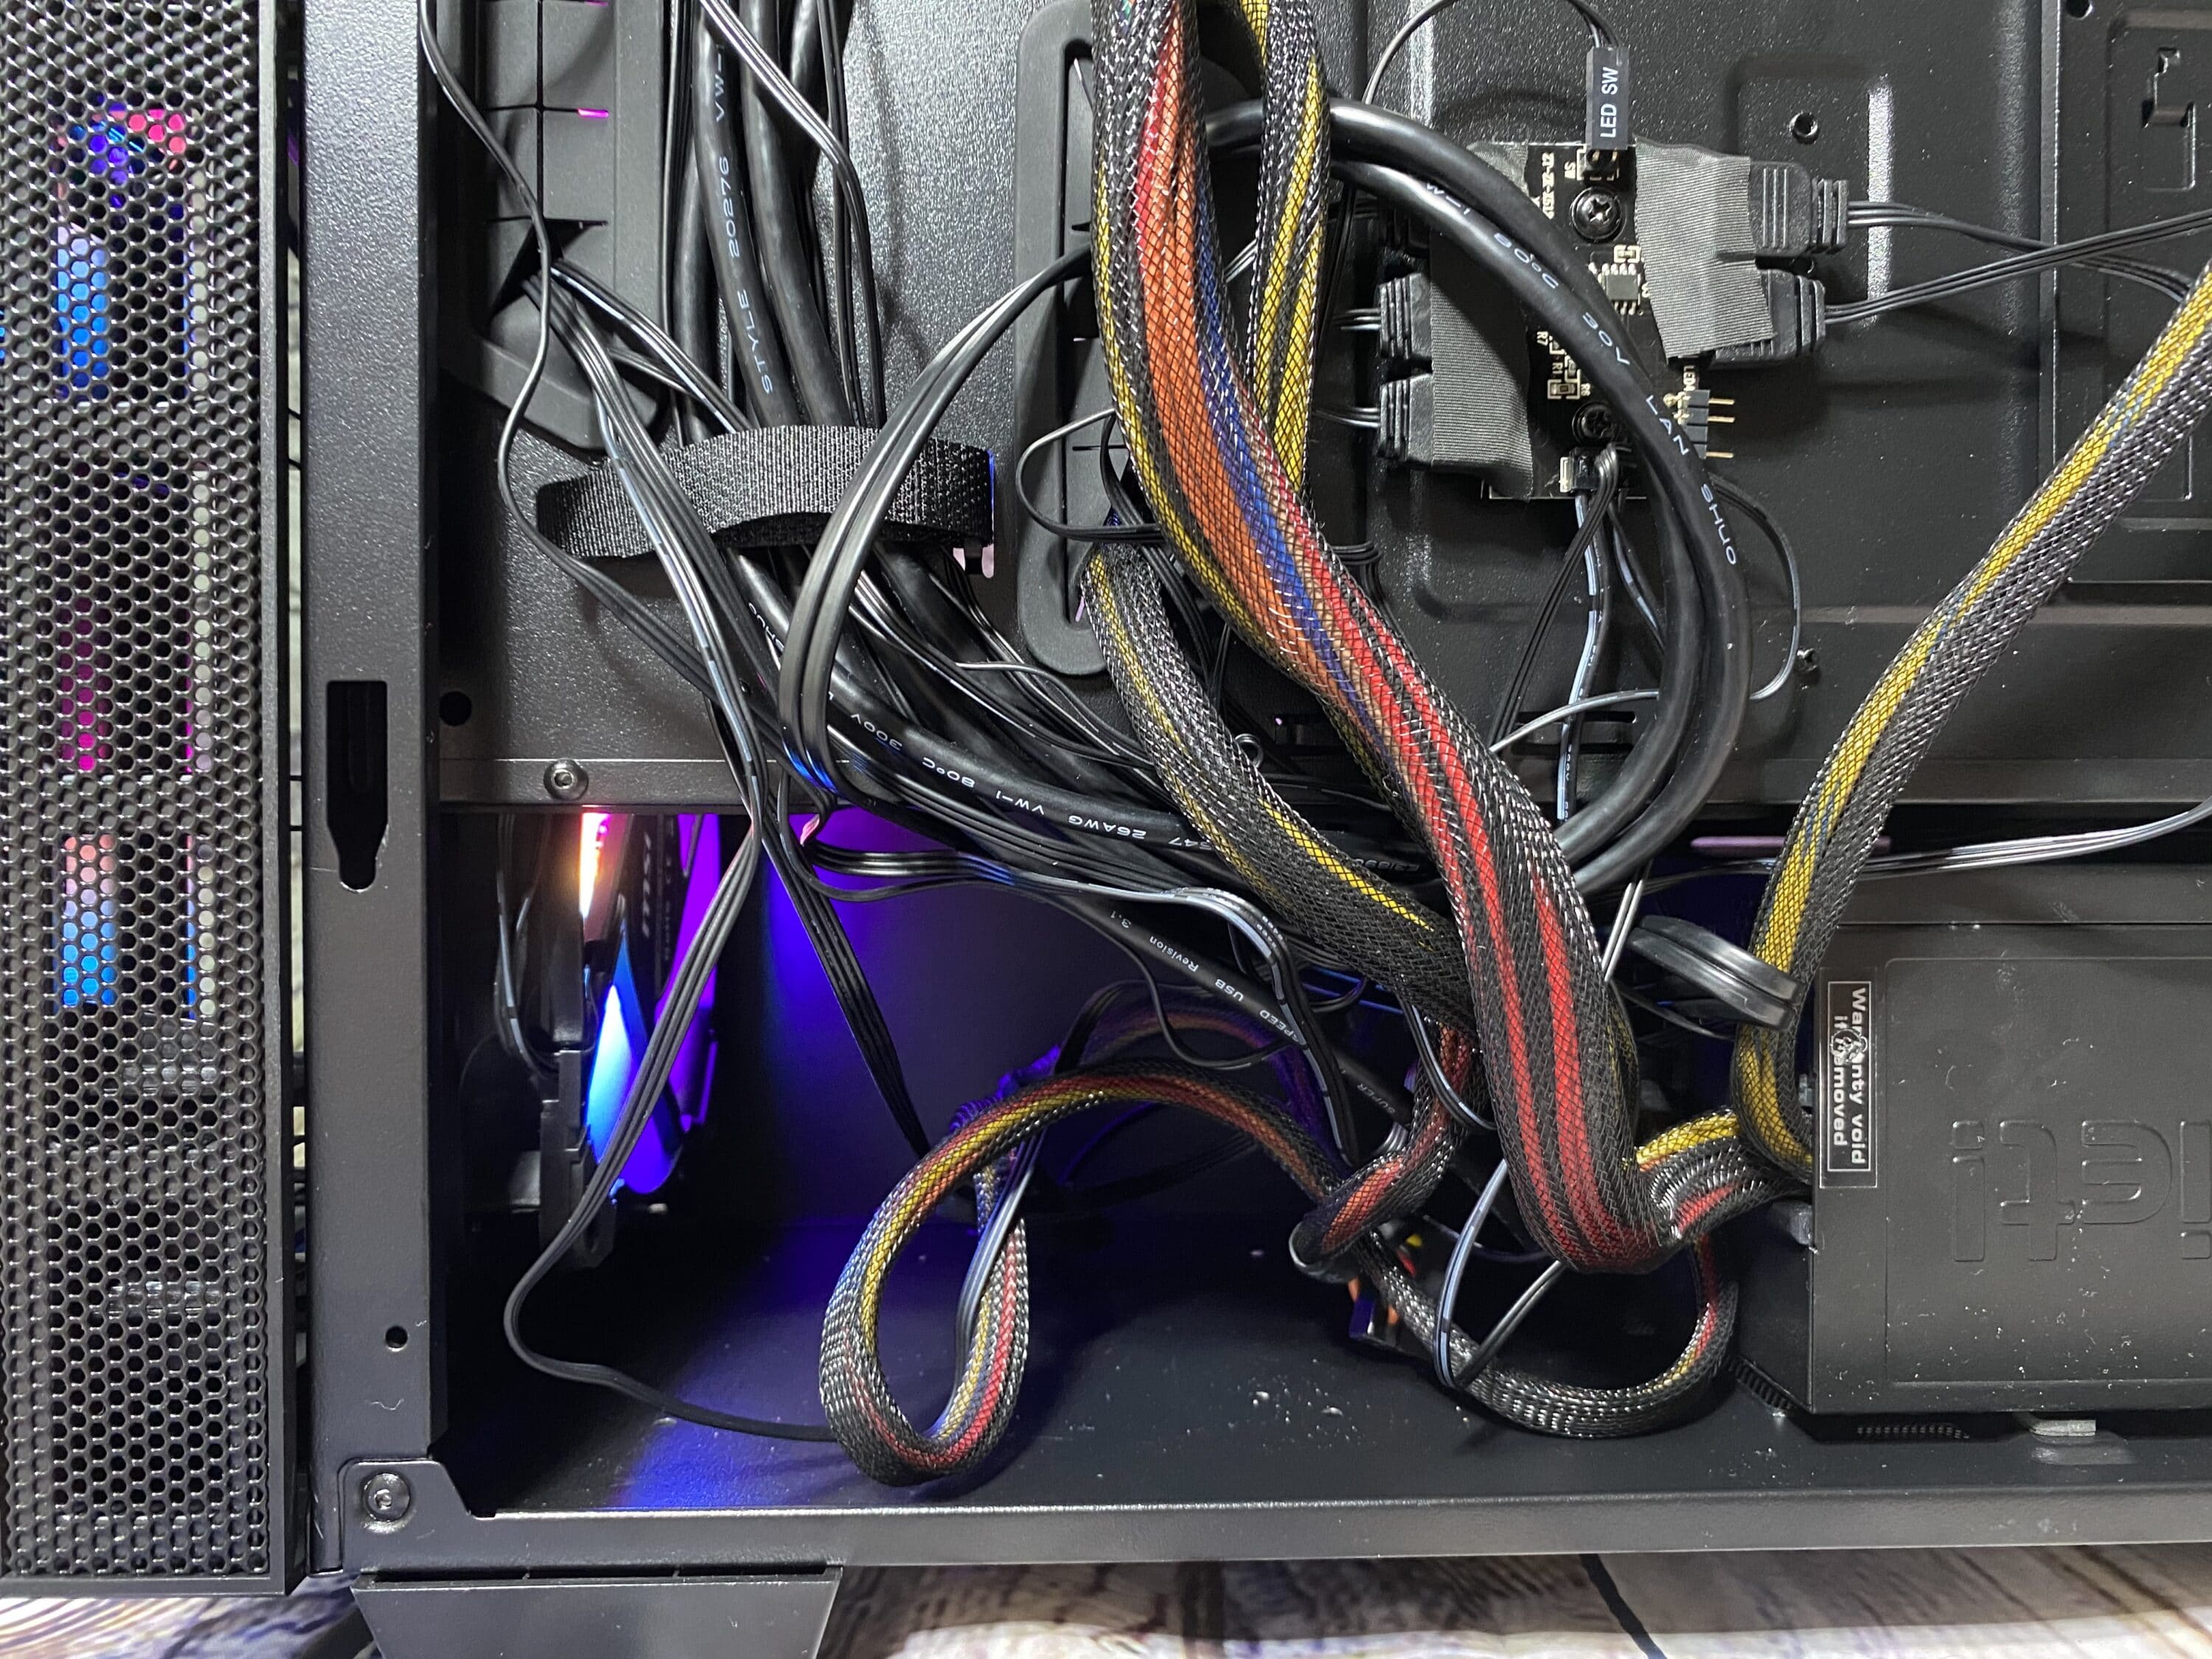
If you look at the backside, you can already see cleanly laid cables. The cables are held by four velcro fasteners, which are attached to small brackets on the inner wall. In the middle, an ARGB control unit was fixed with two screws, which has already been connected with the included ARGB fans. The plugs were again separately glued with adhesive tape to provide more hold. Next to it there is another 2.5″ SSD slot, which is held by four brackets in the middle and one screw. At the bottom there is a holder for HDDs which can be taken out as desired and enough space for the power supply. In the HDD slot you will also find the included mounting material and instructions. It is also worth mentioning that the Velcro mounting bracket is screwed to the HDD bay, so the Velcro has more hold at this point. However, if you want to mount a 360 mm radiator on its front, you will unfortunately have to do without the 3,5″ HDD-slot at this point, because there is not enough space with power supply and radiator.
Installation
The hardware that we used in the MSI MPG SEKIRA 100R tower case for this test is shown here in an overview:
- AMD Ryzen 5 3600, 6x 3.60Ghz
- MSI X570-A PRO
- Corsair Vengeance LPX 2x 8GB DDR4 2400MHz C14 XMP
- PowerColor AXRX580 8GBD5-3DHG/OC graphics card, 8GB memory grey
- KingDian 240 GB internal SSD
- be quiet! STRAIGHT POWER11 CM 650 W
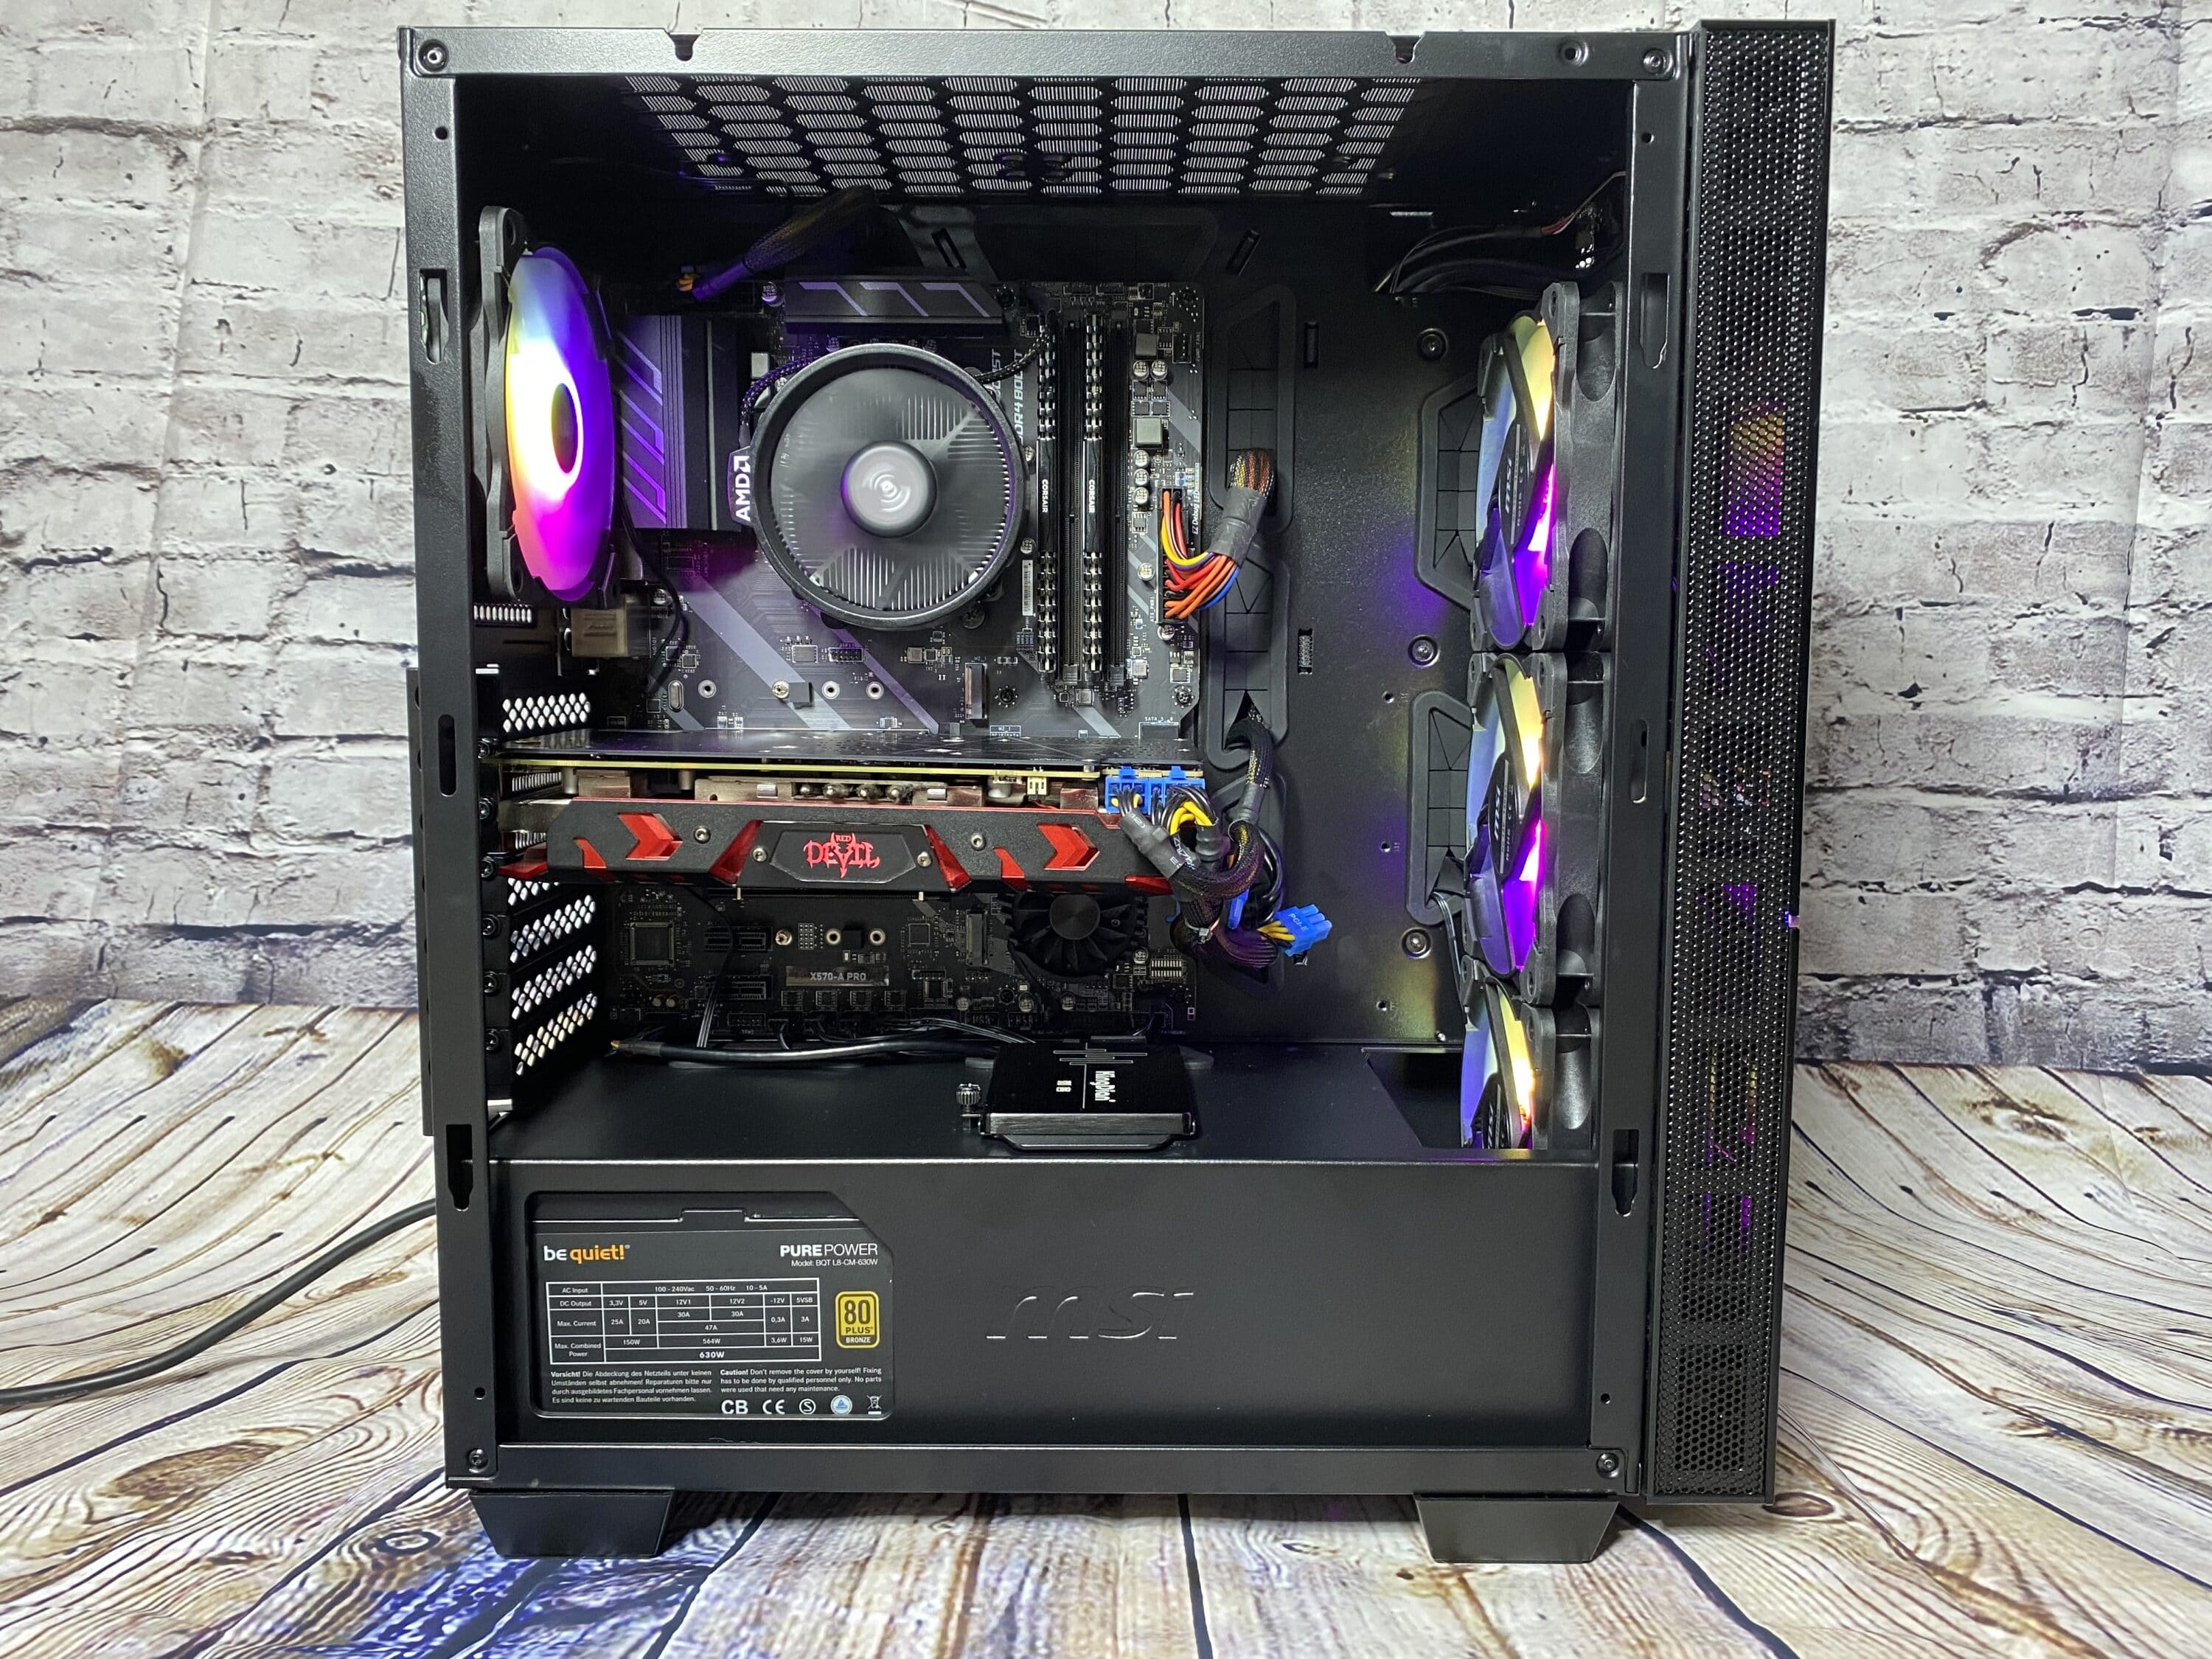
The assembly was basically without big problems, also because it is a little more spacious. Nevertheless we found two minor points of criticism. If you do without the HDD rail, you have to do without a Velcro fastener, unless you unscrew it and just fix it to the case. The extra hold is then no longer guaranteed at this point and it requires a little extra effort. We also noticed that the mainboard was a bit more difficult to screw on. Here a little bit more effort was necessary to fix it. Apart from these points there is nothing to criticize from our side.

The distance between the central housing plate and the rear side plate ensures sufficient clearance to accommodate even a not very good cable routing. Everyone who is not necessarily a professional to wire his hardware correctly can be really happy about this. Below you can see such a cabling, which is still expandable. But even in this case the case can be closed again without problems. But sometimes closing it can be a small task, because the side panel does not always slide down into the correct position of the holding rail. In this case two or three attempts are necessary.
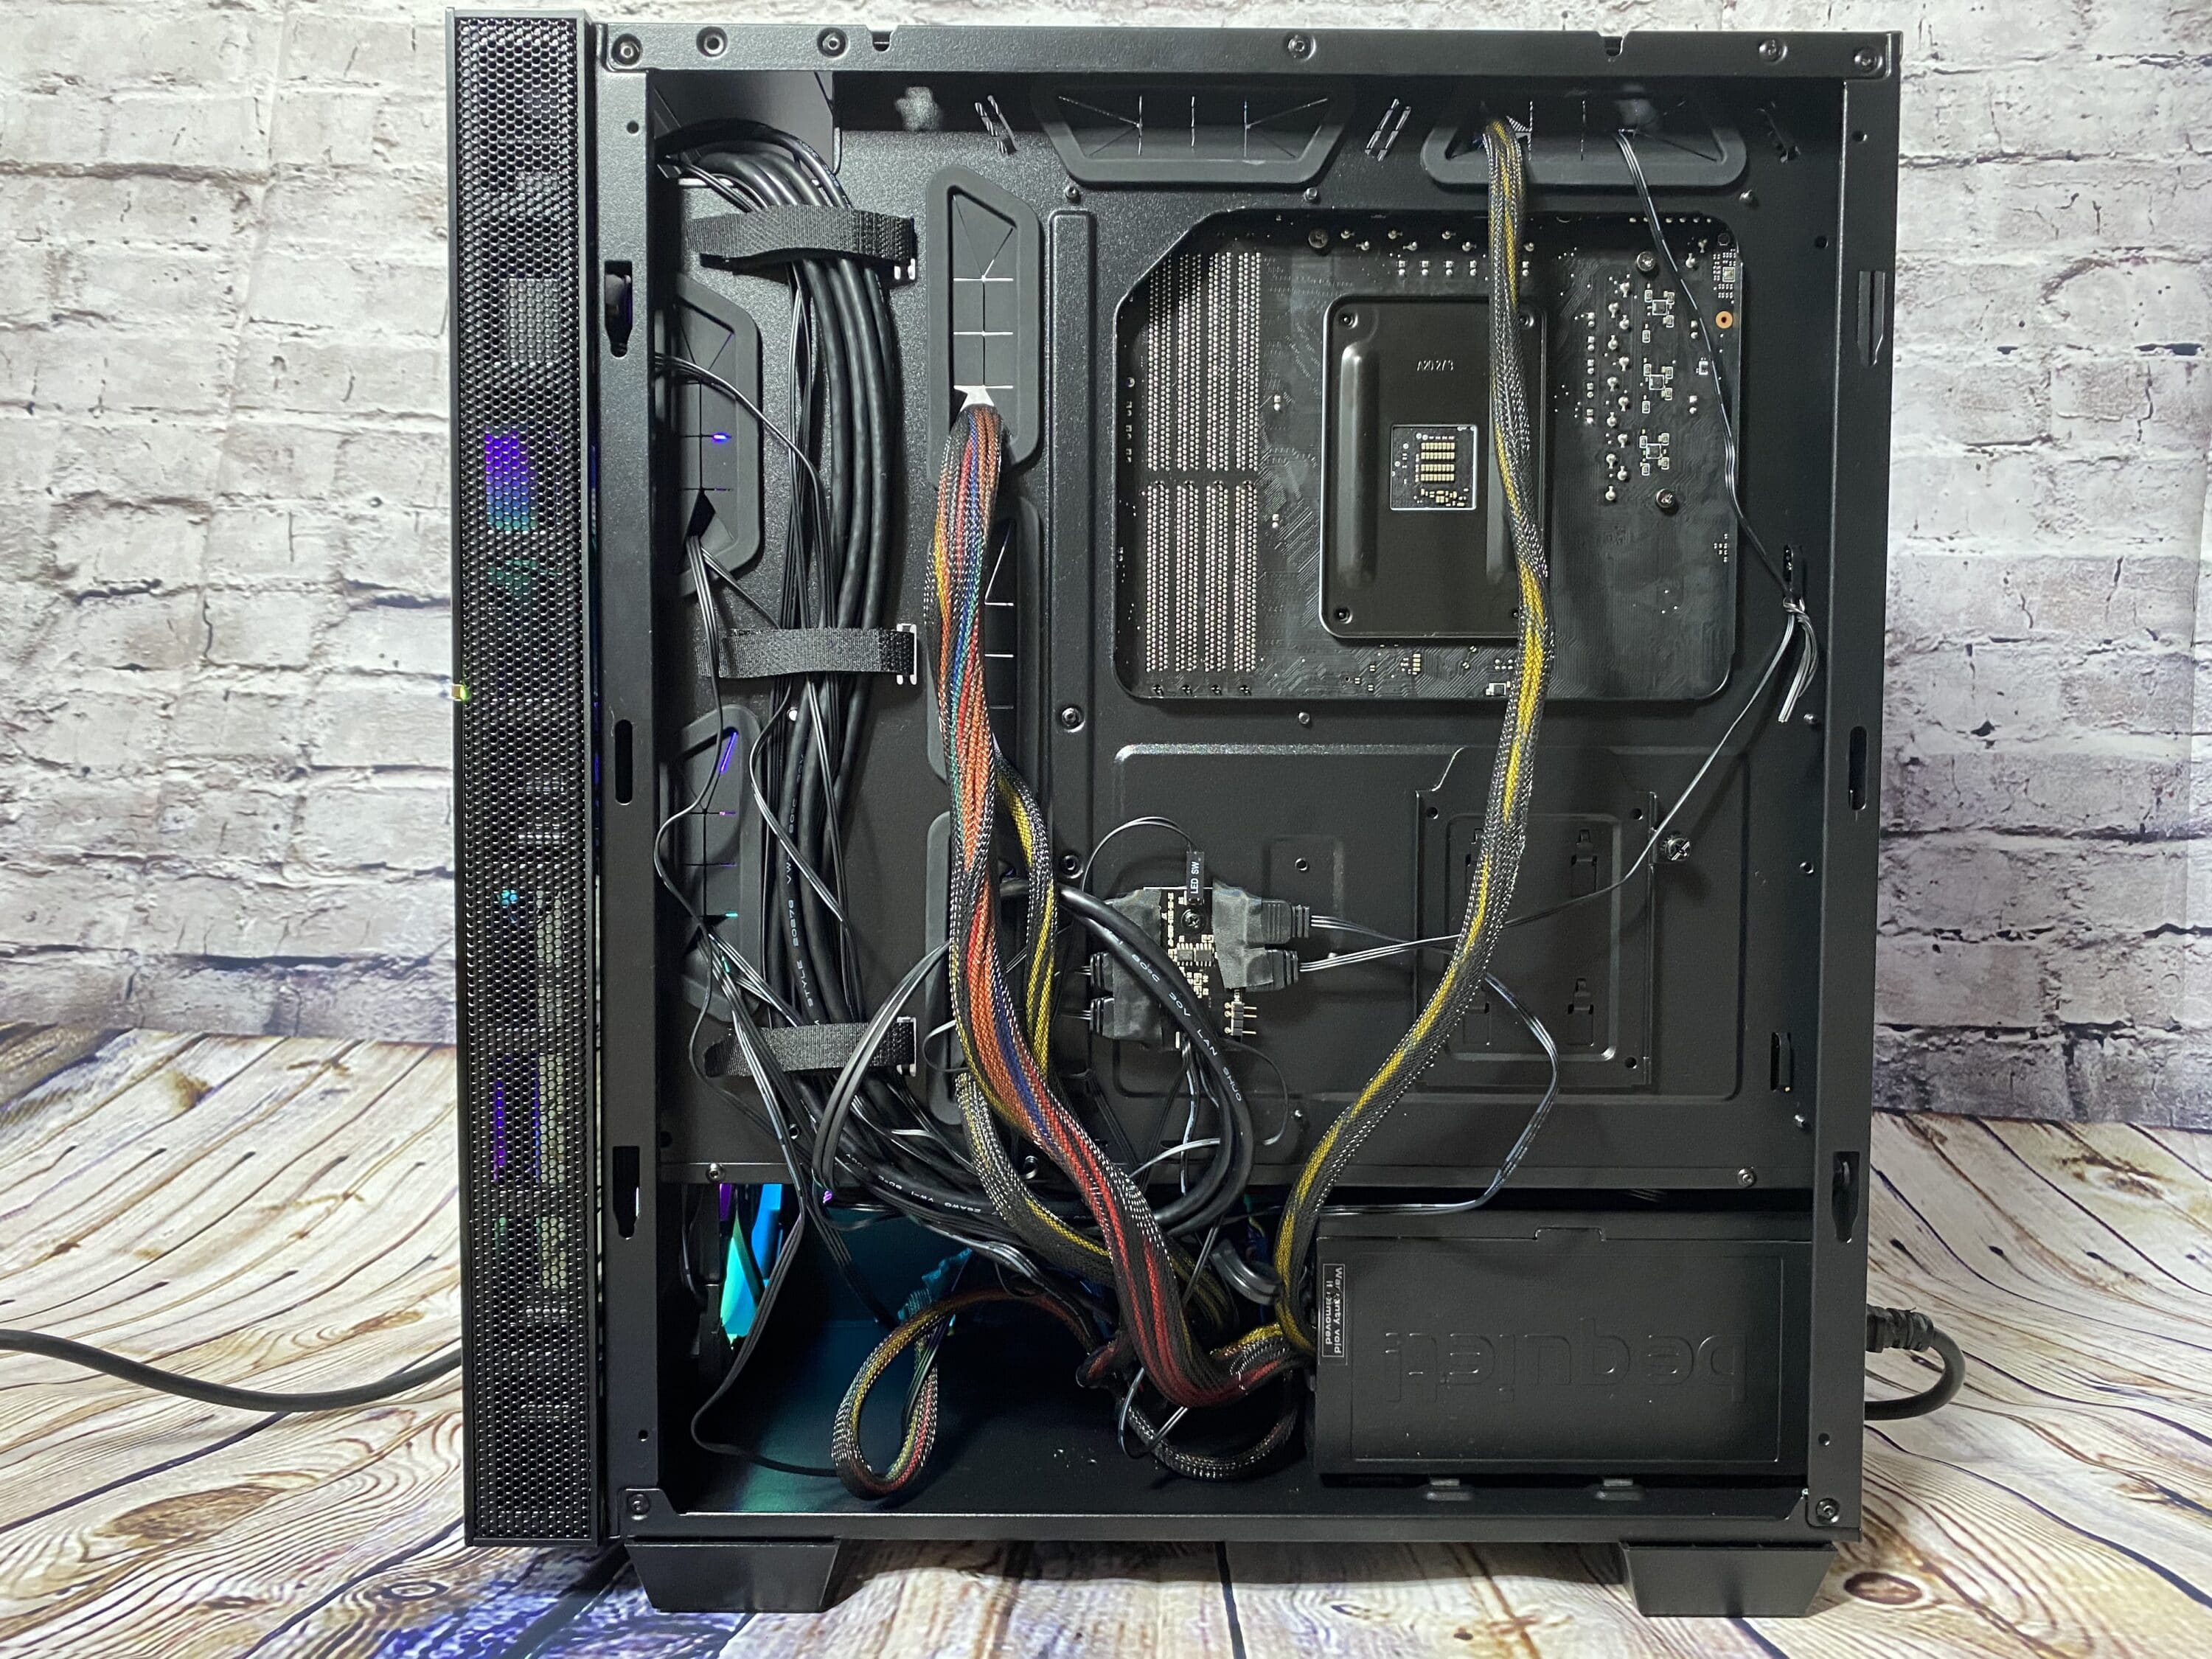
But before that you should make a plan with the cabling. We first mounted the power supply and then tried to push the fan cables through the cutout above the power supply – unfortunately we did not succeed with the power supply screwed down. The plugs are a bit too thick to squeeze in between. Here you should have a look at the planning beforehand.
Lighting
Now let’s just say a few words about RGB lighting. The front panel looks very chic thanks to the small LED strip and also the lower fans can be viewed from the front. Thanks to the dust filter the fans have a special touch. In addition, the MSI logo also shines in RBG colors, which looks very noble.
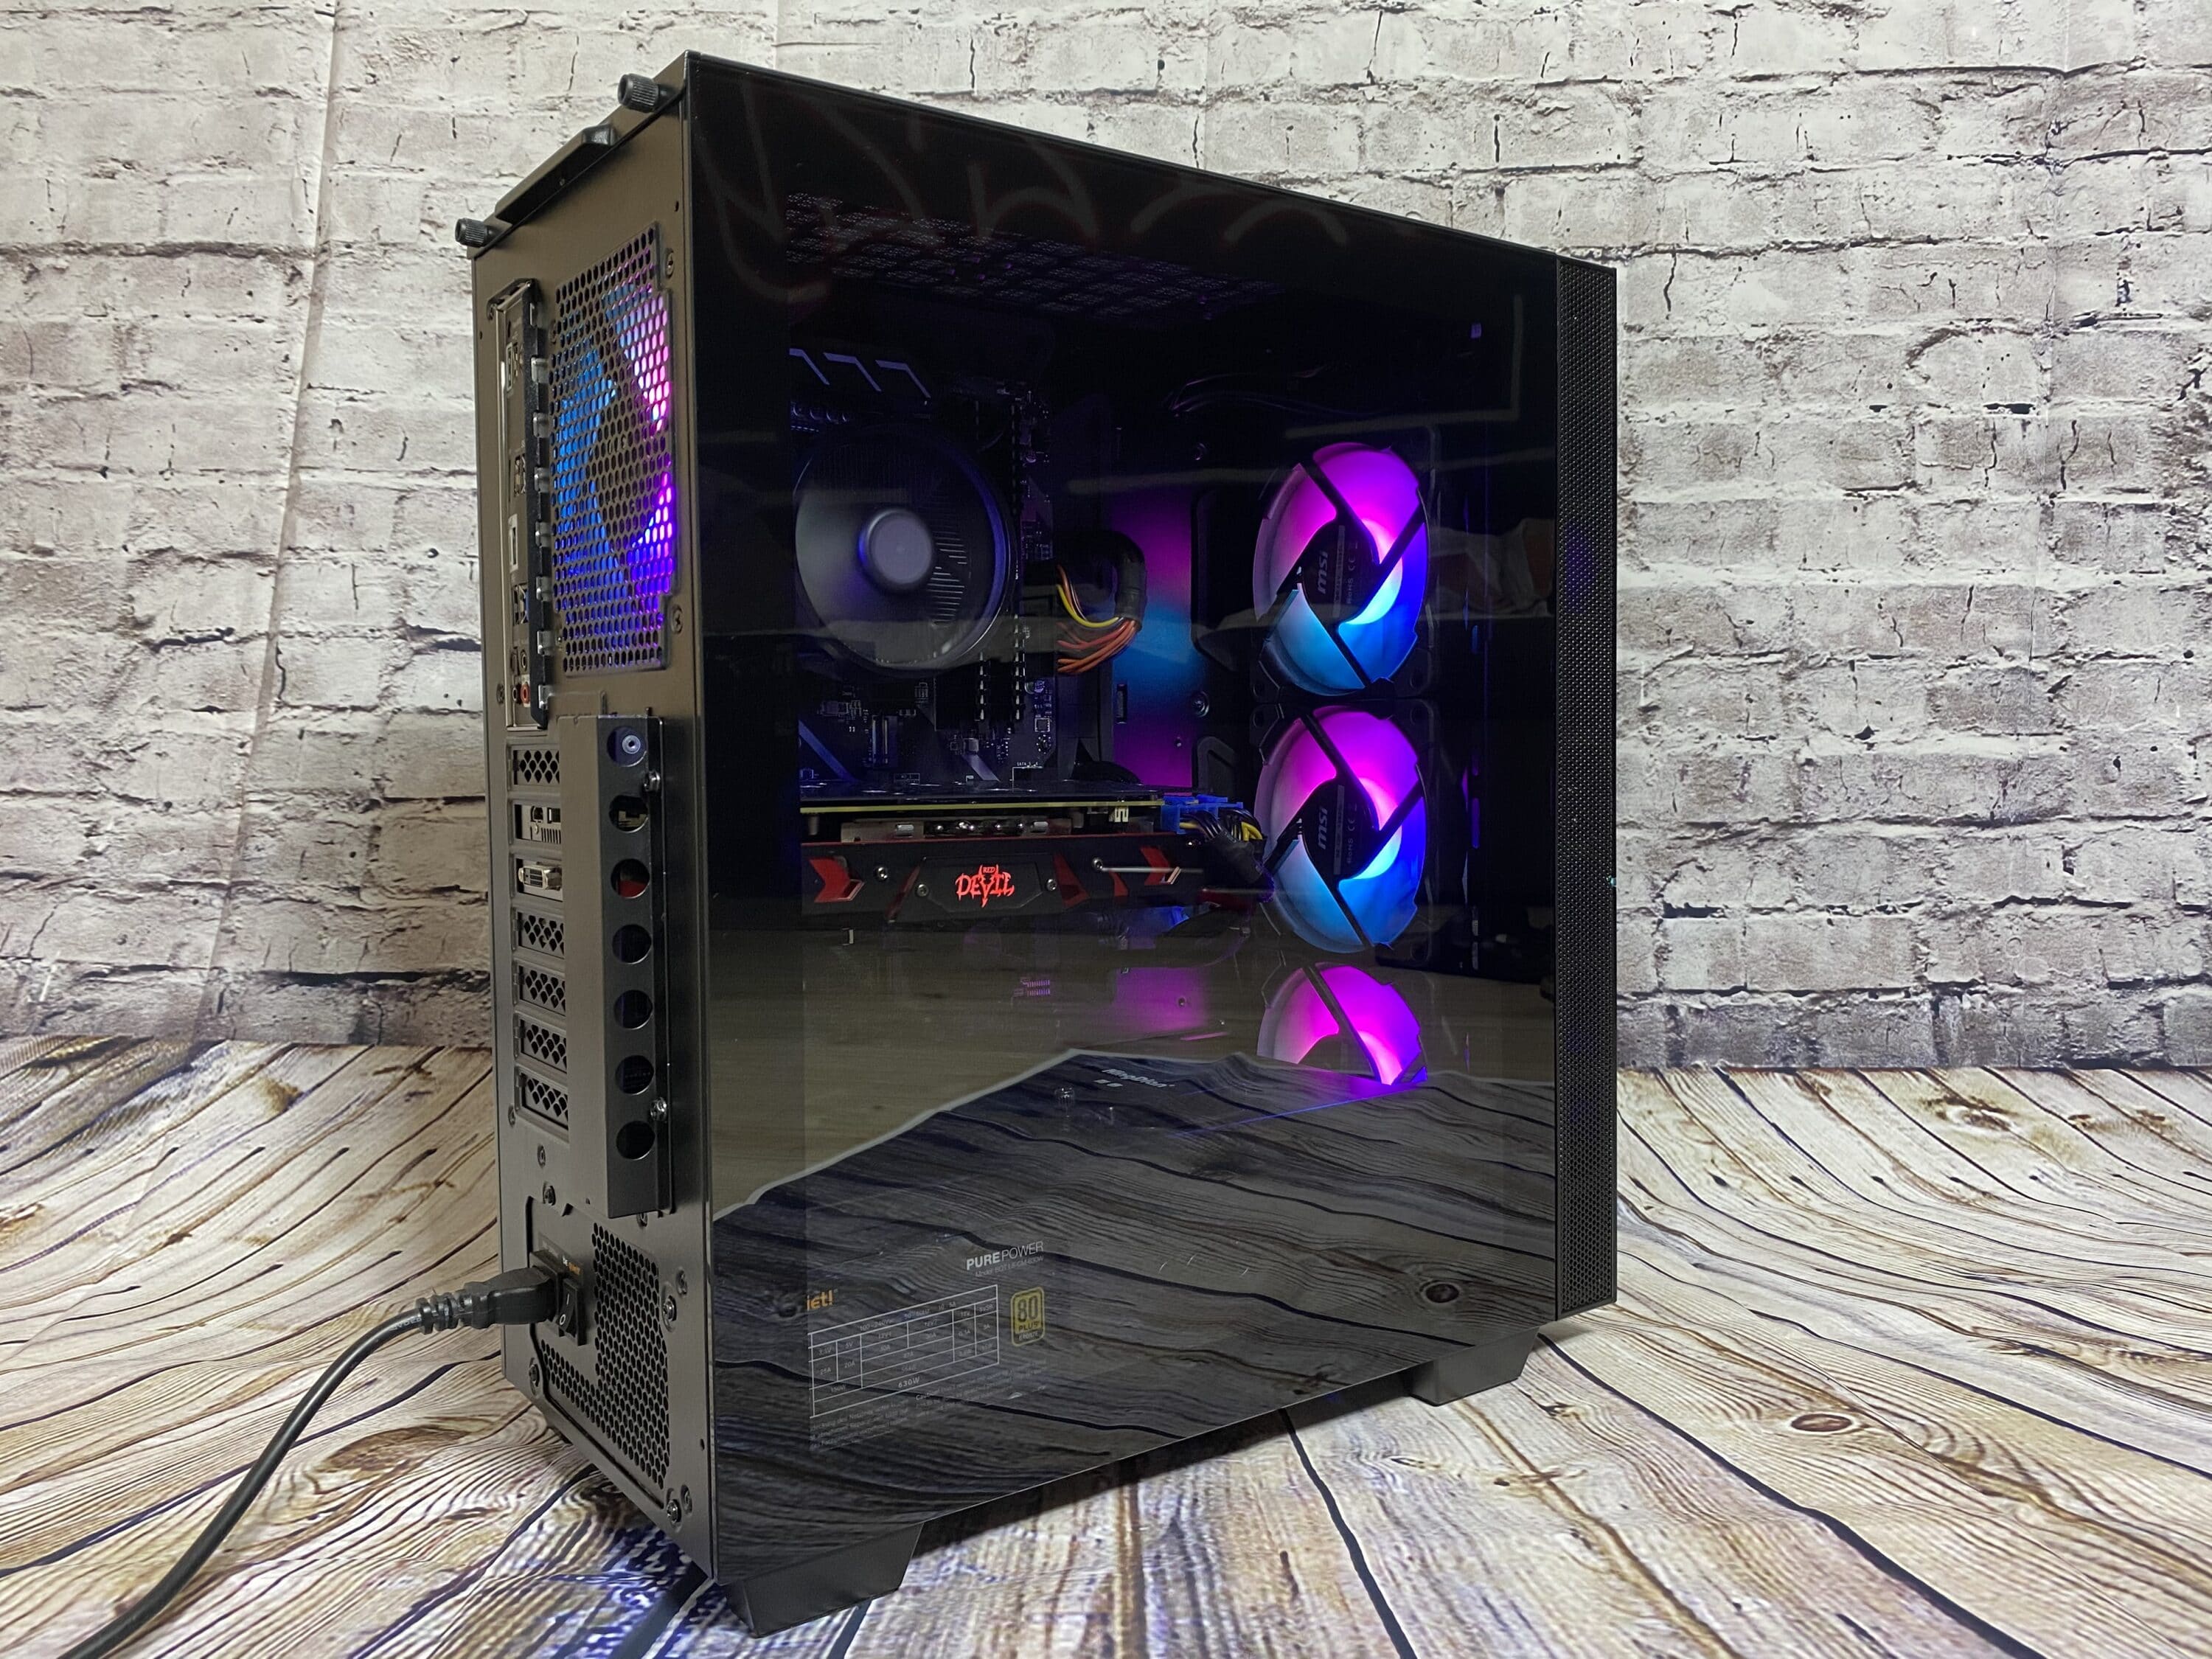
Through the glass side panel you can also see the other two fans from the front and the rear fan in RGB. The RGB rotor blades of the fans at the front of the case can only be seen from the inside to a limited extent, but they still look nice and fulfill their purpose.
Cooling
Let’s come to the last and most important point, how well the airflow of the MSI MPG SEKIRA 100R and the associated cooling and volume works. In the table below you can see our test results compared to the MPG Sekira 500X with comparable hardware. Only the supplied RGB fans from MSI were used and the AMD Wraith Stealth CPU cooler, so no water cooling. We loaded the system with Prime95 and made it sweat.
| Cases | CPU temperature | GPU temperature |
| MSI MPG SEKIRA 100R, case fan on 100% | 73 °C | 81 °C |
| MSI MPG Sekira 500X, case fan on 100% | 69 °C | 76 °C |
The cooling capacity of the case is solid. The ventilation slot at the top of the case allows the warm air to escape easily to the outside and sufficient air is let into the case from the front. The MPG Sekira 500X has an advantage due to the larger fans on the front panel, but this is balanced out again with a glass plate at the top of the case. Thus the two cases are quite identical in terms of cooling. A small disadvantage is only the size of the interior of the MSI MPG SEKIRA 100R.
Let’s have a look at the volume last. At low revs, you will only hear something when you listen very closely. The case fans are almost silent, also thanks to the good sealing of the case. At higher rpm it looks a bit different, the fans are noticeable already thanks to their volume, but still tolerably quiet.
Conclusion
Compared to the MPG Sekira 500X case one notices that the MSI MPG SEKIRA 100R case is a cheaper variant. But one thing is clear: it is still very solid. Some corners are cut down, but for this price range, the case is very nice to look at. Another nice thing is that you get four RGB fans included.
The cooling is similar to the MPG Sekira 500X, even though the MSI MPG SEKIRA 100R is more spacious. If you look at the design of the case, you can’t go wrong, everything you can expect from a case is there. It should be noted that MSI has built a pretty solid case and that’s why we gave it the Gold-Award.

MSI MPG SEKIRA 100R
Workmanship
Structure
Features
Dampening
Cooling
Value for money
90/100
An all around solid case from MSI for a quite reasonable price.