Anycubic 3D printers are popular and have already proven themselves in the past. With the Anycubic Vyper, the manufacturer launches an FDM printer for under €400. Due to the promised simple assembly and the auto-leveling function, the 3D printer is also interesting for beginners. In addition, the build space offers room for prints with a height of up to 260 mm. Thus, the Vyper offers more space than comparable 3D printers. The overall package promises: unpack it, set it up, and get started right away with the first print. How the Anycubic Vyper performed in our test and what there is to consider despite the beginner-friendliness, you can find out in the following test report.
Technical specifications of the Anycubic Vyper
| Printer technology: | FDM |
| Dimensions installation space (L x W x H): | 245 x 245 x 260 mm |
| Extruder: | Single, 0.4 mm |
| Maximum print speed: | < 180 mm/s |
| Supported filaments: | PLA, TPU, PETG, ABS, Wood |
| Leveling: | Automatic |
| Material Nozzle: | brass |
| max. temperature Nozzle: | 260 °C |
| max. temperature heating bed: | 110 °C |
| Slicing Software: | Cura ; output format: GCode |
| Compatible input formats: | STL, OBJ, AMF |
| Inputs: | SD card, USB cable |
| Dimensions – Total (L x W x H): | 508 x 457 x 516 mm |
| Weight: | ~10 kg |
| Features: | Auto leveling, 4.3″ touch screen, filament holder, detachable and magnetic printing plate |
| Price: | € 70.90 * |


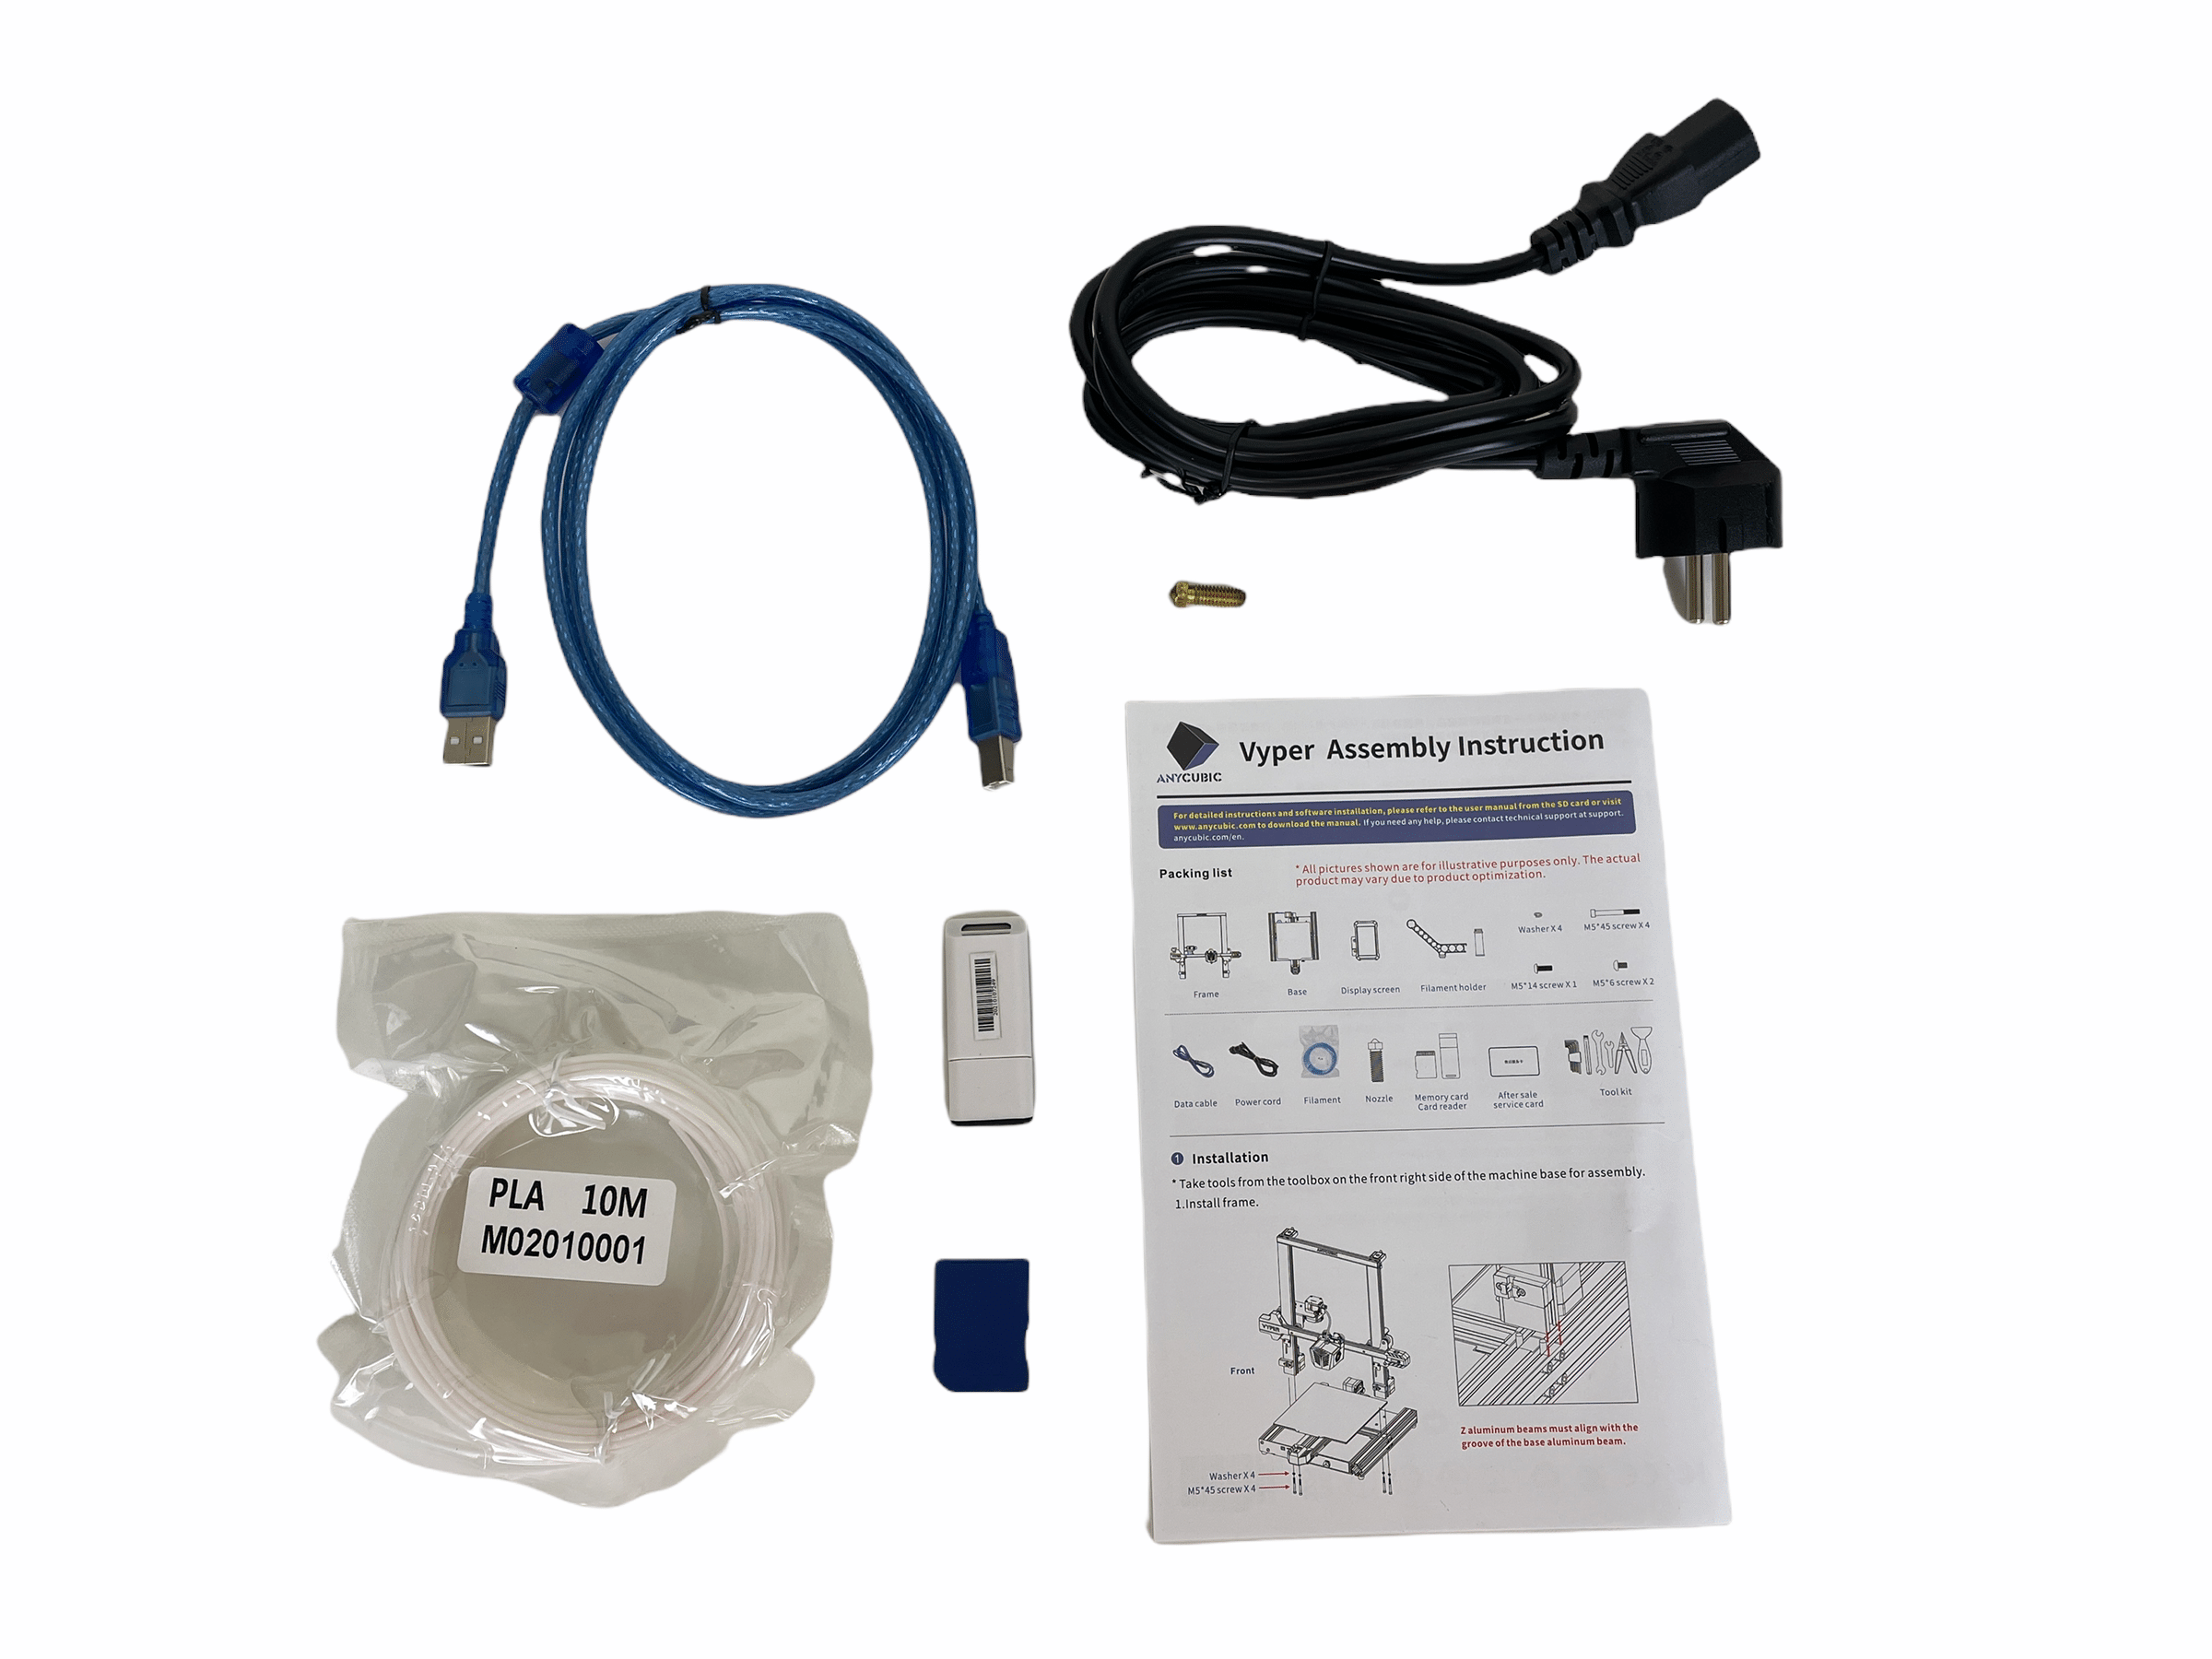
Scope of delivery
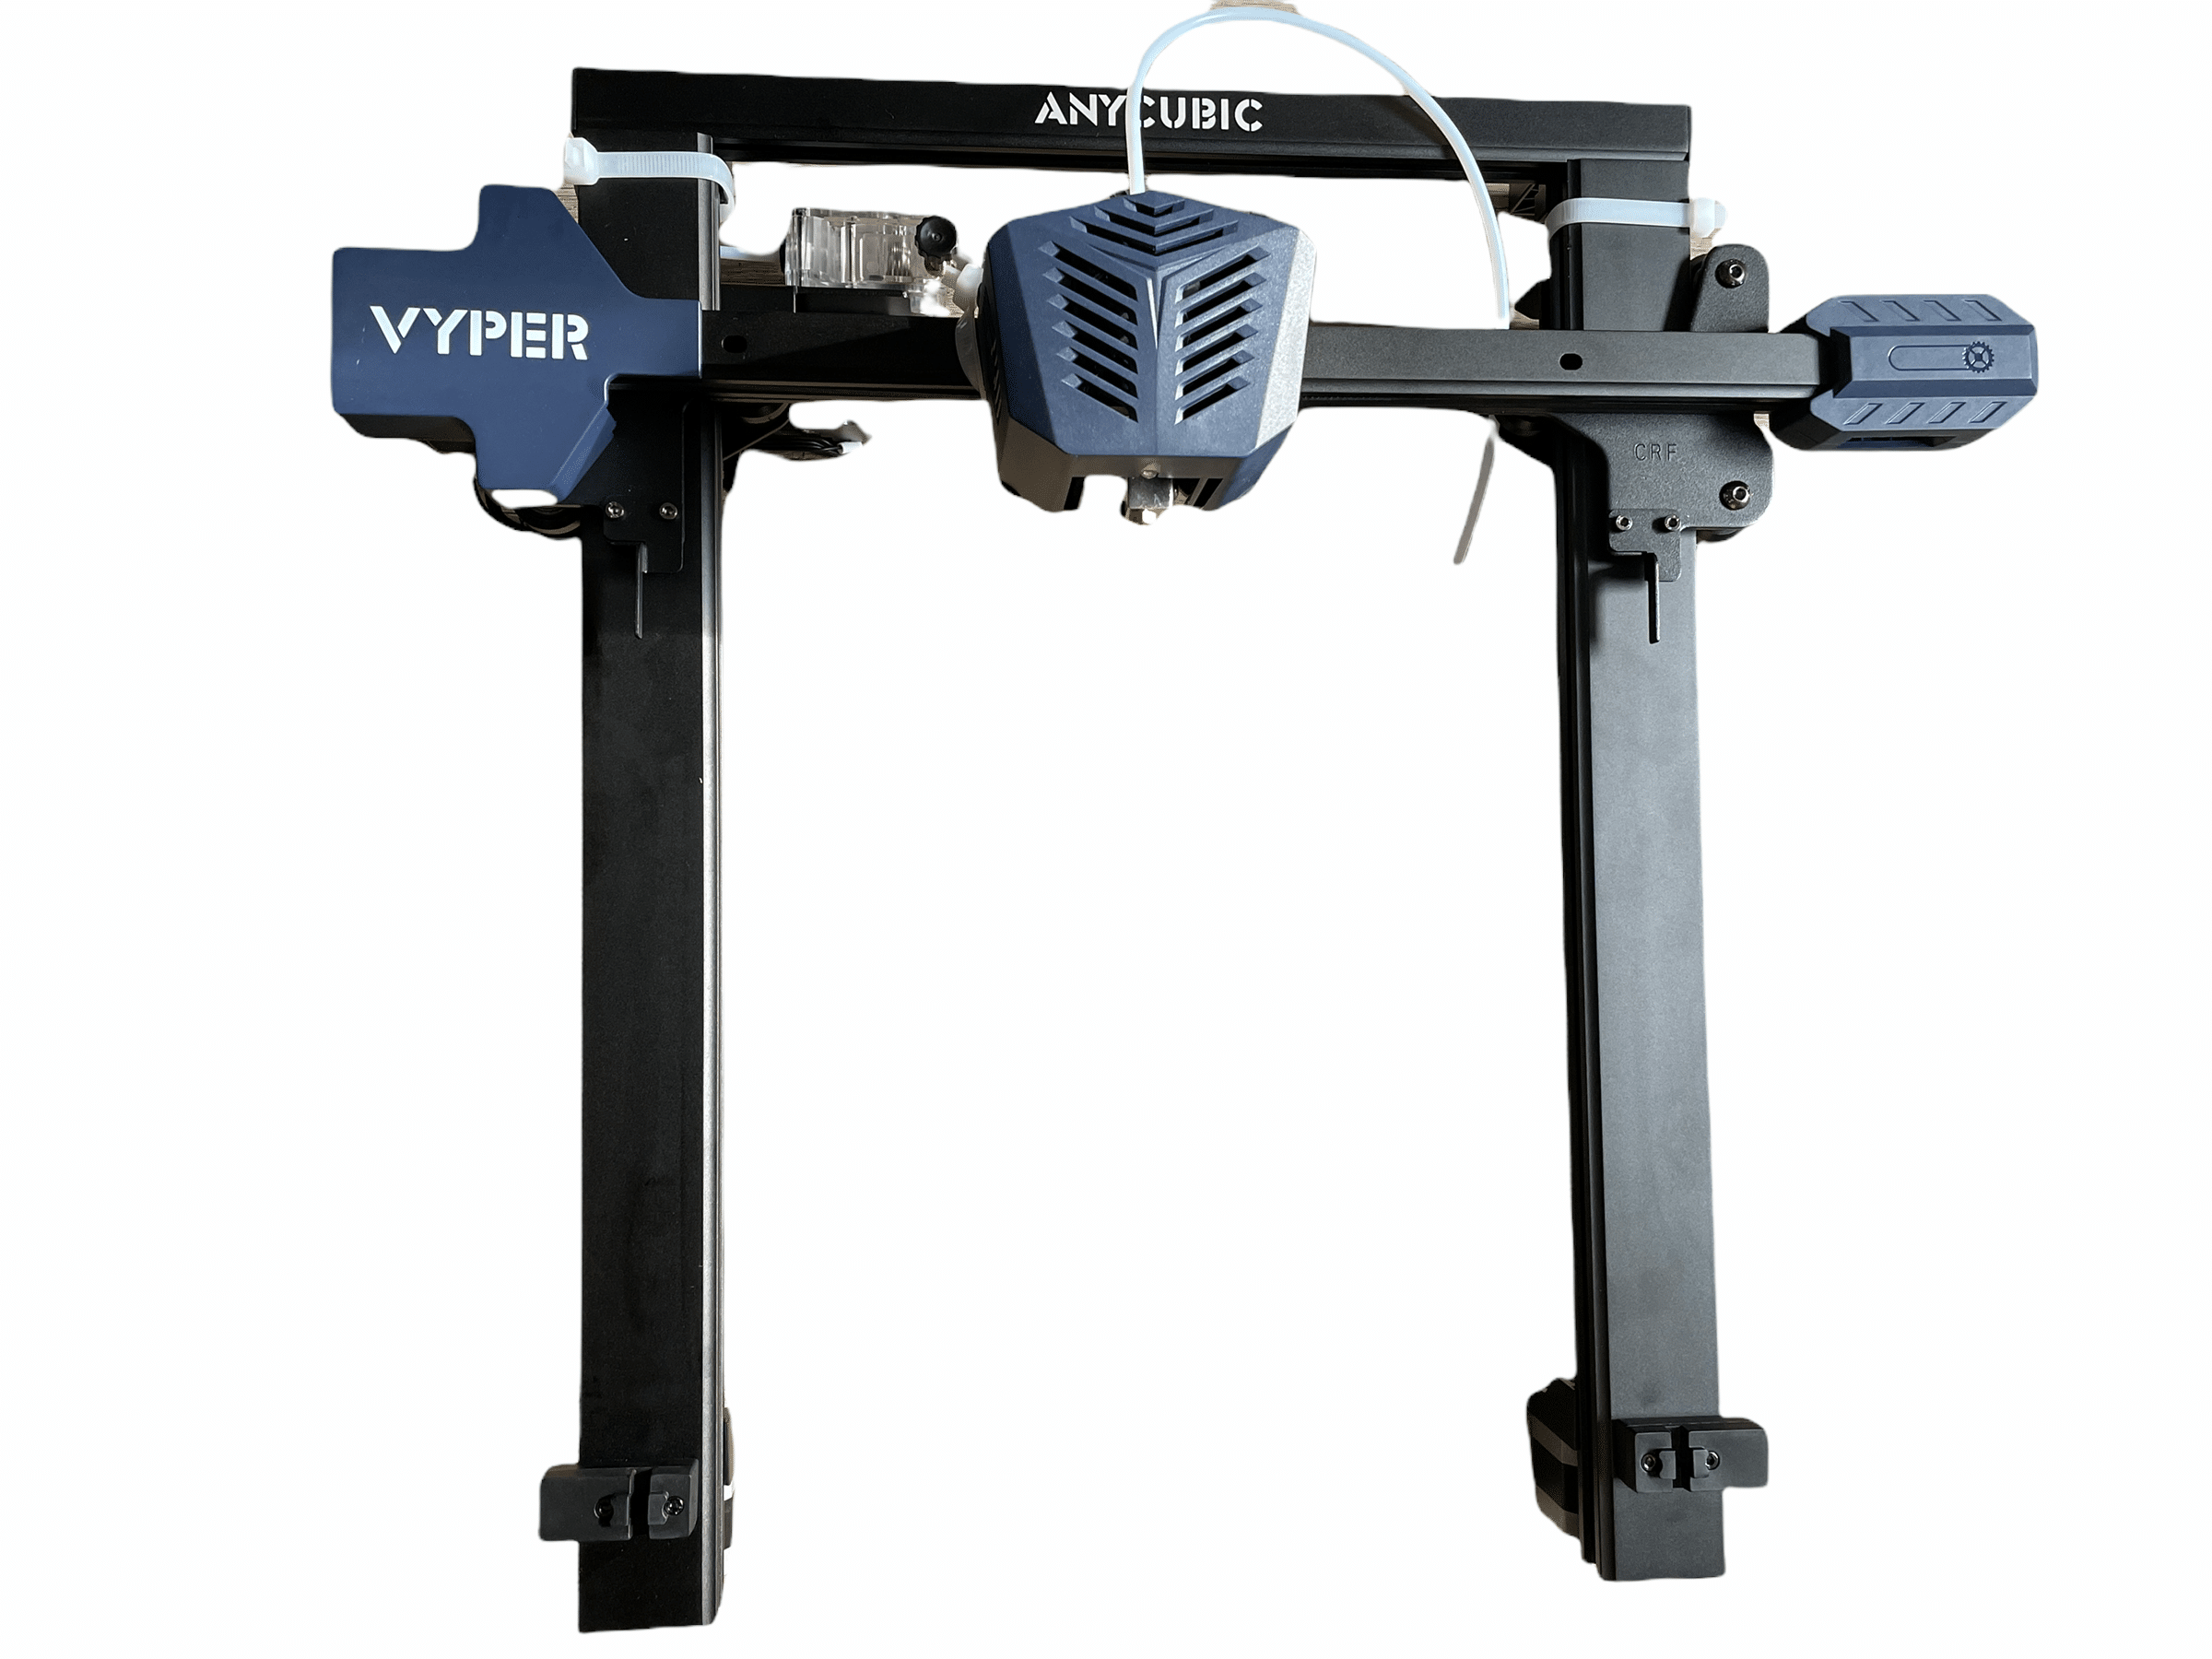
The Anycubic Vyper reaches one well packed in a large cardboard box. Whereby the individual parts of the 3D printer are securely packed and protected by foam. Once you have unpacked everything, the printer awaits you disassembled into two large parts. The gallows (frame) is separate, as well as the base. The heating bed is already firmly mounted on the base and all moving parts are secured with cable ties. In addition to the gallows and the base unit, there is also the monitor in the package, which must also be mounted. A holder for the filament roll was also thought of, this is also included and is mounted by simply hooking it in. For the mounting of the gallows and also the monitor are suitable screws included.


The drawer holds a special surprise. Namely, in addition to the assembly tools, it also houses a pair of filament scissors and a small “needle” for cleaning the printer nozzle.

Also included is an accessory pouch that contains many useful items. Among other things, a USB cable for connection to the PC or laptop and a power cable can be found here again. The included SD card paired with the SD card reader is also very useful. The card reader is in the form of a USB stick and can also be handled like one. The SD card simply has to be inserted into the card slot and the stick can be used on the PC or laptop. To get you started, Anycubic even includes a small rolled-up amount of PLA filament and a plastic spatula for removing the print.
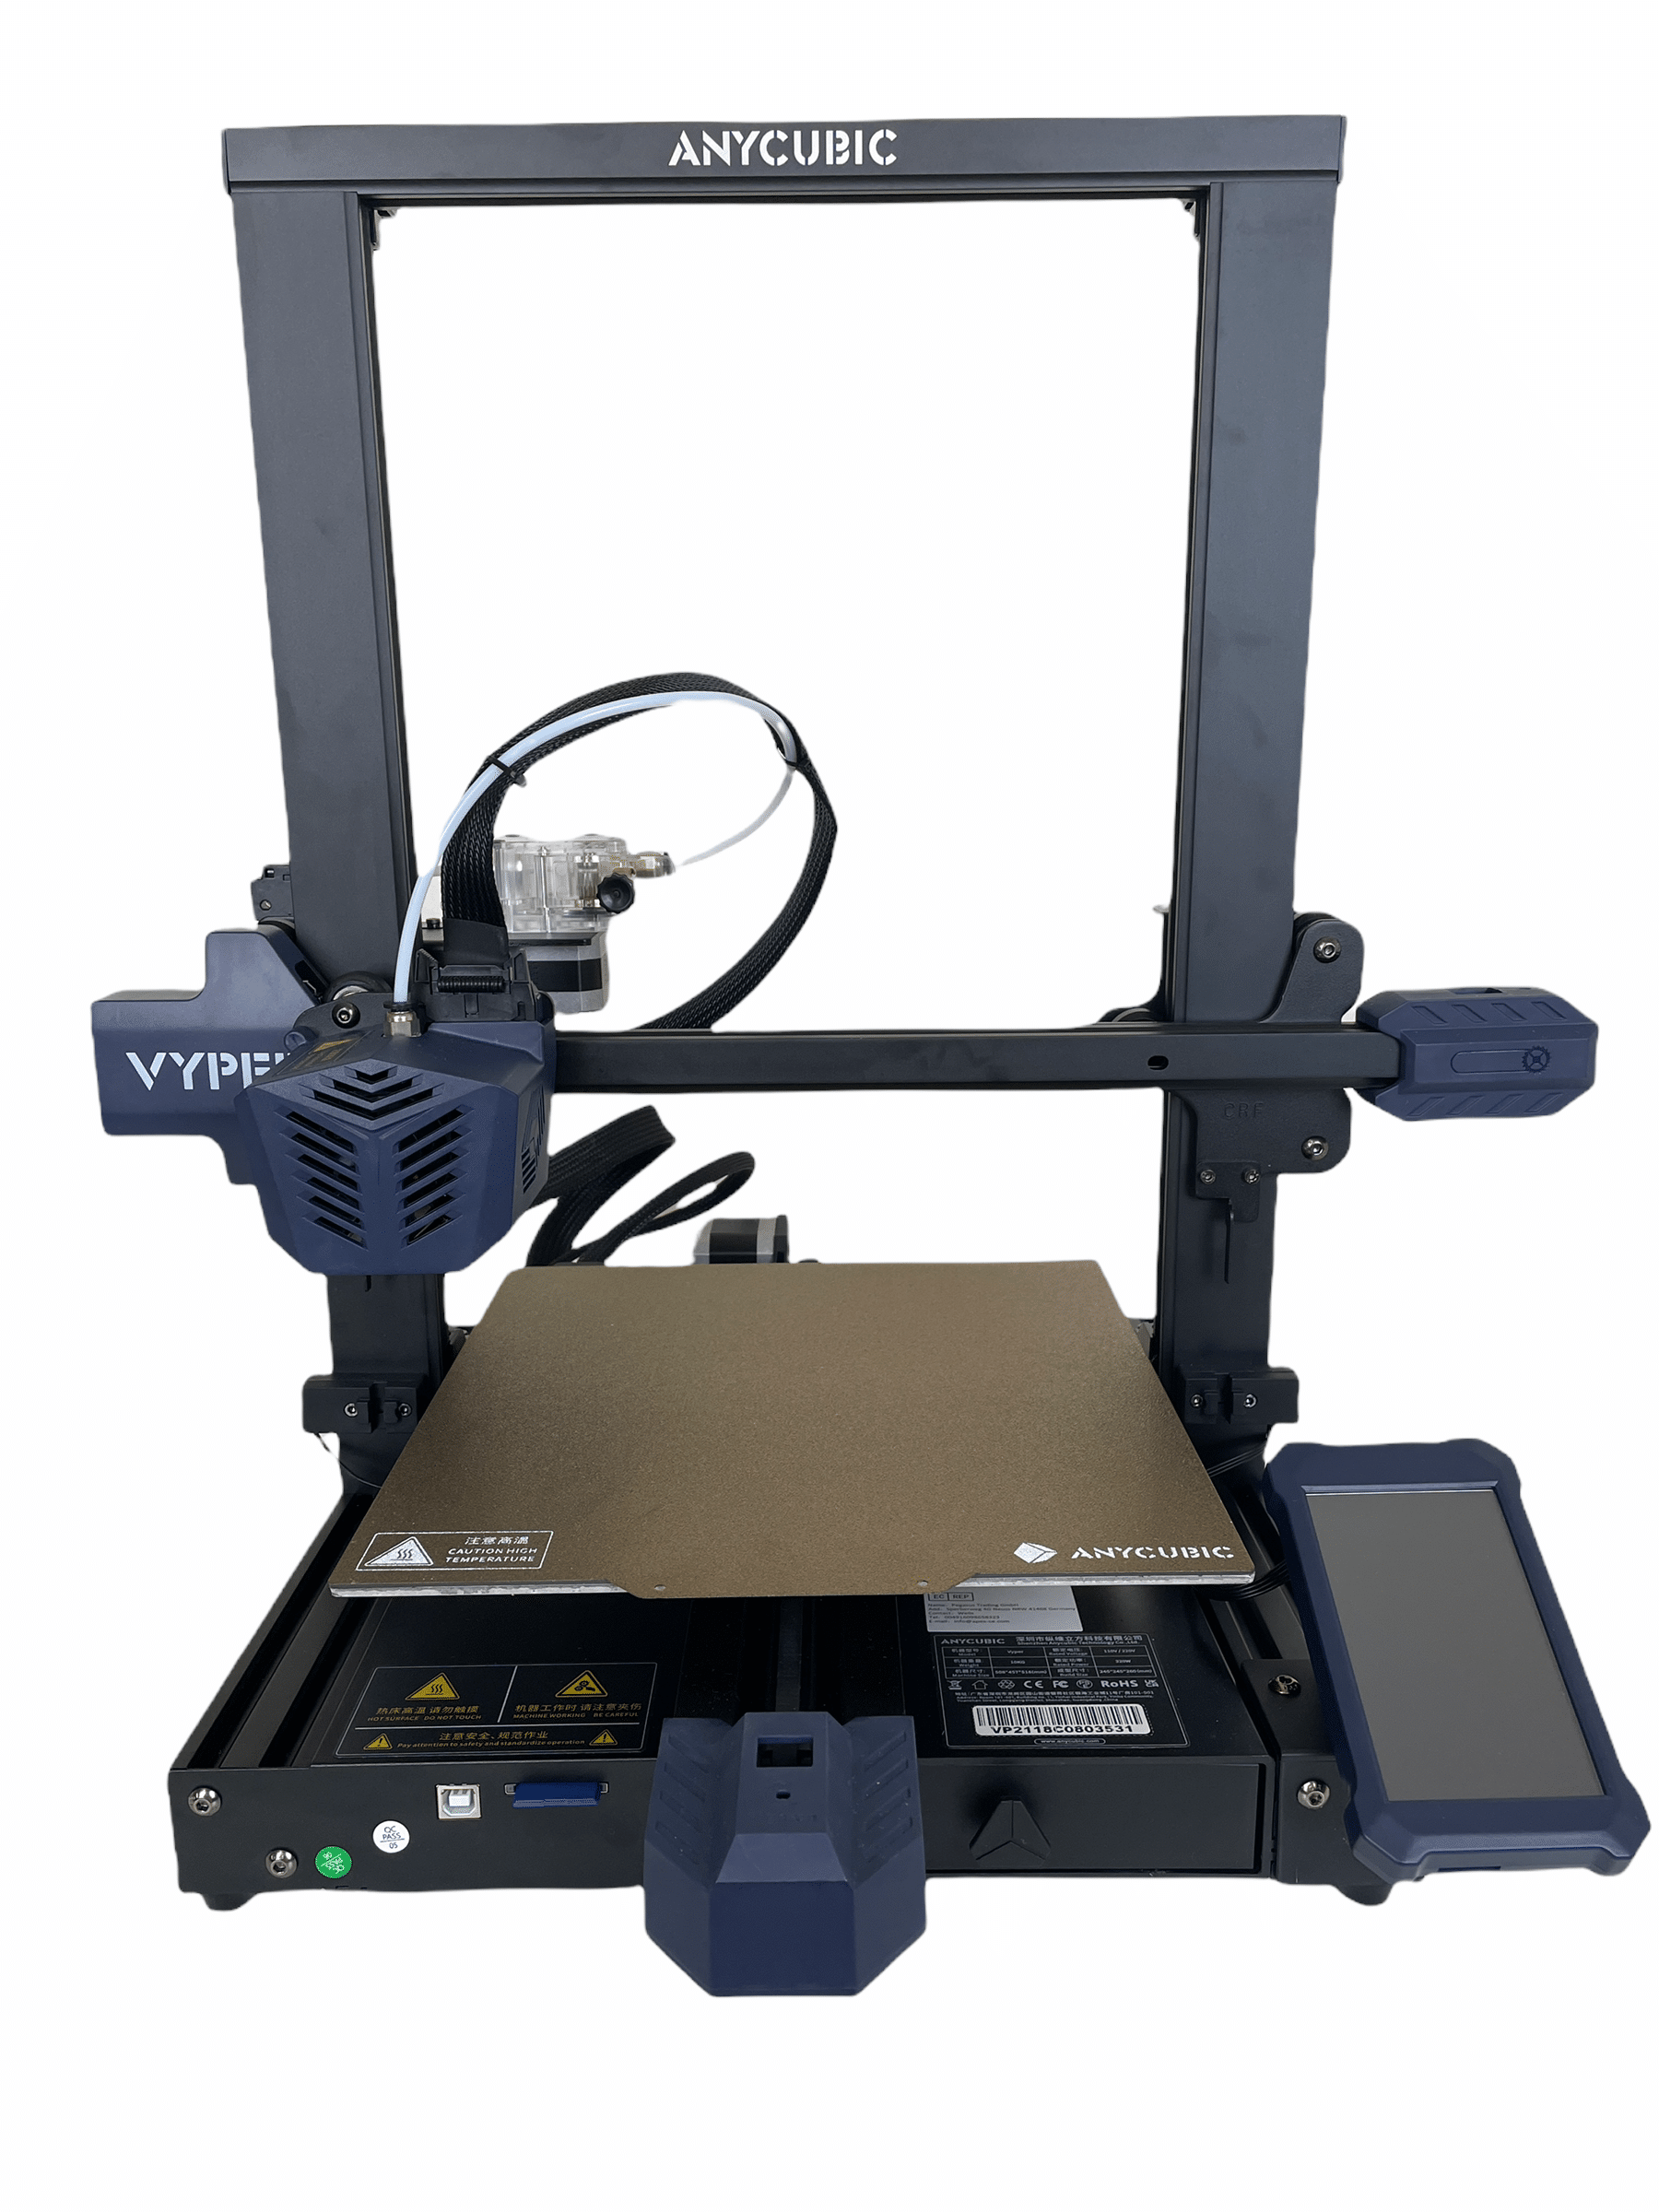
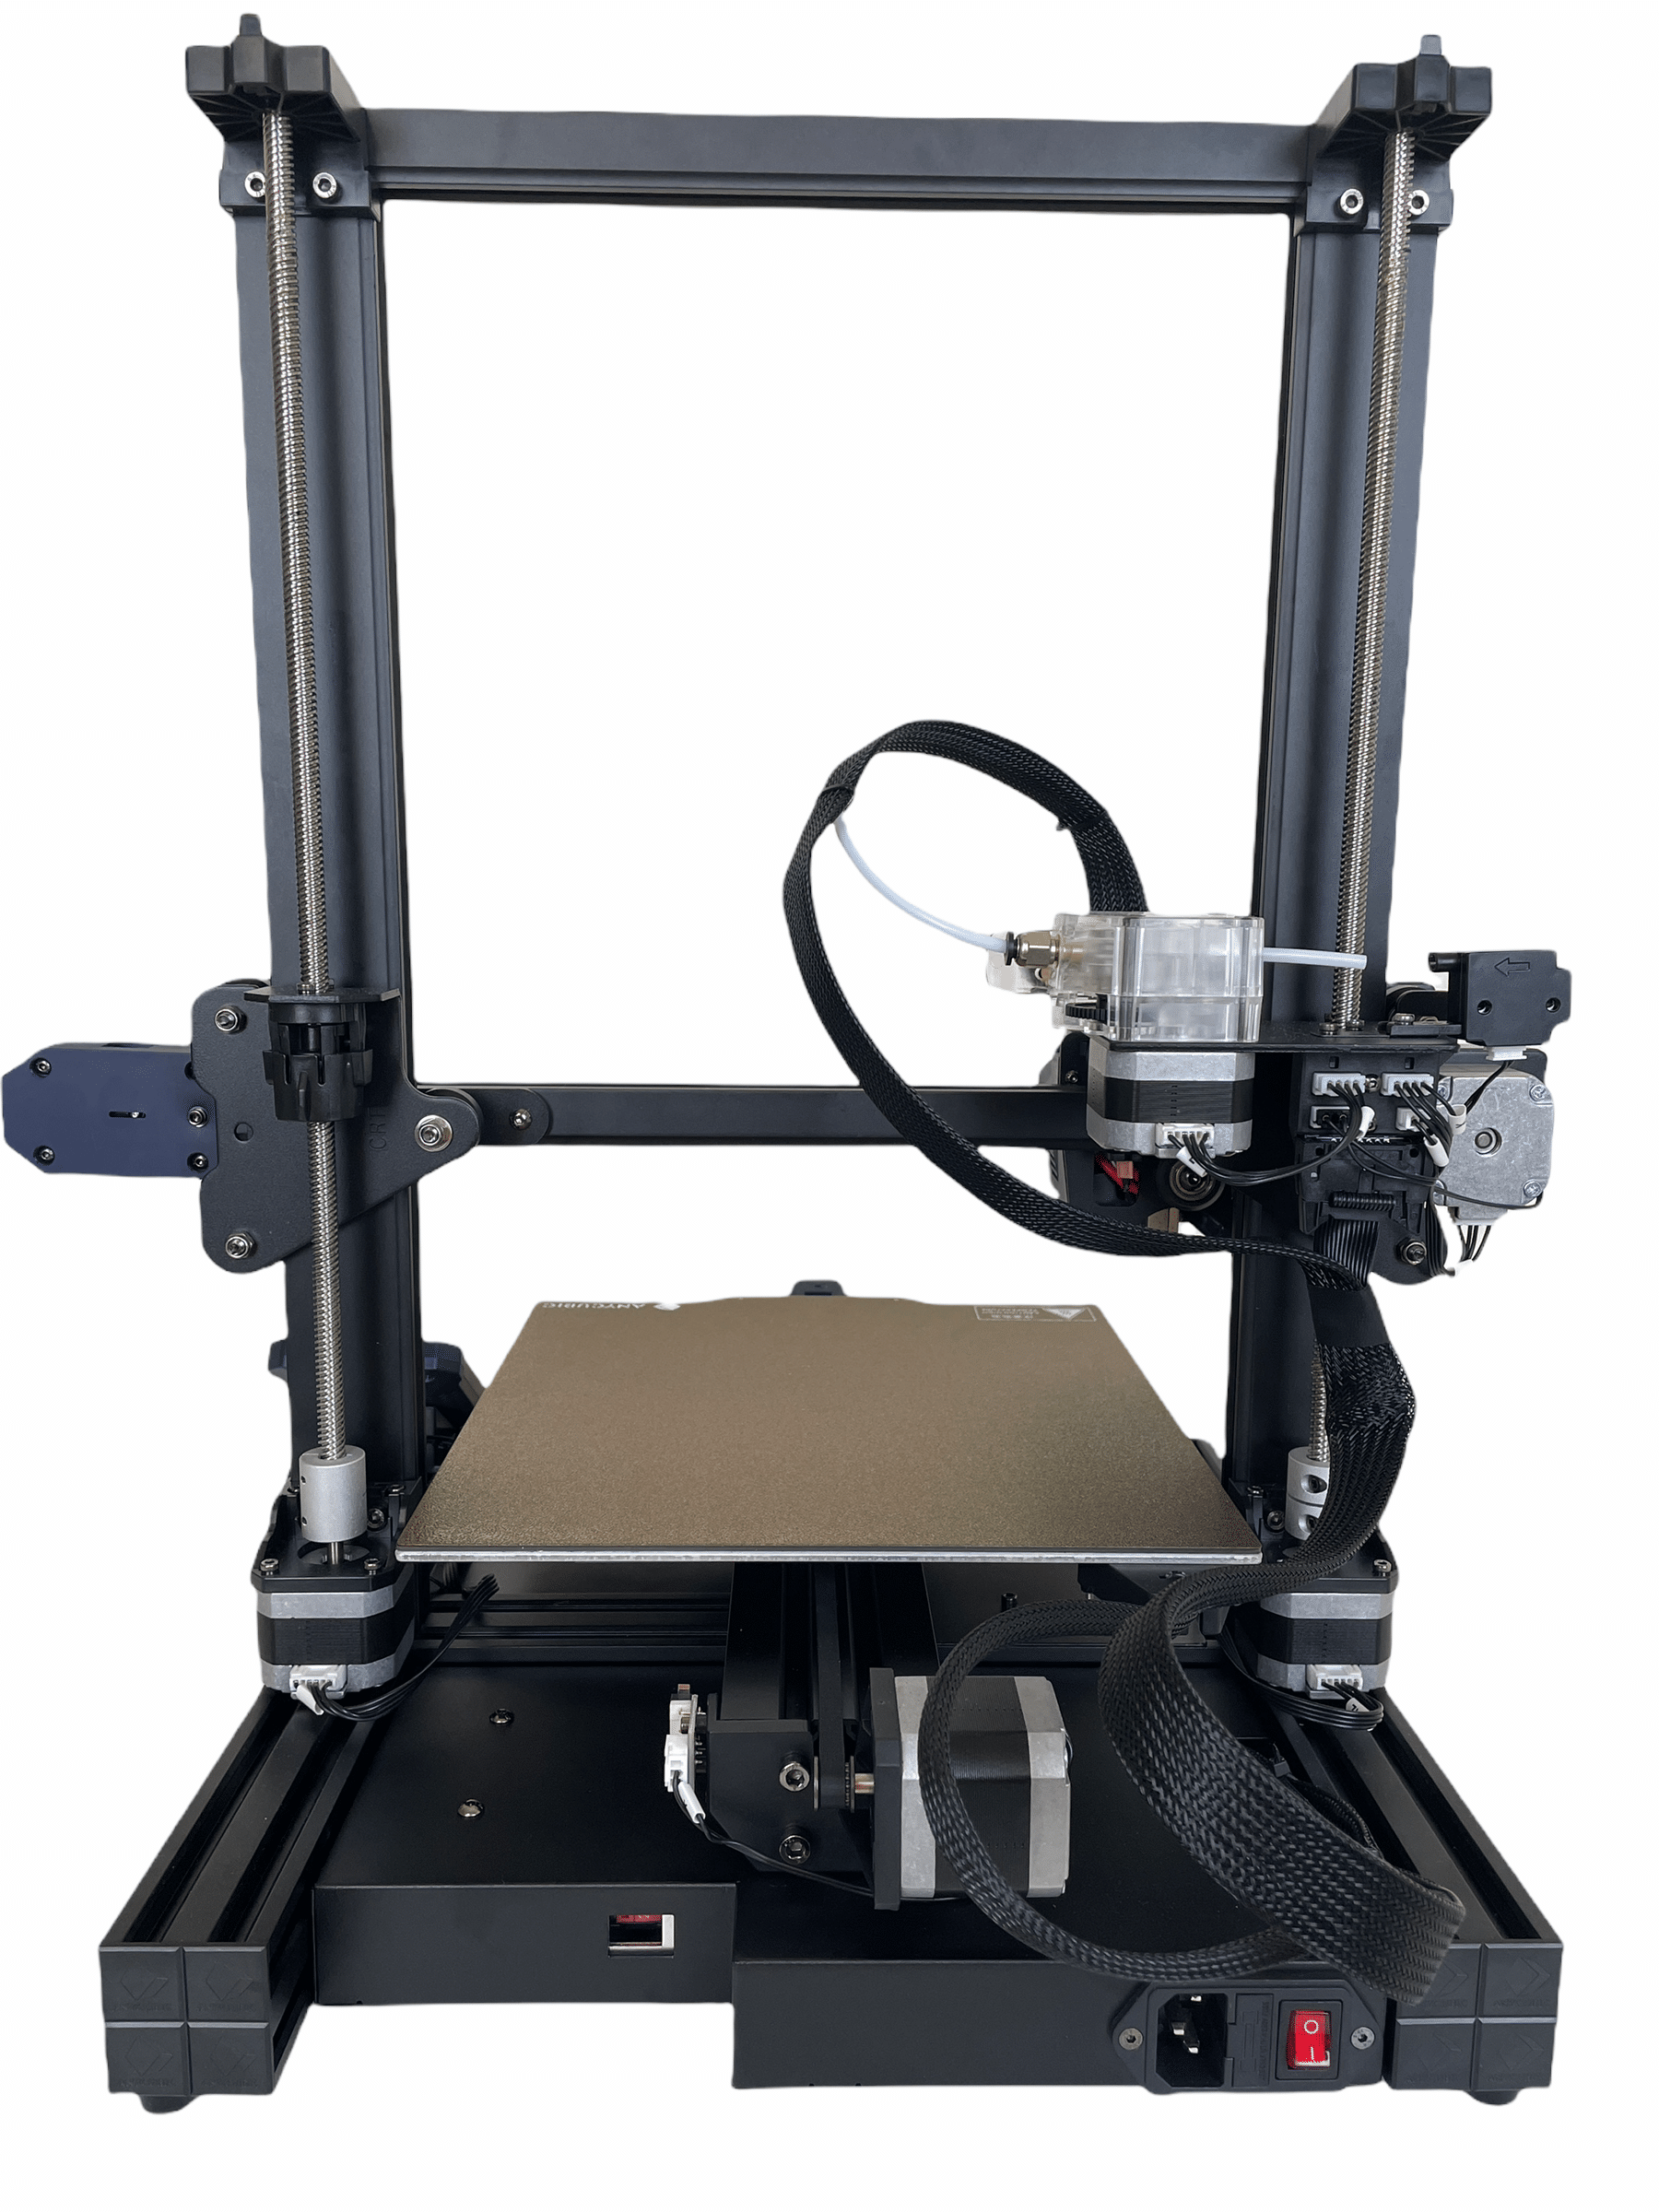
Assembly
Assembly of the Anycubic Vyper is very easy and becomes a breeze thanks to the assembly instructions. For setup, we recommend checking out the online instructions, which can be found on Anycubic’s website, as there is a bit more information in there. The Vyper is 80% pre-assembled, so only the frame has to be screwed to the base and all cables have to be plugged into the right place. The cables for the actuators and the monitor are also already in the right place and only need to be plugged in. As already mentioned, the monitor must also be screwed to the base. The appropriate screws are included and the correct position is made clear in the assembly instructions. Once the cables for the extruder, the hot end and all the servo motors are plugged in, you’re ready to go.
The Cura version supplied on the memory card is already outdated and it is recommended to download the latest version directly from the Cura website.
A cold-device cable is included for the power supply. Anycubic’s 3D printer has a power supply switch, which makes it possible to switch between 110V and 230V. In Germany, we need 230V, and the switch is usually already aligned correctly. Nevertheless, a check is recommended. We would also recommend to check the screws of all casters again. They may be stuck or simply too loose. This can affect the print quality. You should also check these screws every now and then and tighten them if necessary.
Auto Leveling
Auto leveling is the big plus with the Vyper. Just press the button and let the magic happen. In this feature, the 3D printer travels 16 predefined locations to define the perfect distances from the heating bed. This is possible via a pressure sensor, which is installed in the hot end. It detects as soon as the nozzle touches down on the print bed. The precision is made possible by the sensor’s slight pressure sensitivity. The process takes a few minutes and you can start printing directly after it is finished.
Small tip: If you should move the printer to another place after leveling, better repeat the function, because a crooked background can affect the print spacing or the print bed.
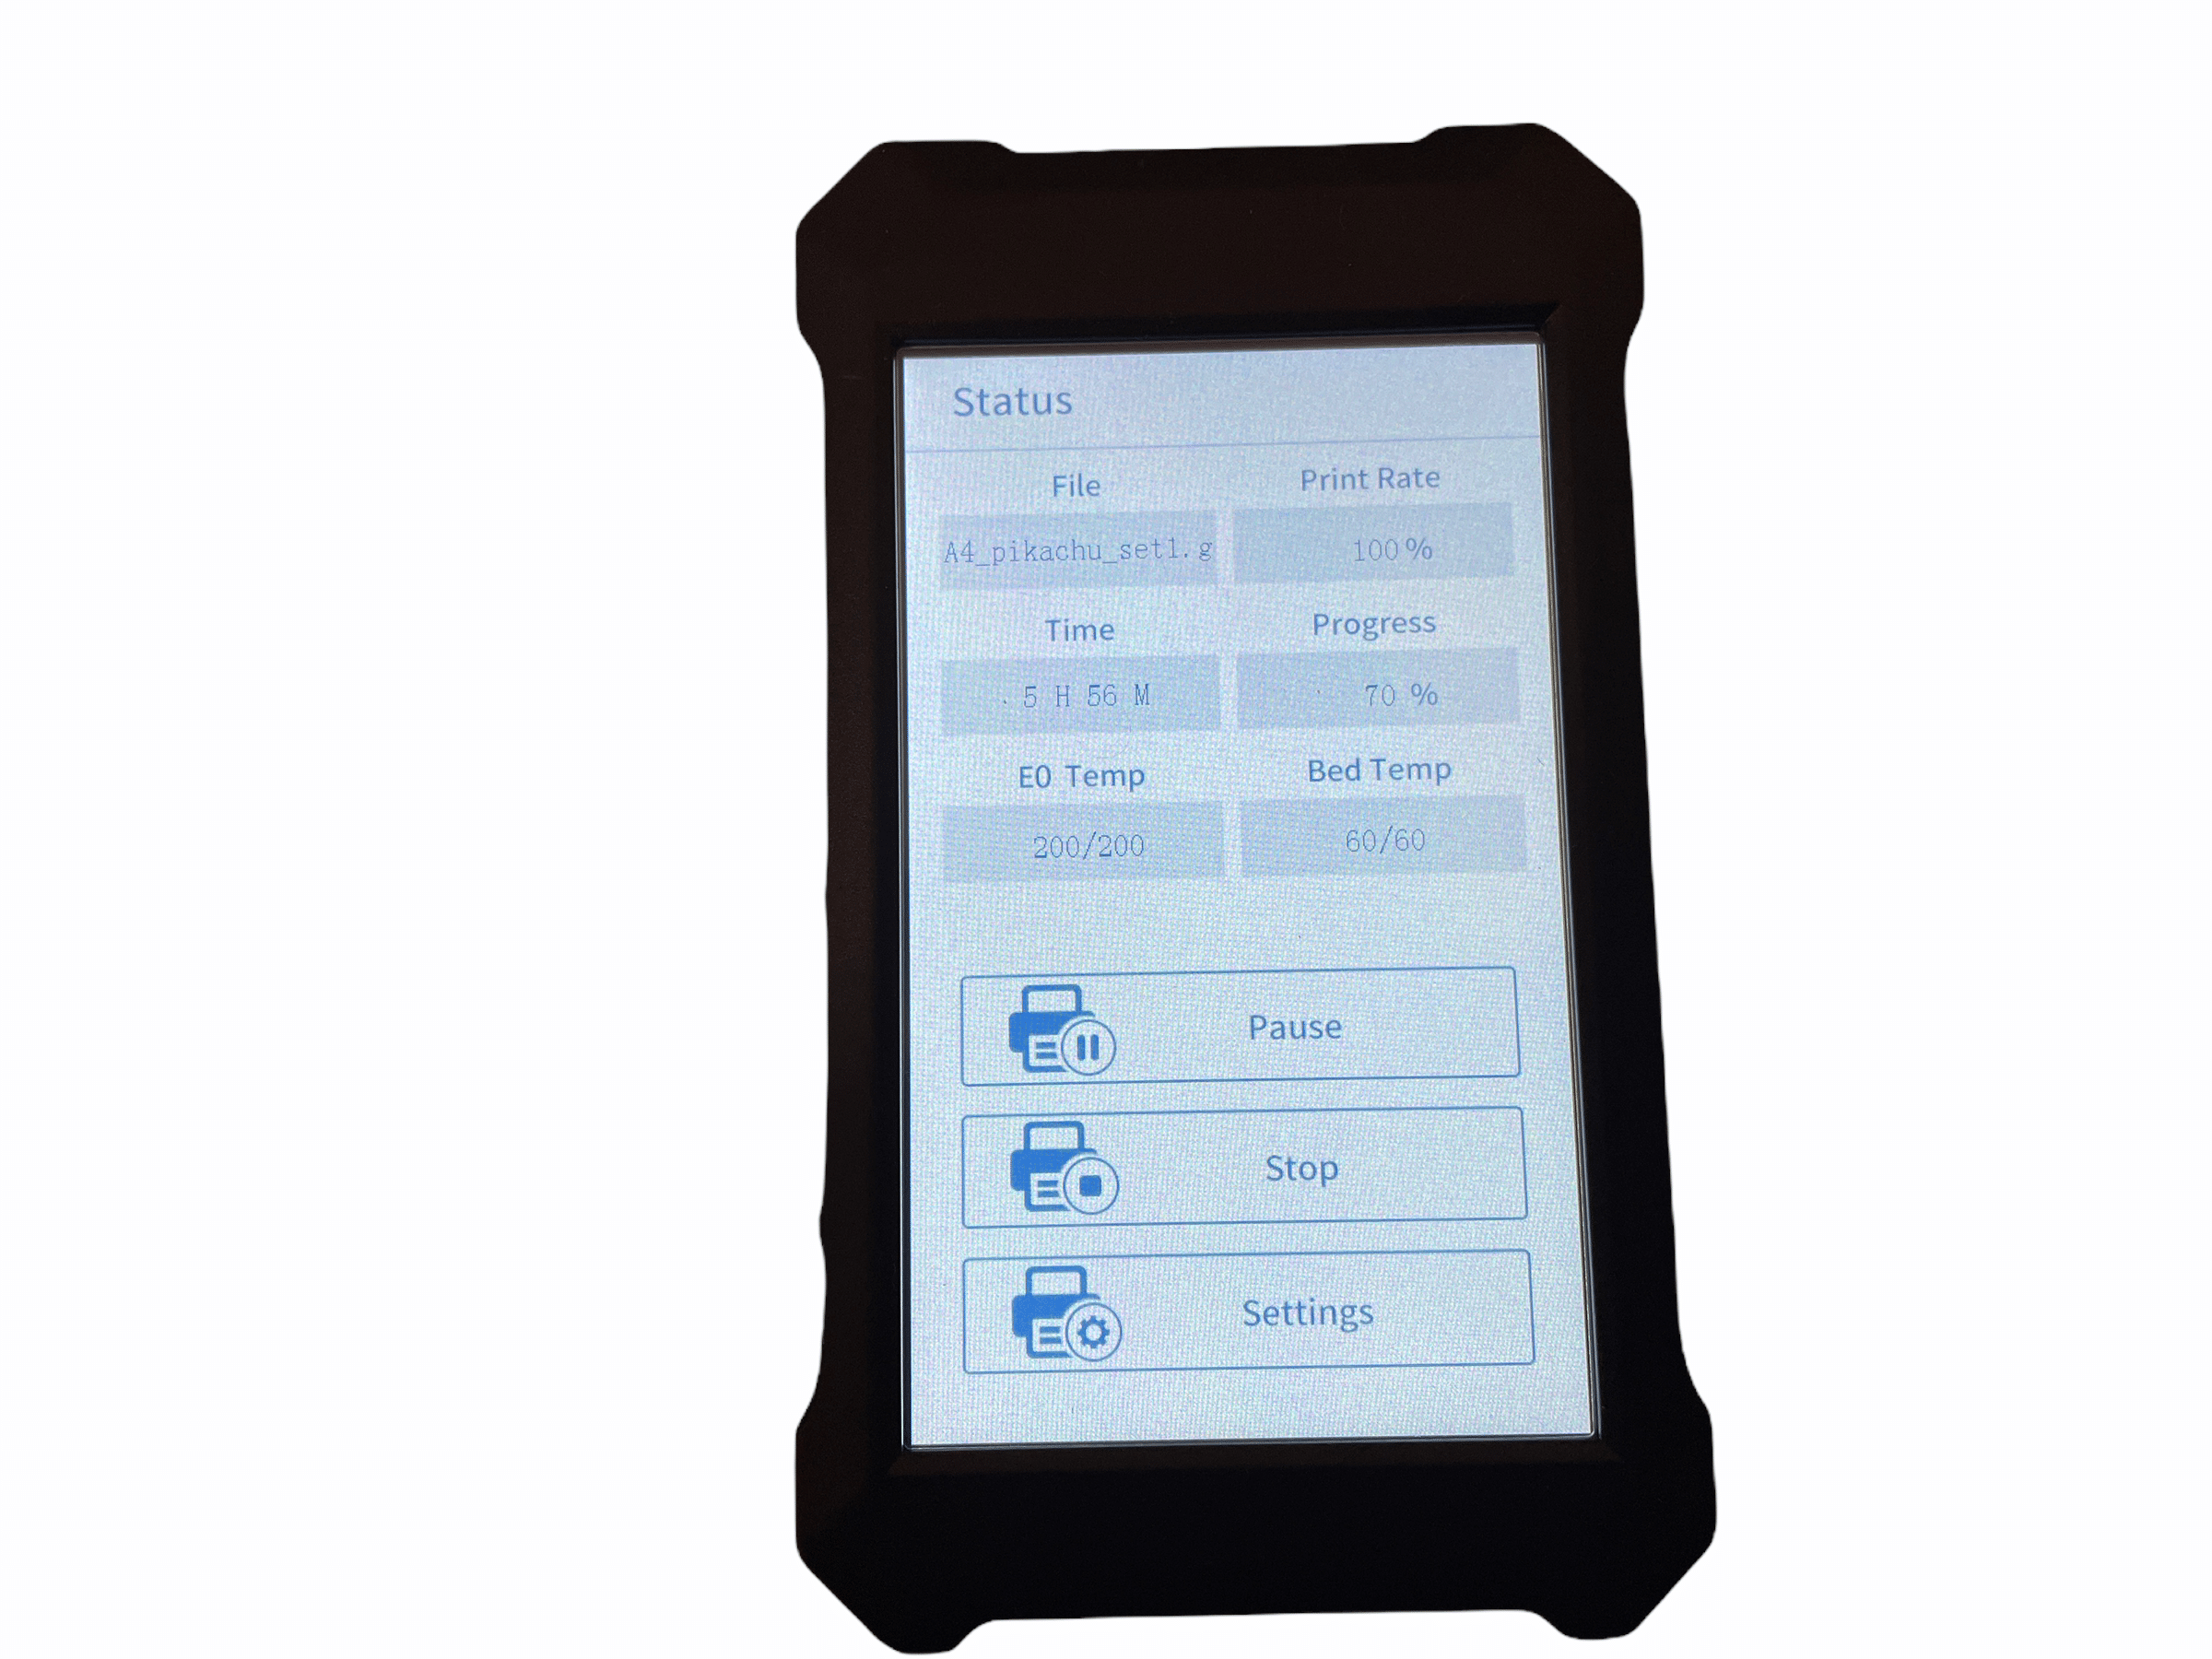
Monitor
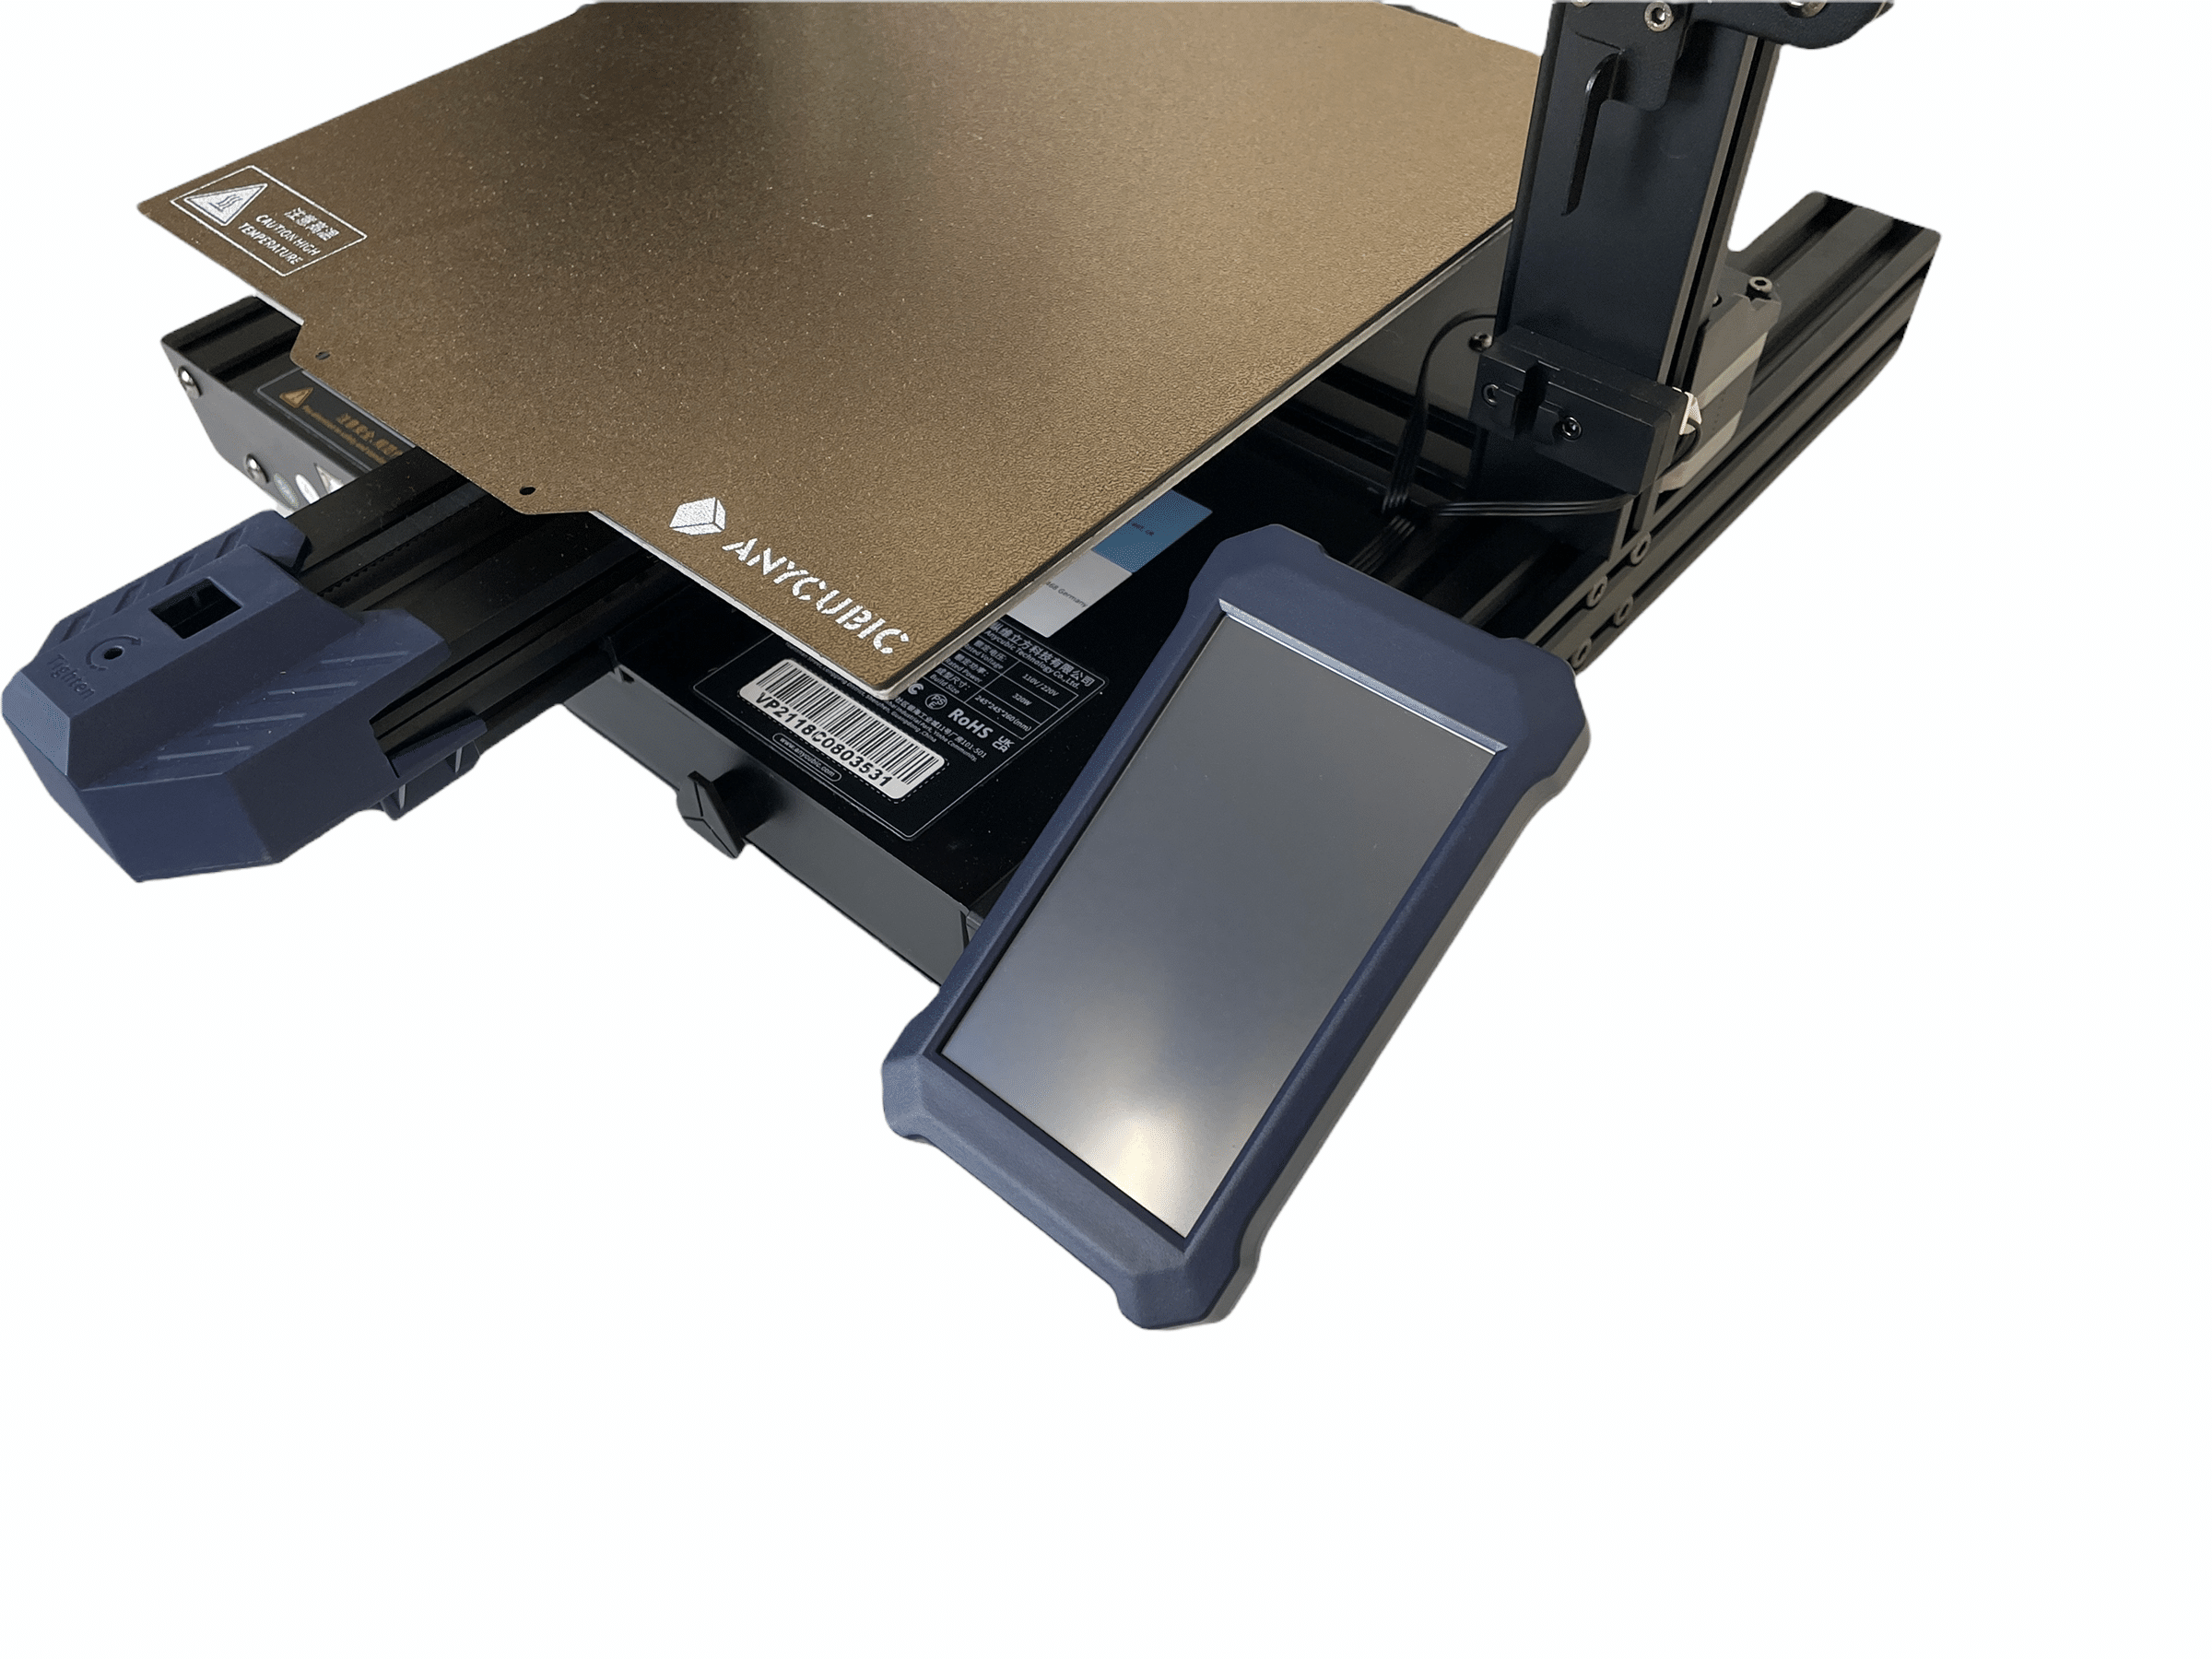
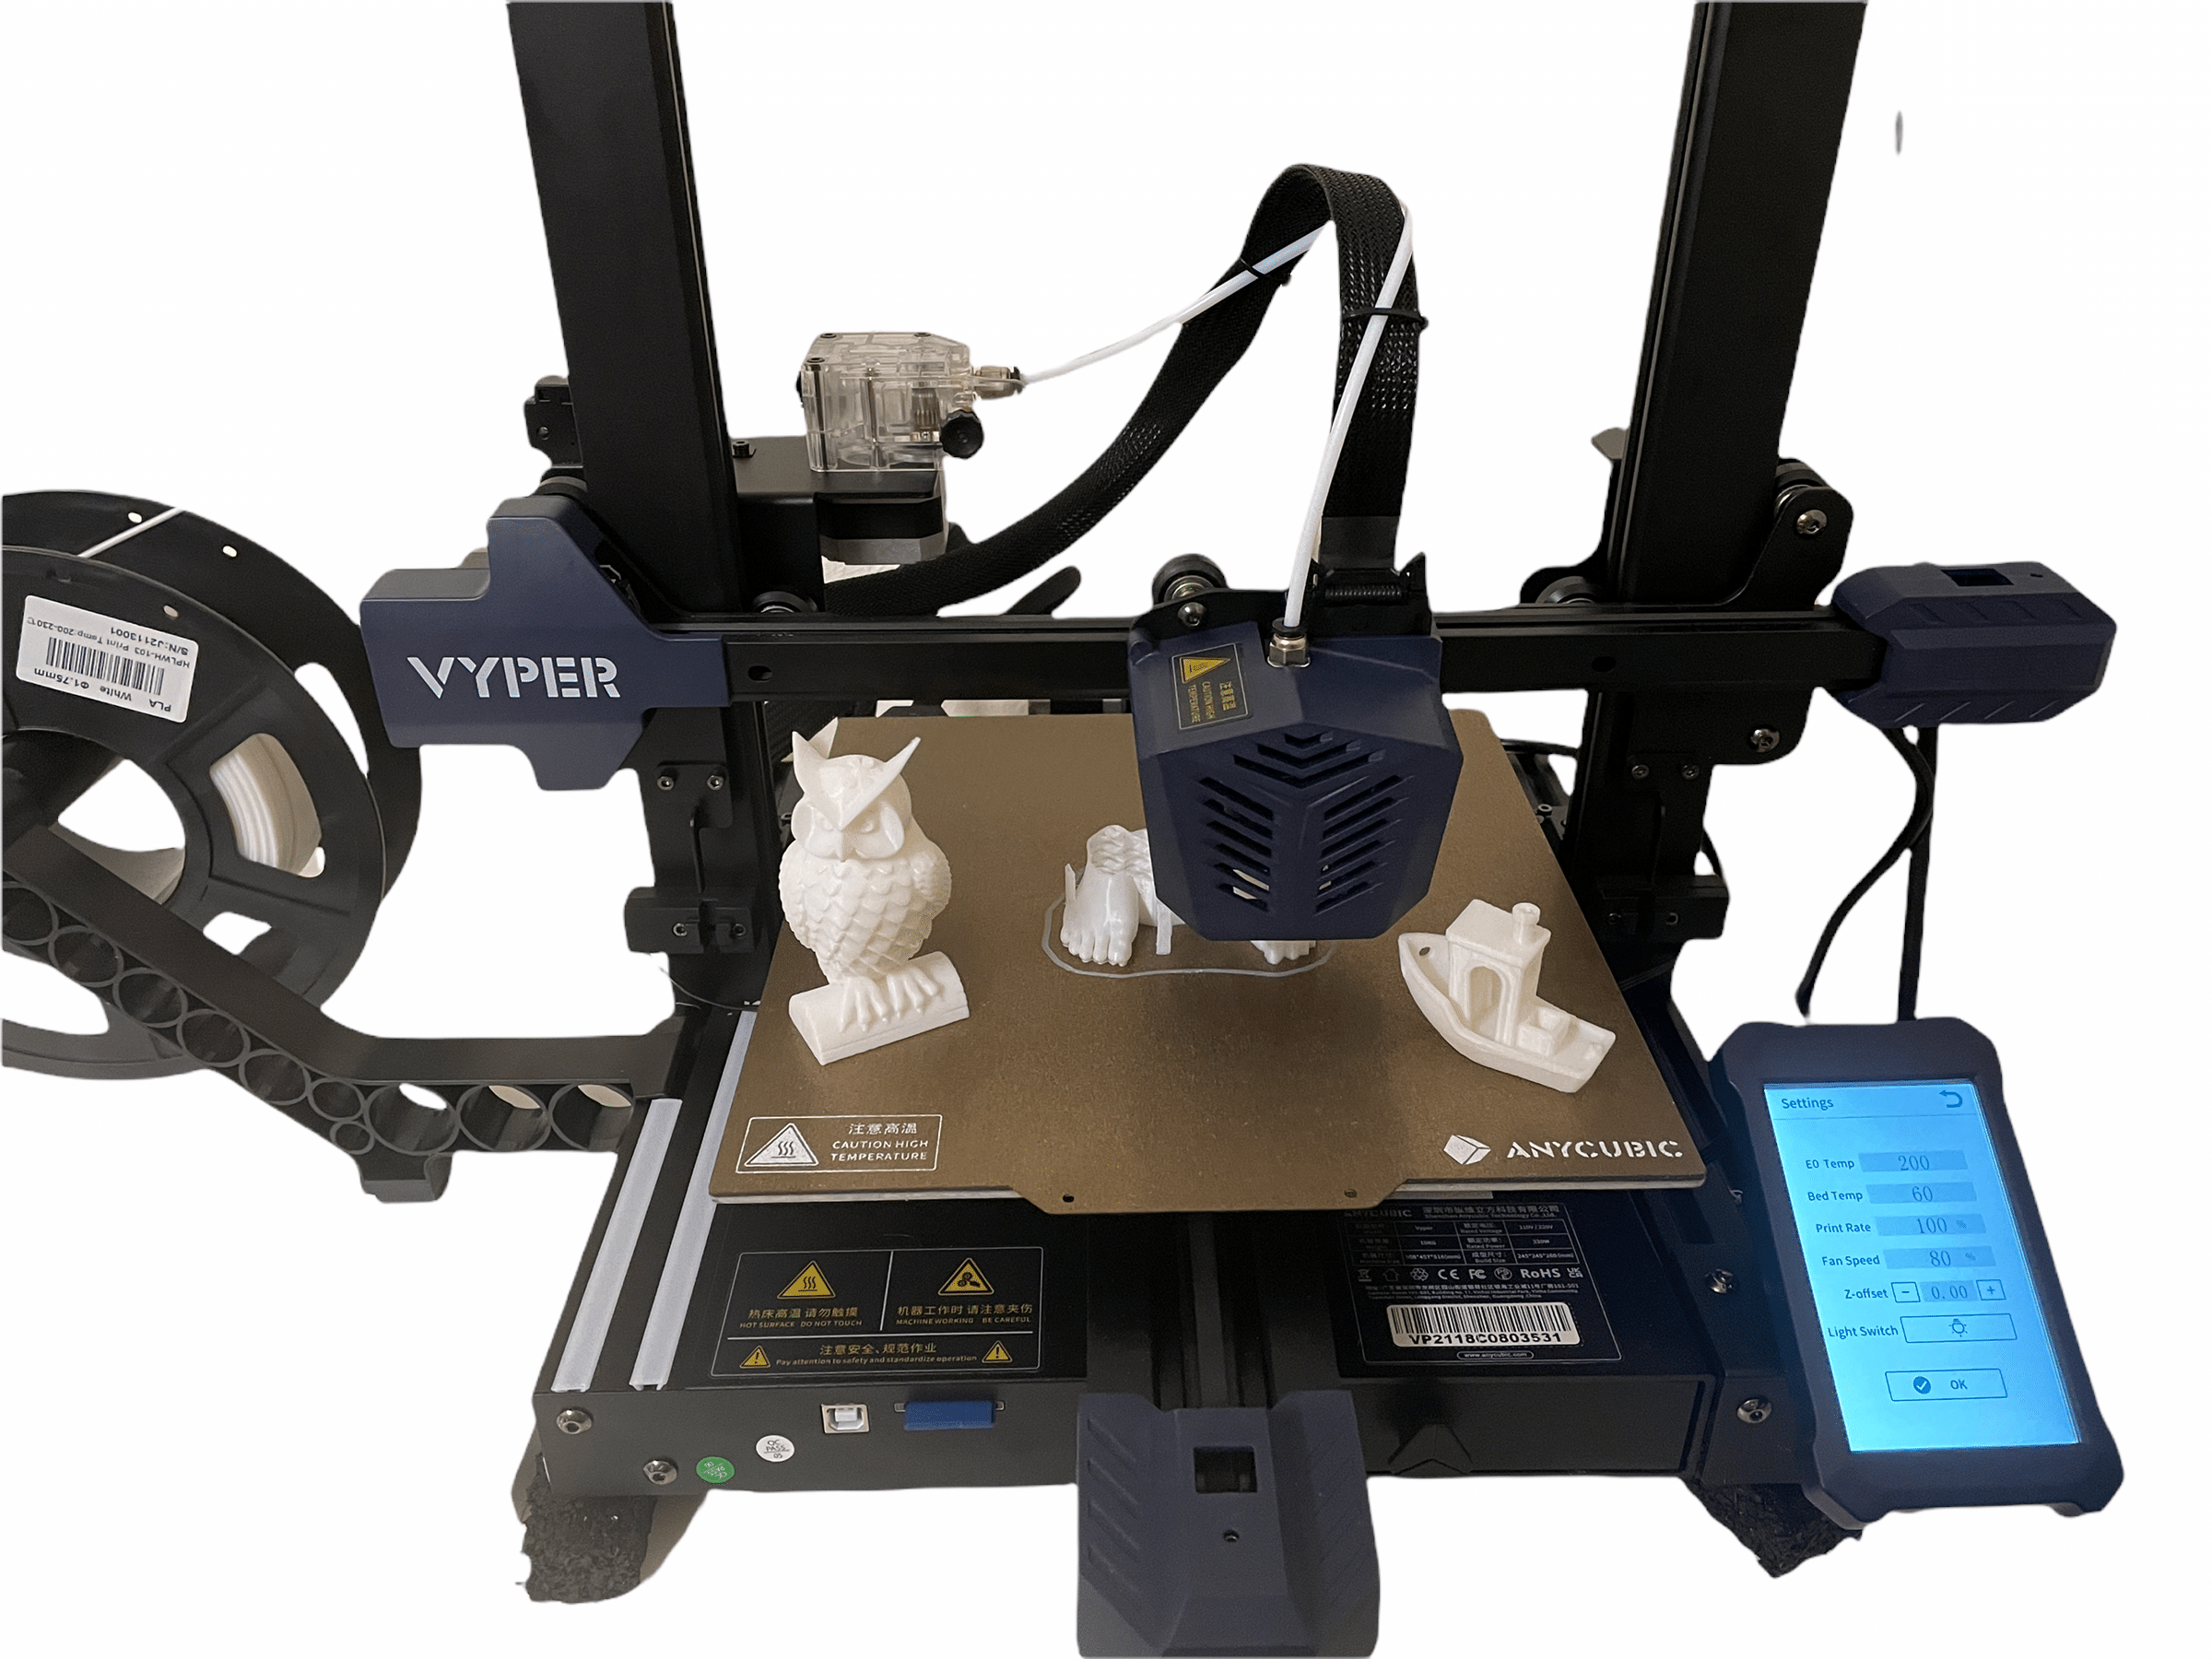
The 4.3-inch touchscreen comes with decent brightness. The content displayed is clean and the color scheme alternates between white and blue for the most part. The interface is very clearly arranged and reliably guides the user to the target. The menu language of the Vyper is English and Chinese, whereby the former should be more suitable for most users. We also noticed the touchscreen’s response very positively. It looks high-quality and all input commands are implemented quickly and precisely. Overall, the monitor and case have a high-quality build and the overall impression is very positive.
First print
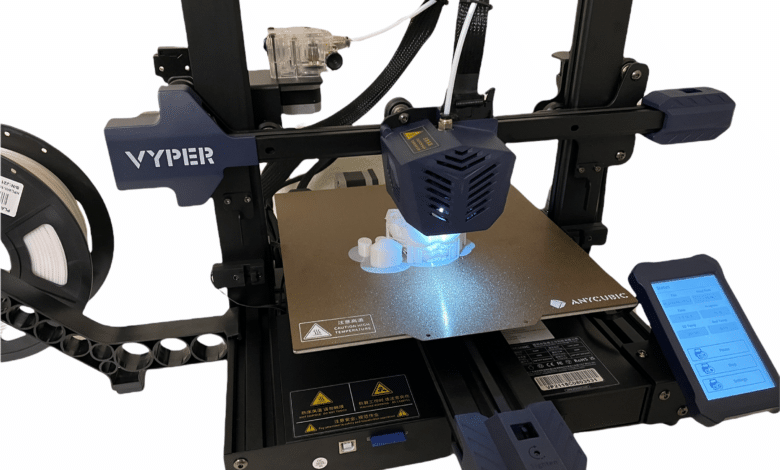
Assemble, level and start printing, of course we tried it out. As the object to be printed, we went for the Anycubic owl already prepared and on the SD card. Insert the SD card, select the file via the menu item “Print” and start. Through this process, we did not have access to the print profile. So the predefined quality of the print was in the hands of Anycubic’s print profile. As a further comparison, we also printed a Benchy with the print profile located on the memory card for the Cura import. Both objects were printed with the Anycubic filament in white*.
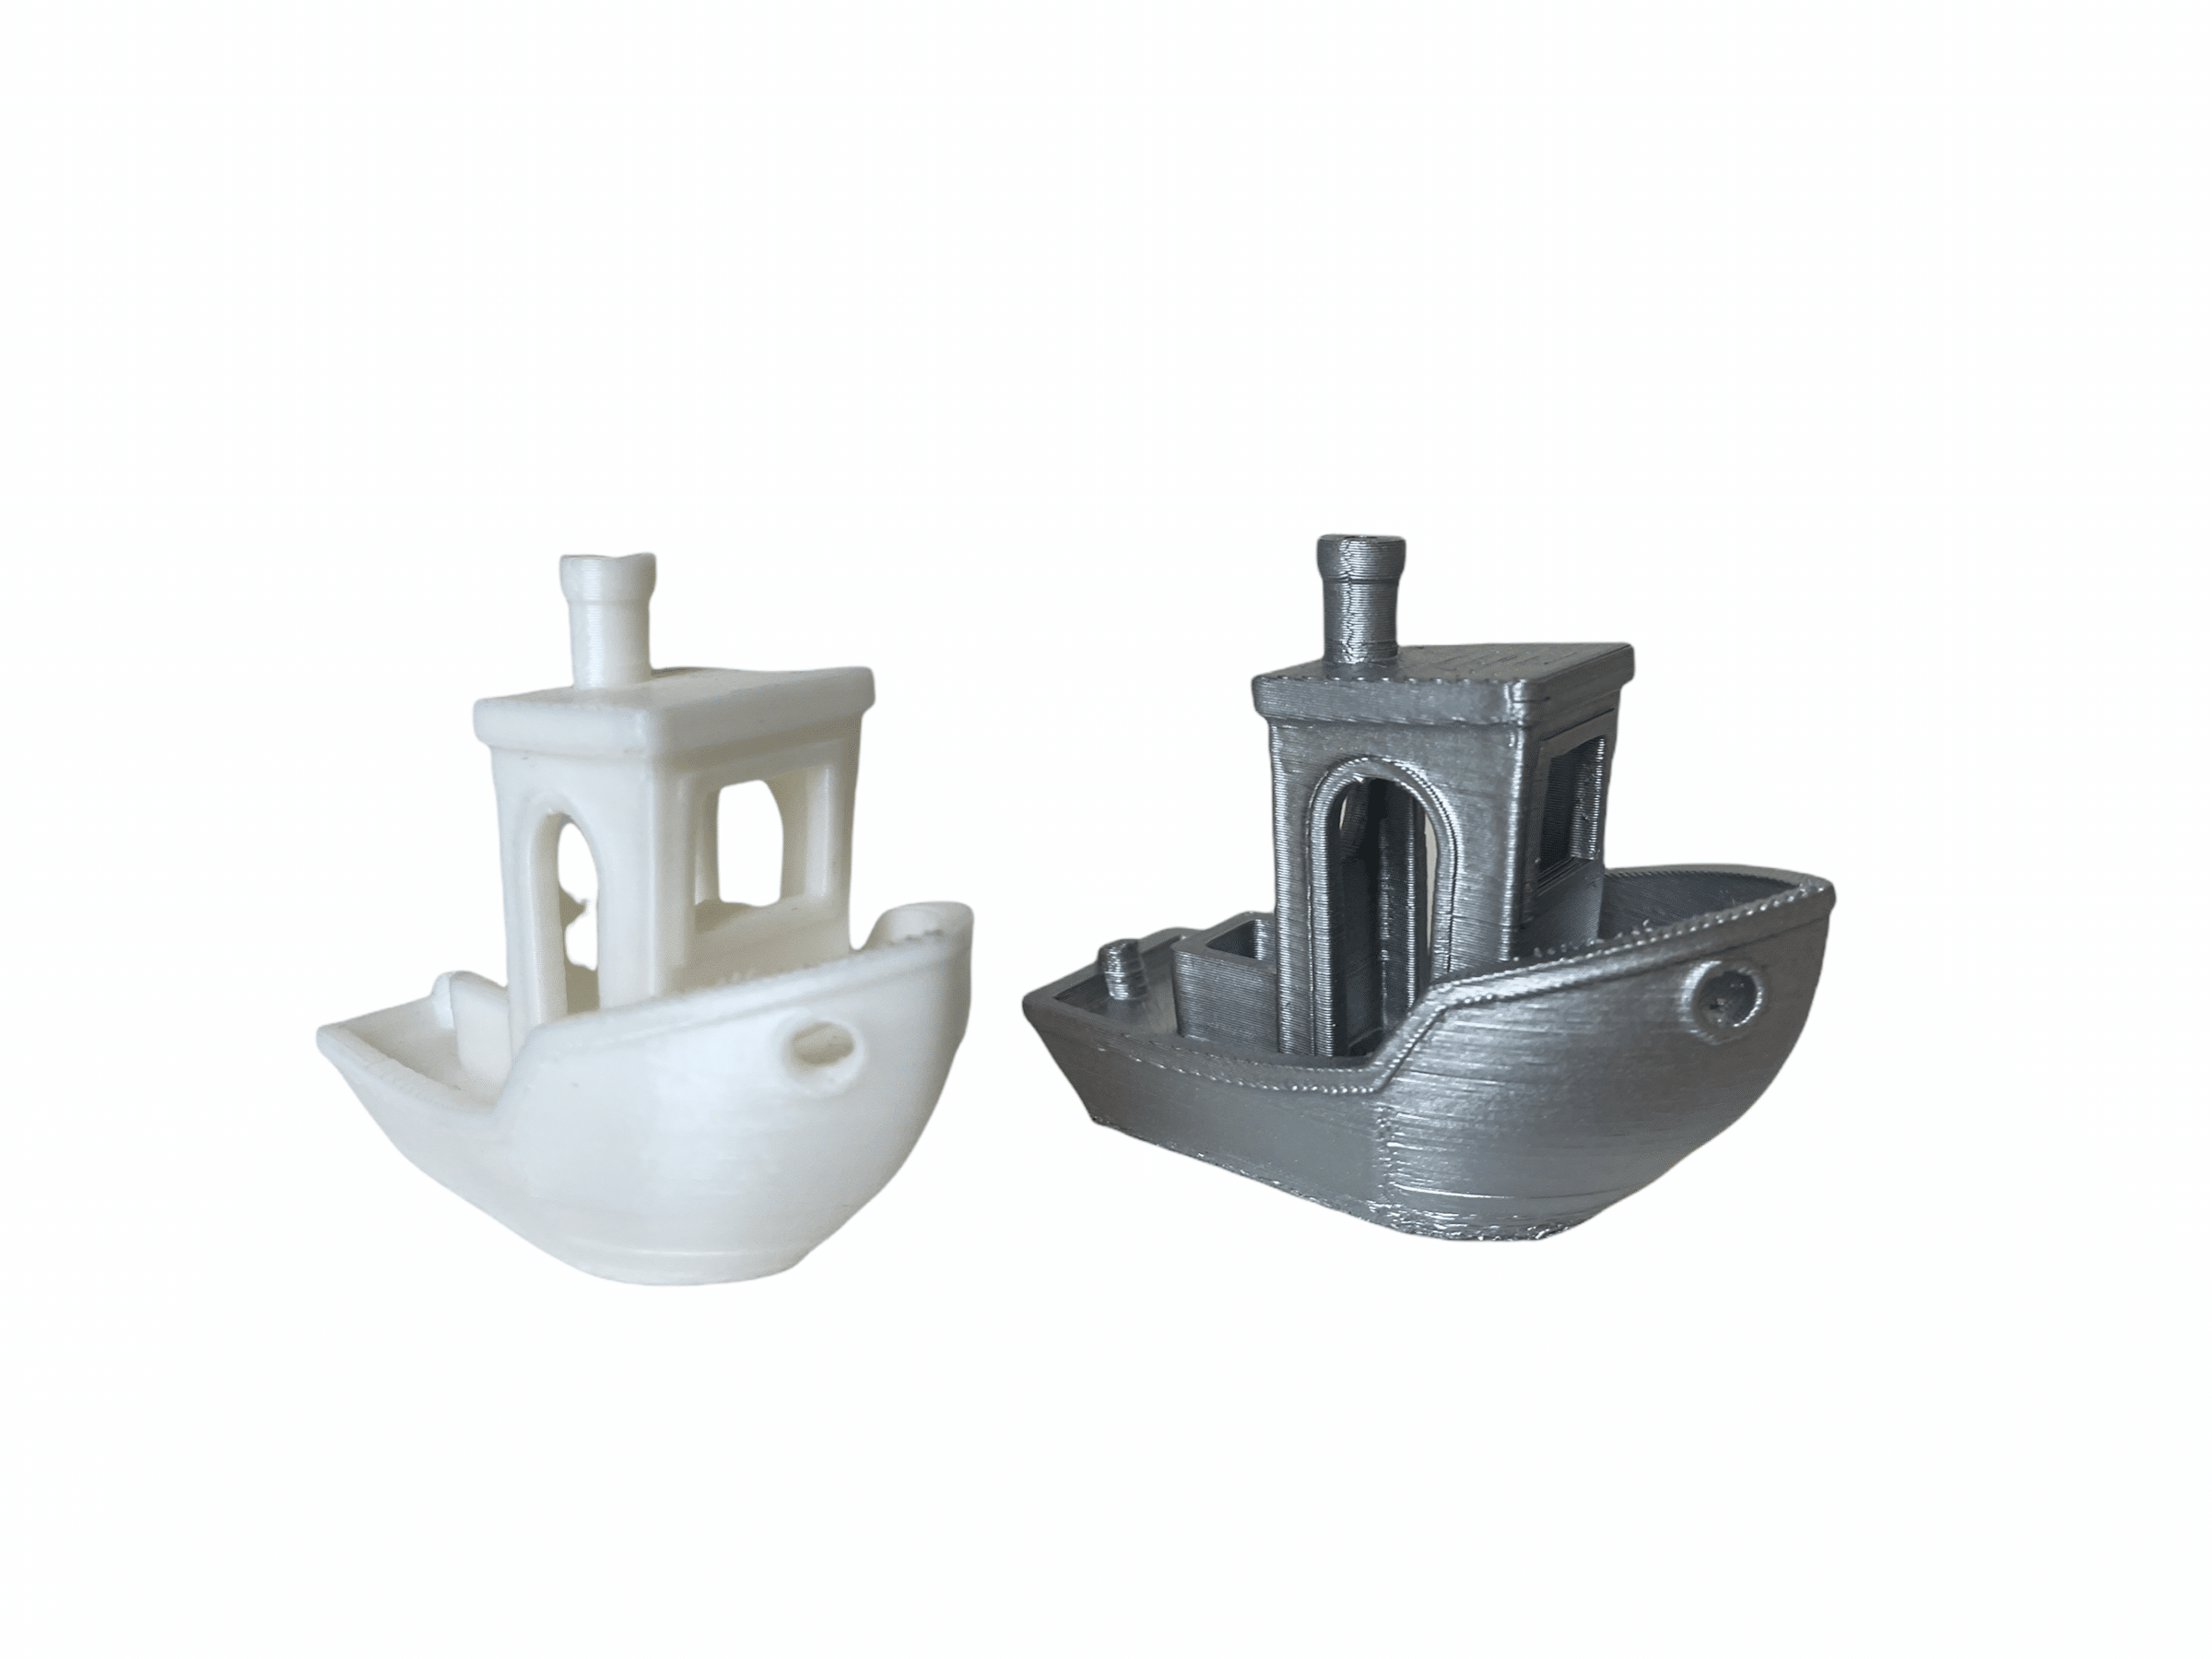
For better visibility of the not clean printed areas, we printed a second Benchy and colored it with a spray paint in silver. We would like to note, however, that in general with colored 3D prints the individual layers stand out. We are only concerned here with the edgy areas and also the places where a layer was finished and was switched to the next layer. Because it is here that an unsightly indentation occurs.
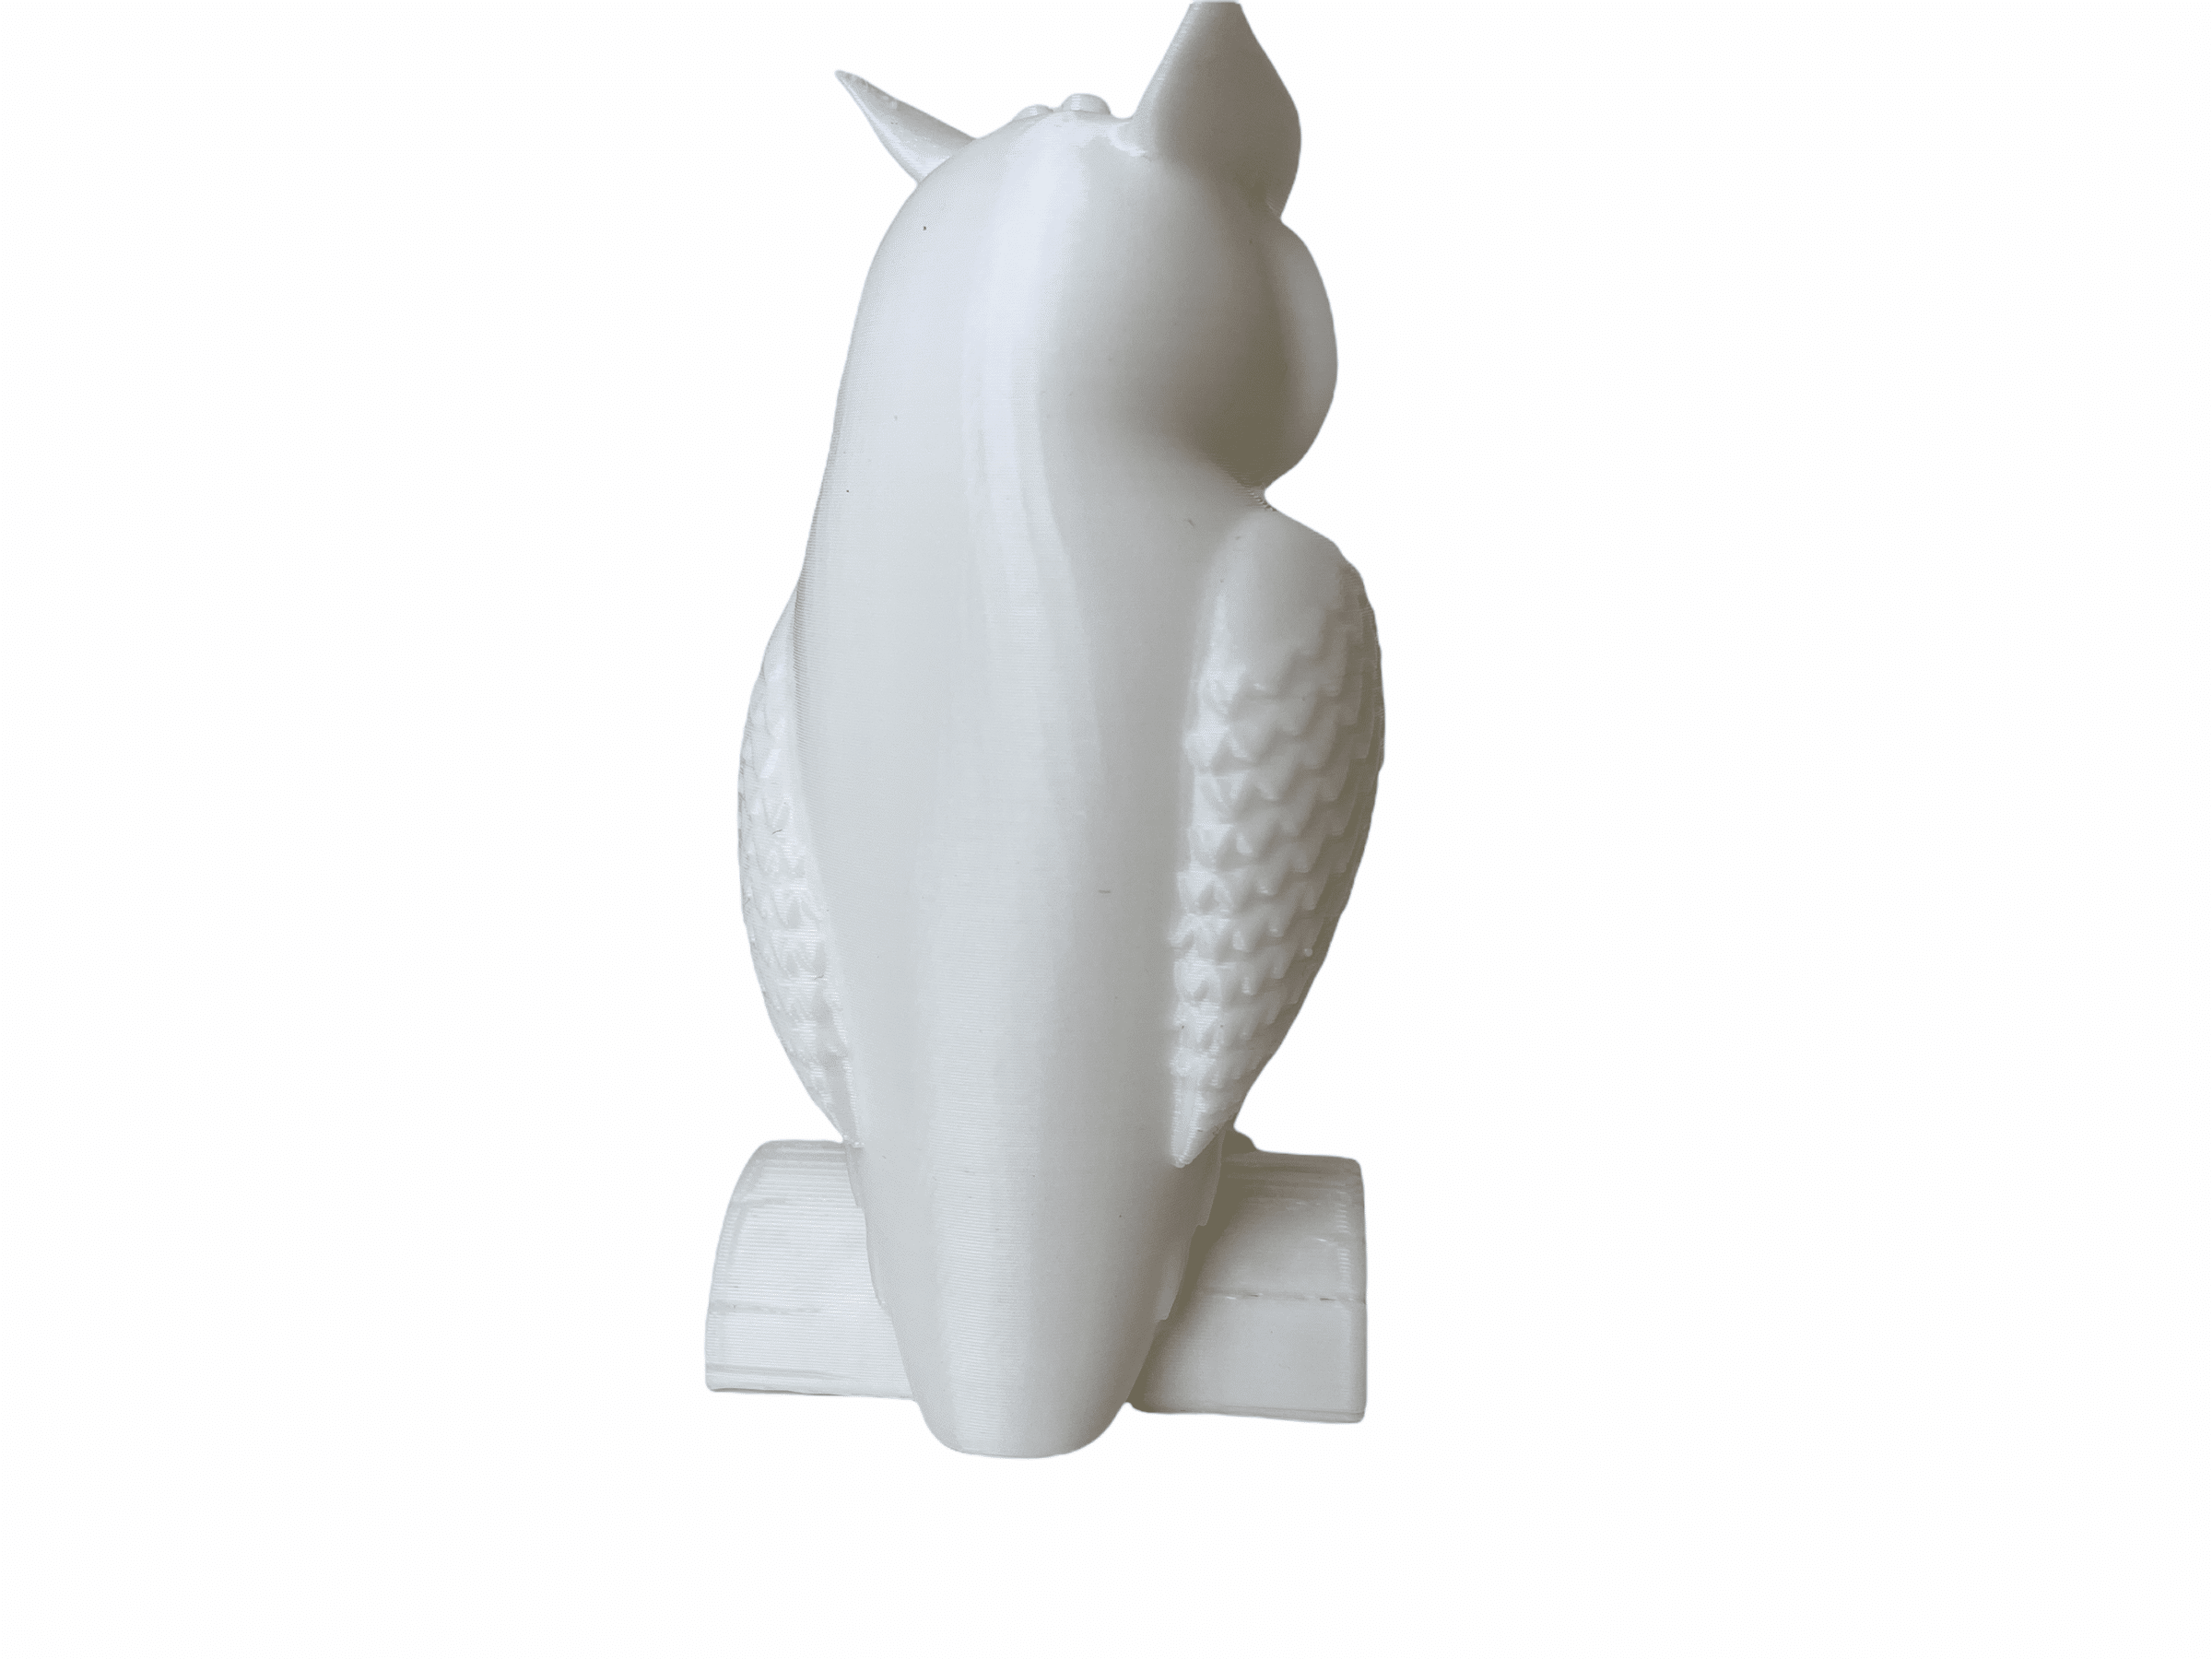
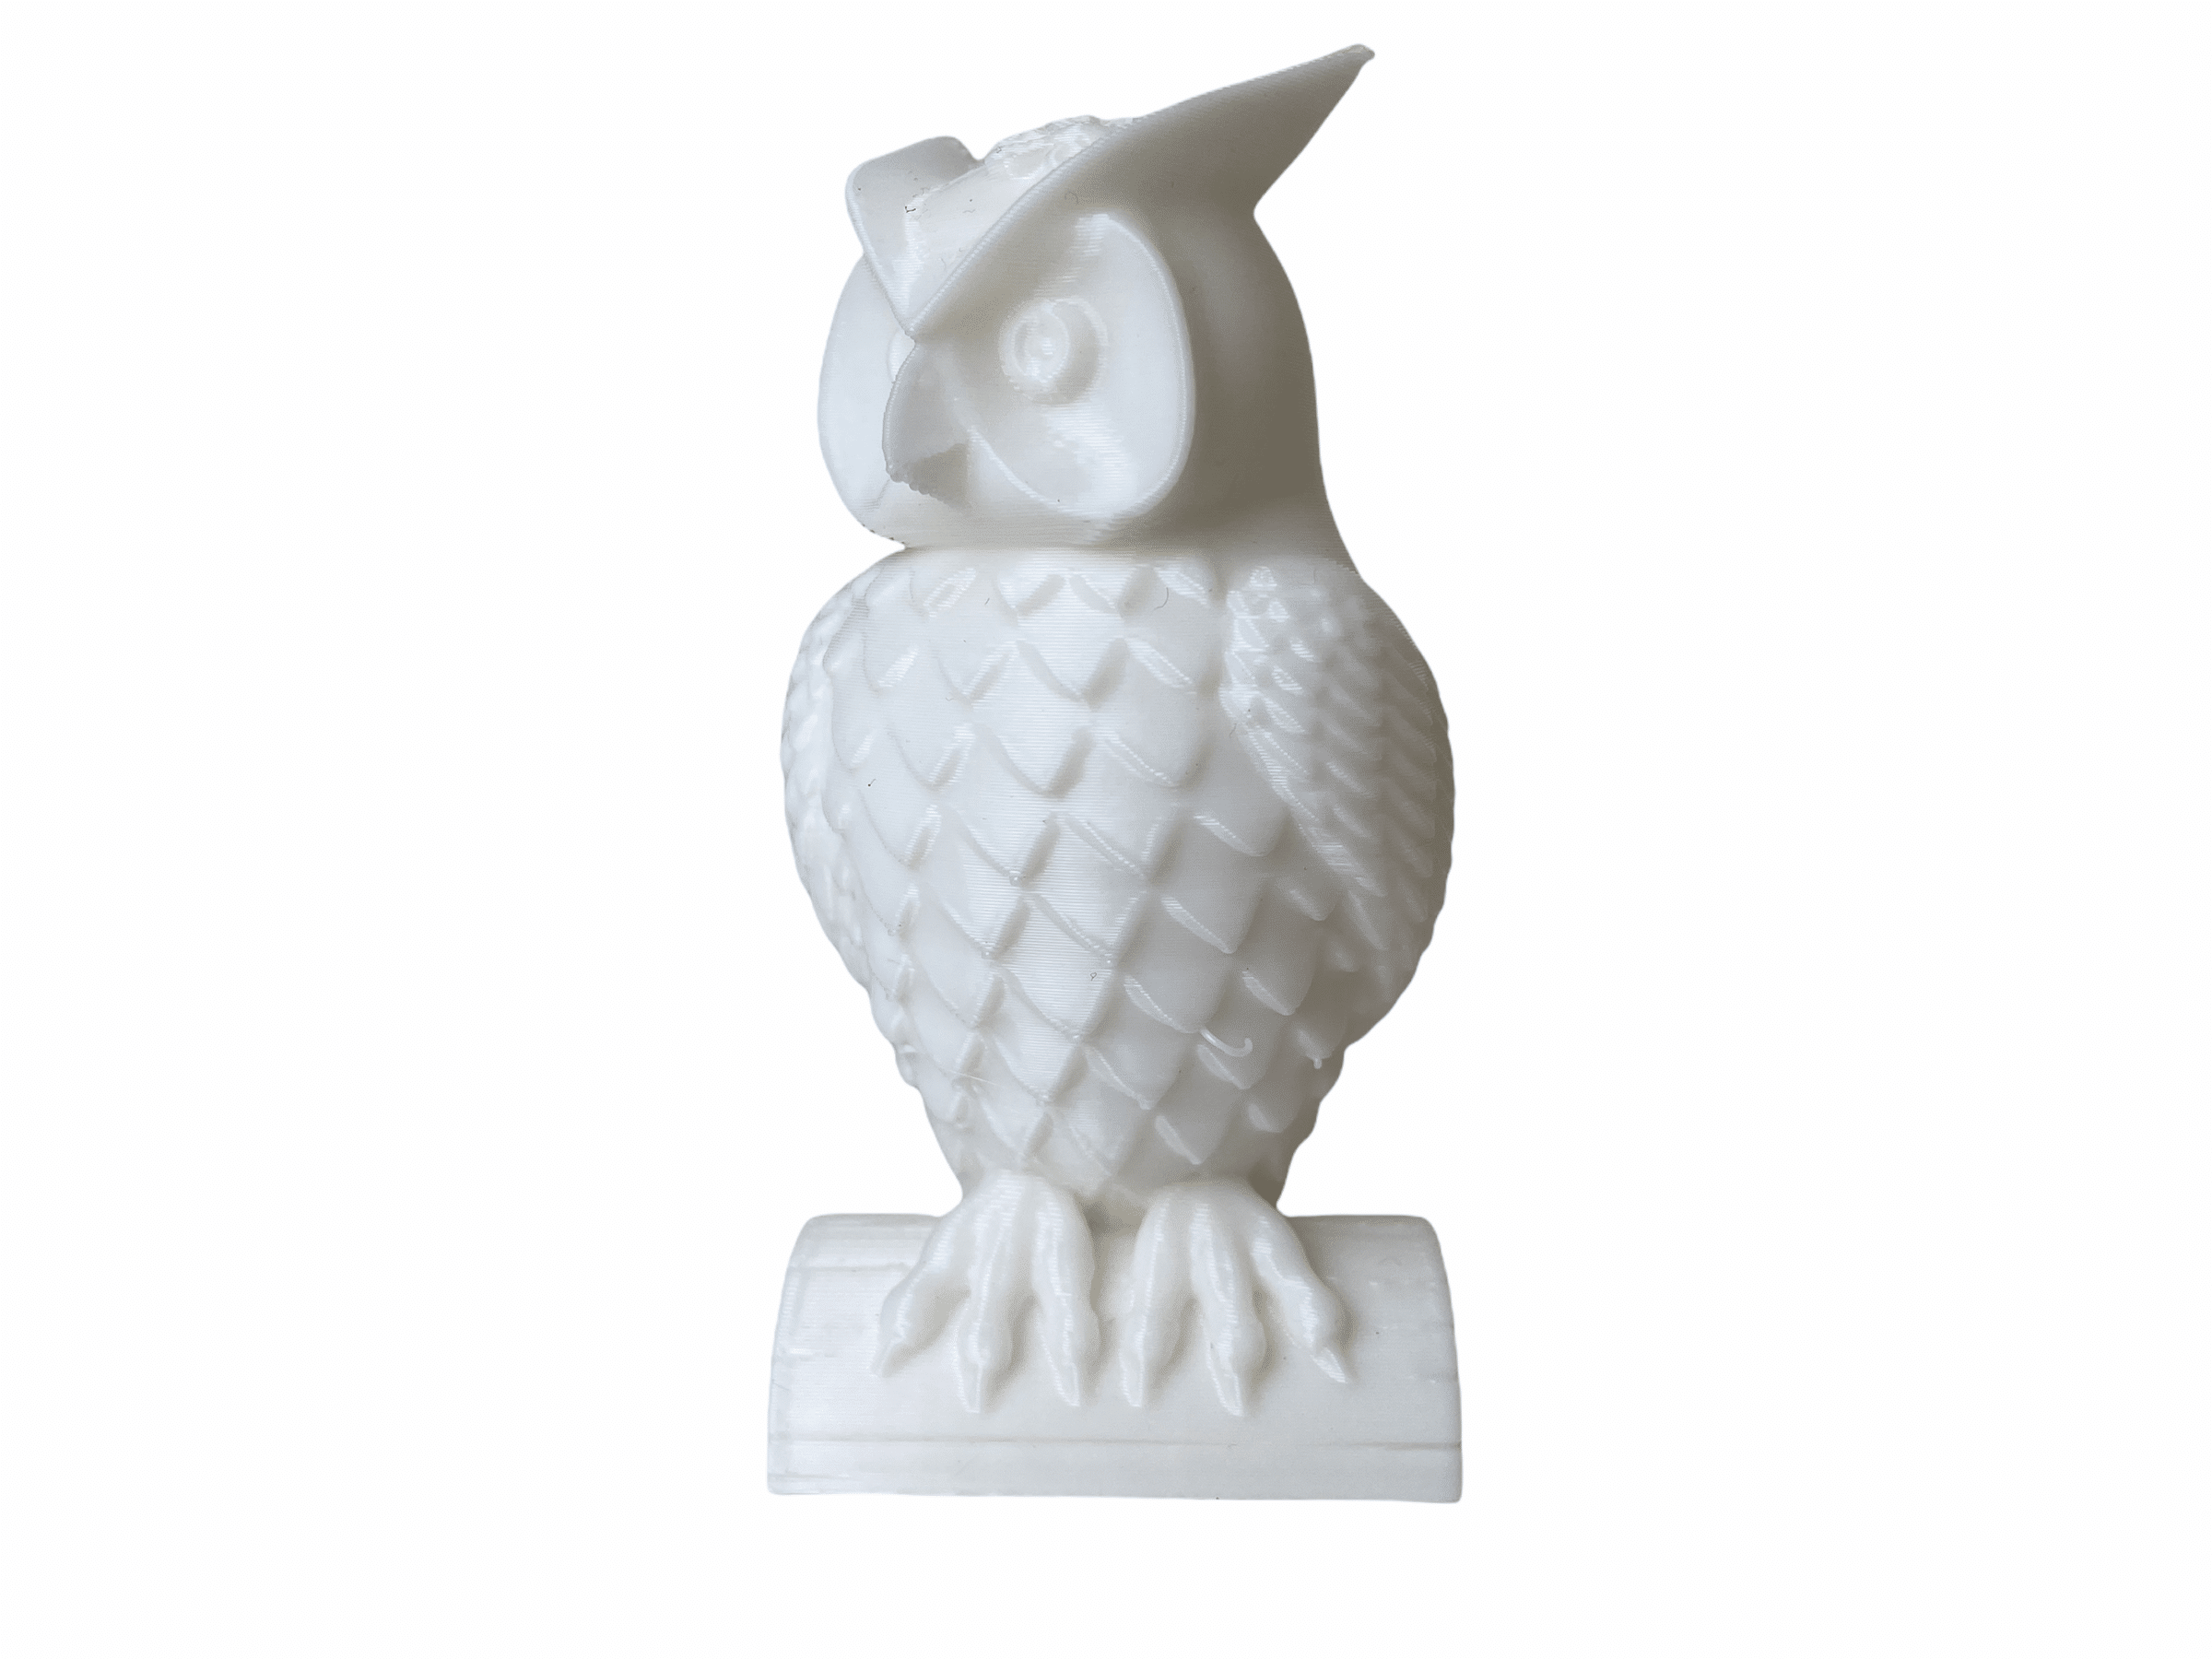
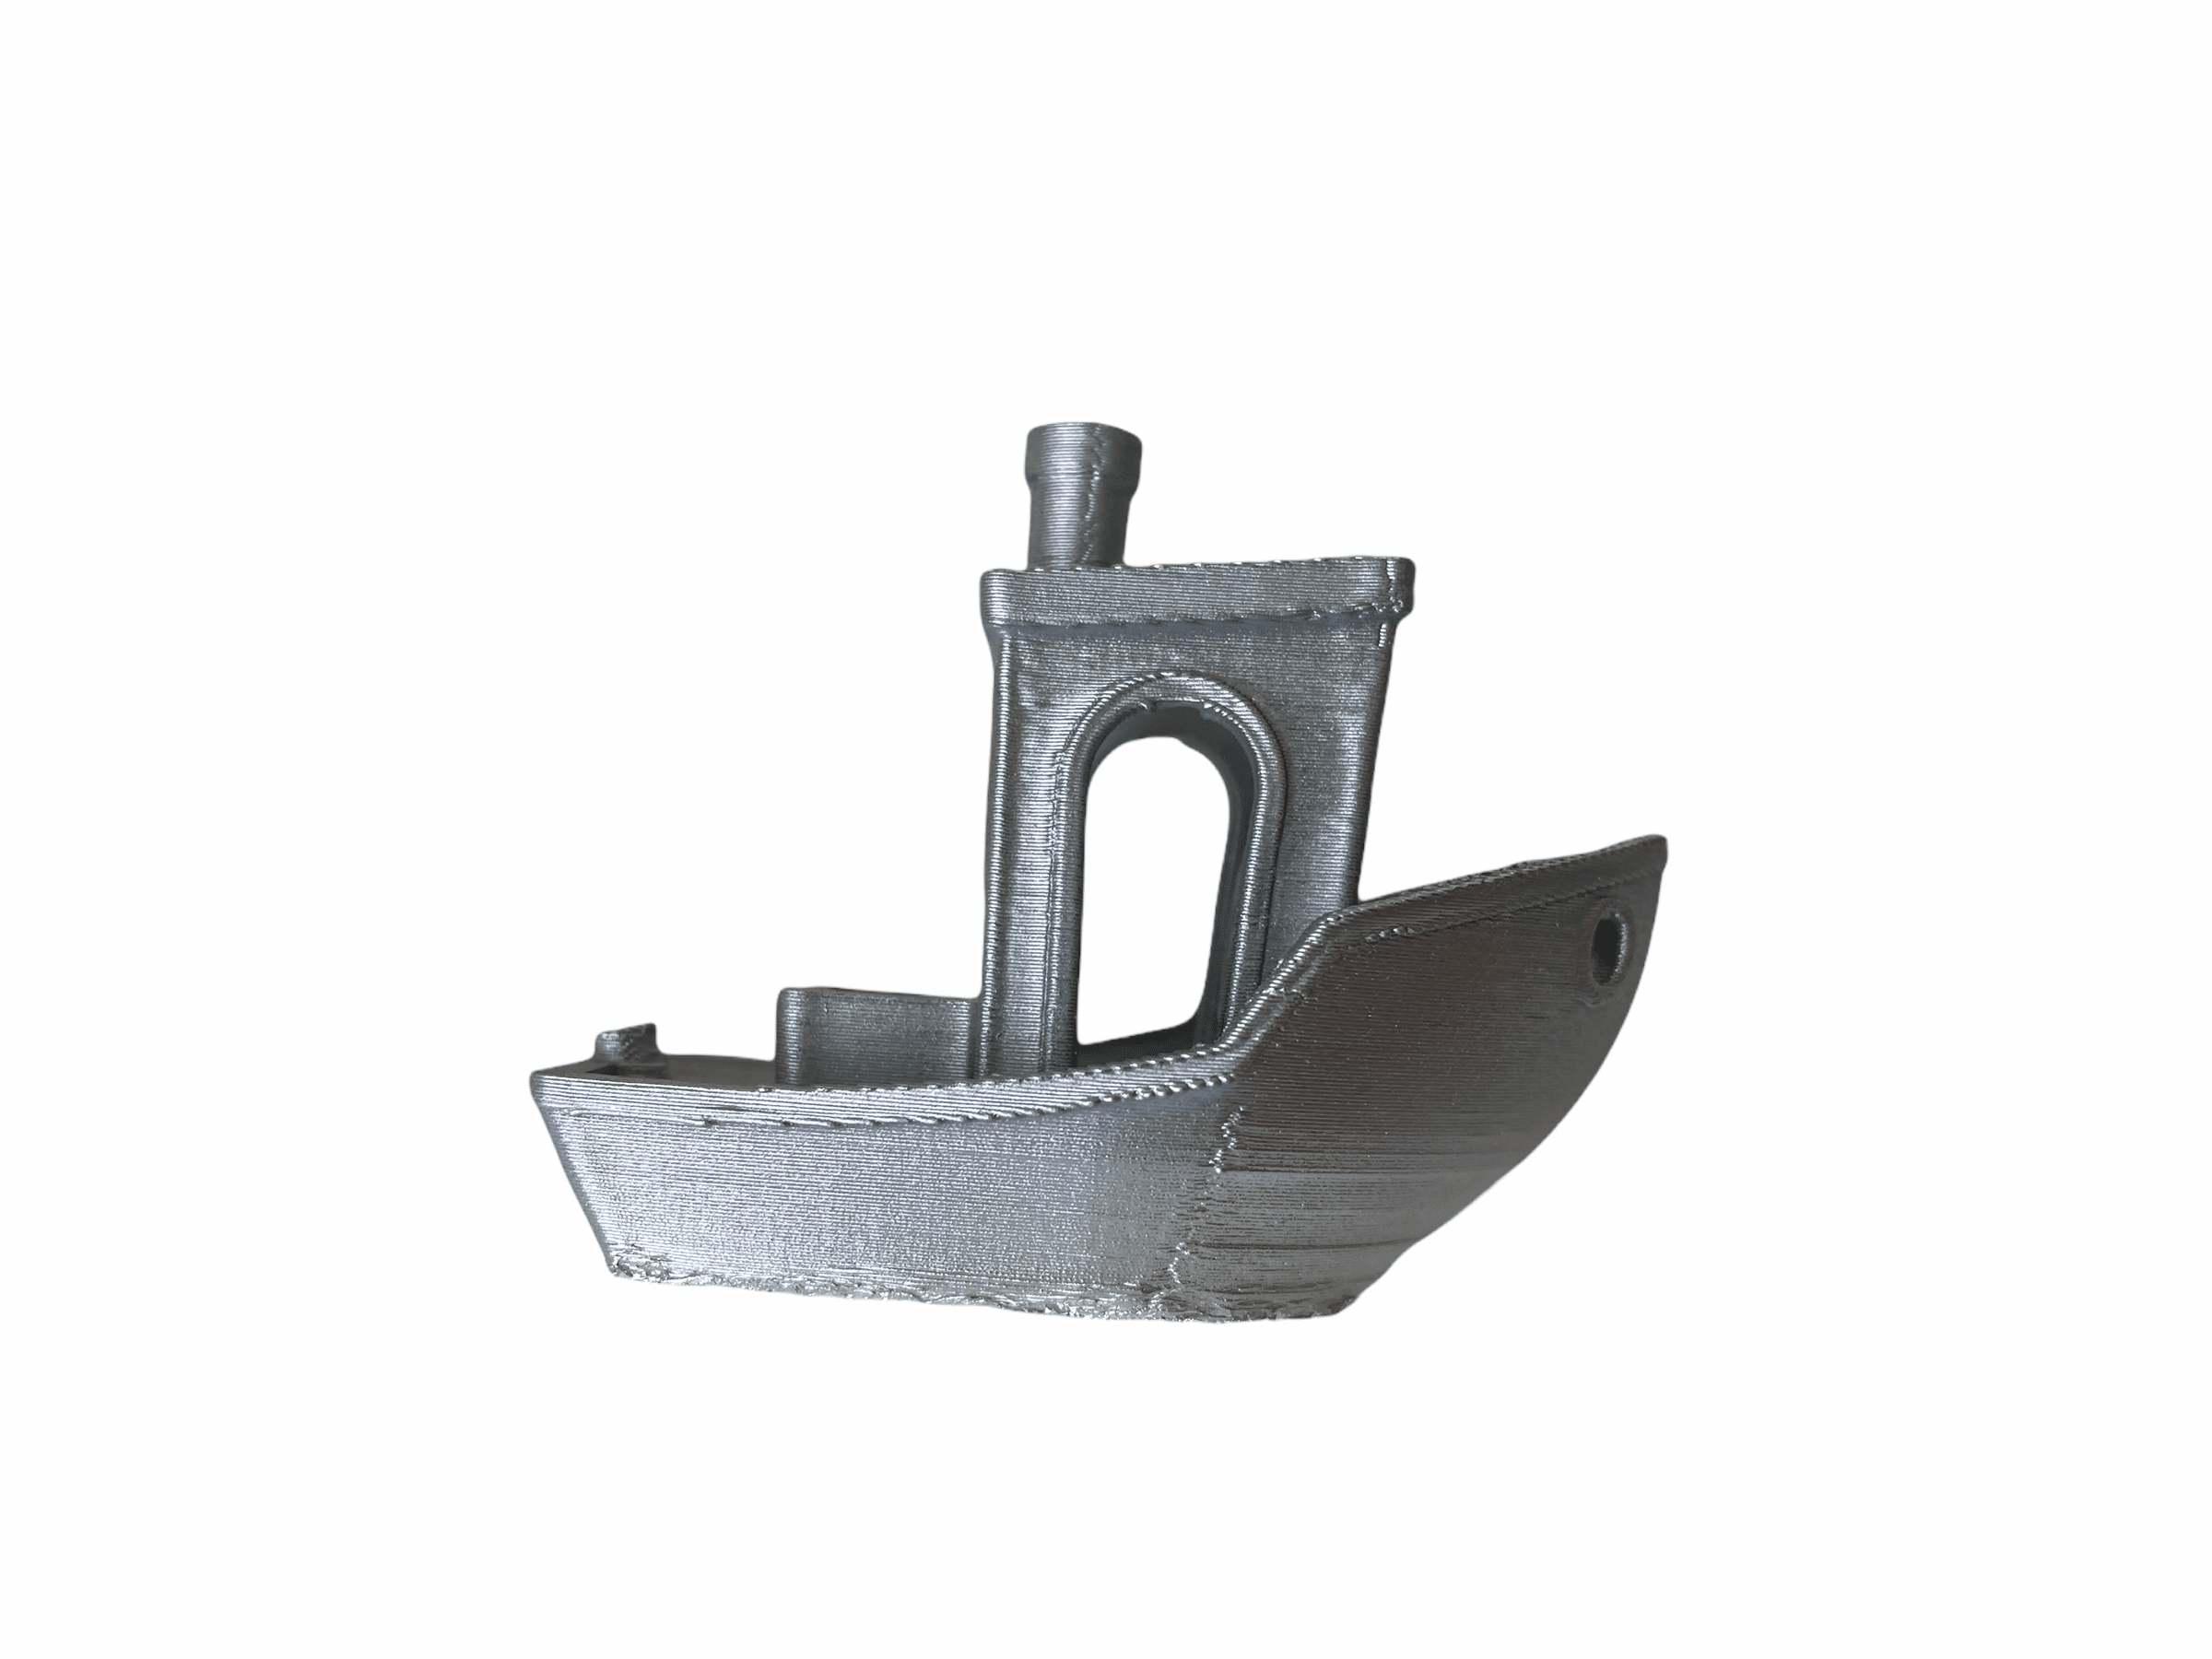
Both objects make a clean impression at first glance. However, a closer look reveals weaknesses. Especially in the fine parts on the torso of the owl, bumps can be seen. Overall, however, it makes a very good impression.
The Benchy, i.e. the small boat, shows poorly finished areas here and there. Especially the layer switch leaves some unattractive flaws. The uppermost parts of the “arches” of doors and windows also didn’t convince us. However, these shortcomings are not caused by the printing quality of the Byper, but by settings in the Cura profile.
After reviewing the print profile, we were able to discover a few points that we felt needed improvement or were more appropriate for printing. We have recorded our print profile and other prints for you later in this test report.
Some printers have problems with print bed adhesion and spray adhesive is often mentioned as a trick. We did not experience this problem with the Vyper. The printing plate itself is basically metal, with the bottom side having been given a magnetic 3M pad. The upper side has been equipped with a special coating. The entire pressure plate can be detached from the heating bed thanks to the magnetic attachment and can then be bent freely. This massively simplifies the release of a print. There’s also no need to worry about scratches when removing filament residue with a plastic spatula. Anycubic states that the coating is designed to be extra scratch-resistant. It is exactly this coating that is responsible for the good print bed adhesion. This is made possible by the structured surface. Structured also means that the underside of your print takes on this structure. For some prints, this should be factored in.

Anycubic Vyper print profile
When it comes to the print profile settings, it’s always worth a bit of trial and error to adapt the settings to the object. Therefore, we cannot offer a universal solution. However, we have made the most important changes for a solid basis available to you below for download and direct import into your Cura application. The print speed of the supplied standard profile bothered us and we were initially surprised at the time it took to print the test prints, because we were used to longer times.
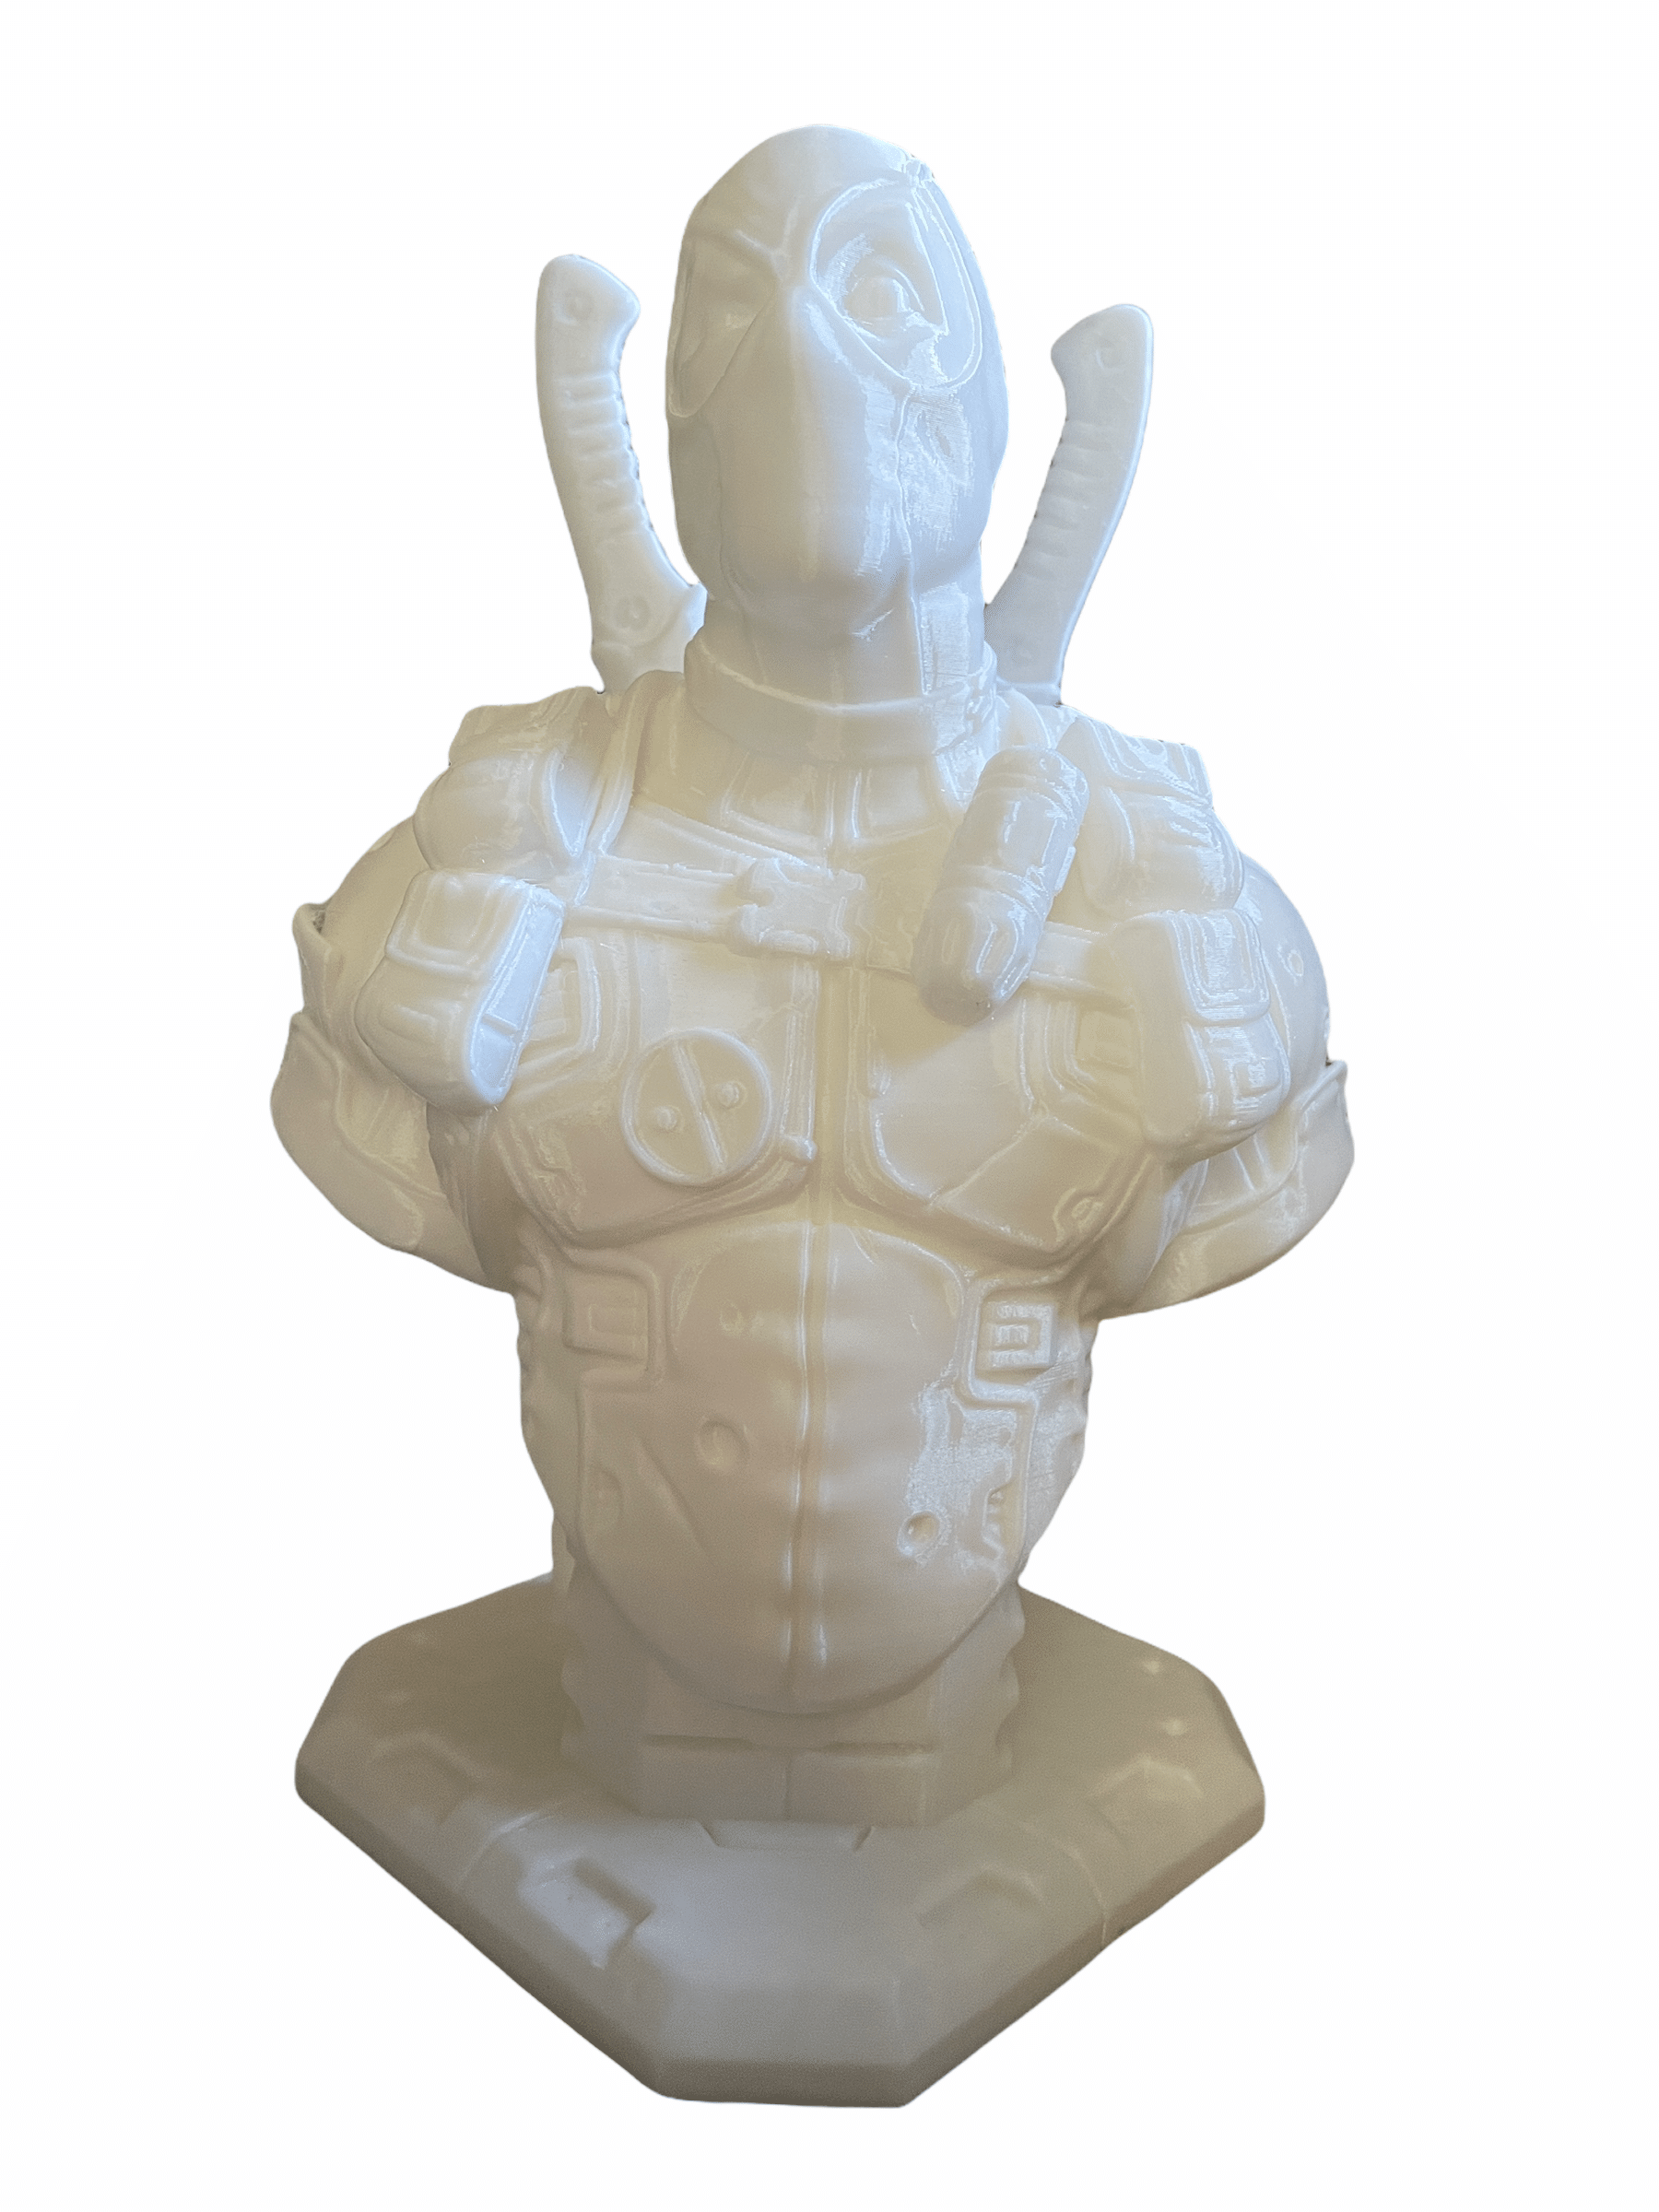
The print quality has improved massively with the new print profile and especially with larger prints, like the Deadpool below, the Anycubic Vyper shows what it can do. The level of detail is really very high and there is no trace of the previously described problems!
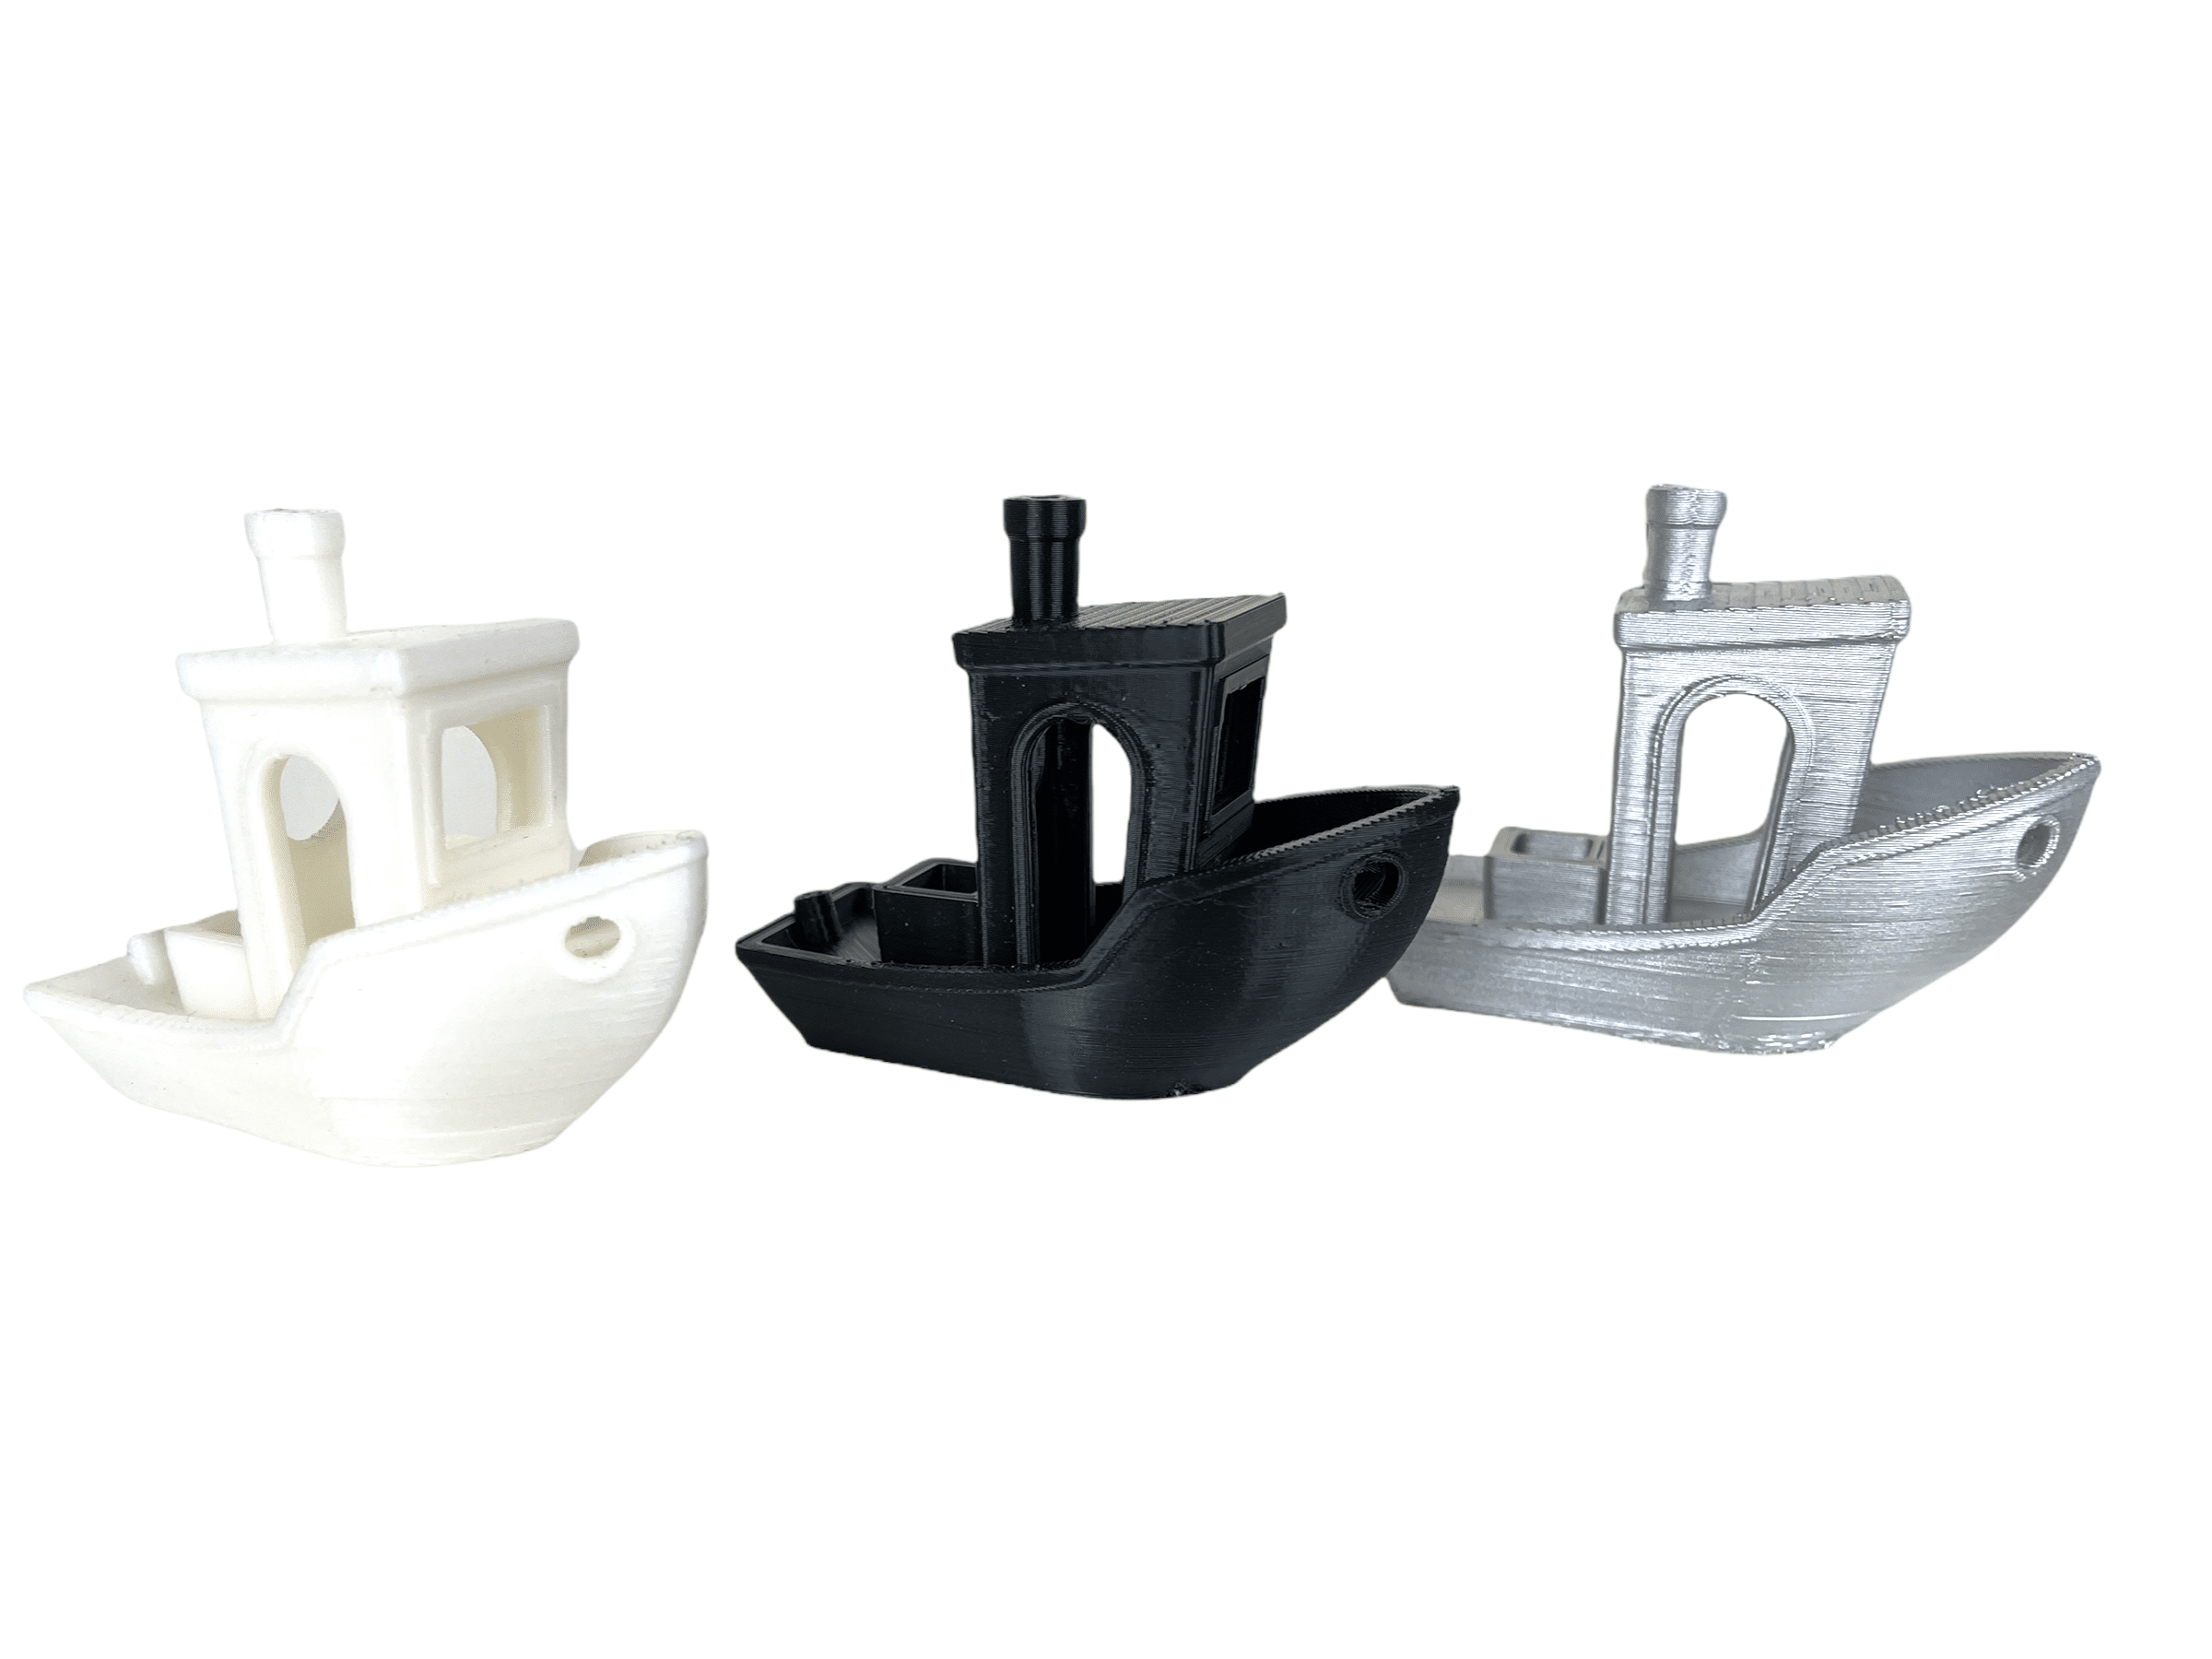
 With a new printer profile and a different filament, we also dared to Benchy again. For the filament we used the black PLA filament of the brand GEEETECH*. Due to the changes in the print profile, we were able to achieve an improvement in print quality. In the pictures, we compared the black Benchy with the two previously printed variants. As you can see, the bumps due to the layer switch have disappeared and overall the print makes a much better impression than the two prints before.

We’ve provided our print profile for the Anycubic Vyper for you to download here.
Summary of the Anycubic Vyper review
Now that we have had the Anycubic Vyper in use for some time, we can say that it has completely convinced us. Especially the auto-leveling makes it very easy to get started with 3D printing. But also for advanced users, the auto-leveling is very helpful and requires little effort. The workmanship is simply great throughout, so we could not find any flaws. The monitor and the displayed interface also made a very good impression. The menu is set up in English and the menu items are very clearly arranged and guide the way to the goal very precisely. The contents are filled with all the necessary information and are displayed in a decent resolution. Inputs via the touchscreen are recorded very precisely and implemented quickly.
However, we still have something negative to note besides the outdated Cura version, which is on the SD card. That is the volume of the fans, which are installed in the hot end. They are quite loud and can be really annoying depending on where the Vyper is placed. Even at a speed of 75-80%, the fans are loud and annoying.
Nevertheless, the Anycubic Vyper remains a real recommendation at its price of under 400 euros.

Anycubic Vyper
Usability
Assembly
Noise level
Print quality
Value for money
92/100
An excellent 3D printer that is very suitable for beginners. It brings with it a clear interface, great build quality and good print quality.