As the owner of a so-called uninterruptible power supply (UPS), the day will come when the batteries of your device give out. This can happen after just a few years or after two decades, but sooner or later a battery replacement is usually unavoidable. You don’t have to replace your entire UPS, just order and change the appropriate replacement batteries. We show you what you should consider when replacing the batteries of your UPS and how the procedure works.
Which replacement battery is the right one?
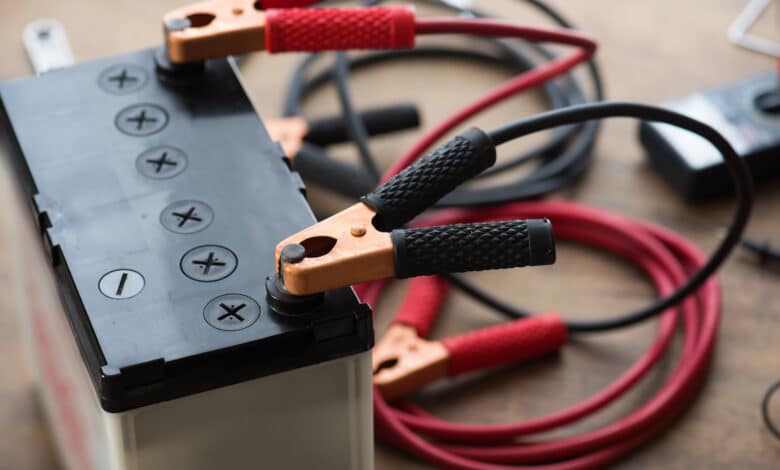
First, you’ll need new batteries, but the market offers a sheer number of different types and sizes. All in all, most models offer an output power of 12 volts and have similarities to a motorcycle battery. One thing in advance: Do not use motorcycle or even car batteries for your UPS. These would neither fit the format nor have the high current capability needed for a moderately loaded UPS. In addition, UPS batteries are usually in the same price range.
So if you don’t know exactly which model you bought several years ago, take a close look at it. Usually there is still the type plate on the back or bottom with the exact designation. You can then use this to order the appropriate replacement battery, preferably from your favorite online retailer. To make sure that you really get the right candidates and the right number, the designation on the batteries themselves should also match those in your shopping cart. Of course, you have to remove them first – but more about that in a moment.
If you also have the possibility to find out the manufacturing date of your new battery, make sure that it is no longer than 6 months ago. New batteries are usually charged to about 80% and lose this charge quickly. This results after too long storage deeply discharged batteries with reduced life.
Removing the worn-out batteries from the UPS
Before you loosen even a single screw on your device, make sure that it is no longer connected to the mains. Also disconnect all loads from the UPS. As a rule, your device should also have a fuse, usually accessible from the back, with which you can disconnect the batteries from the UPS. In our case (with an APC UPS), this is the yellow flap on the back.
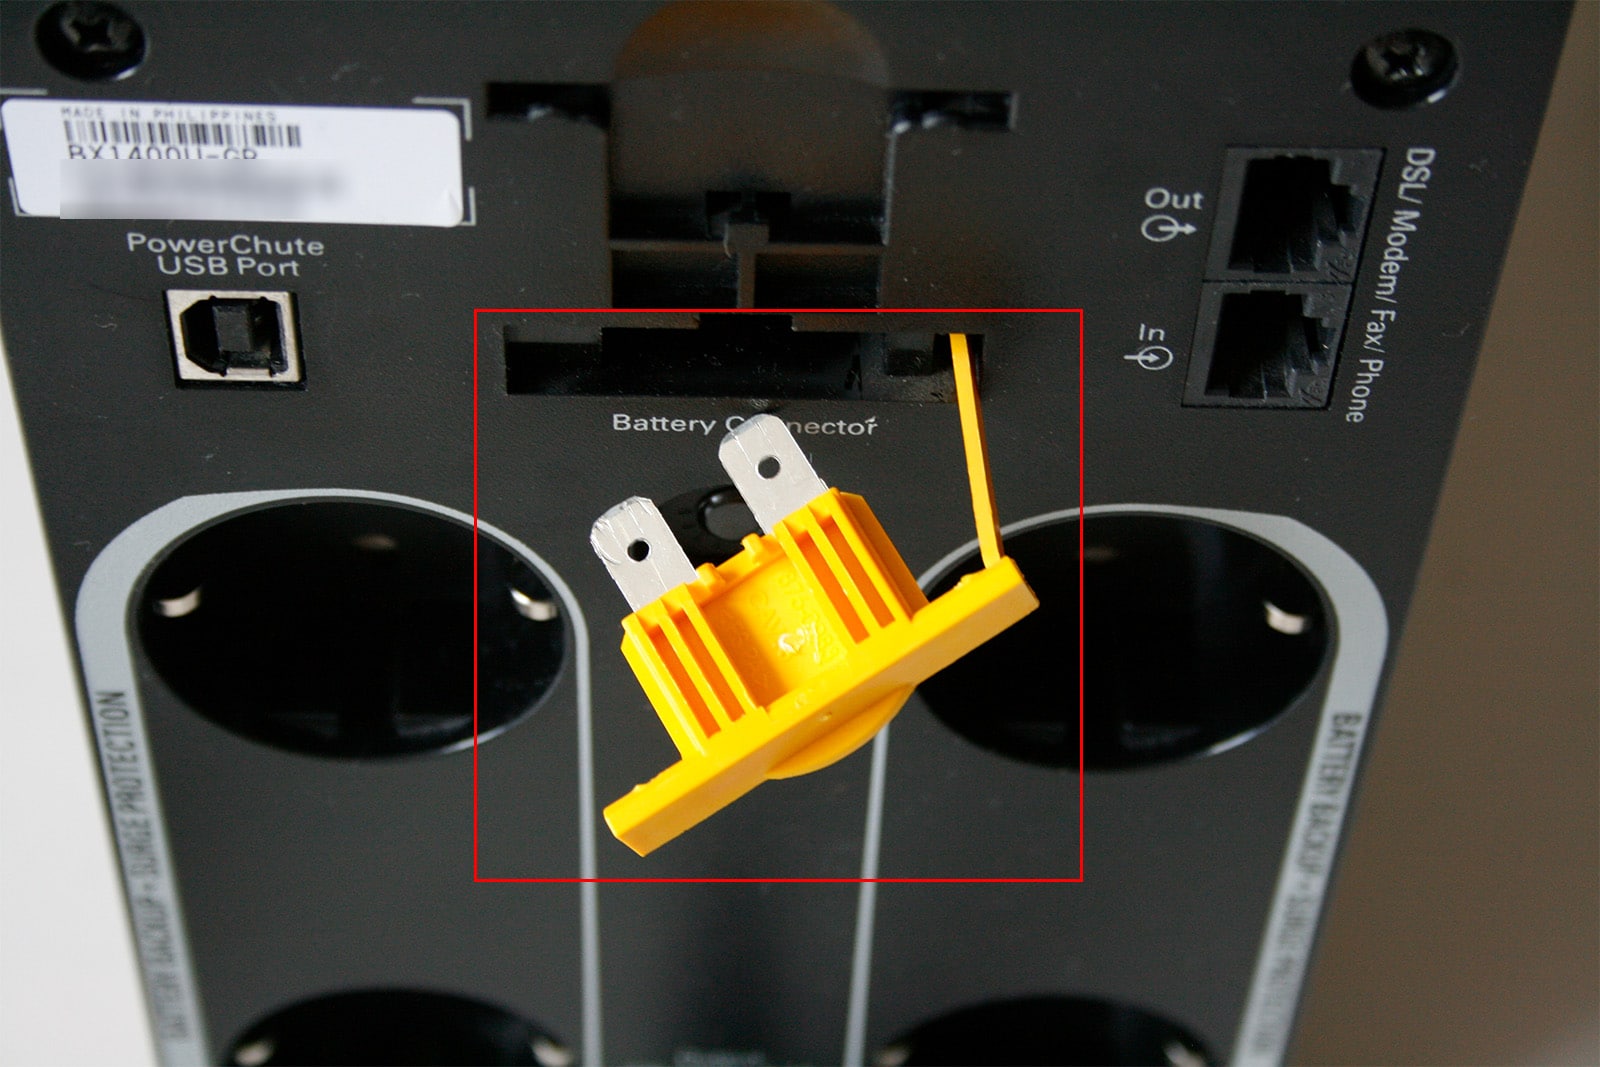
This can be levered out without much effort (or with an insulated screwdriver if necessary). To prevent it from snapping back in unintentionally, you can clamp it slightly above the case.
After that, you need access to the batteries themselves. On most models, these are easily accessible. Normally, you don’t have to disassemble the entire UPS, but only remove the front cover, for example. This has the advantage that you won’t break any warranty seals, since the replacement is provided for by the manufacturer.
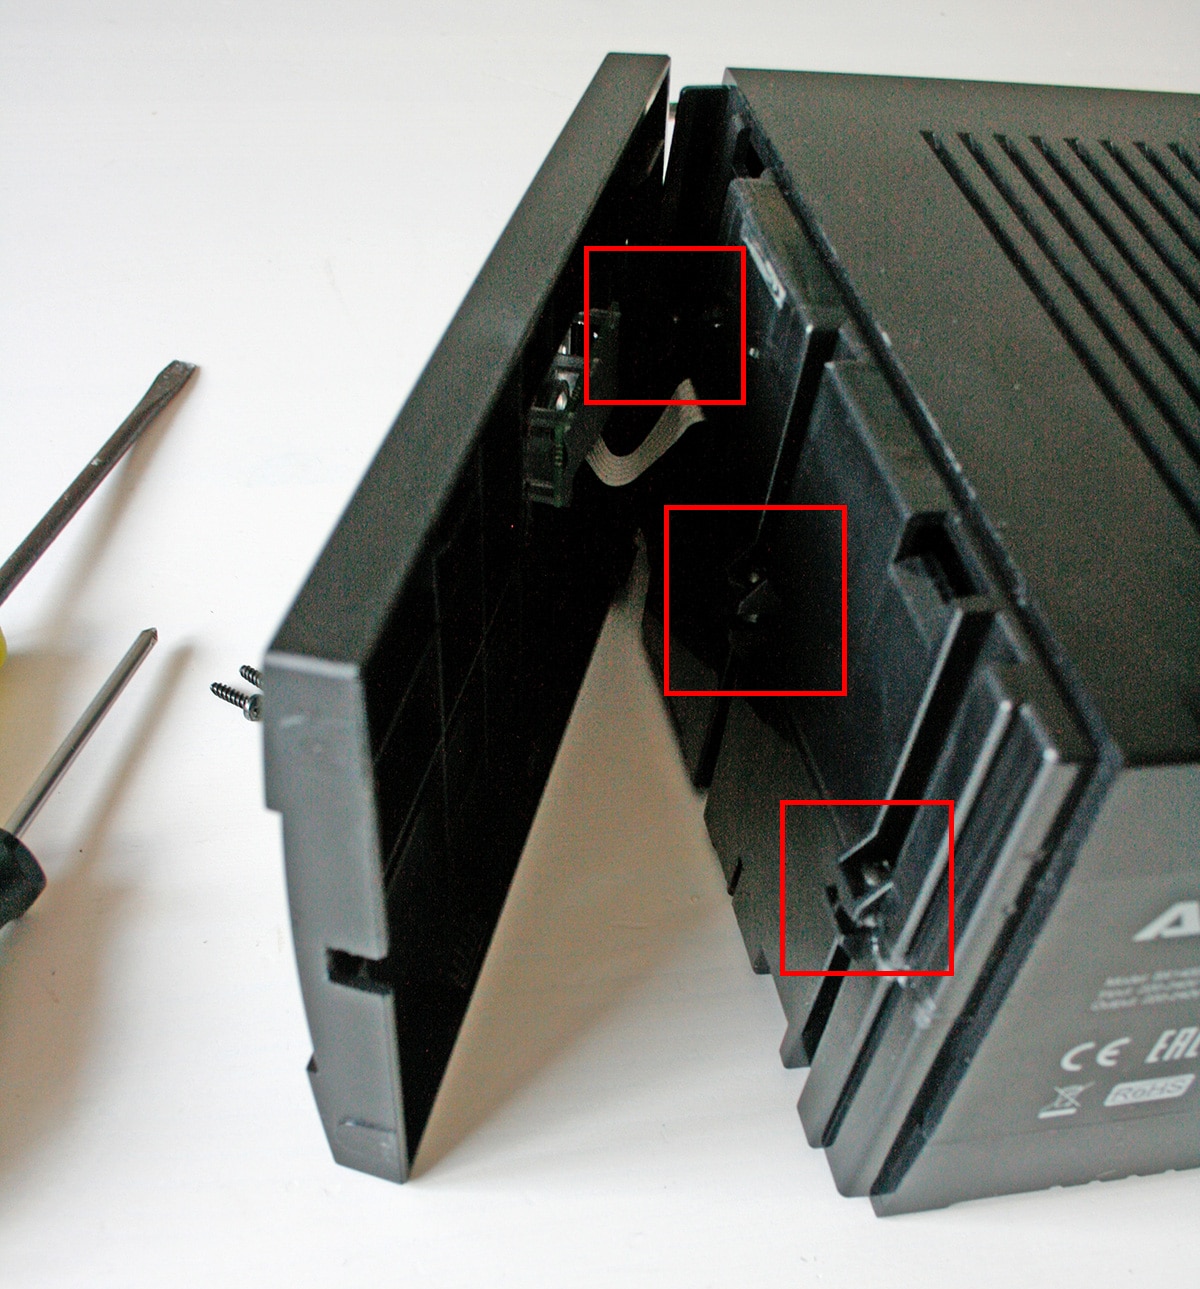
To open the case, you might also have to remove the front to uncover further screw connections. In our case, the affected side panels also had retaining lugs that we had to loosen with a flathead screwdriver.
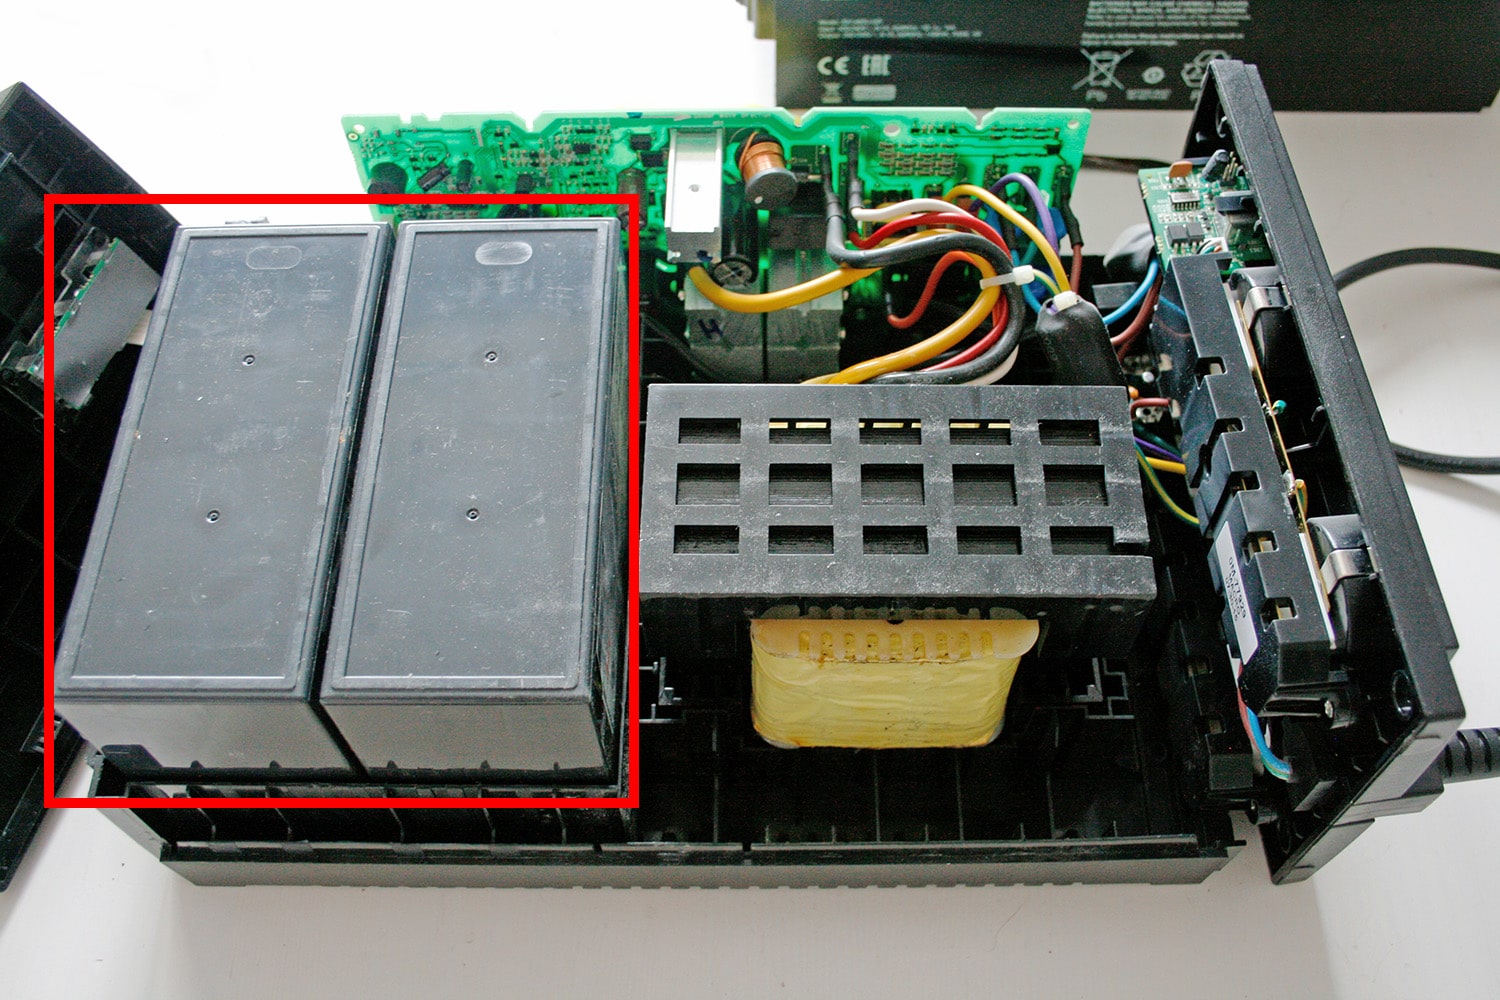
Once you have uncovered the battery(ies), you can carefully loosen the clamps or disconnect the cables. As with a car, disconnect the negative terminal first, then the positive terminal – i.e. black first, then red.
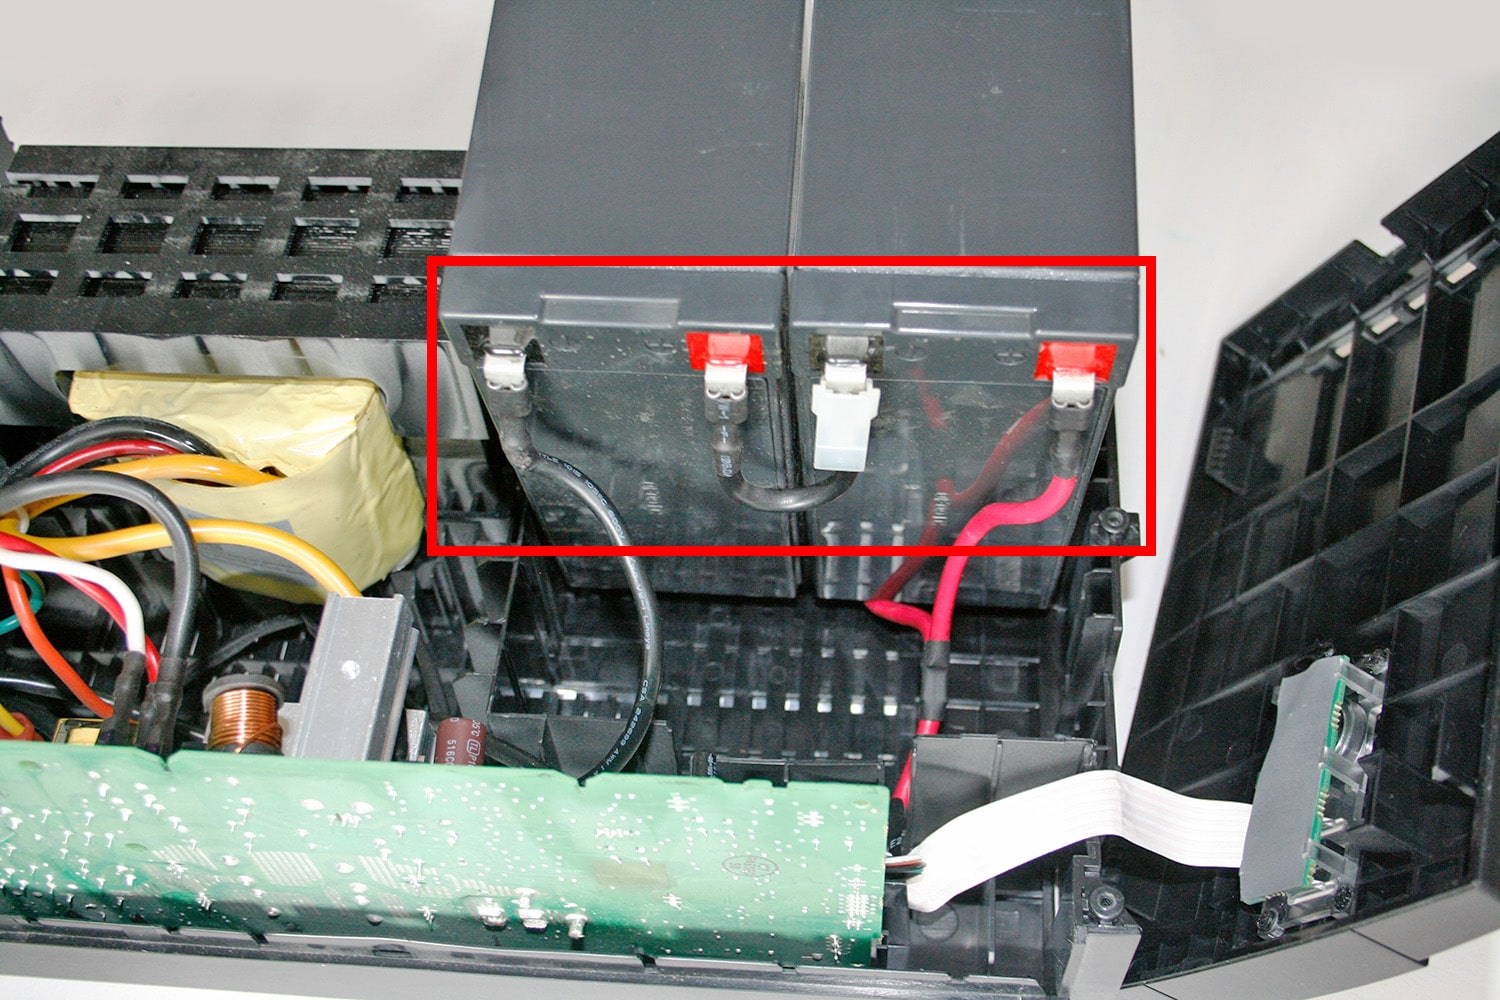
If there are several batteries in the case, you also have to loosen the connecting bridges between the individual batteries and make sure that the poles do not touch each other or other metallic surfaces. There is a short-circuit and subsequent fire hazard – so it is better to approach the matter carefully.
Insert and connect new batteries
As soon as you have removed the old batteries, you can insert the new ones into the case. It’s best to take the old ones to the recycling center. If you have a model with only one battery, you can put the new one back into the case in the same way as the old one was installed. However, this is not always the case. Even less powerful models use a 24-volt system and therefore contain two batteries connected in series. In this situation, it makes the most sense to stick the two batteries together using double-sided adhesive tape or something similar. You will find that the manufacturer did the same with the discarded battery pack. Tape them side by side, so that you can connect the inside plus pole with the inside minus pole with the connecting bridge.
Now it’s time to fit the double pack into the device without damaging various components or connection cables. The weight of the battery doesn’t necessarily make this process easier. But once the battery pack is finally in place, you can continue with the connection to the UPS.
In reverse order, you should first connect the plus pole (red) and then the minus pole (black) to the outer terminals of the battery pack or the individual battery. Make sure to use the correct poles and check two or three times. Then check all connections to the batteries again for tightness. Finally, reassemble the housing in reverse order.
Commissioning and test run after battery replacement
Now you can put the fuse back into the device. It is best to do this with a single firm push, so that the component sits as quickly as possible where it should. Otherwise, sparks can occur.
Before you reconnect your holy hardware to the uninterruptible power supply, do a test run first. Most models can be activated without power. Connect a not too power hungry consumer, like your desk lamp and activate the UPS. After a self-test, the battery should now power your lamp. Now connect the UPS to the mains. Now the battery(ies) should be charged and the device should work as usual.
You can also check the status of many UPSs via network or USB cable and view various parameters about the status. However, you might need an app from the manufacturer for that. Otherwise, you only have the status LEDs or acoustic warnings, which you have to interpret first. If necessary, you can take a look at the user manual or search for information on the Internet or on the manufacturer’s website.
Tips against premature battery aging
It is often the case that installed batteries age much earlier than the specified intended runtime. On the market, there are various categories for batteries that define their service life. However, this time span only applies at a constant temperature of 20 degrees Celsius. In a UPS, the temperatures are usually significantly higher. At 30 degrees, which corresponds to a normal temperature during operation, the service life is already halved. Temperatures that are too low are also problematic. So make sure that your device is always sufficiently ventilated to achieve an optimal battery life.