With the X-Plus 3, QIDI TECH is launching a printer that looks very appealing on paper. Fast, affordable, quite a large print area and still attractively priced. 600 mm/s is quite an achievement, not many can manage that.
As a Chinese brand, QIDI is not yet really known in this country – but QIDI wants to change that. With an EU warehouse, shipping is possible at short notice and there are no customs duties or similar charges.
In addition to the X-Plus 3, there is also the X-Smart 3, a smaller, slimmed-down version, and the X-Max 3, a version with a larger print area. But how does the printer perform in practice? We have tested it for you.
Technical data
| Printer technology | Fused Deposition Modeling (FDM) |
| Installation space | 280 x 280 x 270 (H x W x D) |
| max. printing speed | 600 mm/s |
| Nozzle size | 0.4 mm (0.2, 0.6, 0.8 mm optional) |
| Print bed material | Double-sided flexible magnetic HF plate |
| Print bed leveling | Automatic |
| Filament diameter | 1.75 mm |
| Filament material | PLA, ABS, ASA, PETG, TPU, PC, UltraPA, nylon, etc. |
| max. temperature of the nozzle | 350 °C |
| max. temperature of the print bed | 120 °C |
| Display | 5″ LCD touchscreen |
| Connections | micro SD, USB-A, LAN, WLAN |
| Slicing software | QIDI Print and other third-party software such as Ultimaker Cura, Simplify3D, PrusaSlicer etc. |
| Firmware | Clipper |
| Structure | CoreXY |
| Extruder | High-flow extruder with direct drive |
| Extruder flow | 35mm³/s @PLA mat (Model: 150*150 mm single wall; Material: PLA Rapido mat; Temperature: 240℃) |
| Special features | removable and magnetic printing plate |
| Size | 440 x 435 x 486 mm (H x W x D) |
| Price | € 619.00 * (with the voucher NNNDEXPLUS3 only 639€) |
Scope of delivery
- Printer, USB stick, desiccant drying box, copper and hardened steel hotend
- Tool, spare parts kit, scraper, Ethernet cable, nozzle cleaning tool, glue stick, 500 g black high-speed filament
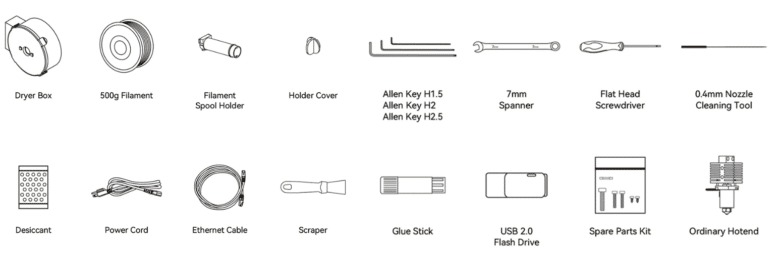
The QIDI TECH X-Plus 3 comes secured in a rather plain cardboard box. The box is reinforced for transportation and the printer arrived clean and undamaged. All the parts you need are in the box. Accessories for cleaning and drying as well as a glue stick are included – so no additional accessories are required and you can get started straight away.
Assembly
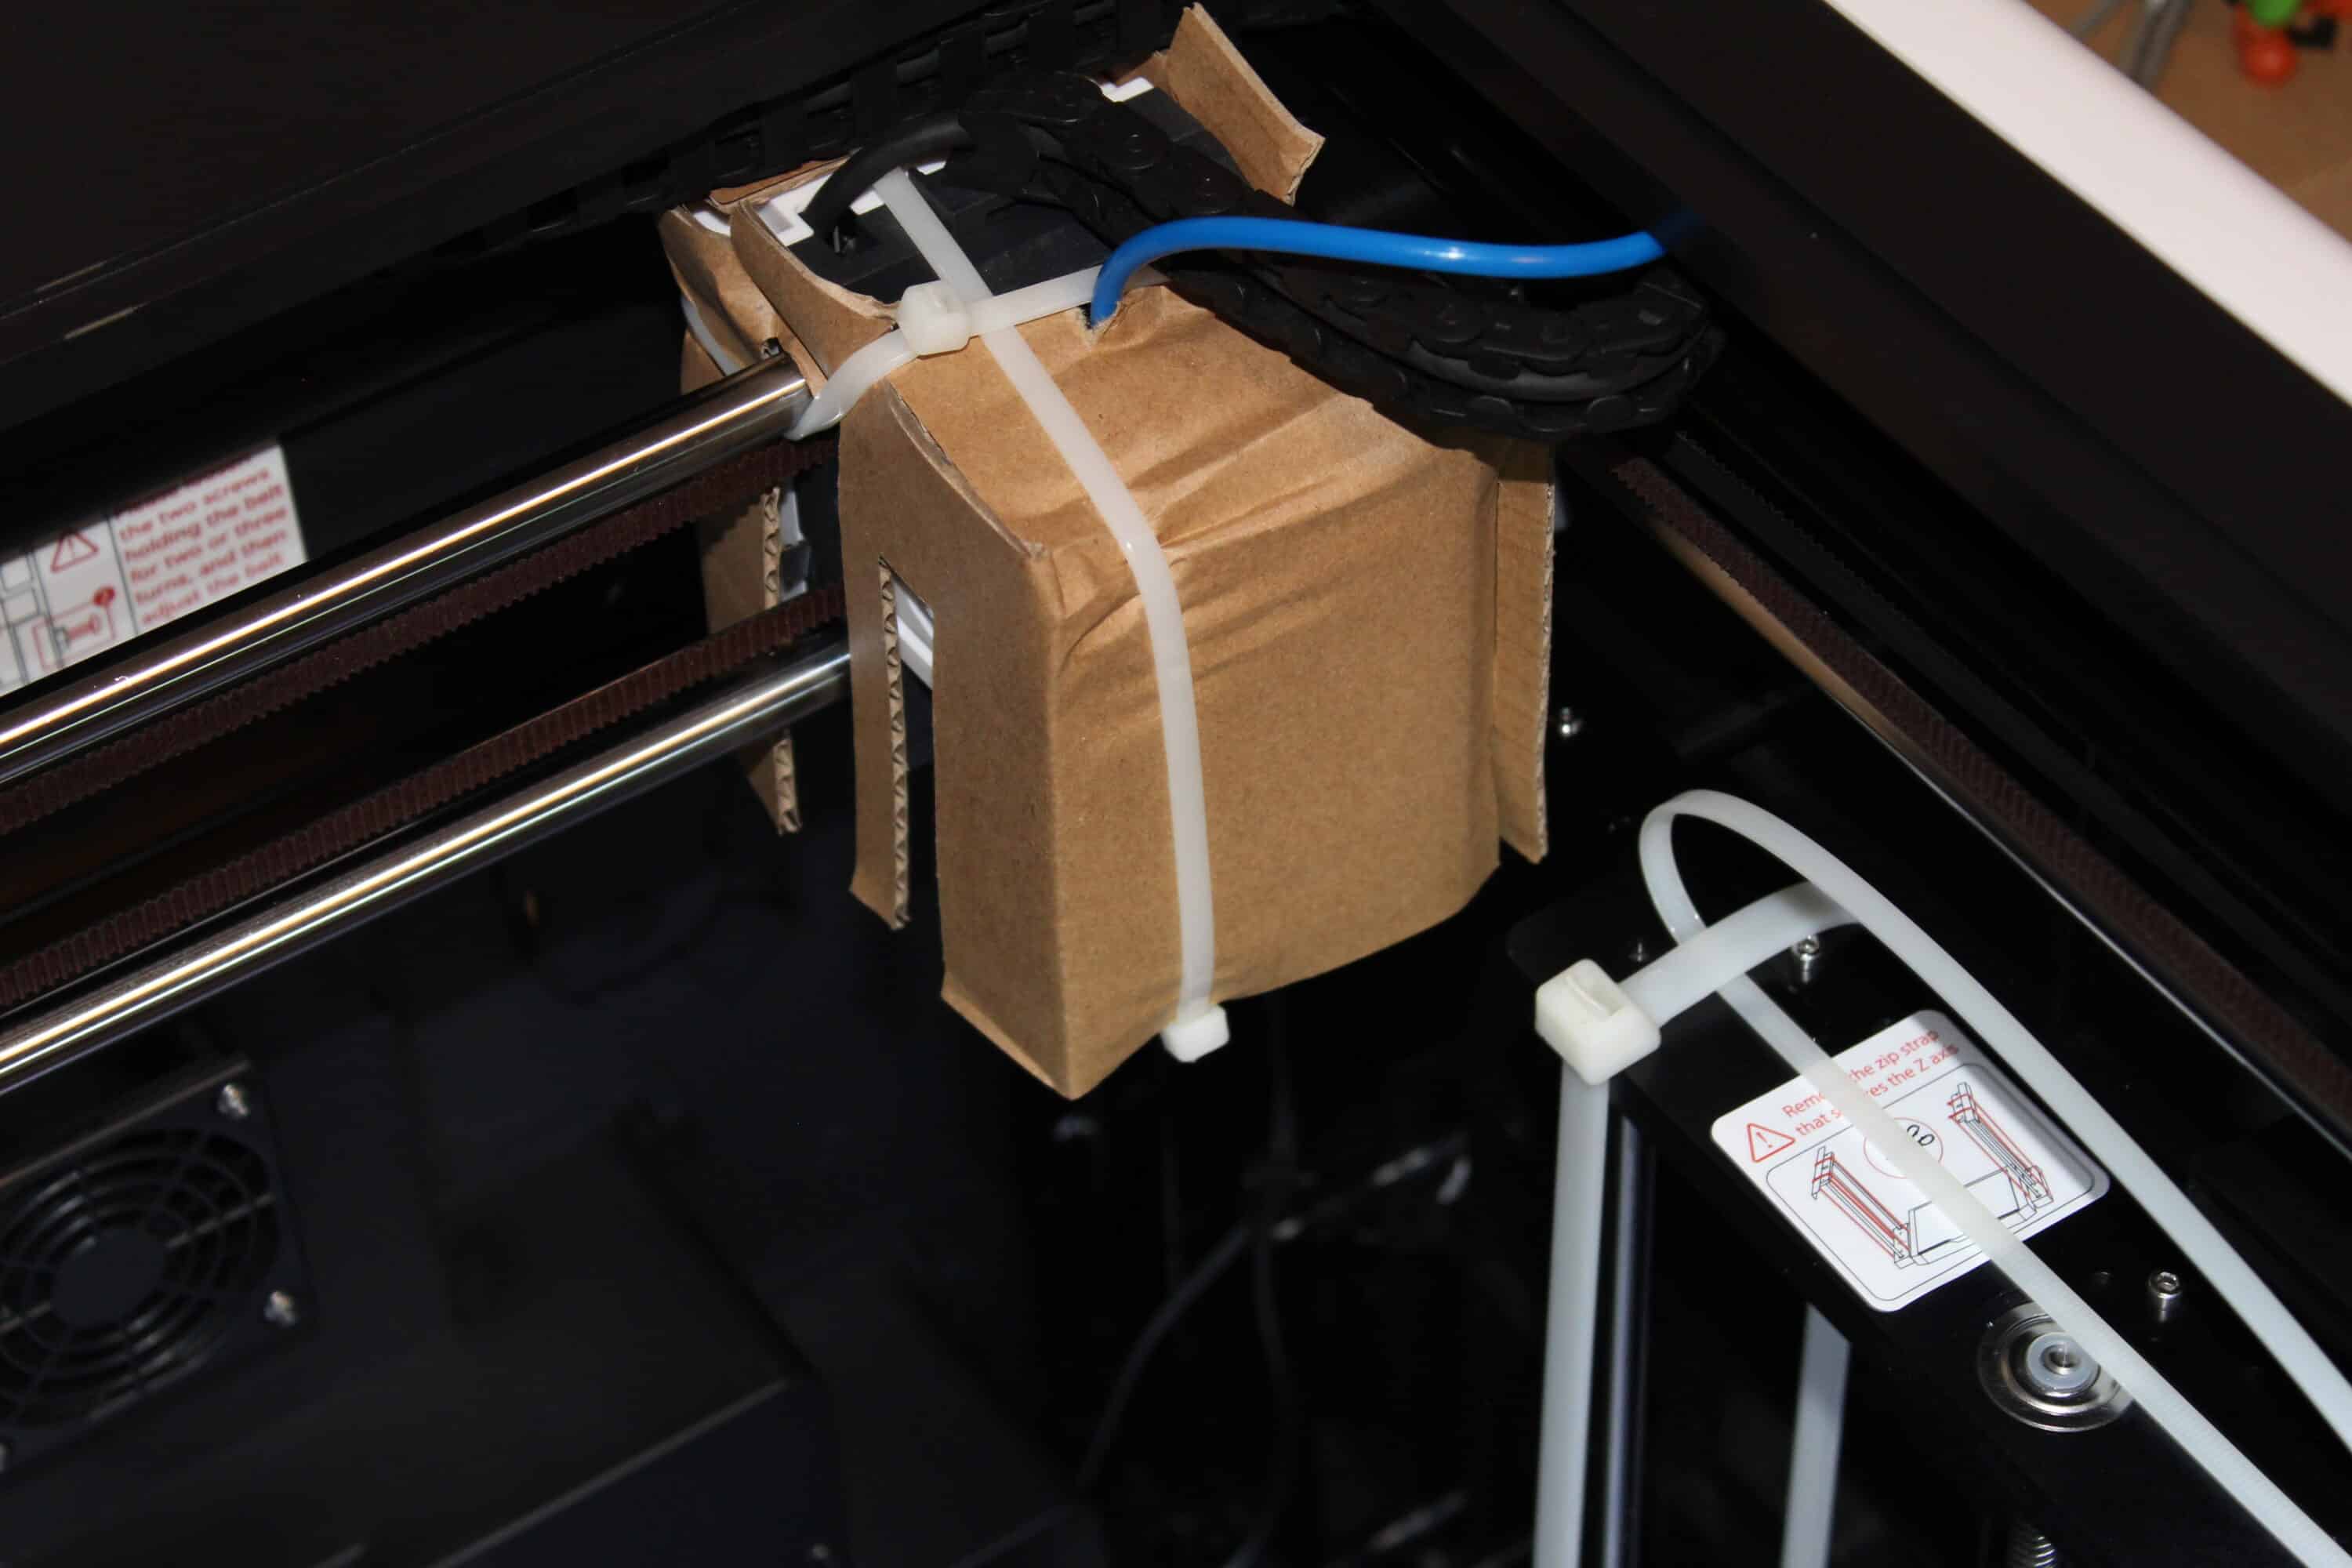
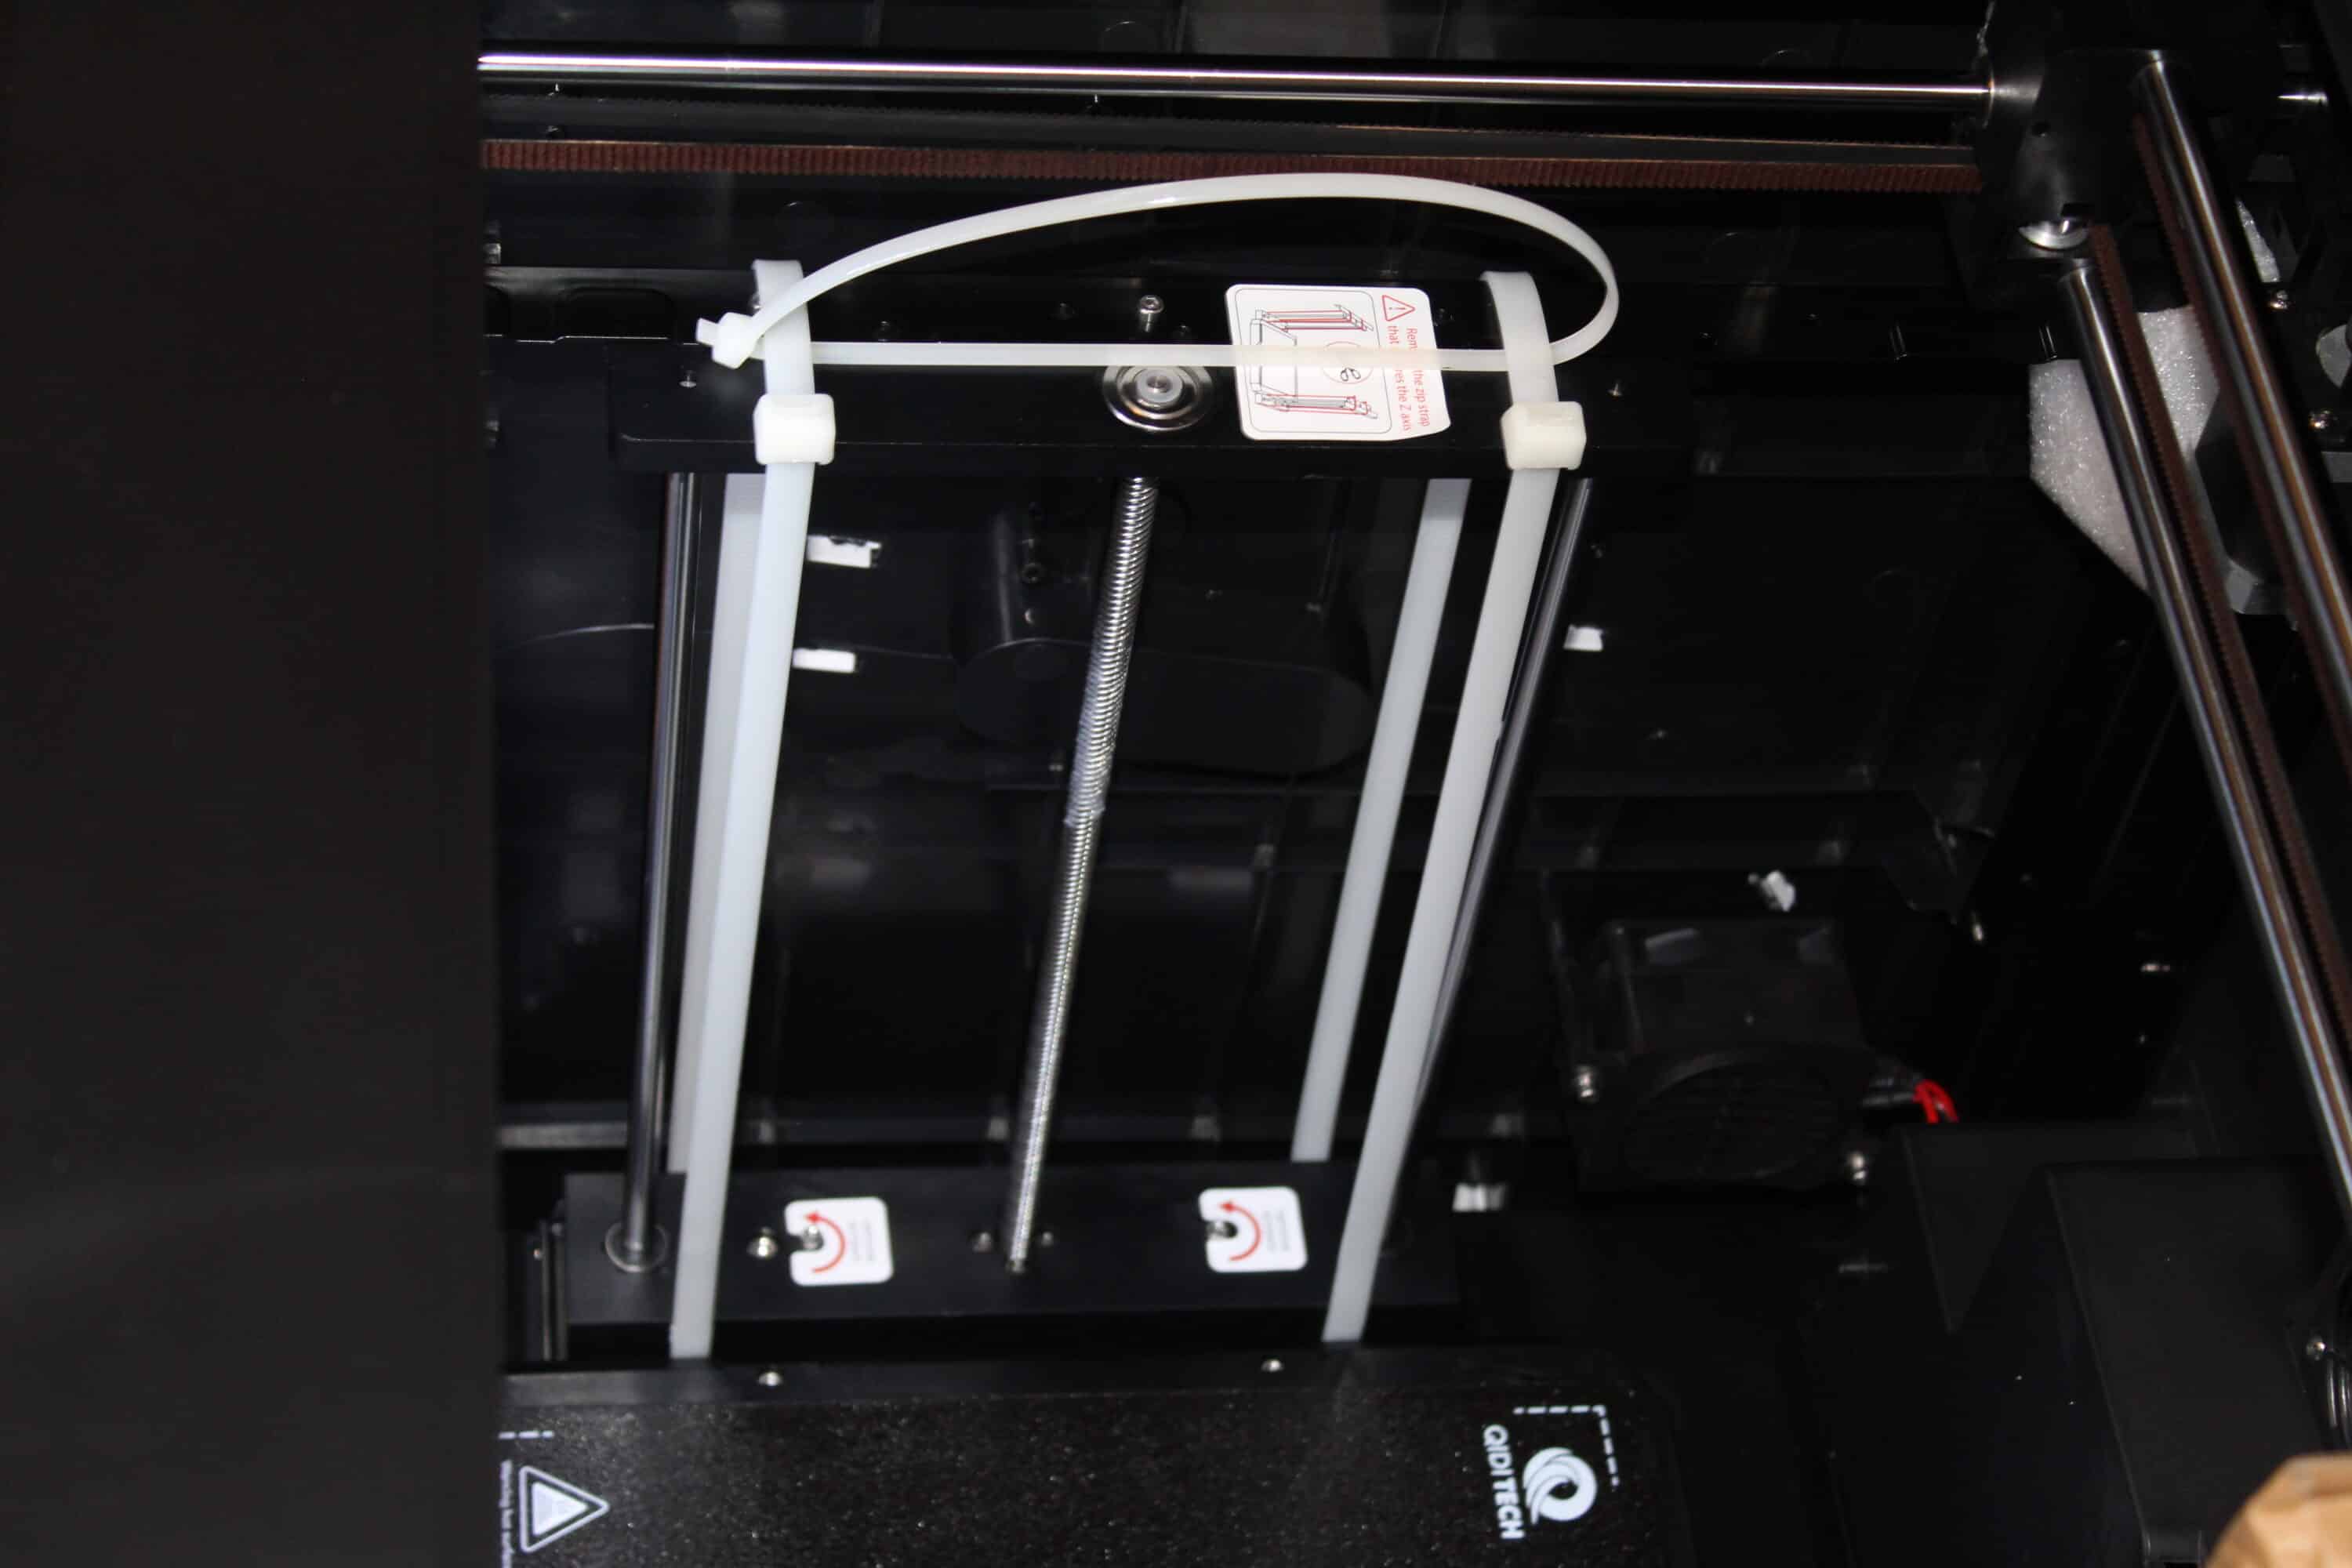
- quick guided set-up, only the transport protection needs to be removed
- Check whether the power supply unit is correctly set to 230V (110V possible – in our case it was correctly preset)
The printer arrives fully assembled. Only a few transport locks need to be removed, this is clearly documented and can be done within a few minutes. A few cable ties are cut and screws loosened. You are guided through the setup and unpacking process. You don’t even need the instructions. The setup is explained and displayed on the 5-inch color display.
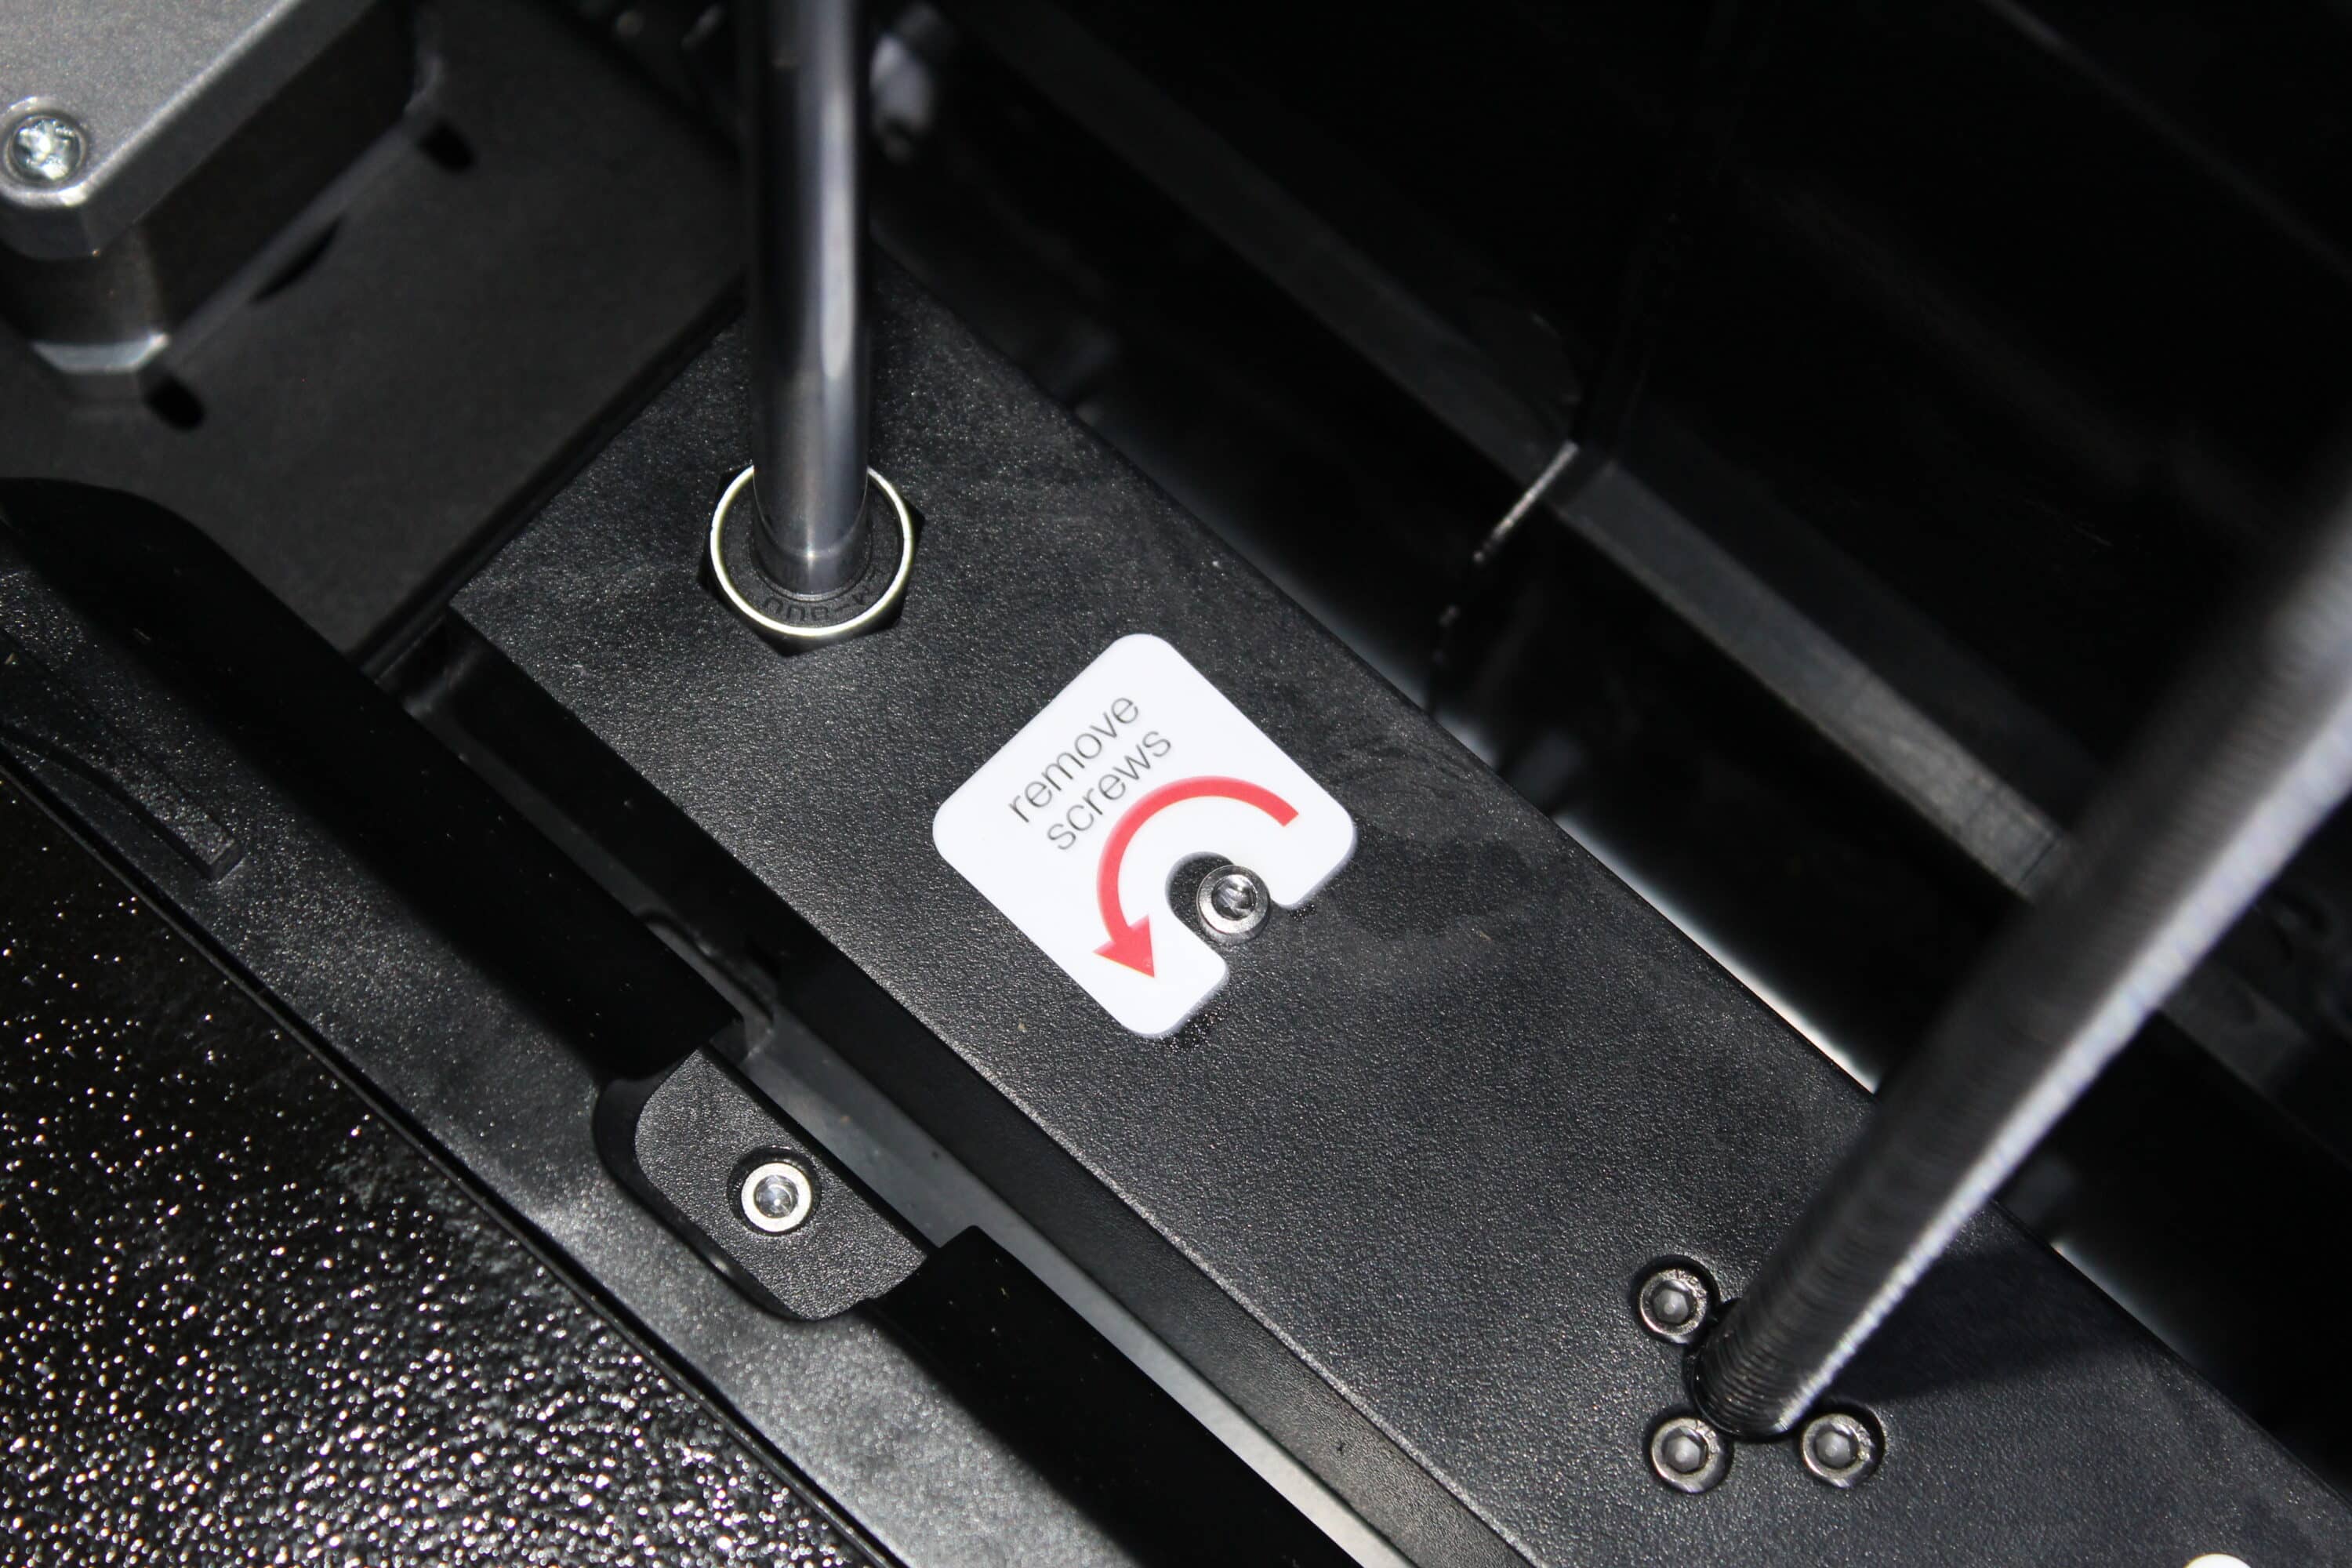
The only thing you should check before switching on the printer for the first time is whether the toggle switch on the underside of the printer is already set to 230 V for the German power grid. In our case, however, this was the case and we would also assume that it is preset appropriately for the receiver – nevertheless, a check is always advisable.
As soon as the printer has started up properly for the first time, set up the distance of the Z-axis. A type of paper is supplied for this purpose – this is pushed between the nozzle and the printing plate until it grinds minimally and is confirmed. In theory, you are ready to go – no further pre-configuration is necessary.

The filament is fed through a tube and simply pushed through. Unfortunately, this does not happen automatically, so we have to push the filament until we feel resistance – then we have arrived in the nozzle. It is not a real effort, but other printers in the upper price segment can do this fully automatically. To store the filament, we push it into the box (including a dry mat if required) and fix it to the back of our QIDI TECH X-Plus 3.
To summarize, everything is done quickly and is quite uncomplicated. Everything is documented and easy to understand.
Design and processing
- closed installation space
- Lots of plastic
- somewhat rickety door
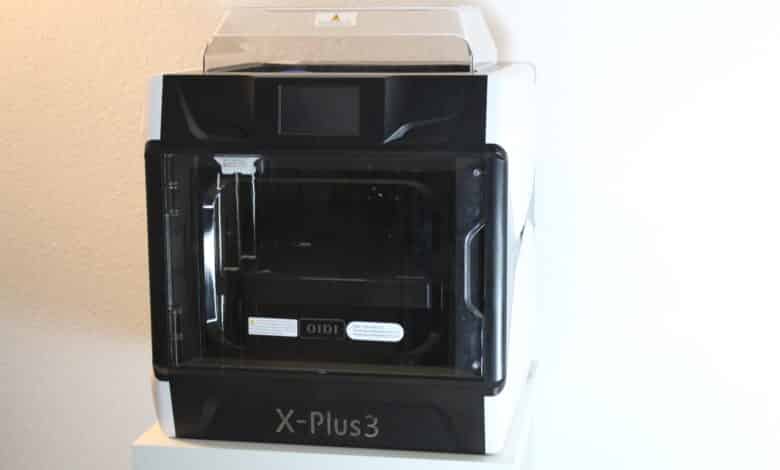
The rather large printer comes in black and white, the side panels are made of solid plastic. At the top of the front is the 5-inch display, embedded in the plastic. The model designation X-Plus 3 is chrome-plated at the bottom of the front. All in all, it makes a sturdy impression on the outside – even though it is made almost entirely of plastic. Depending on your own perception, this could be described as too much plastic.
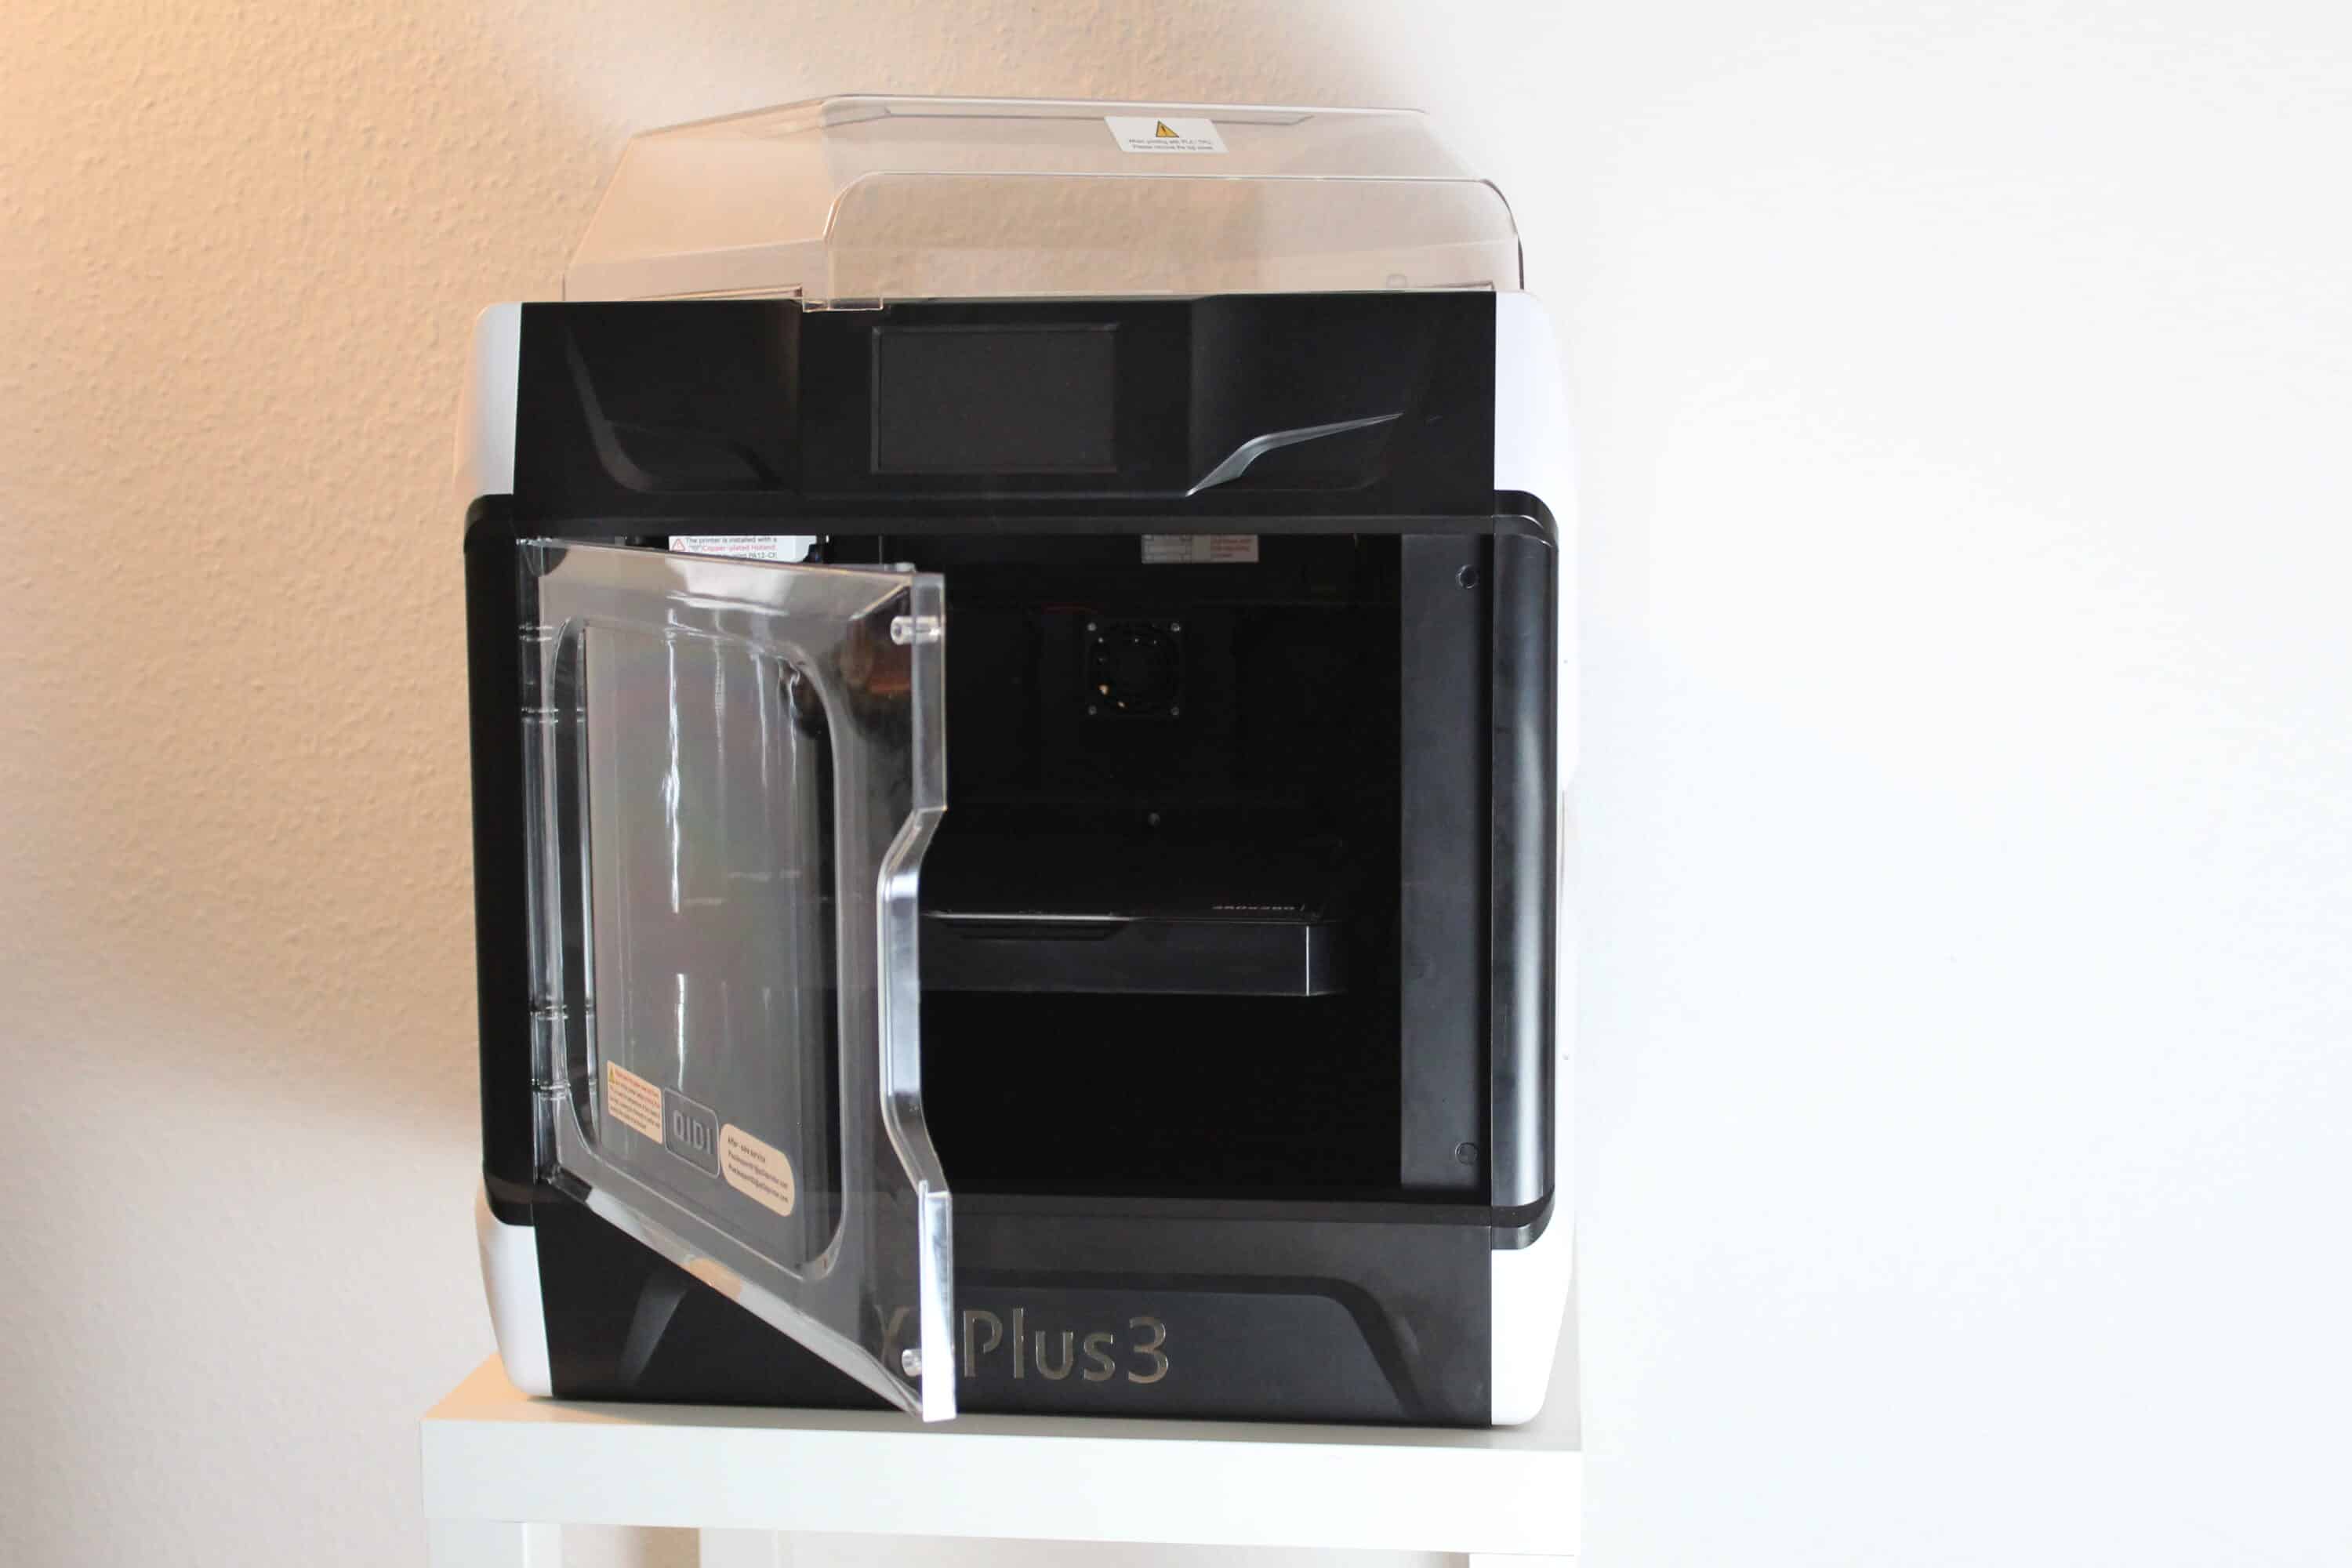
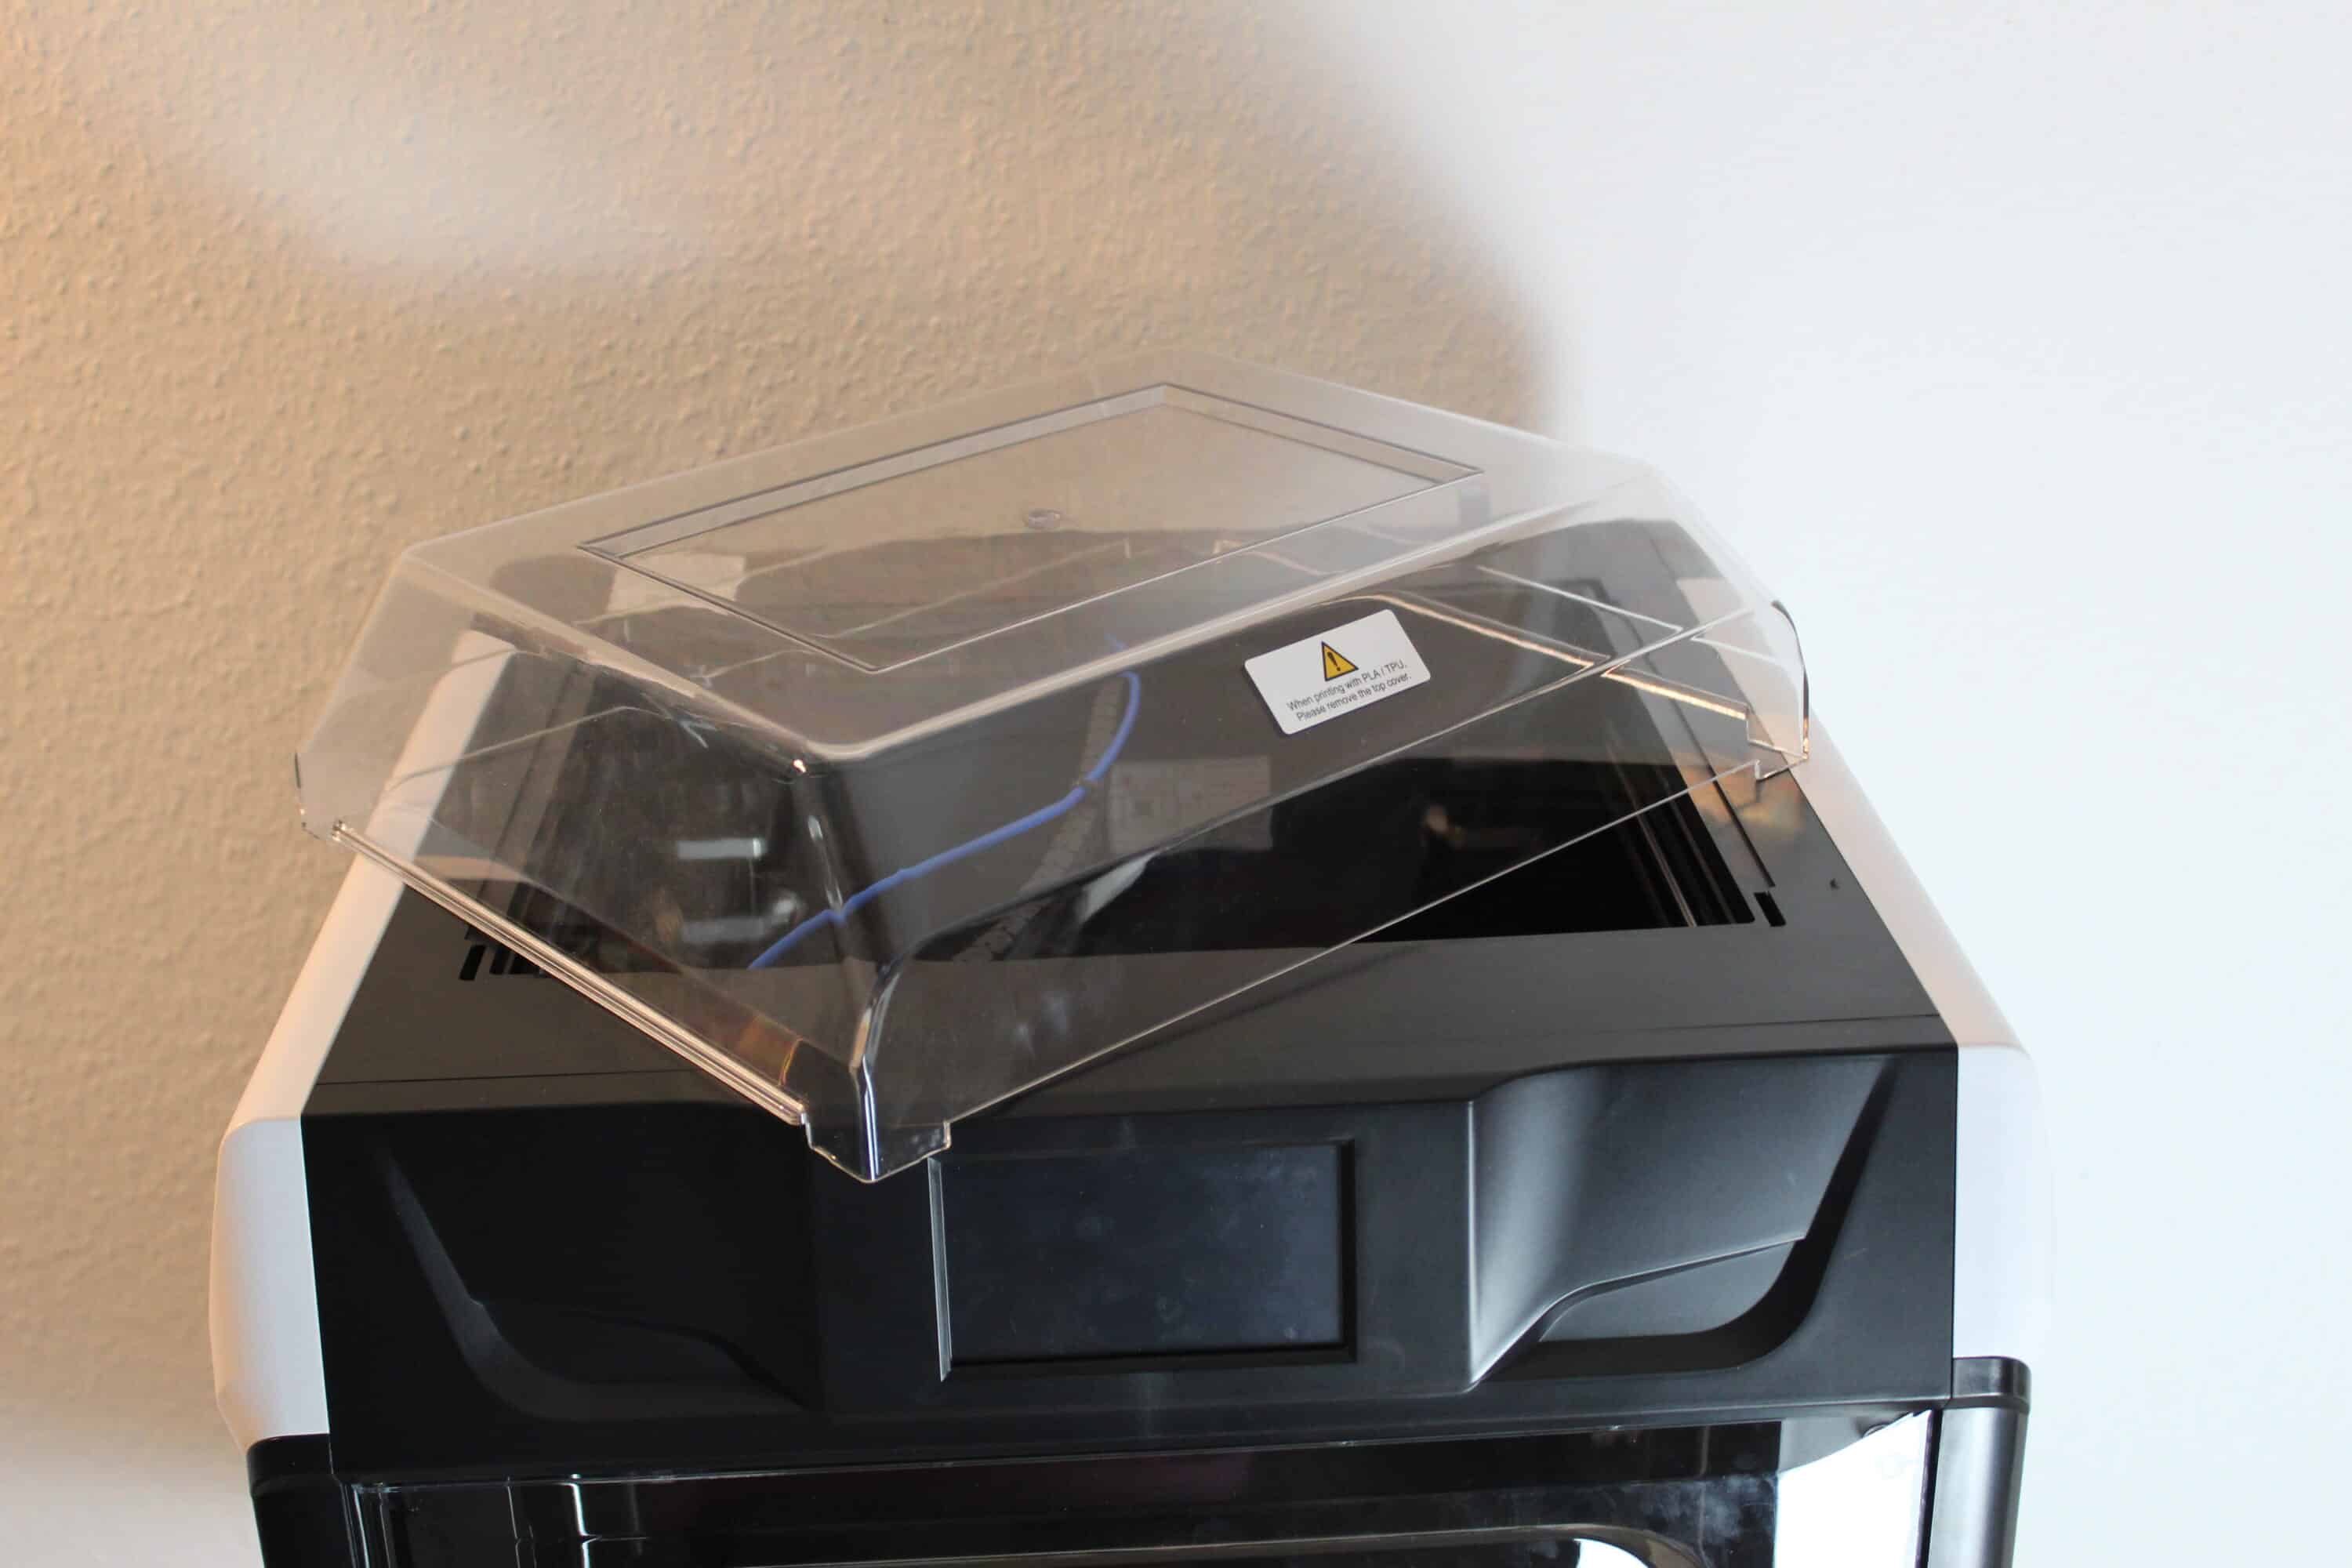

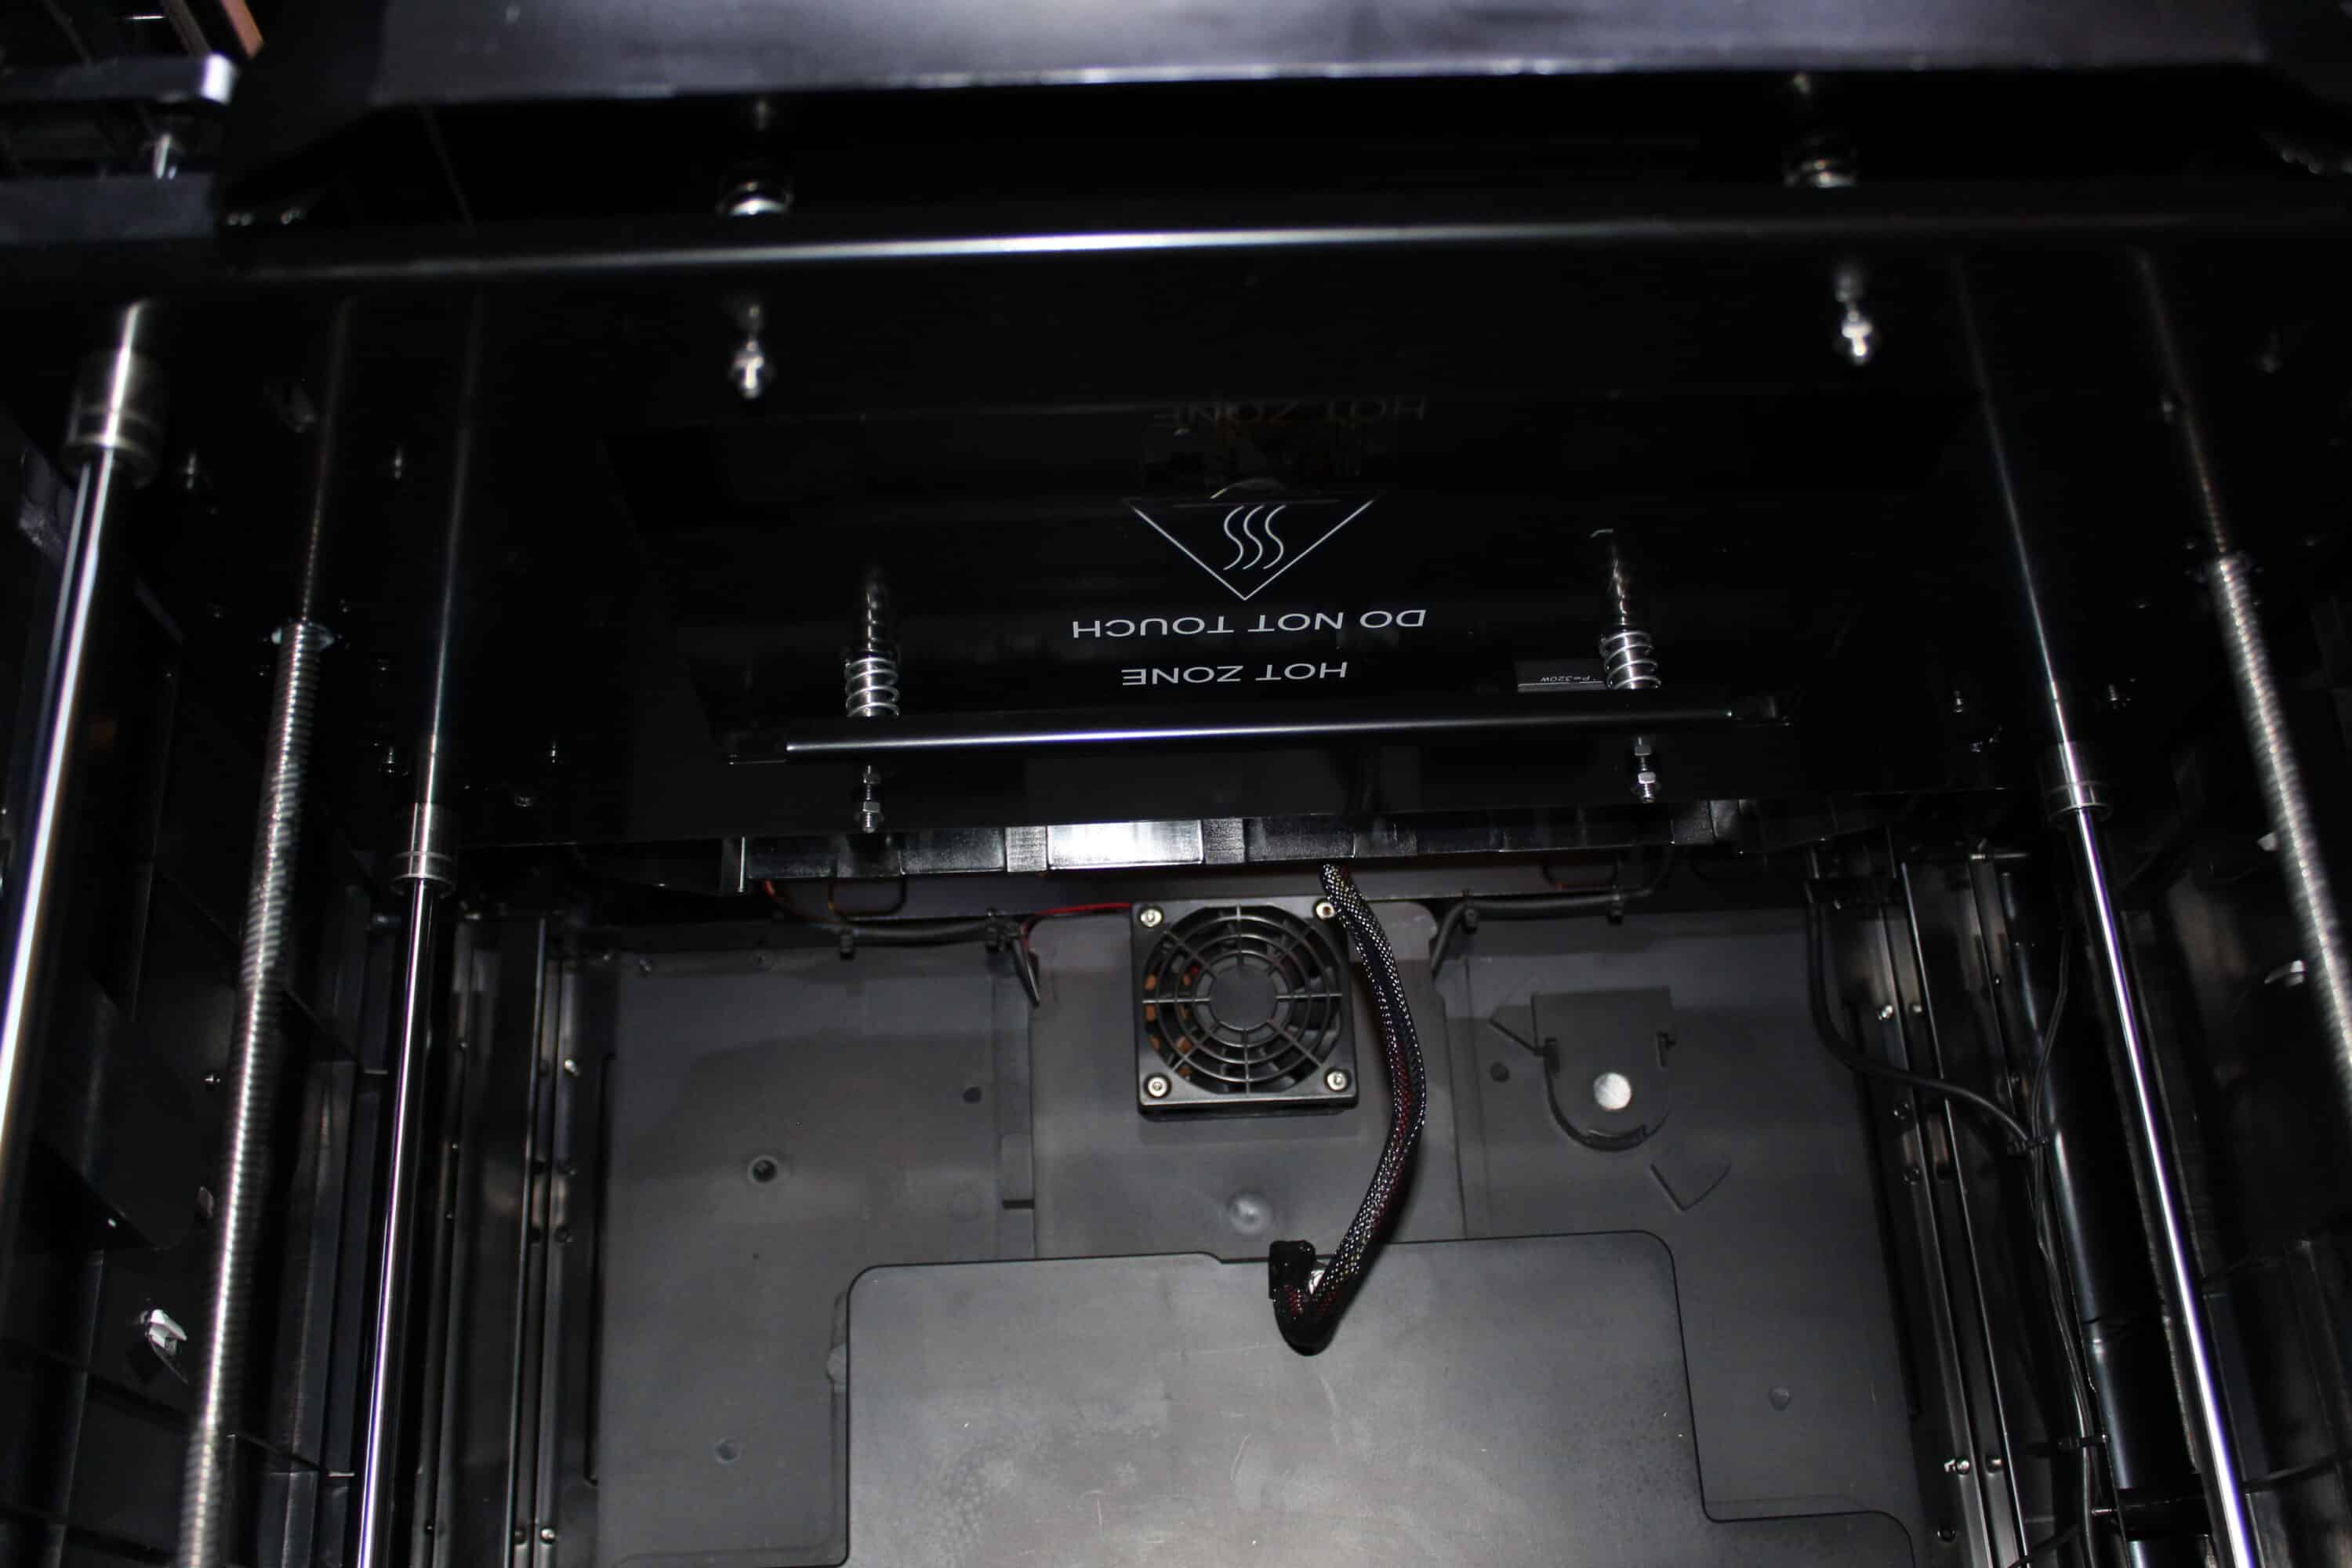
It is striking that the QIDI X-Plus 3 has a closed and heated pressure chamber. This can be inspected via a door made of transparent plastic, and a raised lid made of the same material is also included. The door has a few indentations for design reasons – this means that the view inside is somewhat distorted. In addition, the door wobbles enormously when you open it. Honestly, so much so that you rather suspect that a screw or similar is loose somewhere – which makes a somewhat sad impression for the price.

At around 20 kilograms and with overall dimensions of around 51 x 60 x 63 cm (including filament box and lid), the X-Plus 3 is quite massive. The dimensions are somewhat incomprehensible – there is a lot of space inside. If you look at a Bambulab X1 with a slightly smaller printing plate, for example, you get a much more compact printer.

Overall, everything is neatly finished. Nevertheless, due to the design, one or two parts look a little “cheap”. The panel under the print bed looks “frayed” due to some processing points of the plastic. The door could also have been much nicer overall. However, this is of secondary importance in terms of functionality.
Hardware of the QIDI X-Plus 3
Let’s move on to the technical features of the X-Plus 3. It is nice to see that it uses the CoreXY structure. In short, this means that the X and Y axes are fixed. Only the Z-axis, i.e. the print bed, is moved through the printer via belts – so it does not move the print bed back and forth wildly (ergo no “bed pusher”).
It is not only the print bed that can be heated, but also the entire print area. Three fans are installed for this purpose, so that the general printing conditions should always be identical.
An important feature of the QIDI X-Plus 3 is its high printing speed. QIDI provides two direct drive hot ends for this purpose. The hot end with the somewhat more robust hardened steel nozzle is fitted as standard – alternatively, we have included a hot end with a copper nozzle. The different nozzles allow various different filaments to be used.
Another plus point is the proximity sensor. The Z-axis only needs to be measured once with the paper, then it moves to a few points and saves its profile.
Print profile, QIDI Slicer, Firmware
- QIDI Slicer already knows default settings for your own filaments
- Test files are pre-installed on the USB stick
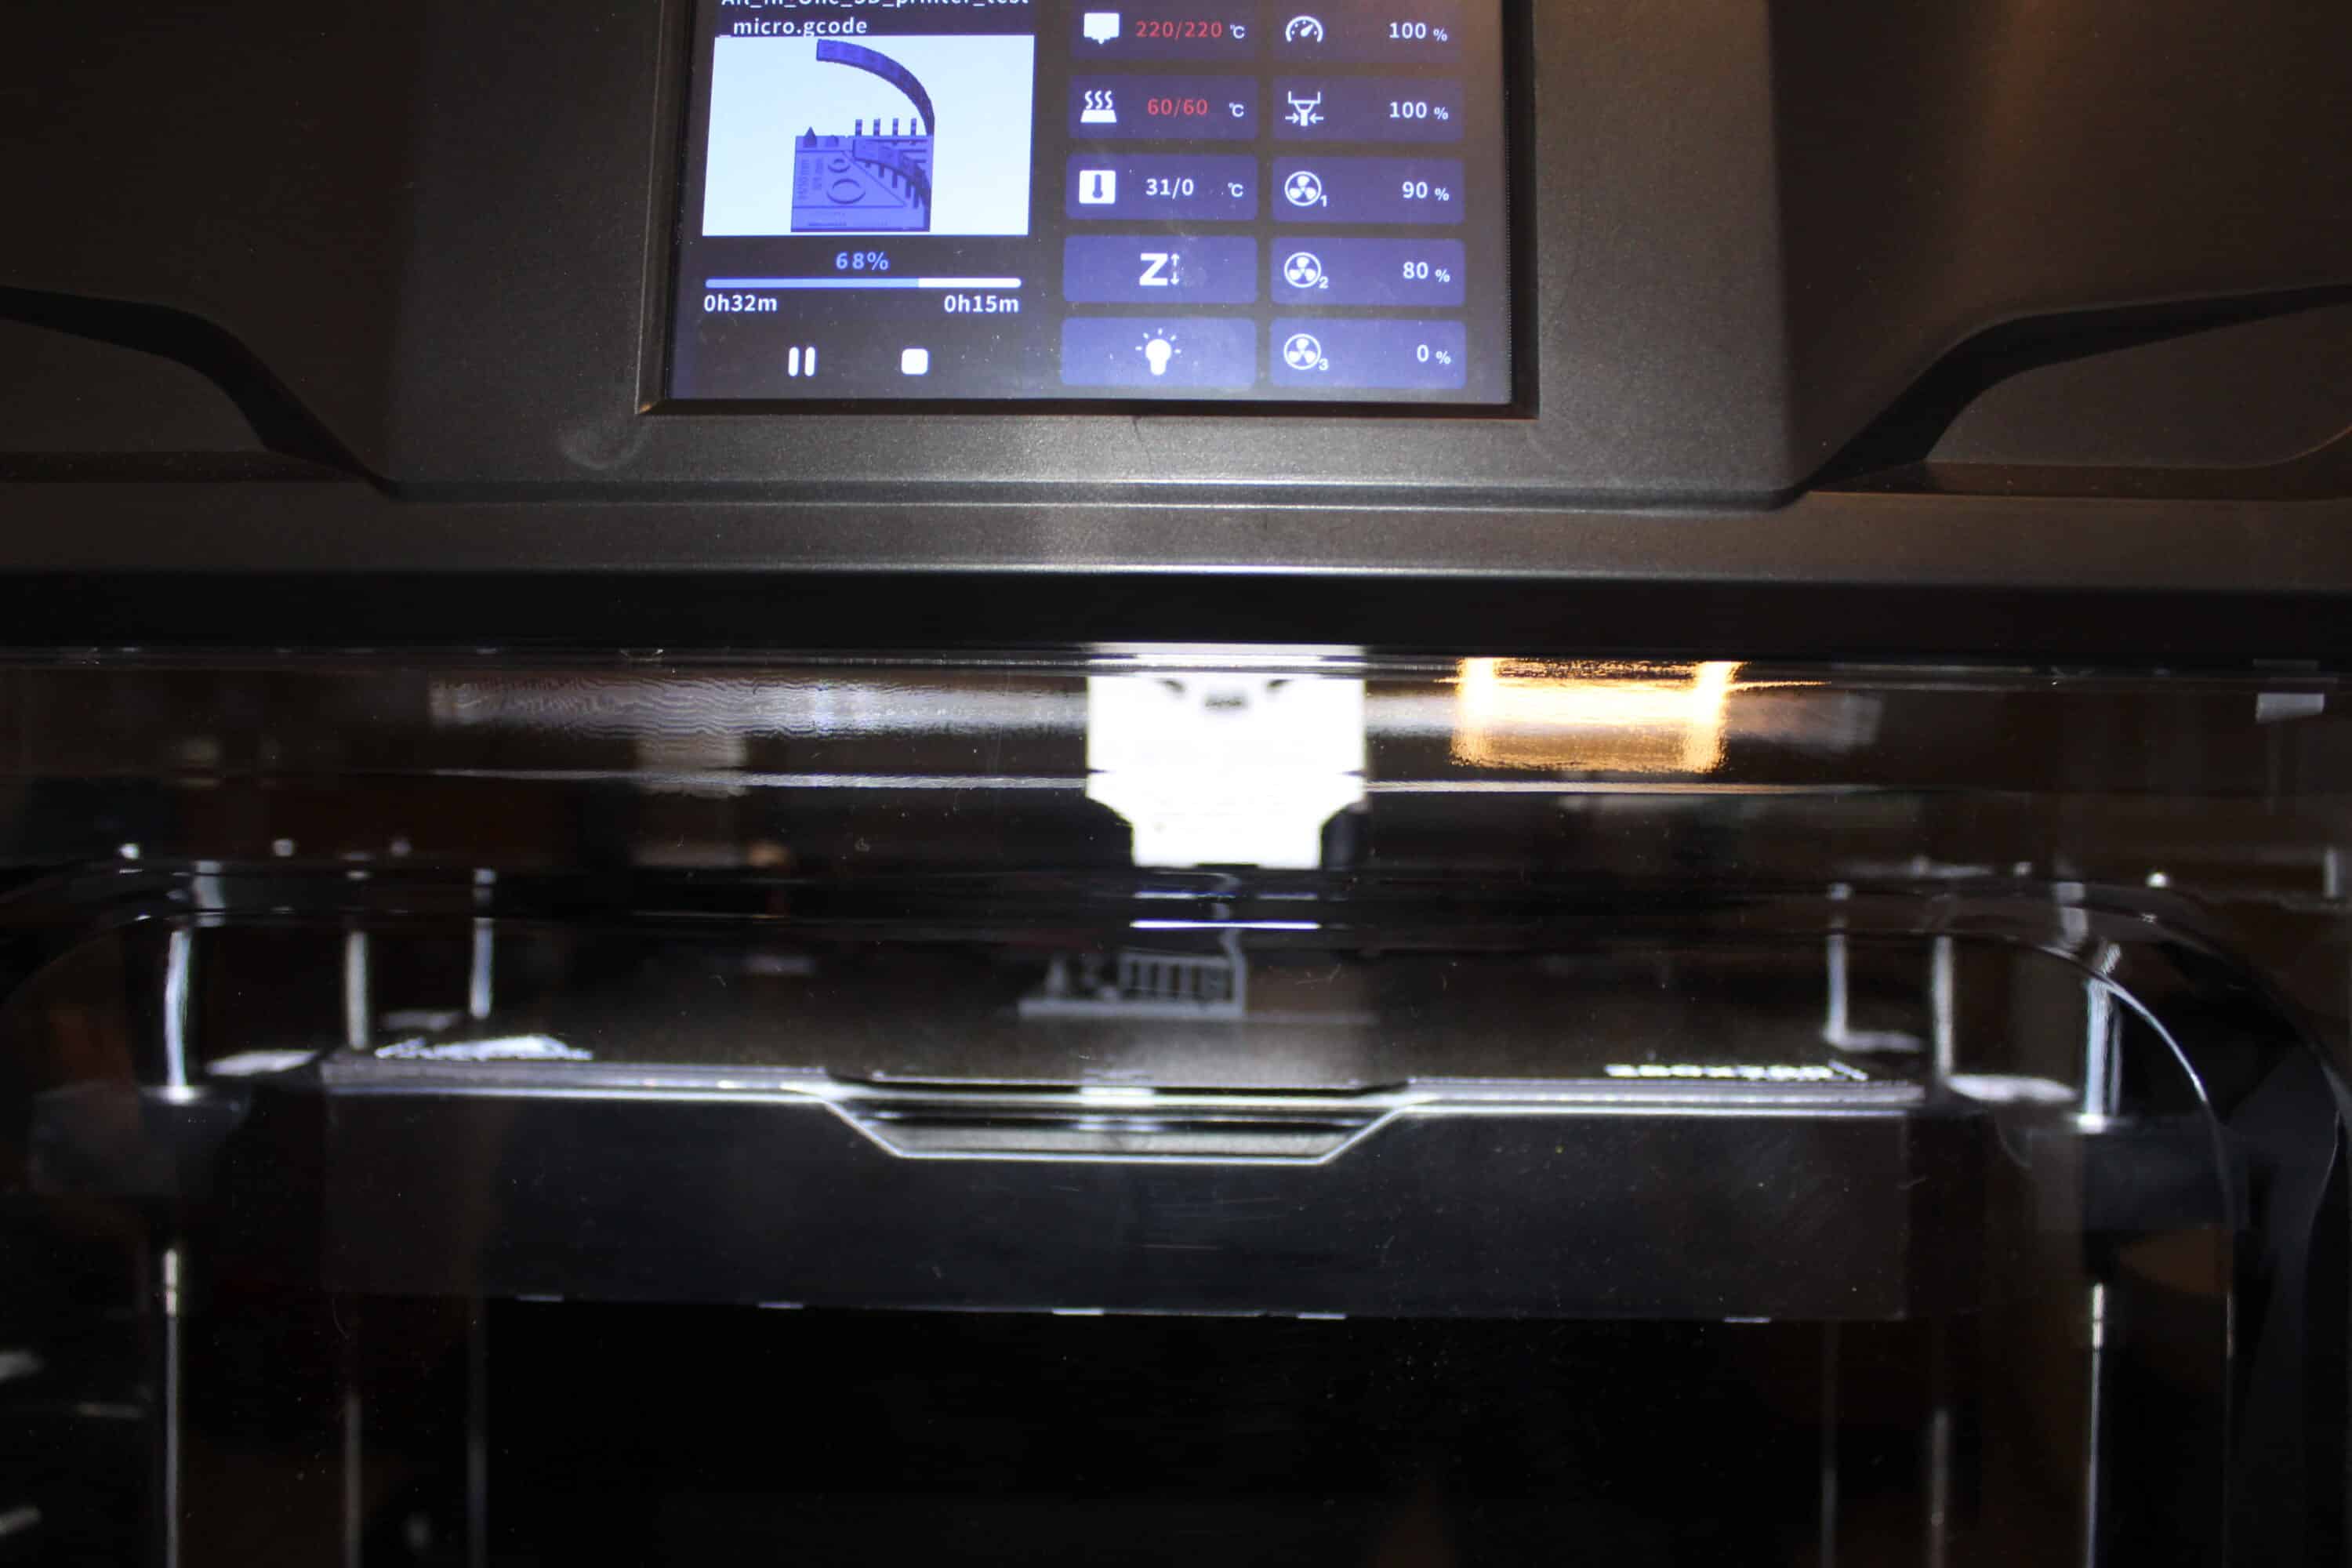
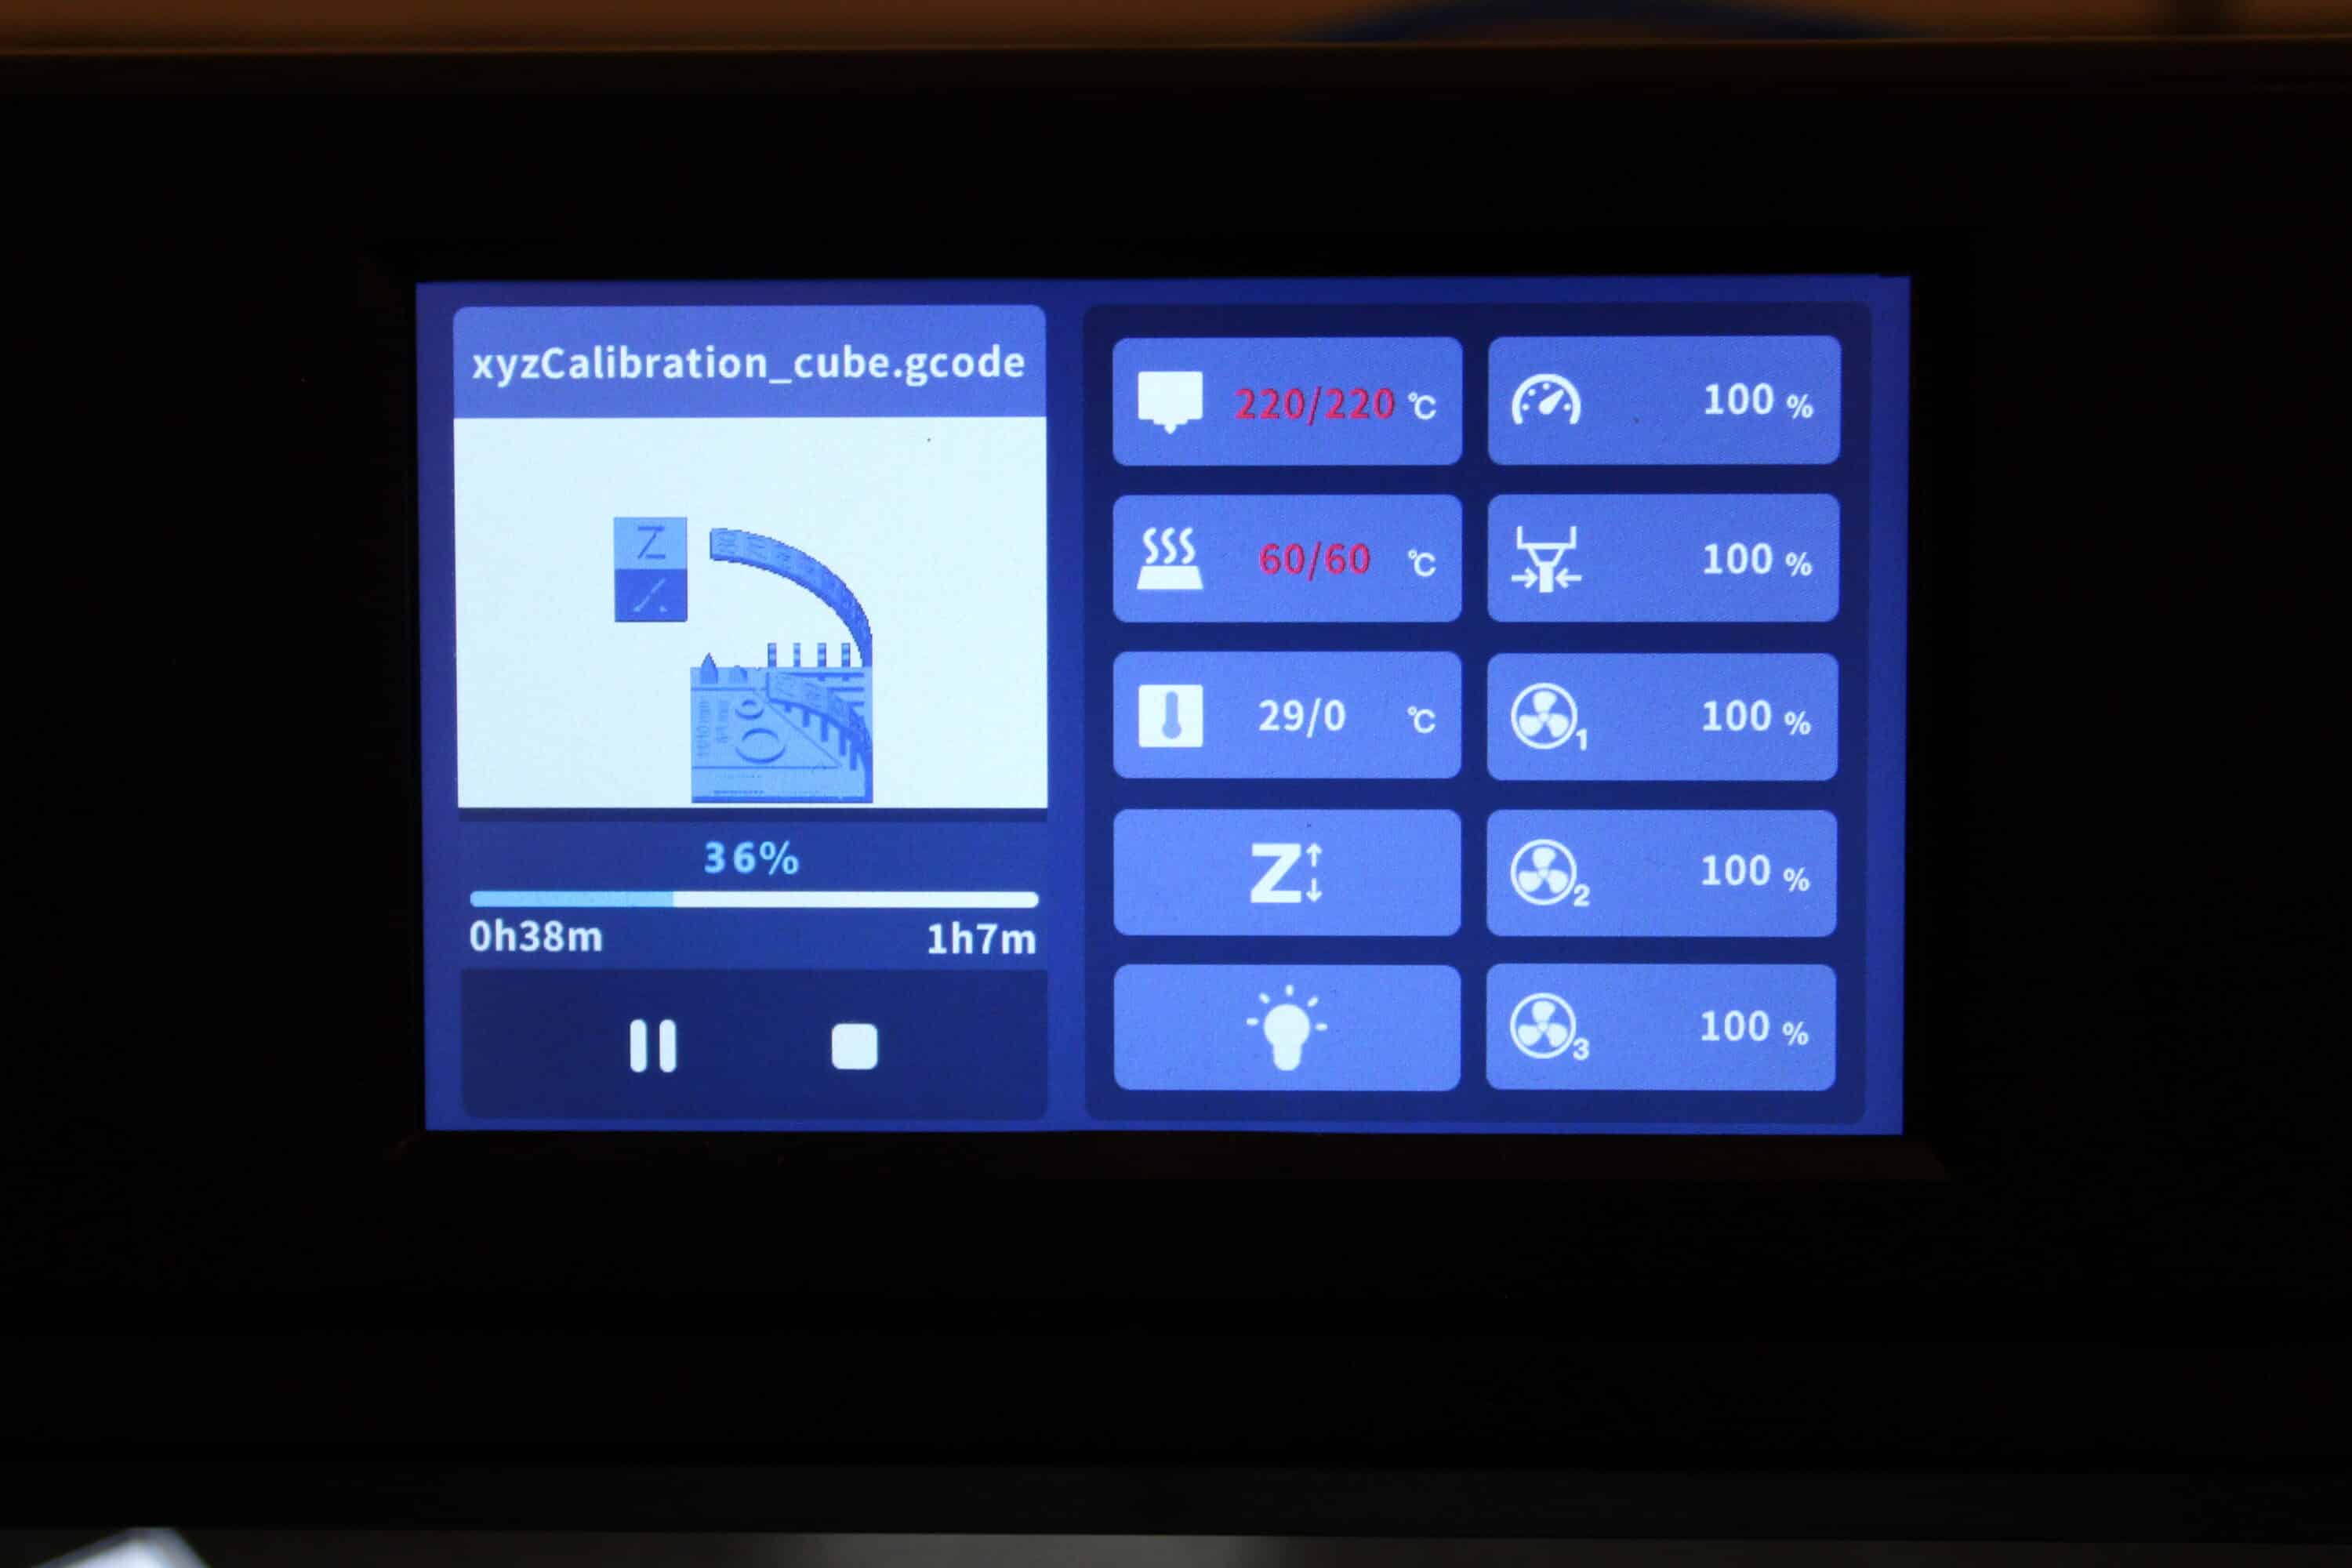
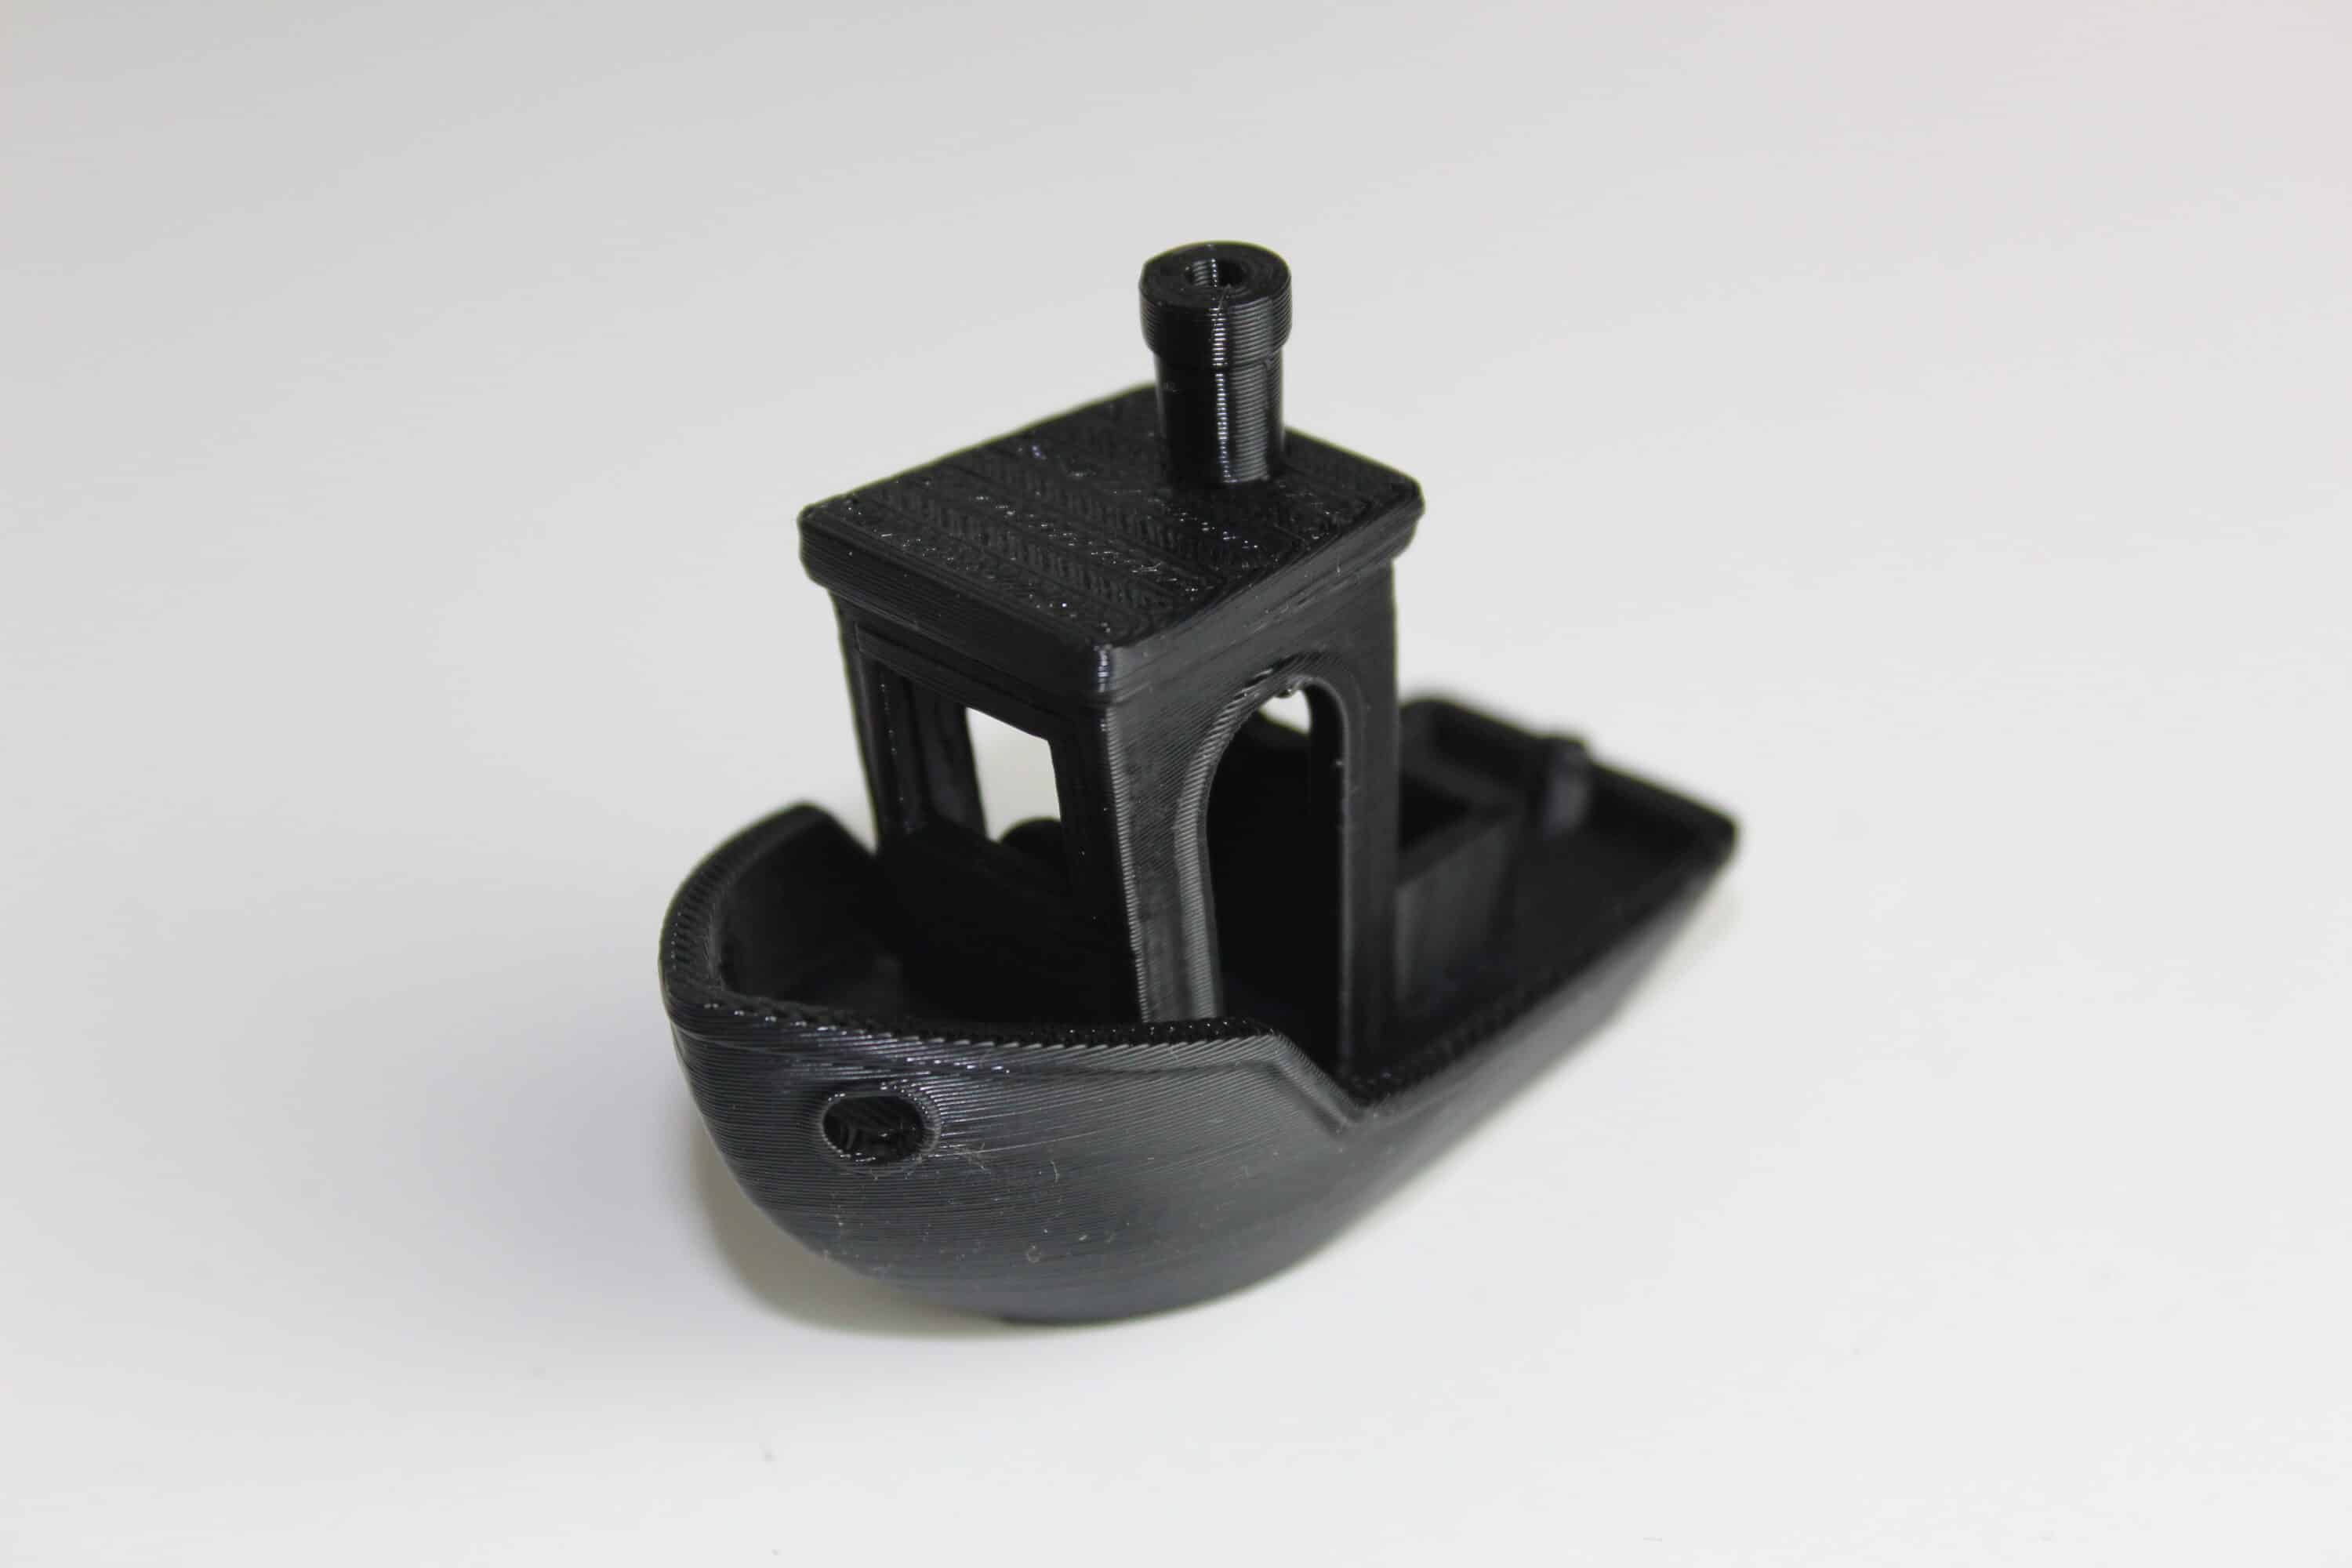
The USB stick included in the scope of delivery already contains some test files in GCode, e.g. the Benchy. So you can start testing immediately after unpacking and setting up.
In addition, there is QIDI’s own slicer “QIDISlicer” – you can store your printer on it and receive the recommended default settings directly. There are also default settings for the filament. Of course, you can calibrate it more precisely later – but a very good guide value is already provided here.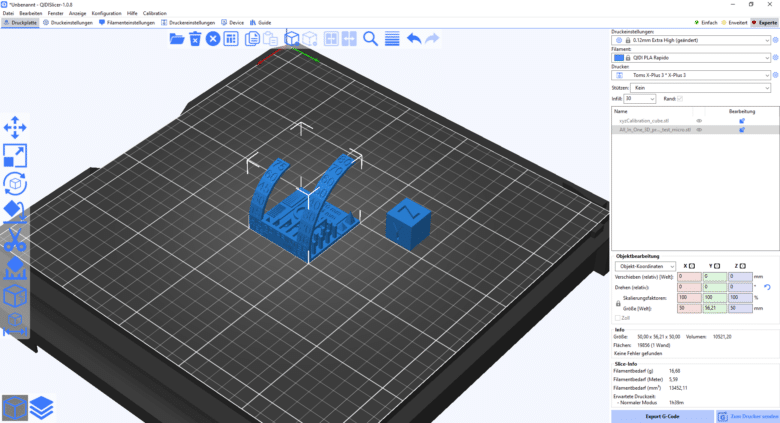 The standard settings are also marked – deviations are highlighted. If you want to change something for a test, for example, you can see directly where there are deviations.
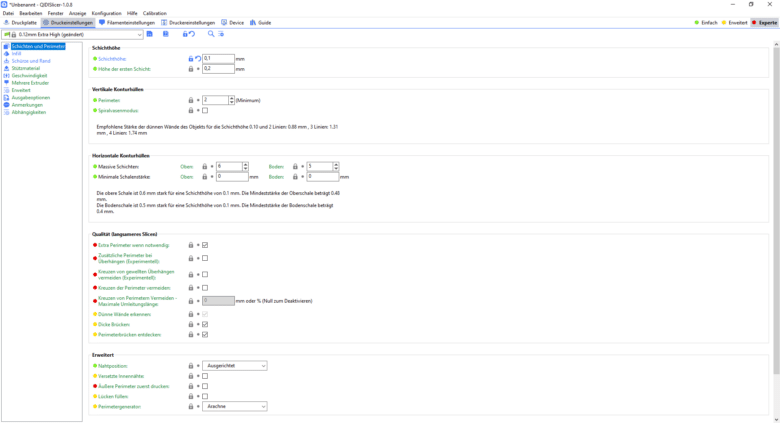
The Klipper firmware ensures that this can also be viewed in the program using the web interface. This is very much intended for advanced use – a lot can be done at command line level or by adapting the config files, but there is no simplified interface for beginners. For example, with Klipper you can store a webcam in the config – even if there is a manual, intuitive tends to be different. The target group is clear. Even the configuration of pressure advance and flow rate, for example, is now done via the QIDI Slicer software – but you only get a template to print out and are “left alone”. Of course, when it comes to speed, this tends to be basic knowledge, but a short introduction for beginners would always be desirable.
Use in everyday life
- Translation into German sometimes bumpy
- Fans always turn to 100%
- Print results okay to good
- Heating up the printing plate takes quite a long time
- Processor quite slow
The QIDI slicer is relatively intuitive, so you can get started straight away. To start with, we printed a benchy using the supplied (and customized) GCode – this takes about 16 minutes. If you ignore the heat-up time! In case of doubt, this can take up to 5 minutes.
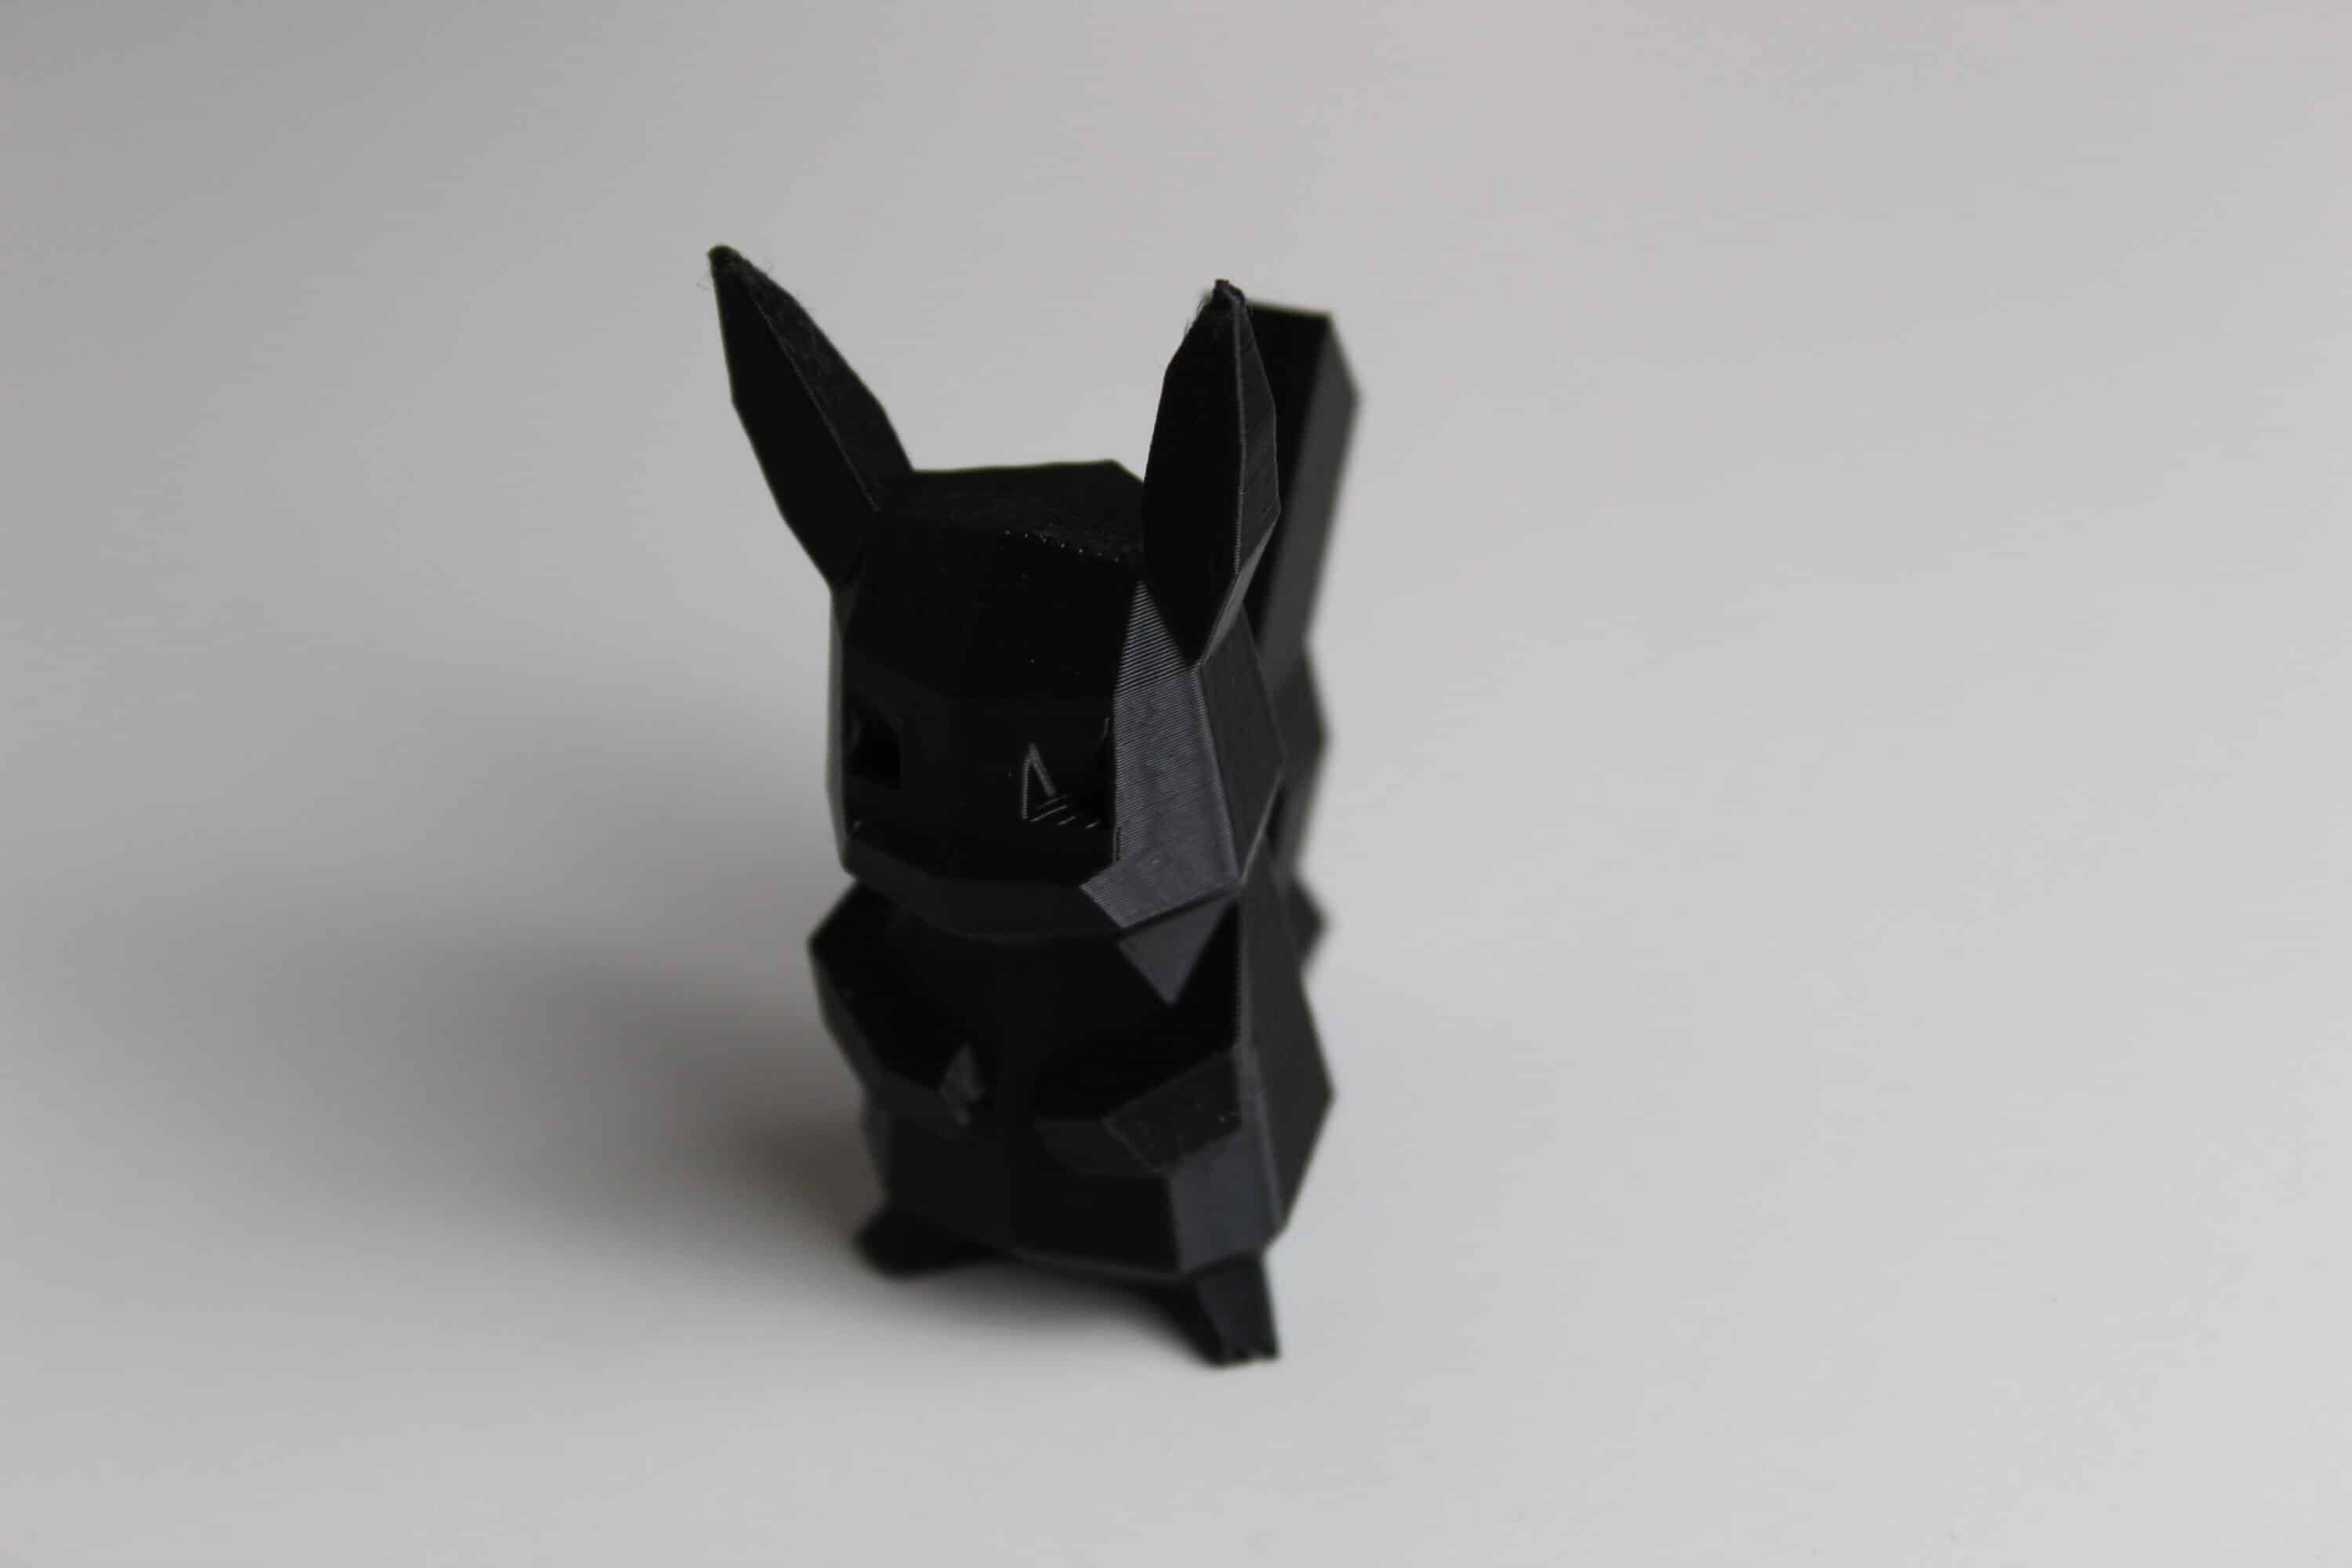
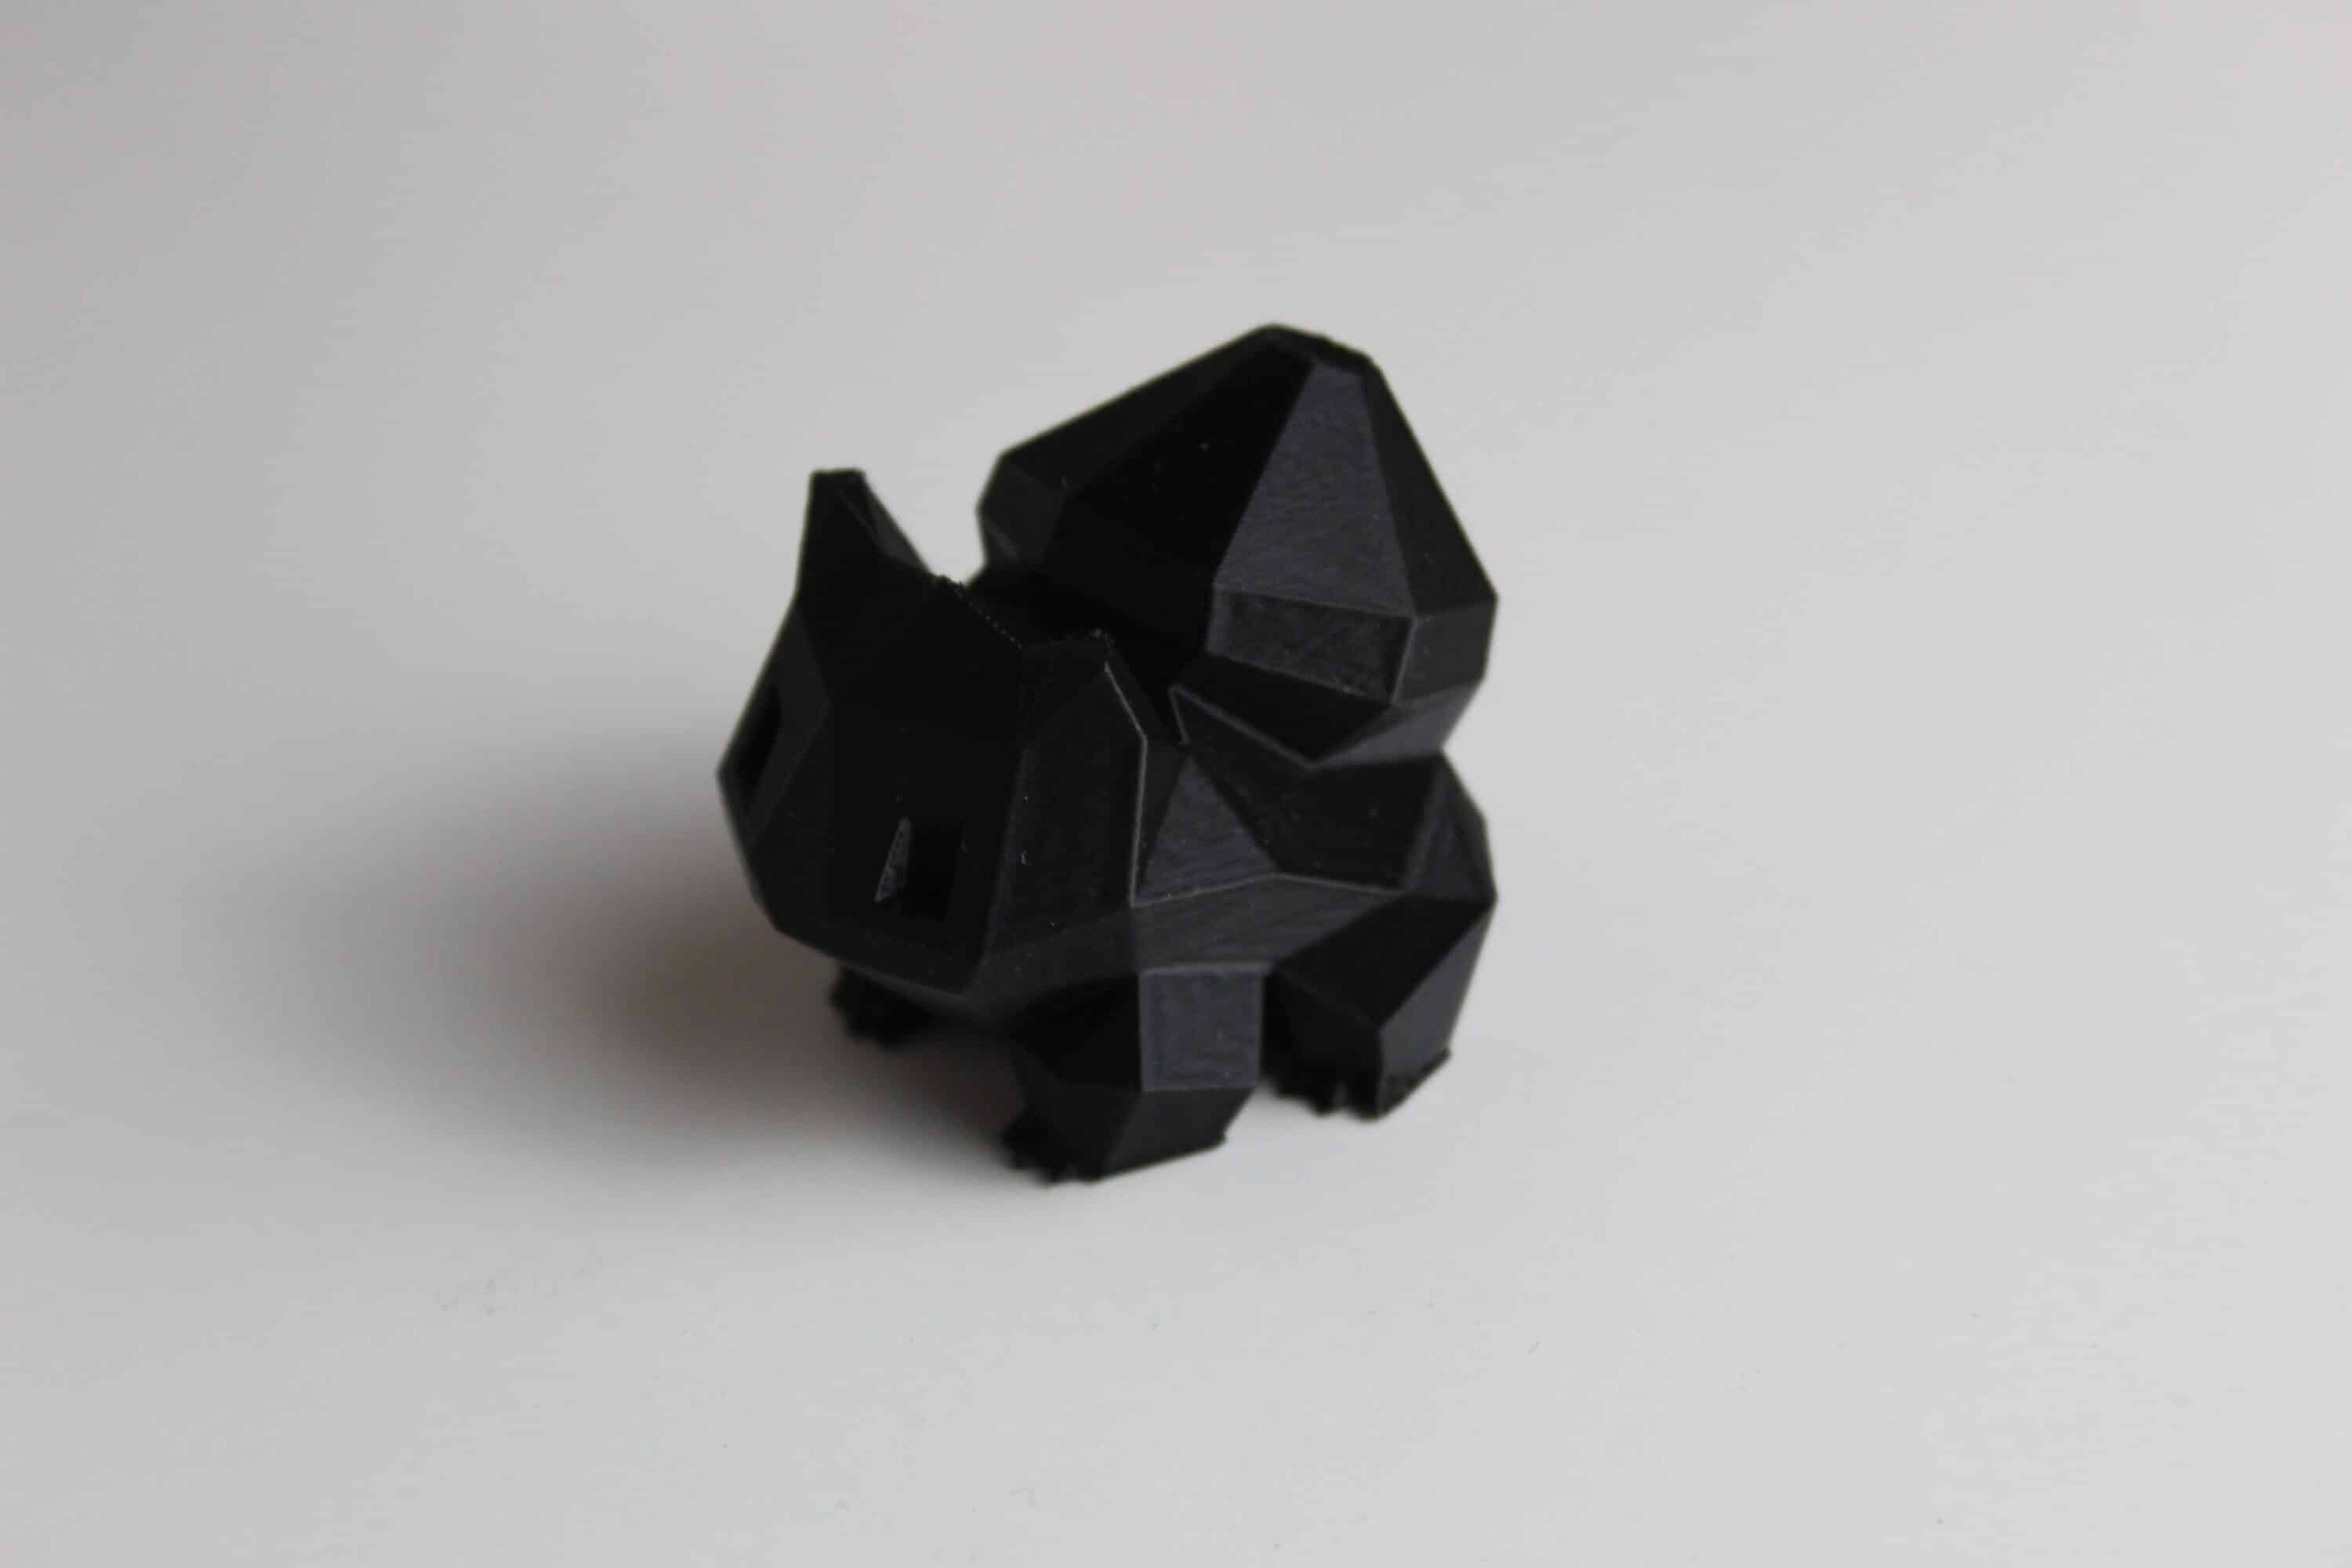
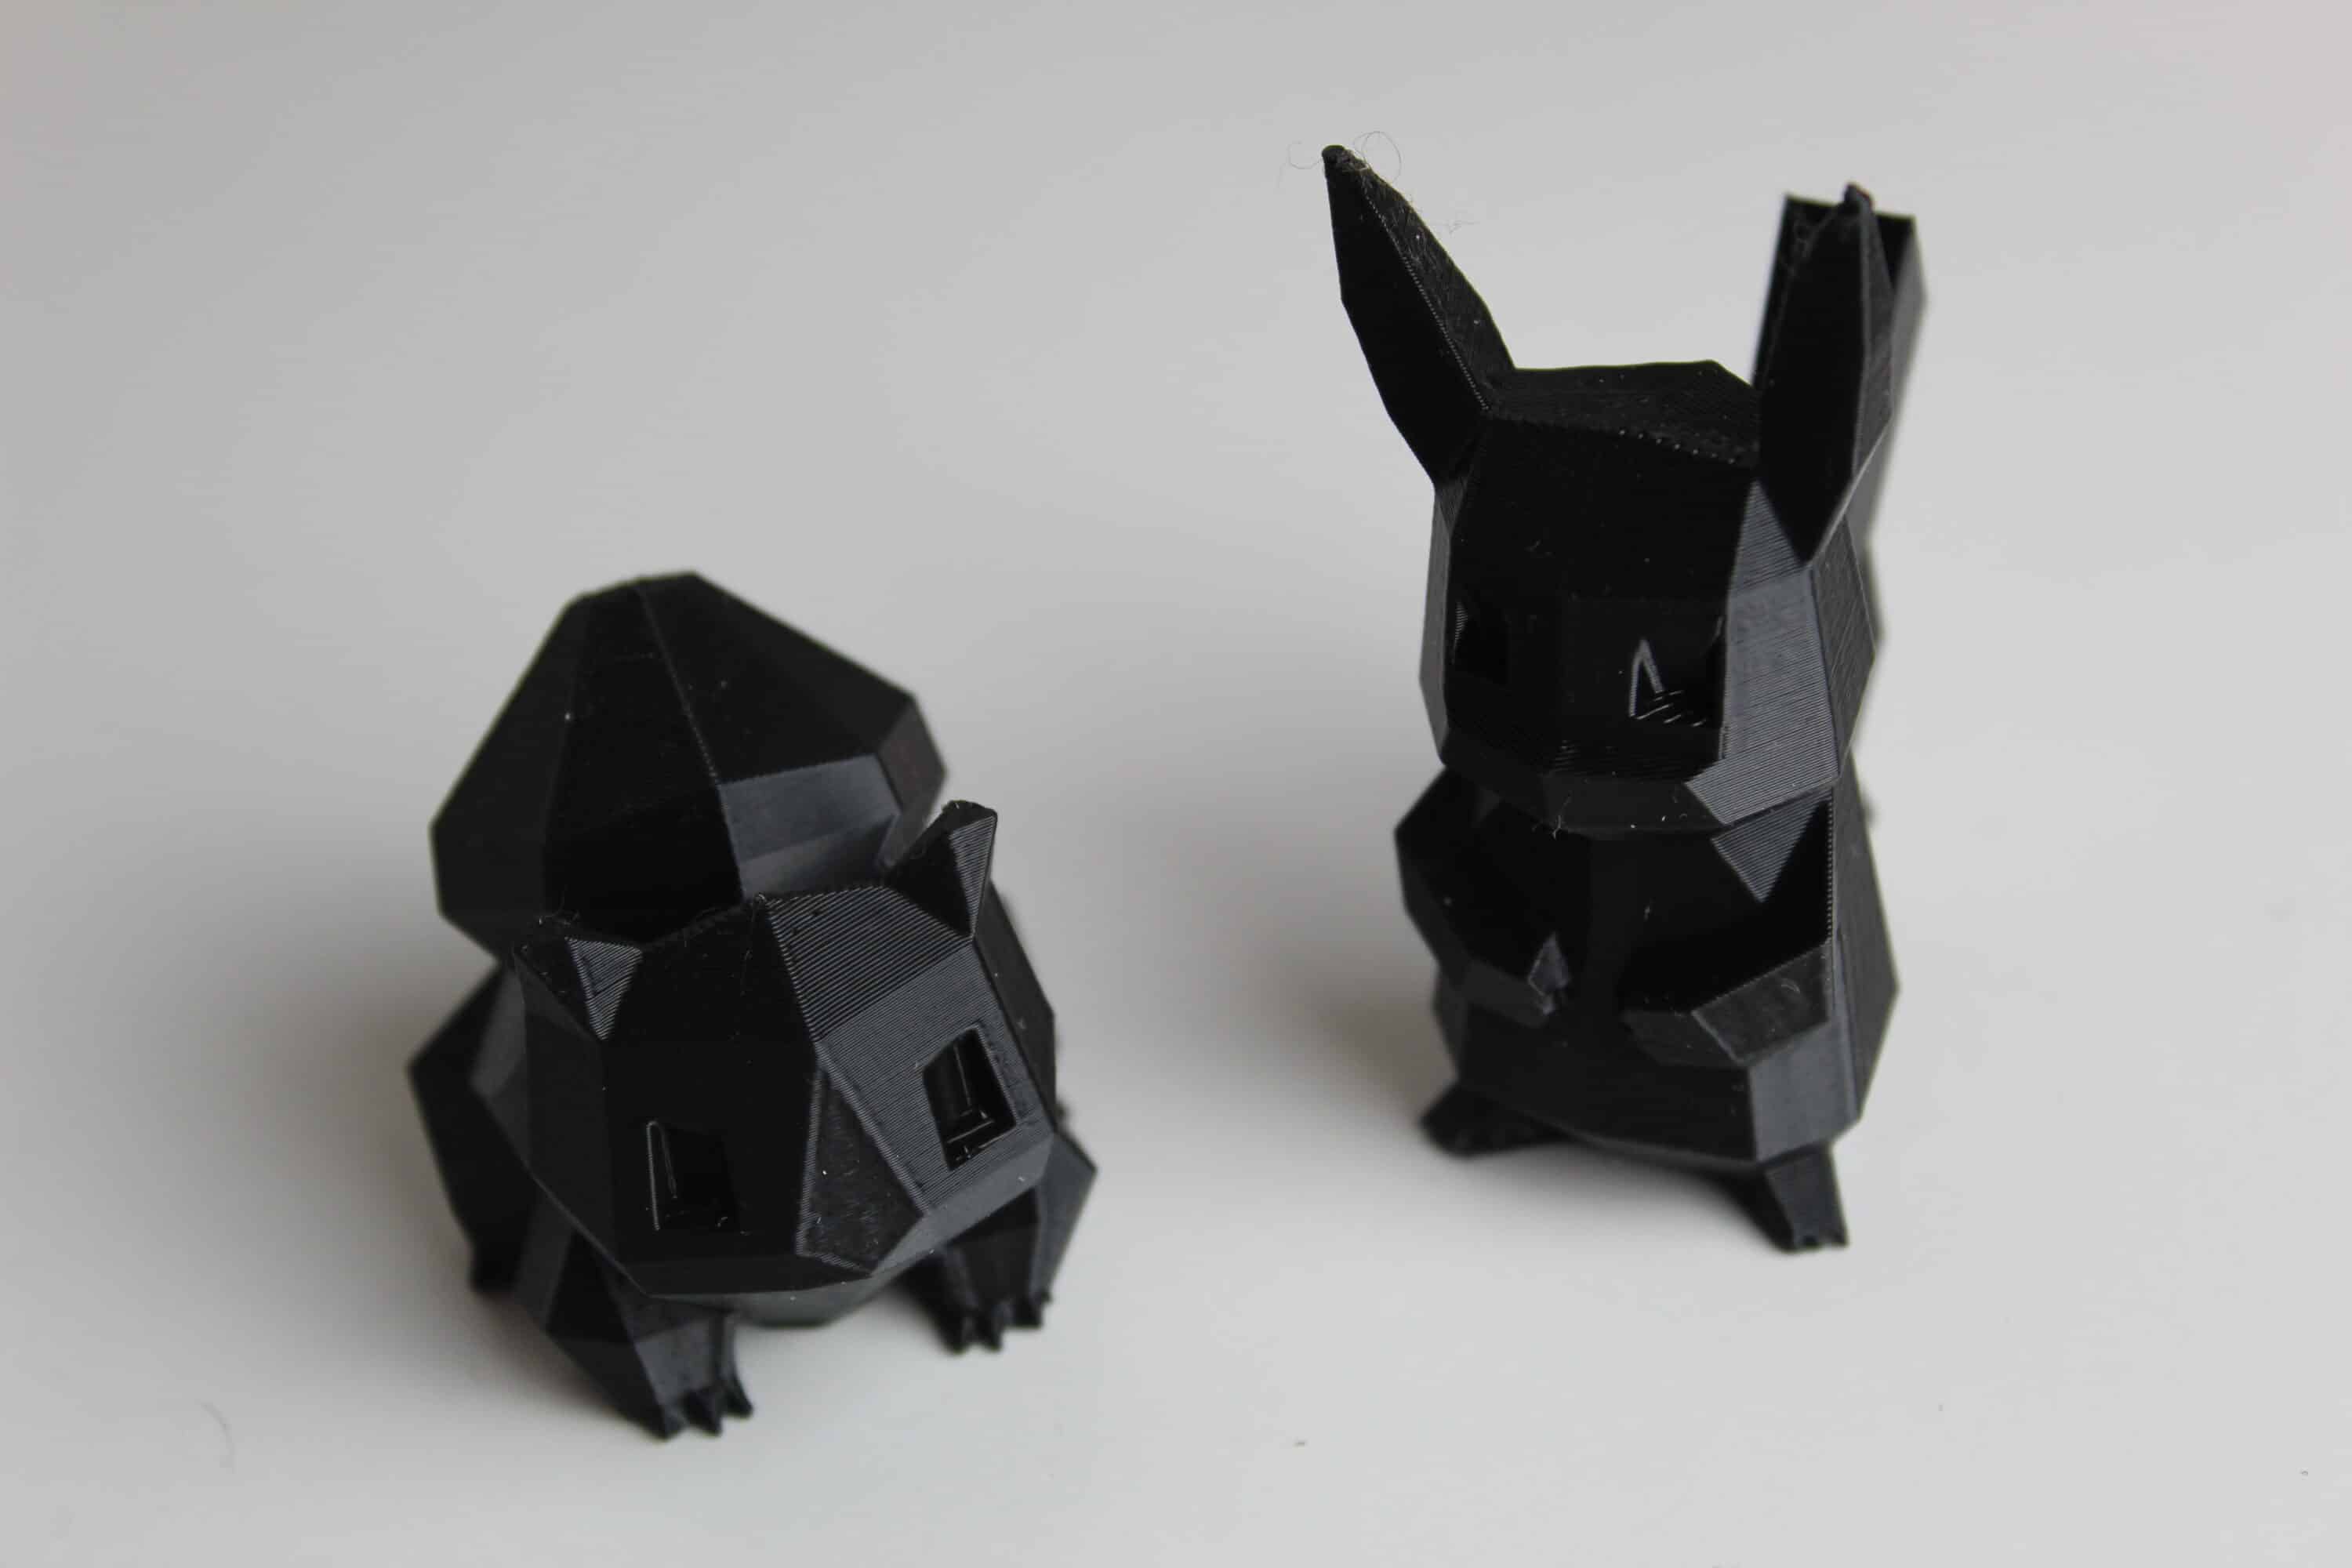
The printing times are very good. you have to be able to print a benchy in 16 minutes. The quality of the printed parts is also very good. Even without further adjustments, the printed works come out visually high quality.
There is no recognition of whether filament is actually being printed. For example, the filament slipped when the printer was moved – it could no longer feed it in. Nevertheless, it continues to “print” happily. Detection would be useful here. The filament also tore once without any external influence – again without observing the print; the part was unfortunately only half finished. Even if a part comes loose due to insufficient adhesion – which tends to be the case very rarely; the adhesion is great – it is happily pushed to the end.
So far so good – let’s optimize the print result. Pressure Advance and flow rate are on the agenda. As soon as I start, the printer flies out of the network. Well, I restart it – no improvement. Home network checked, no other devices causing problems. The next day it miraculously started working again. Strange. This may be an isolated case, but we didn’t want to keep it from you.
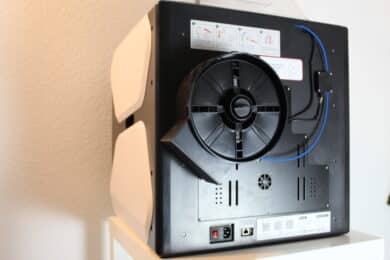
Our biggest criticism would be the standard position of the filament. Behind the printer – why? You don’t want to have the printer in the middle of the room. Unfortunately, you have to move the printer away from the wall every time you want to change the filament.
Conclusion
Overall, the evaluation is a question of the target group. If you are looking for a fast printer that achieves a solid to good print result, you will find a suitable product here. If you value all-round features in the more upmarket price range – such as an integrated webcam, error detection, filament change during printing, etc. – this is the right printer for you. – this is the wrong printer for you.
The open firmware is certainly great for professionals, but for beginners the explanatory GUI, such as Bambulab, is the easier way. So the printer is definitely not a bad buy, you just need to be aware of its strengths and weaknesses.

QIDI TECH X-Plus 3
Usability
Assembly
Noise level
Print quality
Value for money
82/100
Fast printer with good results - some additional features (error detection, possibly filament changer,...) would be desirable at this price, however