With the Anycubic Photon Mono X, the manufacturer from China wants to offer a convincing 3D printer that scores with a particularly large build space, Wi-Fi, 4K monochrome display and other exciting features. Our Anycubic Photon Mono X test reveals how well the model does and how beginner-friendly the resin printer is.
Technical data of the Anycubic Photon Mono X
| Printer Technology: | LCD-based SLA |
| Dimensions installation space (L x W x H): | 270 x 290 x 475 mm |
| Maximum print speed: | 60 mm / h |
| Leveling: | Manual |
| Light source: | High quality (wavelength 405 nm) |
| XY resolution: | 0.050mm; 3840 x 2400(4K) |
| Material | 405nm UV resin (resin) |
| Slicing Software: | ANYCUBIC Photon workshop |
| Compatible input formats: | STL, OBJ, AMF |
| Connectors: | USB type-A (2.0); WLAN |
| Controls: | Touch screen; Smartphone app (Android & iOS) |
| Weight: | 10.75 kg |
| Price: | € 499.00 * |
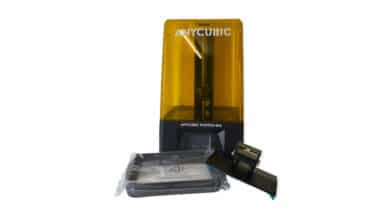
Scope of delivery of the Anycubic Photon Mono X
After the rather compact and lightweight Anycubic Vyper (our review), the Anycubic Photon Mono X lands in our test lab as an absolute heavyweight. The package weighs a whopping 31 kg, which first needs to be transported to the place of use.
At least the 3D printer is securely packed and covered in lush foam, so that nothing can (or should) break even during rough transport. Everything that is necessary for use is included in the scope of delivery.
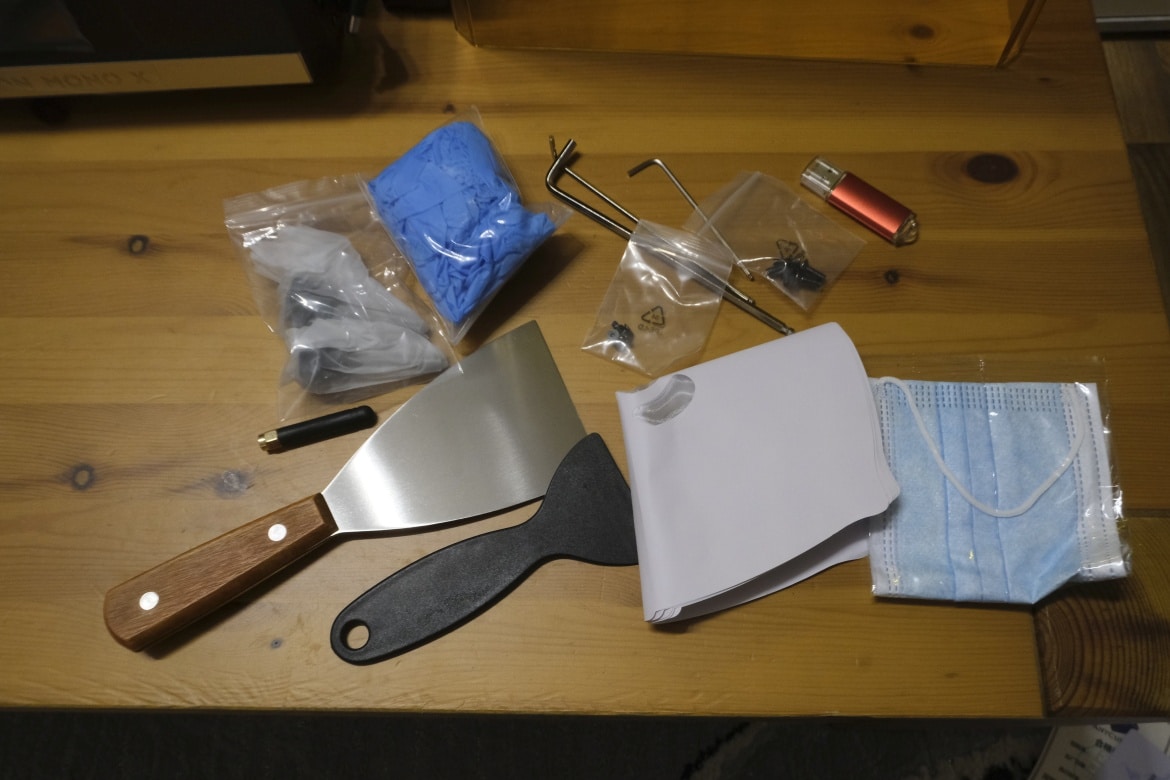
Besides the printer and power supply, the manufacturer includes a lot of accessories. These include, for example, two spatulas, an Allen wrench, three pairs of disposable gloves, face masks, a manual, a USB stick and a sheet for leveling the Anycubic Photon Mono X.

Commissioning
Particularly practical for newcomers to 3D printing: the Mono X arrives at your home fully assembled, no assembly is necessary. Commissioning is correspondingly simple. Simply unpack, connect and calibrate the printing platform, and you’re ready to go.
Optionally, you can set up a Wi-Fi connection to start print jobs via app or monitor the print status. Surprisingly, the setup of the WLAN connection is unnecessarily complicated:
A text file, which can be found on the included USB stick, has to be provided with the user’s own network name and password and saved. You then insert the stick into the 3D printer and start it like a print job. The Mono X then automatically connects to your network. A bit cumbersome, but at least it works reliably.

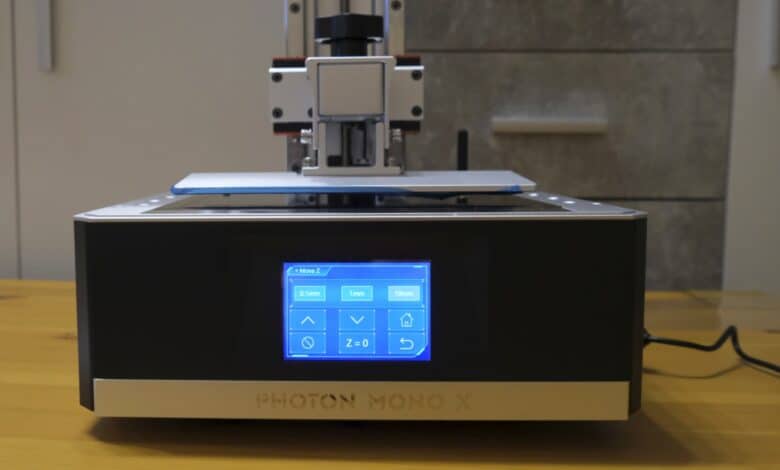
Design and workmanship
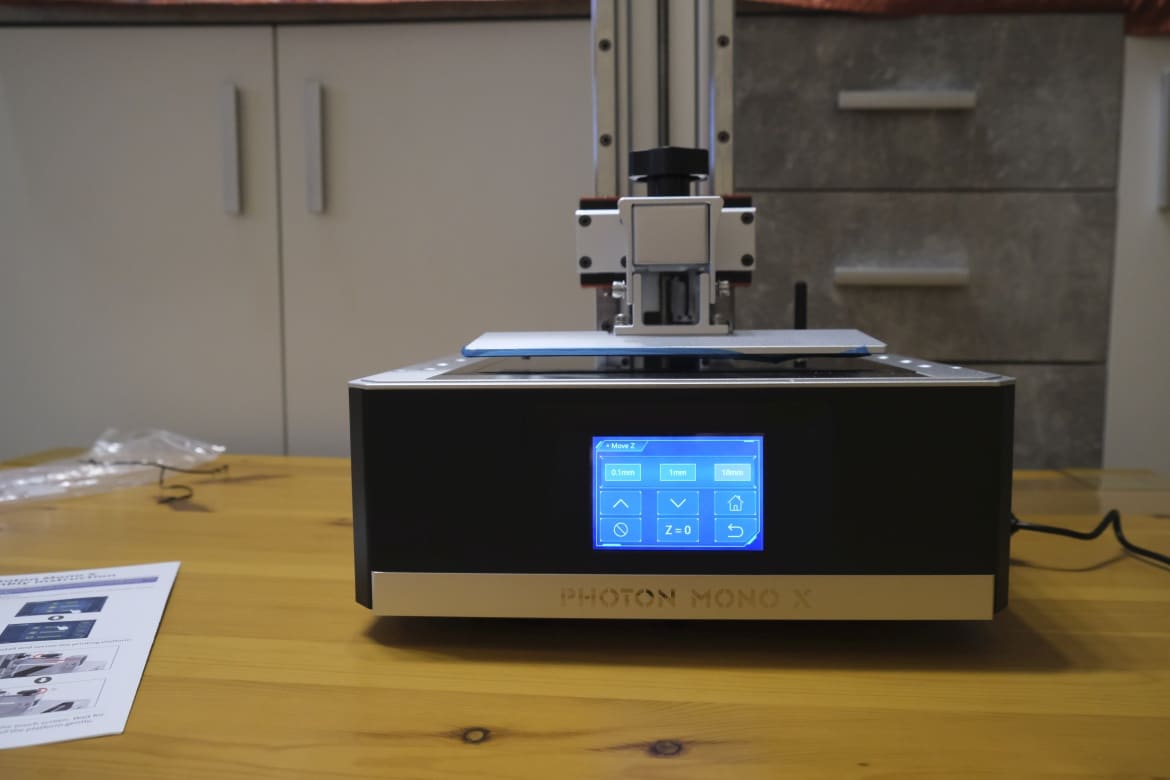
“Bigger is better,” is the manufacturer’s motto for the Anycubic Photon Mono X. This also applies to the design of the 3D printer. With a size of 270 mm x 290 mm x 475 mm (L x W x H), it takes up a lot of space. The net weight of around 10.75 kg is also impressive.
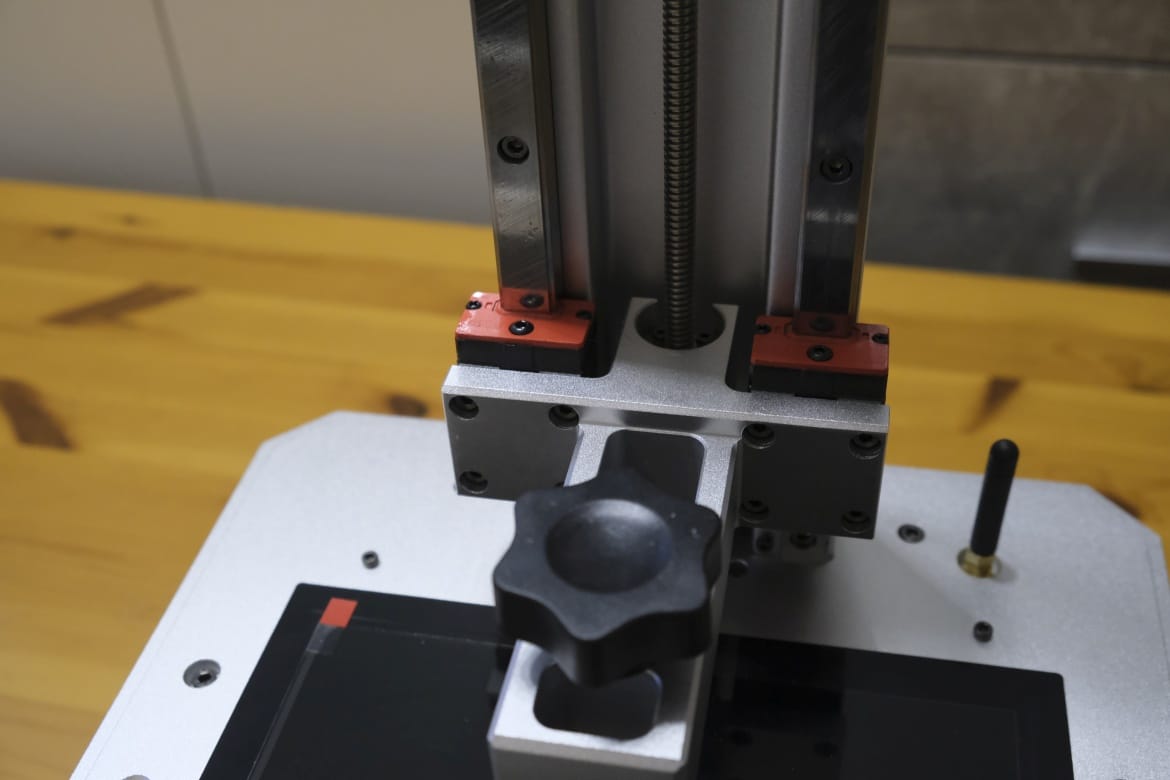
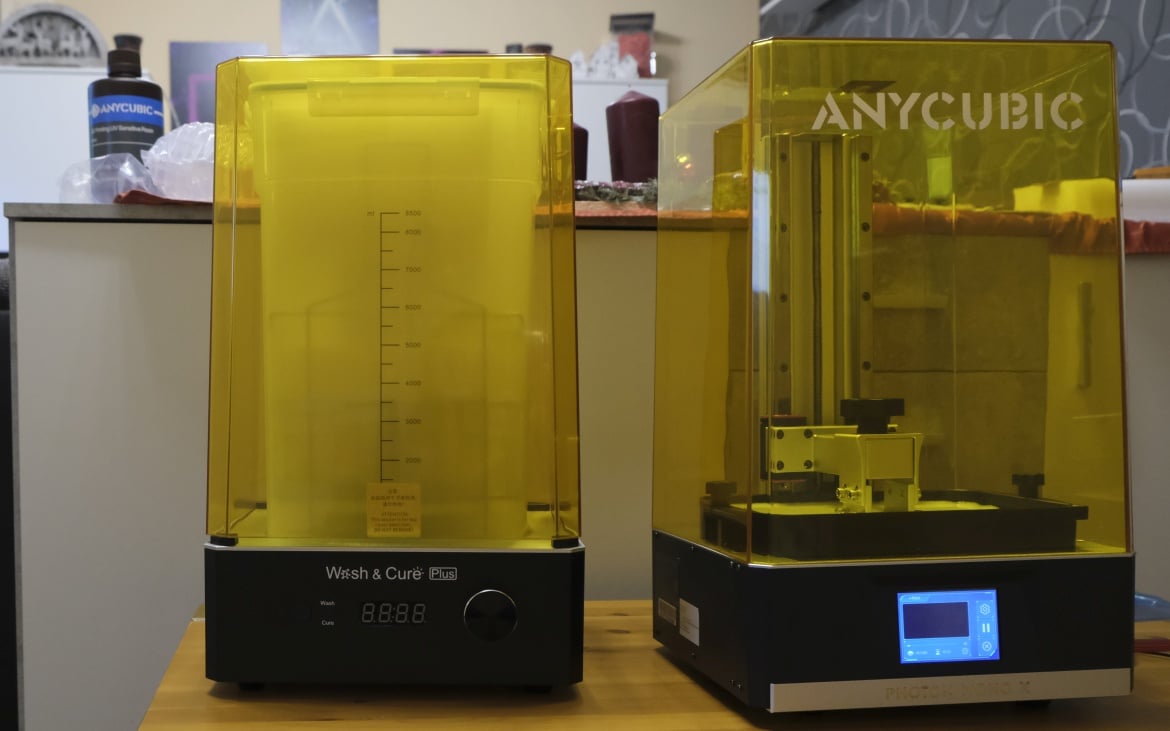
In terms of design, the manufacturer relies on a metal base and a transparent, yellow hood with the manufacturer’s logo printed on it. In terms of design, the Mono X consists of a base unit with a z-axis mounted on linear rails, a removable printing platform, a large resin tank and the aforementioned yellow plastic cover.
With the exception of the hood, the Anycubic Photon Mono X is almost completely made of metal, and the 3D printer’s build quality is accordingly very high. The device feels robust.
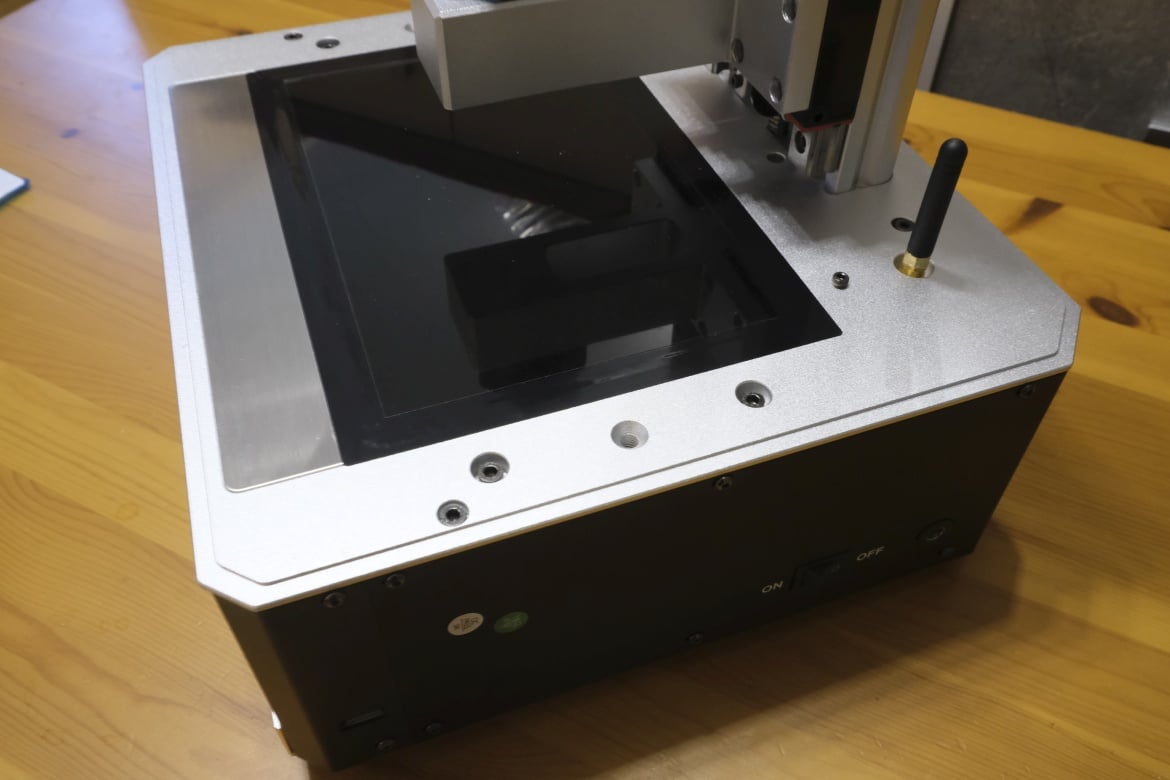
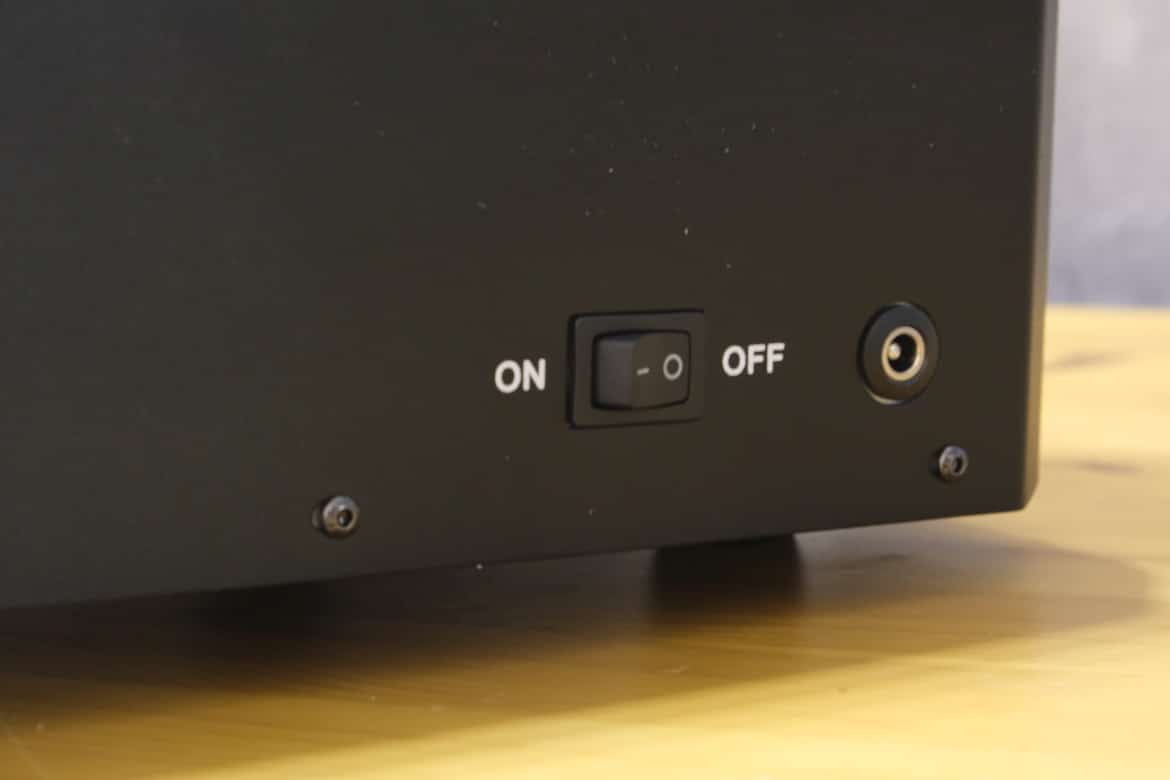
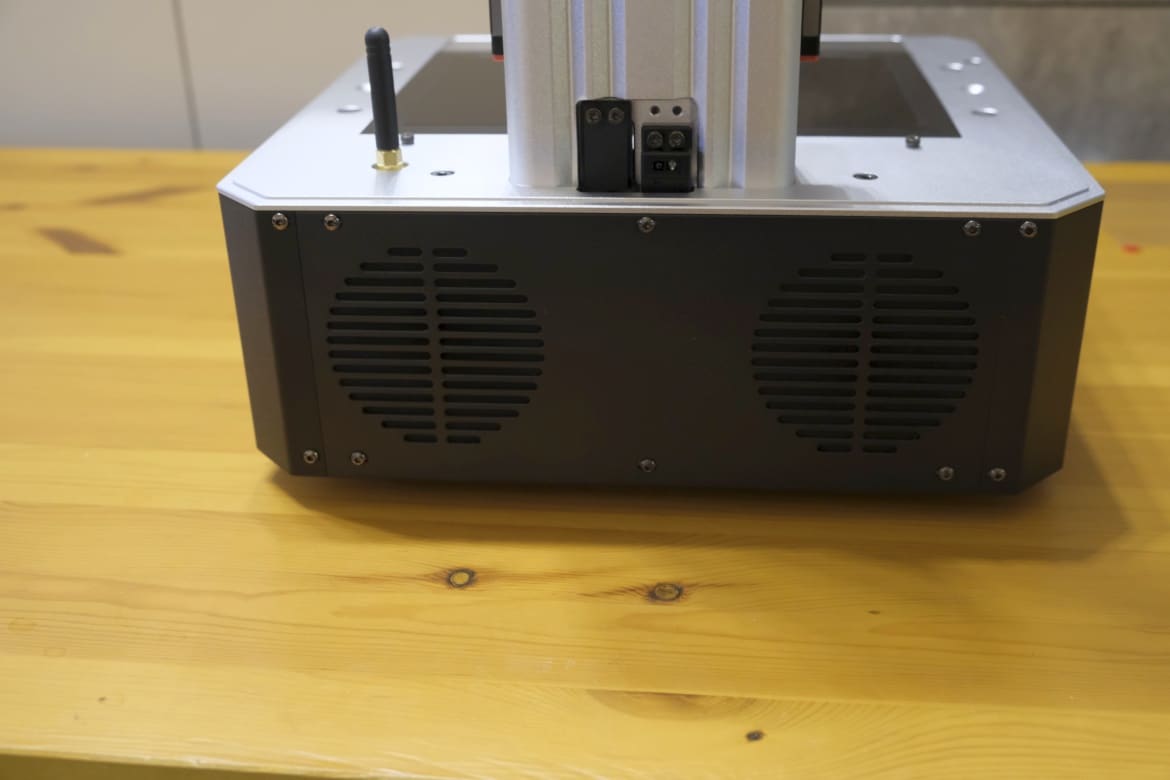
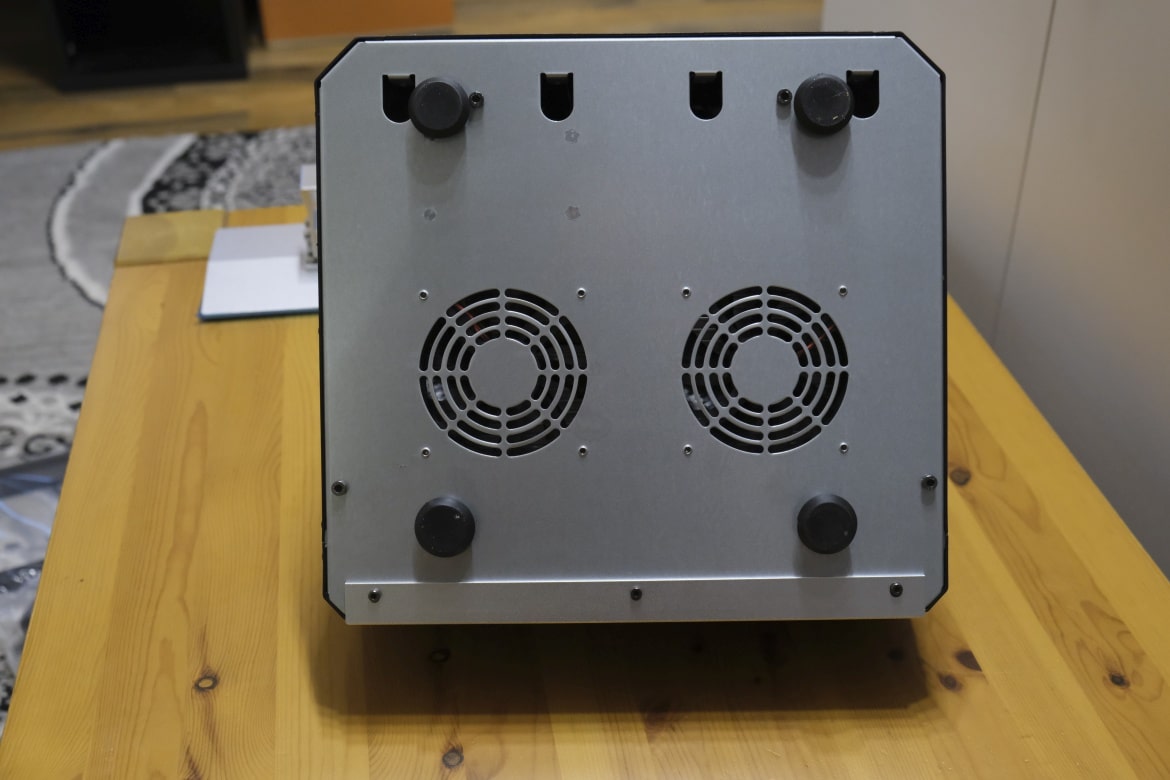
On the front of the base, the manufacturer installs a 3.5-inch touchscreen that scores with a sharp display and precise operation. The only physical button is the on/off switch on the back. Next to it is a USB port. Anycubic places the Wi-Fi antenna above the resin tank to ensure good signal quality.
The 3D printer itself finds a secure hold on surfaces thanks to solid rubberized feet. All in all, the build quality of the Anycubic Photon Mono X leaves an excellent impression. There is nothing to complain about here.

Leveling and operation
Getting the Anycubic Photon Mono X up and running is absolutely simple, even if you’ve never worked with a 3D printer before. The English-only instructions explain everything in just seven steps.
Once you have unpacked all the parts, the Mono X only needs to be connected to the power supply and switched on. Then you have to lift the Z-axis of the printer by 10 mm in the main menu under “Tools” to be able to insert and screw the printing plate. All necessary tools for mounting are included in the delivery.
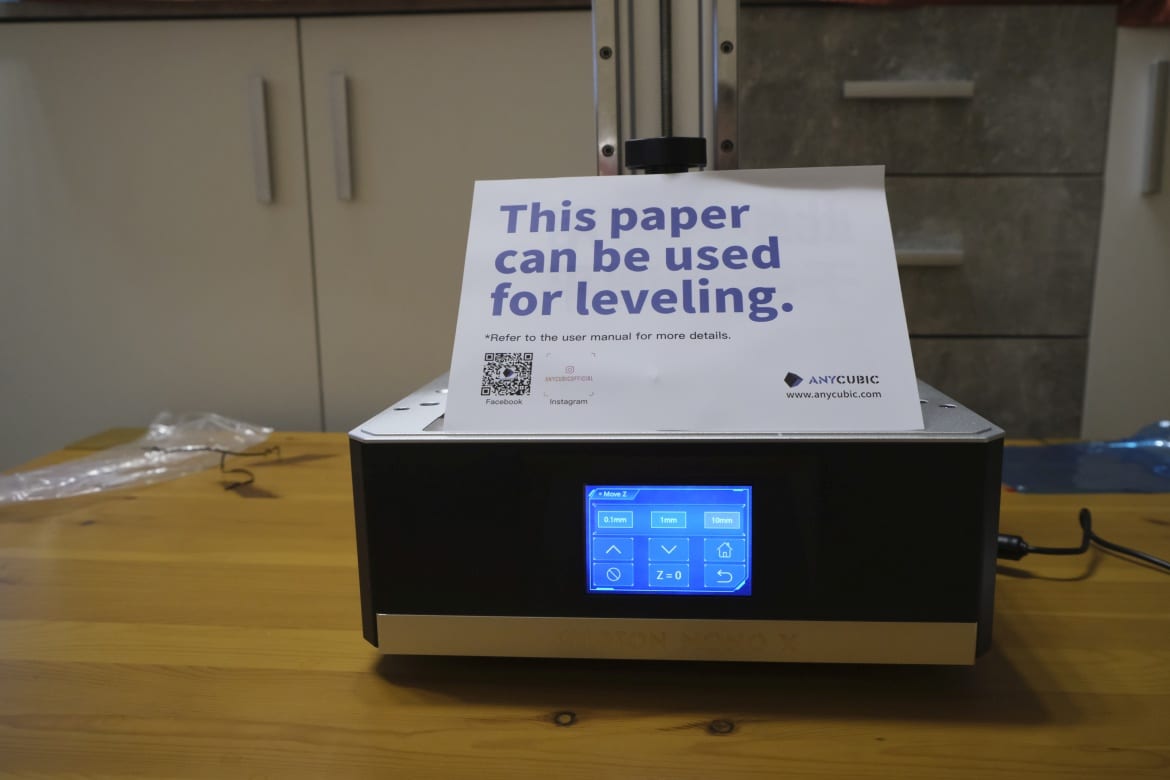
And so, even as a layman, the Anycubic Photon Mono X is ready for use within a few seconds. Leveling the 3D printer is also quick. Simply place the enclosed sheet of paper under the printing plate, press the home button on the touchscreen and leveling starts. Pressing “Z=0” completes the setup.
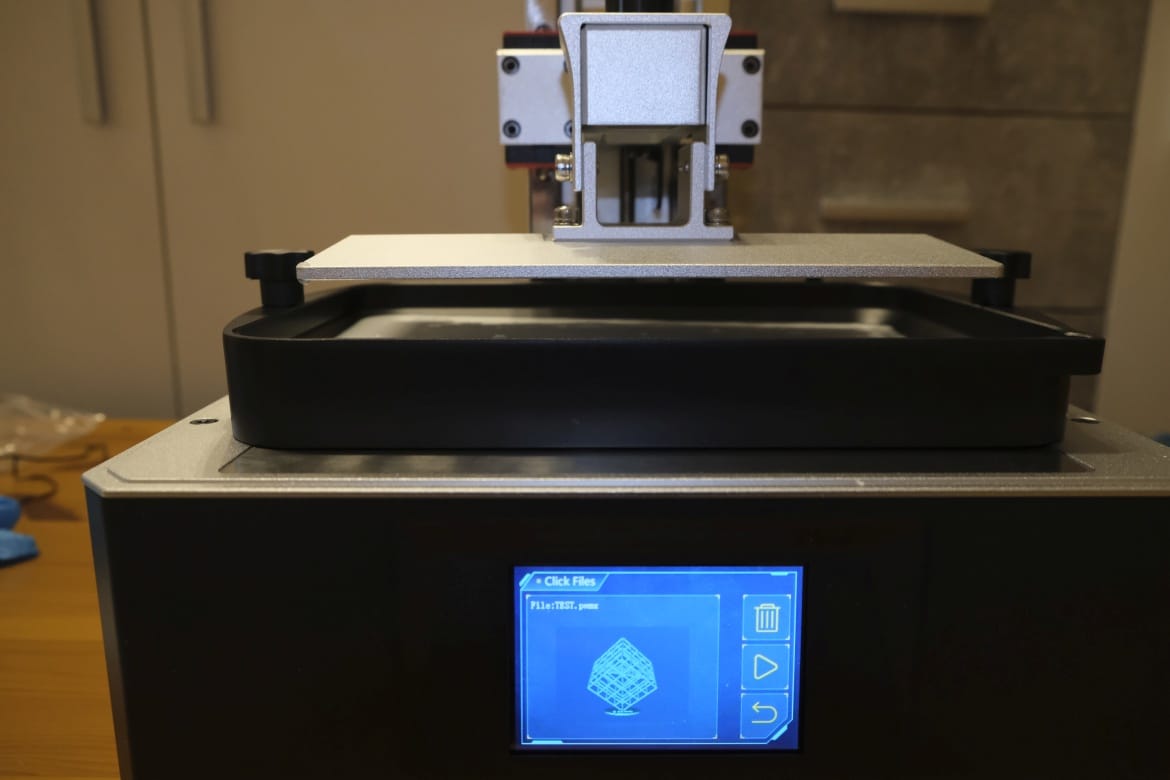
After a short recognition procedure, you only have to insert the resin tank with the help of two screws and you can start with the first print.

Printing with the Anycubic Photon Mono X
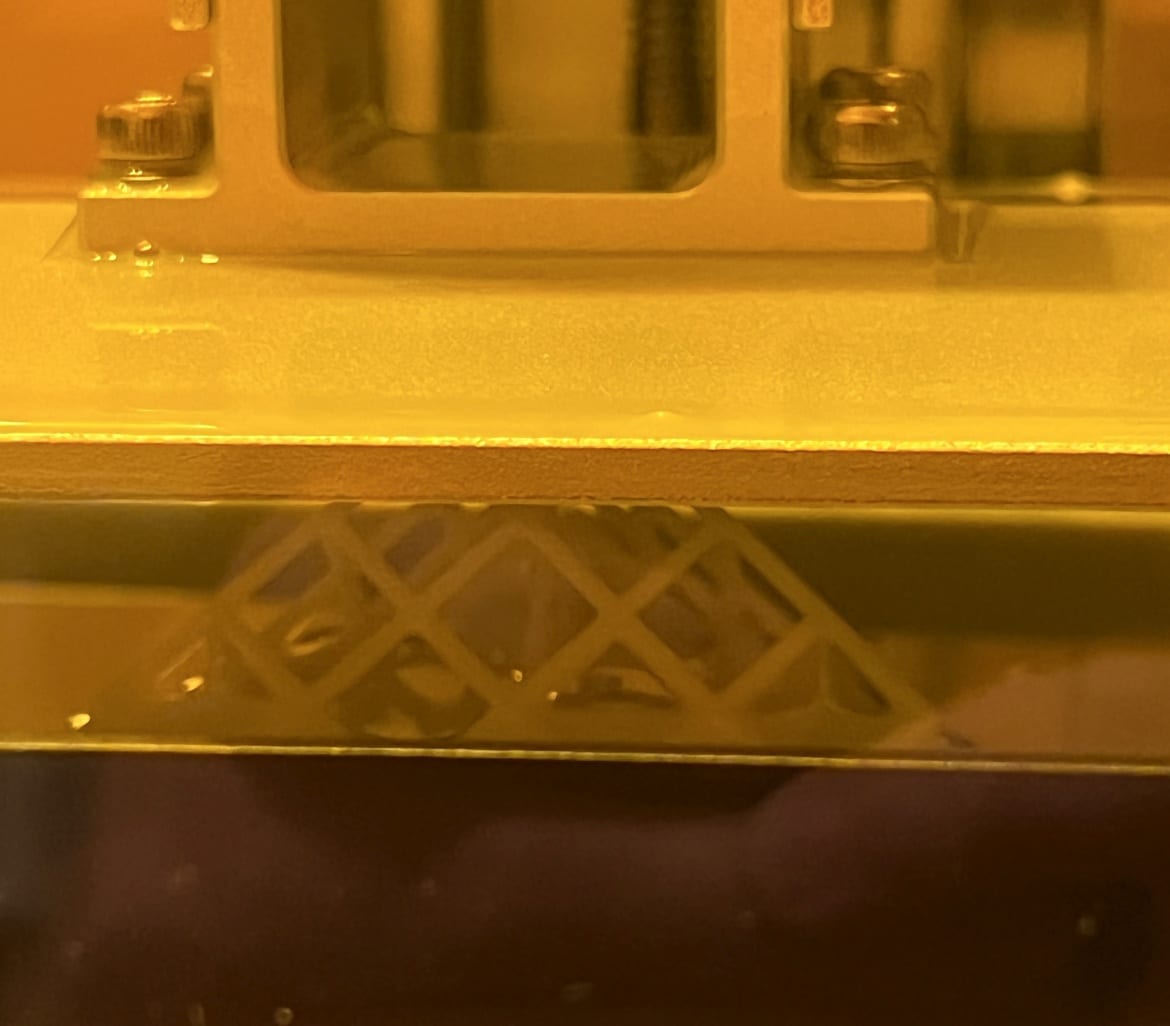
In the instructions, the manufacturer first recommends printing the test file contained on the included USB stick. This is an open cube, in the center of which two bars with the name of the manufacturer and model are positioned offset on top of each other.
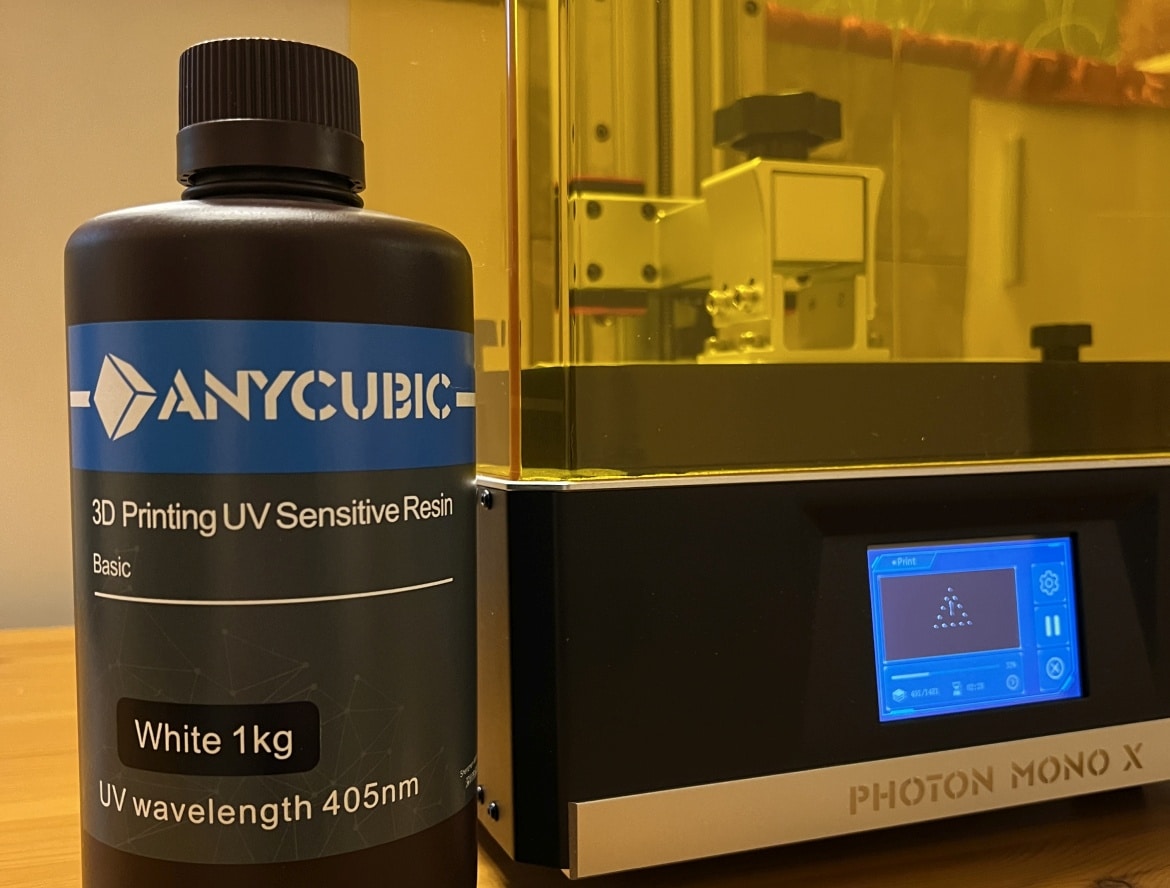
If there is a USB stick in the corresponding port, the printable objects are also immediately displayed on the touchscreen under the menu item “Print”. Now it’s just a matter of filling the resin tank – conveniently, manufacturer Anycubic supplied us directly with a kilogram of white resin for the test, so that we could print several objects directly.
It is important that when filling and touching the material, you not only put on the enclosed respirator mask (or one included in every household anyway due to the current situation), as well as one of the enclosed pairs of protective gloves.
Once the tank is filled, the printing process can be started with just one touch. Before that, you should place the transparent yellow lid over the 3D printer, which is held securely in place. And off goes the first print.

The Anycubic Photon Mono X as a layman
Three things struck me as a layman during the Anycubic Photon Mono X test: First, the prints take a relatively long time – even the 35mm diameter test object takes about four hours of time to complete. Okay, that is a decent value for a resin 3D printer. At most, the Mono X achieves a print speed of around 1.5 – 1.8 seconds per layer. That’s fast, but as a layman I would have thought that printing would be faster.
On the other hand, the fans (a total of four 80-mm fans) work very loudly for my taste. Compared to FDM printers, the volume is much lower, but the constant, loud fan noise over several hours is not really pleasant. It is almost impossible to have a conversation at normal room volume.
The third point is the unpleasant smell of the resin material, which spreads immediately after starting the test print. It is so penetrating that one is reluctant to stay near the printer.
<Furthermore, the manufacturer does not include a note that you should only use a resin printer in a well-ventilated environment anyway. Those who don’t know this risk their health.
Printing results of the Anycubic Photon Mono X
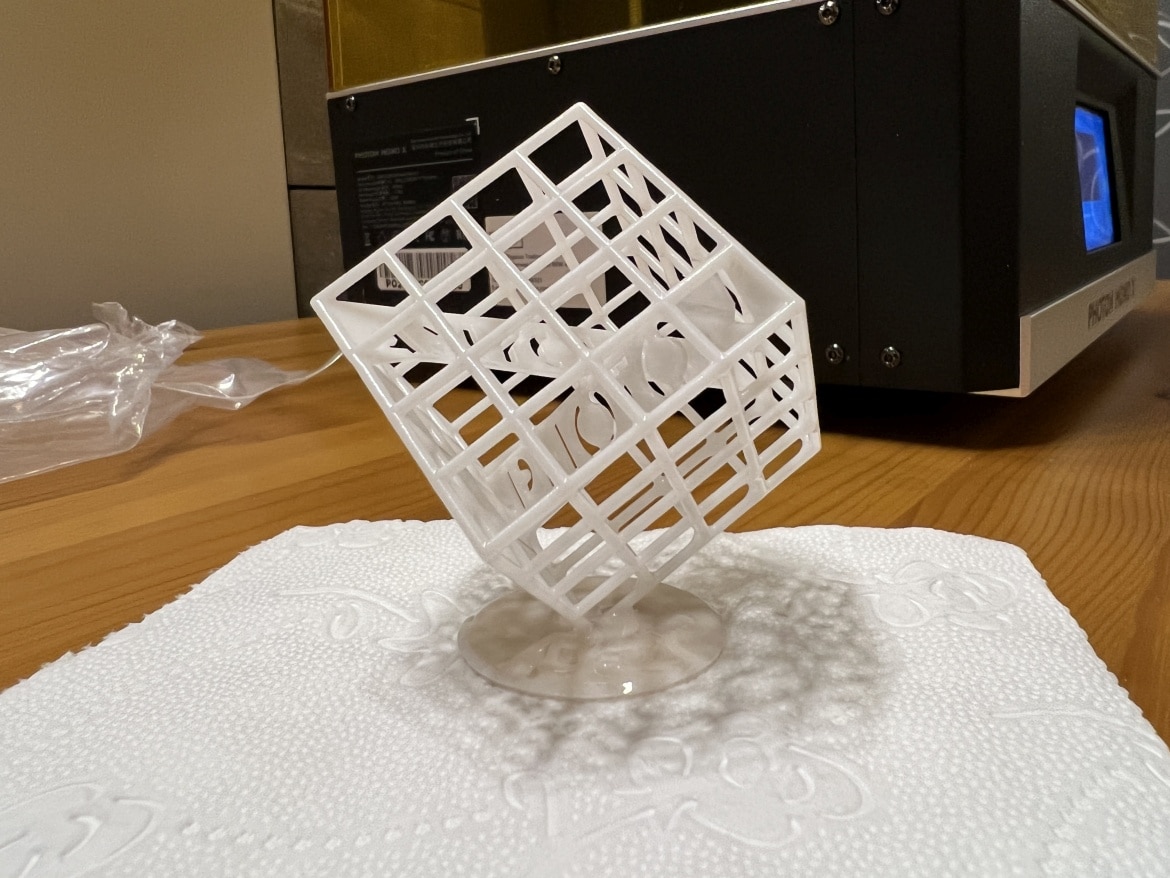
In terms of printing results, however, there is not much to complain about with the Anycubic Photon Mono X. Both the test print and some other objects succeed excellently right away. The manufacturer’s standard resin adheres excellently to the printing plate in most cases, so excellent results can be achieved.
However, useful information is missing here as well, so that two (probably too heavy) test objects detached from the printing plate during our test. Information about the reasons is simply missing.
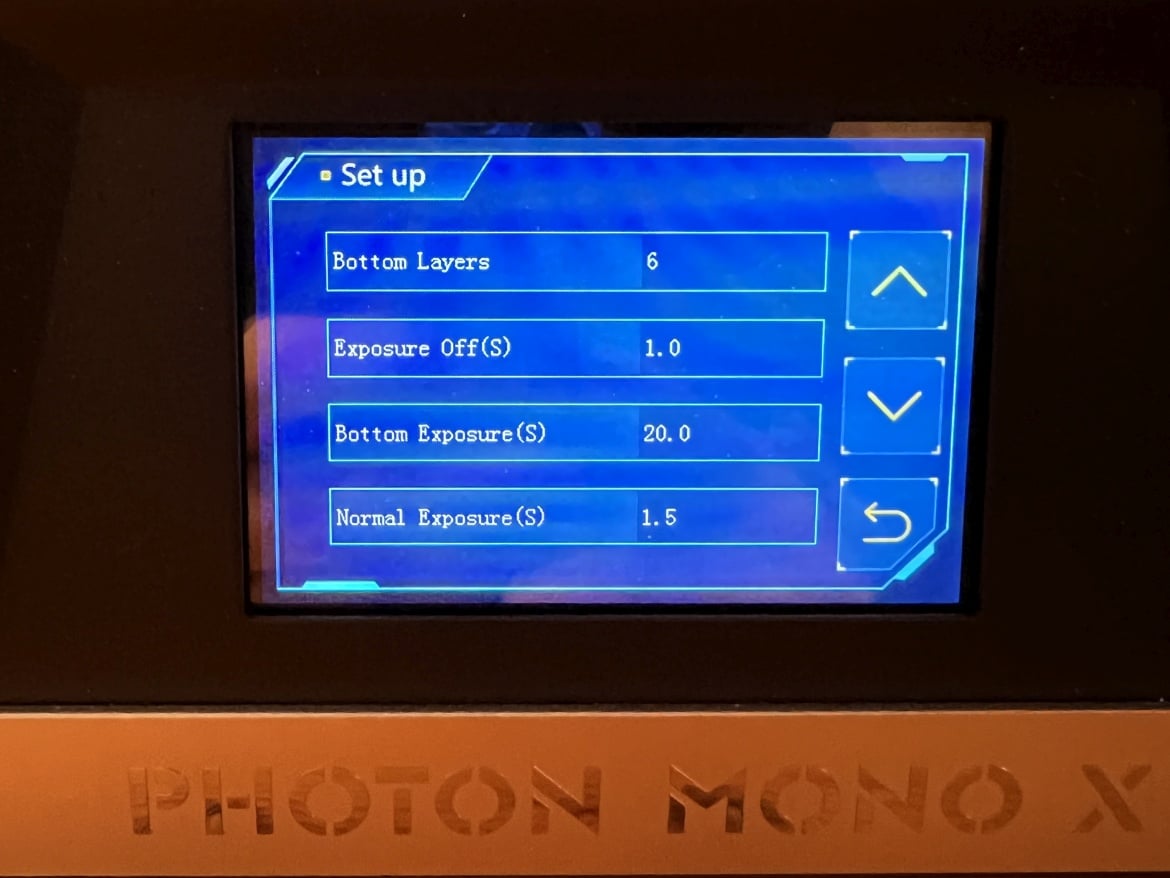
We did not need the option to adjust the exposure in the menu to achieve satisfactory results in the test. Even the finest details on the prints are excellently worked out and very well recognizable.

To get the cleanest and most detailed results possible, the print results should still be cleaned afterwards. The manufacturer provided us with the Wash & Cure Plus cleaning machine for this purpose, which also acts as a UV hardener. Alternatively, however, cleaning with the help of an ultrasonic cleaner or with the help of methylated spirits or similar is no problem.
Cleaning the resin tank
What unfortunately does not work quite as well is cleaning the aluminum resin tank, which holds around 500 ml. This does have a lip, with which excess material can theoretically simply be filled back into the bottle, but in practice this unfortunately works rather poorly than well. The result is a huge mess.
The FEP blade can be easily removed and replaced with the help of 14 screws. However, replacements are unfortunately not included in the scope of delivery. Getting it completely clean after printing is almost impossible. If you are interested in the Mono X, you should therefore buy another package ANYCUBIC FEP film to order.

Software
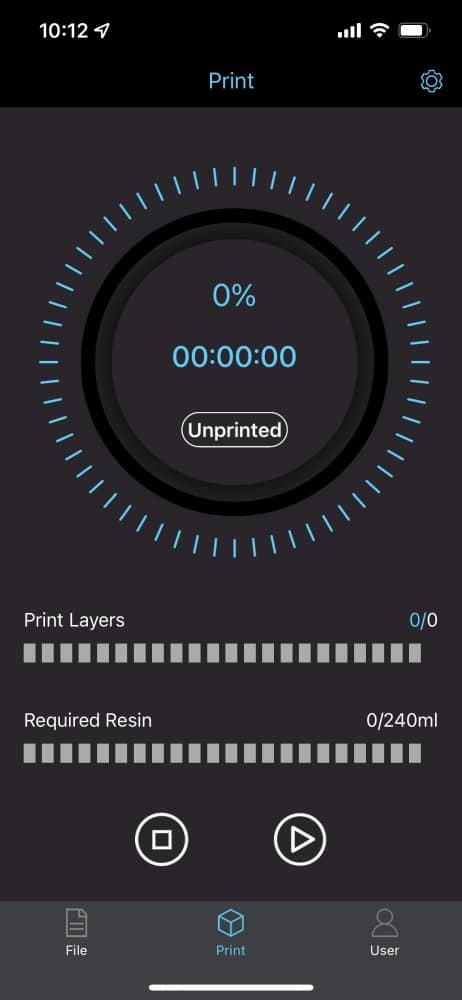
The software marks the only real weak point of the Anycubic Photon Mono X. This applies to both the smartphone app, which – once you’ve set up the printer’s WLAN connection – only outputs rudimentary information such as the remaining time of the current print. A direct connection between the slicer on the computer and the printer, on the other hand, is unfortunately not possible.
Otherwise, a so-called slicer is required on the software side. Here, Anycubic’s in-house solution Photon Workshop comes into play, which works neatly, but is completely cluttered, making navigation and customization unnecessarily complicated.
In addition, I was unable to export a scene file in STL format to the PWMX file format needed for the Mono X during testing. There is also no help available in the software, which is why laymen are once again left in the lurch here.

We like working with the free Lychee slicer software much better, which even has its own profile for the Mono X. Here, even as a novice, everything is quickly set up and can be exported to the required file format.

You then simply drag said file onto the USB stick, plug it into the Anycubic Photon Mono X and you can start printing the desired templates.
Summary of the Anycubic Photon Mono X
From a purely technical perspective, there is nothing to complain about with the Photon Mono X. The 3D printer scores with a high-quality finish, extensive accessories and easy handling. Thus, the Anycubic Photon Mono X is quickly and easily assembled even by laymen and usually delivers good results within a very short time without having to make any adjustments.
A monochrome panel, 4K resolution and a large build space are on the plus side and let me quickly achieve excellent results. And yet, there are a few things that bother me – as a layman in the field of 3D printers – about the Mono X.
If there are any problems, for example with slicing, I am left alone thanks to the lack of help and solutions. I can hardly guess where the fault lies. The handling when cleaning the FEP film also leaves a lot to be desired, because it creates an absolute mess.
What I also find questionable is the omission of all safety instructions on the Anycubic Photon Mono X. The fact that you should wear gloves and a respirator is only roughly touched upon in the instructions. However, the fact that the material’s smell is so penetrating and you should only work in well-ventilated environments is not. In addition, I find the fan’s volume extremely annoying. The Photon Workshop software, smartphone app and WLAN connectivity also leave important points behind.
For those who already have experience with resin 3D printers, the Anycubic Photon Mono X is a really good device that lives up to its rather high price. Newcomers to the field, however, should rather look at other 3D printers.

Anycubic Mono X
Usability
Assembly
Noise level
Print quality
Value for money
85/100
Well-manufactured resin 3D printer that achieves excellent results. However, important help is missing for non-professionals, and the software is also expandable.