Custom water cooling – why, for what and primarily – how?
Welcome to our water cooling know-how to! Time and time again, you come across the most beautiful, elaborate and bizarre PCs online, all of which feature custom water cooling. In this series of articles, we want to explain to you, in cooperation with Alphacool and Noctua, some aspects, go into where the sense of such a cooling concept lies and show you how you too can create your own water cooling.
Water cooling – Why? Waste of money?!
Of course, the first question that comes to mind is – Why water cooling? Why spend a few hundred to even a thousand euros, when in most cases it is enough to buy a decent air cooler for the CPU and use the graphics card’s own cooler?
Well, the question will be answered differently by everyone who cools their PC themselves. One obvious reason is of course that your own components run cooler, so you can push them to their true limits by overclocking. Another reason is the noise – a properly designed system can run completely silent even under load. Optics can also be a primary aspect – if you look at some pictures, you will quickly find very nice computers.
But let’s be honest – is it really worth it? Probably rather less, at least financially. But what you shouldn’t forget is the fun. To put your PC completely under water is, especially with the first own water cooling system, also called custom loop, a huge project. Working on and with your PC is a nice hobby – and like most hobbies, there are areas where the pure financial expenditure doesn’t make the deepest sense at first glance.
If you enjoy screwing and possibly already assemble PCs for friends and family, you will notice that some things are repeated over and over again. Why not try a completely new project? The thrill of discovering something new, trying new things and having the result right in front of your eyes – we think that’s the main reason why custom water cooling is on the rise.
Let’s summarize – optics, volume, temperature, fun project. That’s exactly what we’d like to bring you closer to in this How To.
Custom Water Cooling vs All-in-One Solution
Water cooling? But I do have an AiO, such as the NZXT X73 Kraken! Yes – this is also a water cooling, in a closed system – partly this is also called Closed Loop. Basically, this form of water cooling also works identically: the water is passed through a CPU cooler with the help of a pump and then through a radiator, also called a heat exchanger. to release the absorbed heat again. There we have the main components that any water cooling system needs. A CPU block and/or a GPU block, at least one radiator, a pump and hoses or pipes to move the water between the components.
So where is the advantage of having your own solution? Primary – free choice of components. You have an all-in-one water cooling system for your CPU and want to include your graphics card in the circuit? In most cases, that’s not going to happen. Exceptions, like some AiO water coolers from Alphacool, prove the rule. The pump of your AiO is slowly giving up the ghost? Only rarely can a pump in an AiO really be replaced – unfortunately, it is thus often directly expensive electronic scrap in case of a small defect. Additionally, you can’t compare the cooling performance of the solutions – a custom water cooling will virtually always be better.
Components and theory – How does a water cooling system work at all?
The theory of water cooling is very simple. Only a pump, a cooler for CPU or GPU, a radiator and hoses are needed.
To give you a brief overview, we briefly introduce each component:
The “heart” – pump
As the name implies, this is how the pump pumps. Sounds silly, but that’s all it is. A water circuit wouldn’t be a circuit if the water didn’t move – and it has to, after all, to enable cooling. The pump keeps the water circulating so that it passes through all the necessary components.
The “purpose” – cooler
What’s the whole thing for? Well, of course – for cooling. In order for all the fun to have a purpose, something needs to be cooled by the circulating water. Here, you use a cooling block that you place on top of a heat source – the CPU or GPU, for example. The heat generated is absorbed by the water and carried away.
The “heat exchanger” – radiator
The heat – in the form of heated water – from the radiator is transported away, but where to? Exactly, to the radiator. The water runs through thin channels with many fins – so that waste heat can be released. To then remove this waste heat from the radiator area, fans are usually used.
The “wiring” – hoses
Of course, we also need a way to connect the components together. Tubes, also called soft tubes, are one possibility – alternatively there are tubes made of acrylic, glass, or various other materials, these are called hard tubes. Basically, both variants work the same – with Soft Tubes you can work more easily, but most enthusiasts find Hard Tubes more beautiful.
This covers the theory – in practice, there are more components that you should definitely write down on your shopping list. Not core components but important nonetheless:
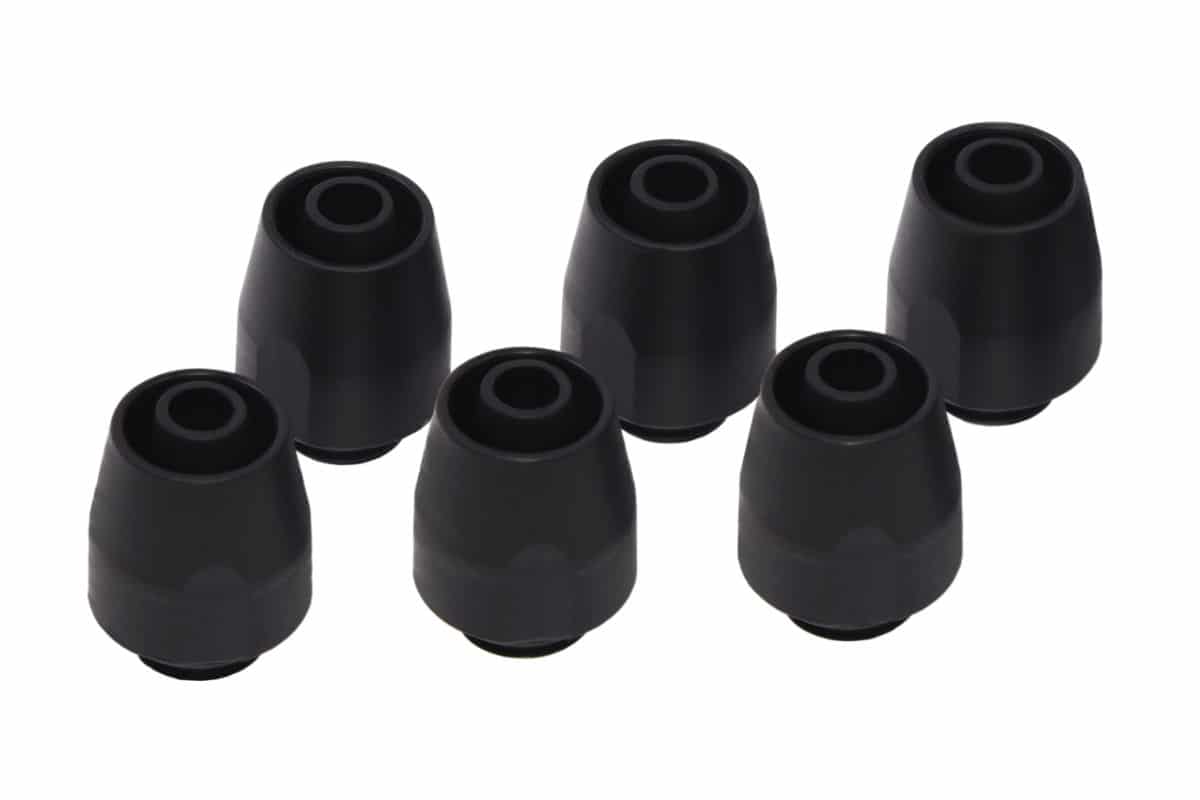
The connectors – fittings
To connect your components to the hoses, there are connectors called fittings. These are available for various different hose and tube sizes!
The tank – expansion tank
Theoretically, this is just there to simplify filling and make sure your pump doesn’t run dry. In many cases, this is permanently installed on the pump, or purchased directly as a set.
You fill it with your coolant so that the pump is always supplied with water. Likewise, you can of course set a visual highlight here.
Planning the circuit
Planning is the be-all and end-all! Nothing is more frustrating than to realize that it does not fit, you bought the wrong components, or simply dissatisfied because you have planned everything only roughly.
Basic question – hard or soft tubing?
Basically, you need to clarify whether you want to plan your water cooling system with tubes (also called soft tubing), or with acrylic or glass tubes (hard tubing).
The decision is basically preference. While tubing looks more appealing to most eyes, it also comes with disadvantages. The biggest aspect is the effort required to assemble – tubes are pliable and easy to cut, pipes mean more effort and difficult fabrication. Bending requires dexterity and patience, cutting tubing is easily done. Tubes also make it easier to change components and to disassemble the CPU cooler for a short time, e.g. if you want to replace thermal paste or make other adjustments.
In our case, we use soft tubing. Due to the easier processing and faster maintenance, we prefer this. Also, in most cases, a well-made water cooling system with soft tubes looks better than an imperfect hard tube cooling system.
Opportunities and existing hardware
Also to consider is what you want to cool, how much space you have, how you want it to look – As with so many things in life, you have to weigh what you really want.
The limiting factor is usually the case. You will need space for radiators – look to take a case with a decent layout. The more radiator surface, the better.
If you already have the case in front of you, you should measure it. Does your plan really fit? Also calculate the length of the fittings and make sure that the hoses have a minimum radius, otherwise they will kink. If you have a hard time thinking up a circuit, just type in your case name + watercooling in a search engine of your choice – you’ll be slain by photos in the vast majority of cases.
Order of the components – What is there to consider?
In short – nothing. Most think that, for example, the water between the GPU and CPU cooler should flow through a radiator to be cooled. But this is a misconception – the water flows fast enough that the entire circuit is at a very similar temperature level.
Plan the circuit so that the hose or pipe routing is simple. Don’t make it too complicated and go the simplest way – everything doesn’t have to be difficult. Especially important – pay attention to the radius – sharp bends will be difficult, especially with hoses. If necessary, angle fittings are available to you, more about this in the component selection.
Paint it on!
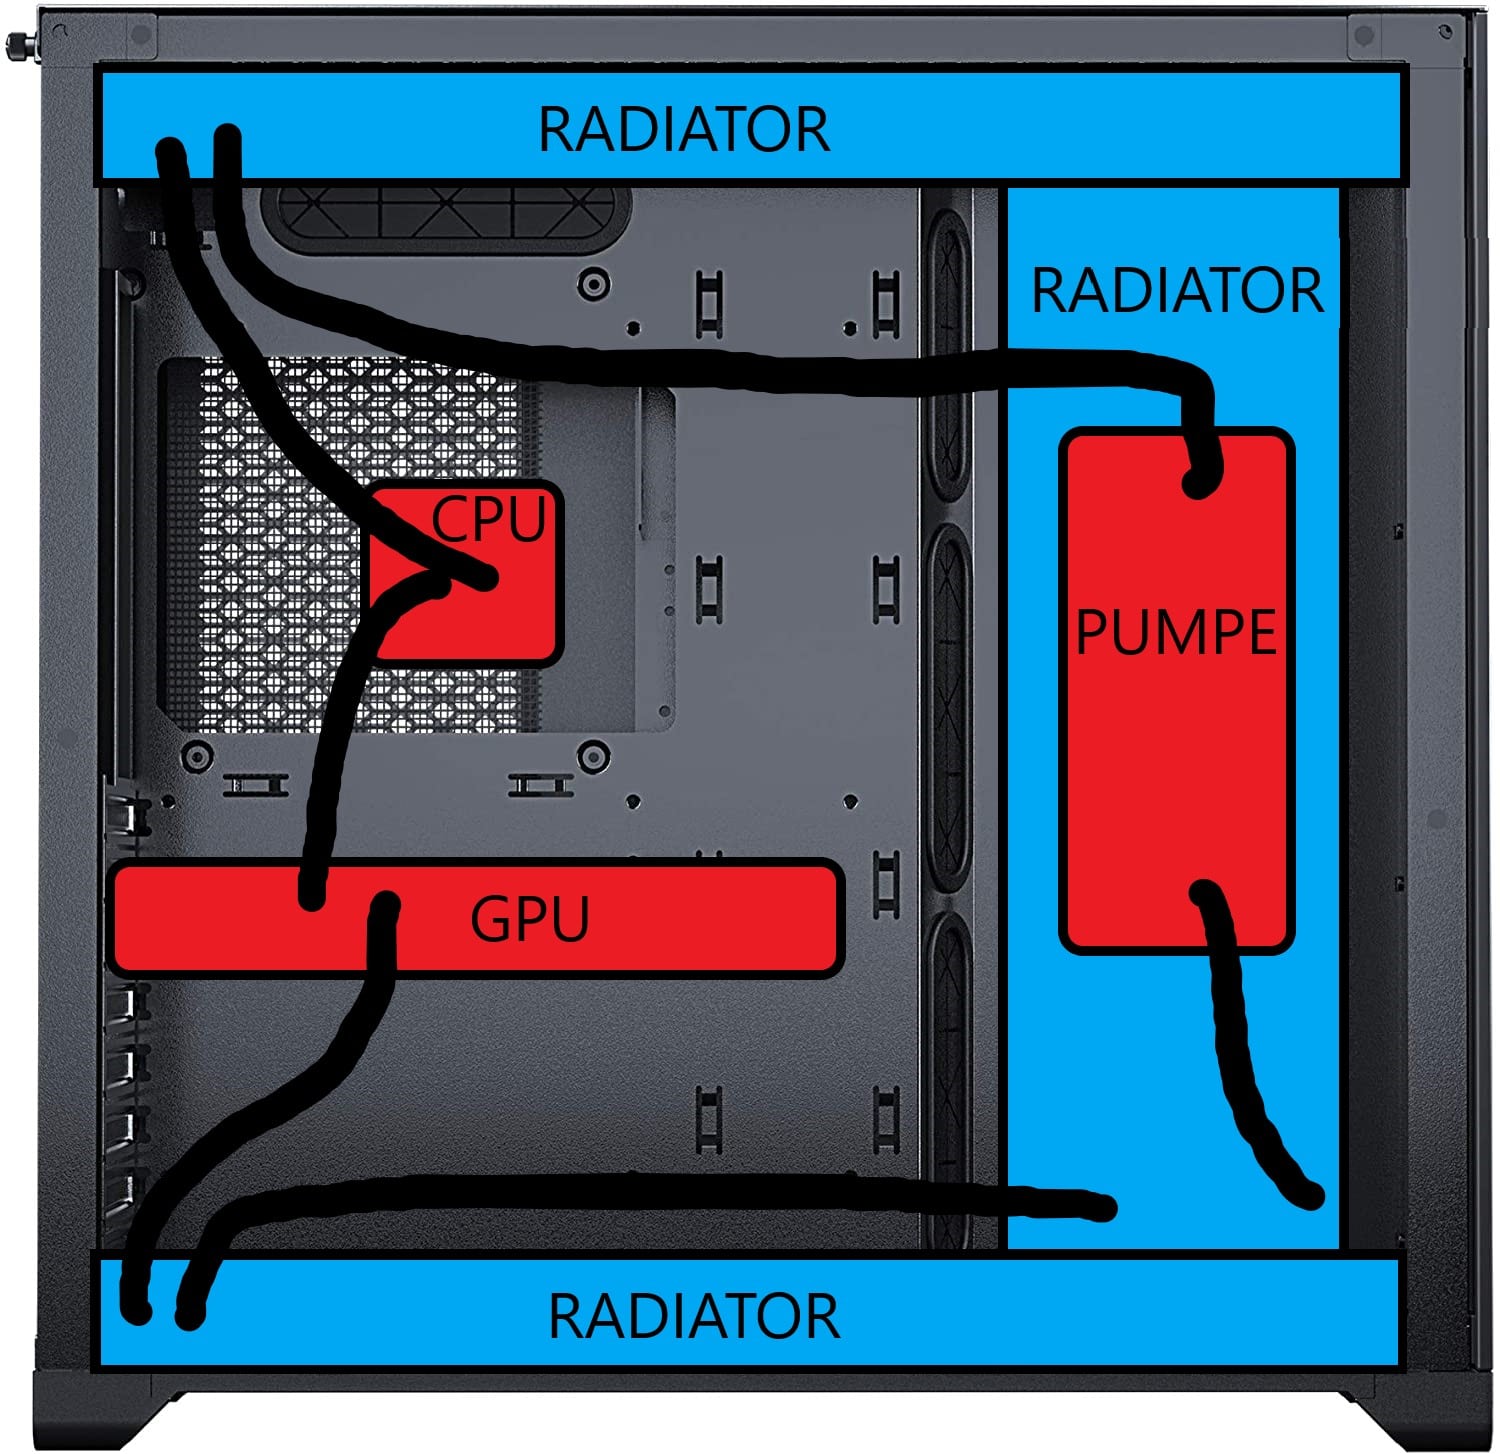
Find a picture of your case, grab a drawing tool of your choice, and draw away. It doesn’t have to be pretty, but it will help you visualize your goal. Planning is much easier – you won’t forget any connections to or from components and you can count how many and which fittings you need later. Here is an example – roughly drawn it could look like this. If you want to know in advance exactly – you can of course measure everything. This was only a rough estimate.
The choice of components
You have already learned why we use water cooling, what components are basically needed and what is the advantage over an all-in-one solution.
If you are now quite motivated and want to get started right away, open an online store of your choice and you will be slain by a multitude of products. What do I have to look out for? What can I orient myself on? What makes sense, what accessories do we need? We want to guide you through the selection of components based on our water cooling project – and possibly help you with your selection.
Basic components – the coolers
First on our shopping list are the coolers. The cooling elements for our circuit are the heatsinks for the CPU and the GPU – the components are essential for performance and looks.
To find the right cooler for you, you can have a good browse online. Besides Alphacool, there are several other manufacturers that offer coolers – EKWB, Heatkiller, Byksi, Corsair would be a few examples. Since we worked in close cooperation with Alphacool here, we limited our selection to Alphacool’s store – but the procedure is the same for all manufacturers.
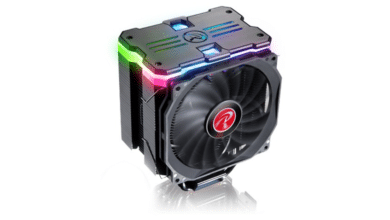
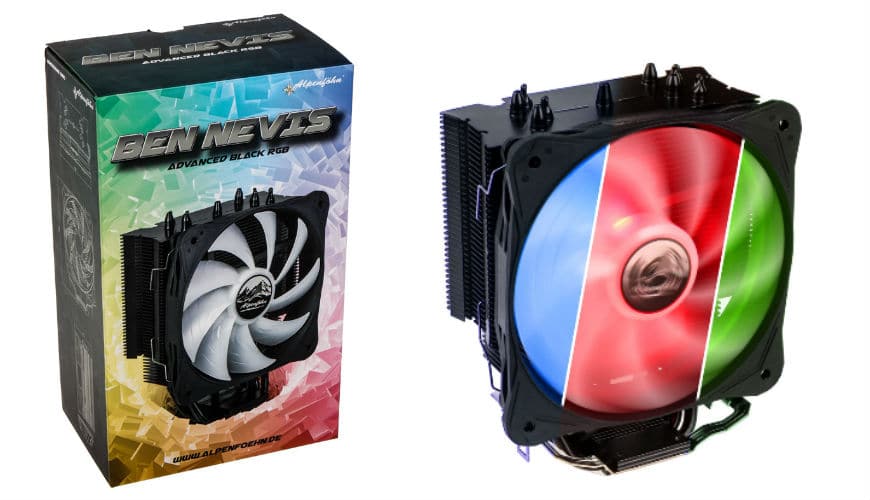
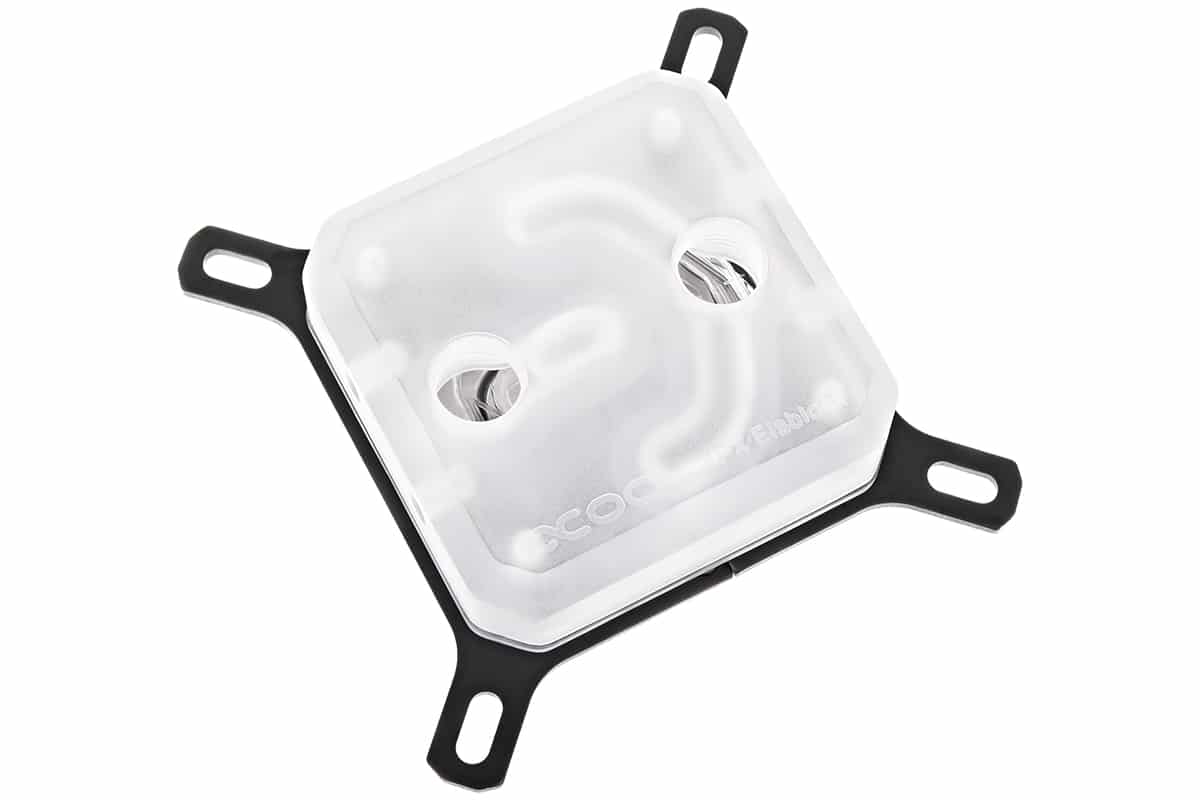
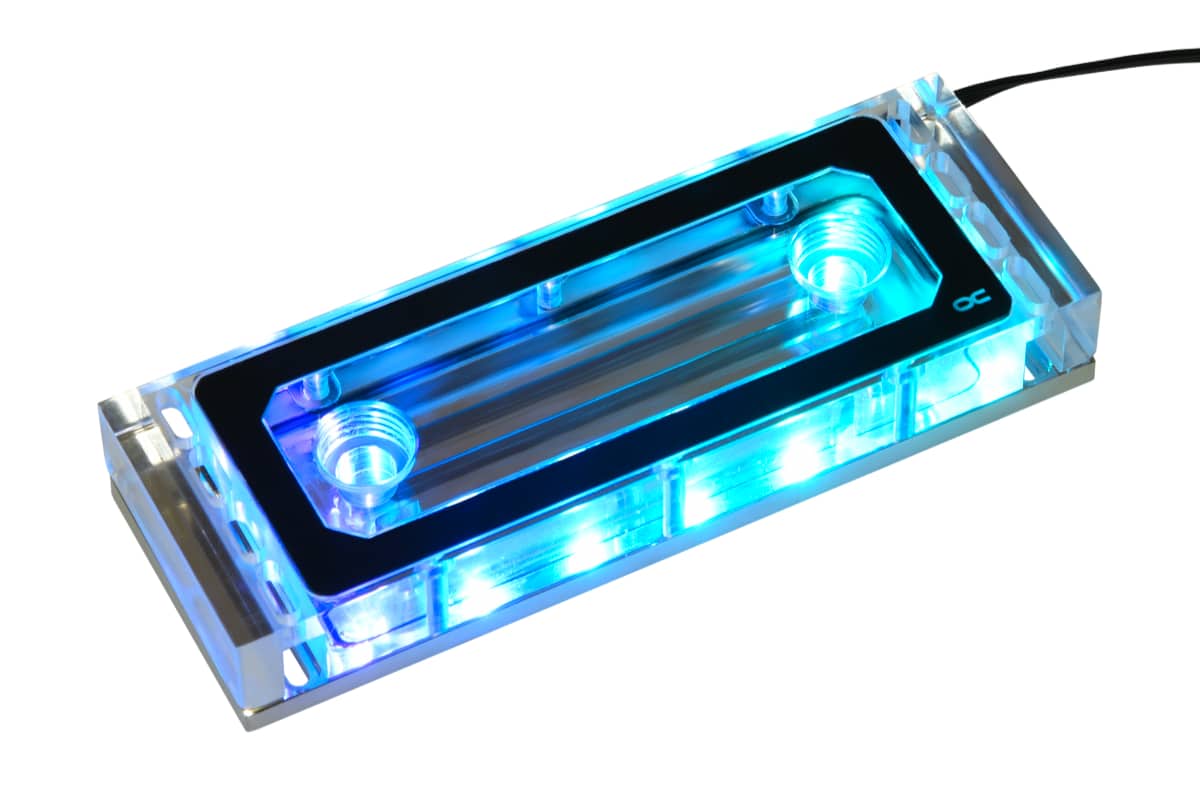
For the CPU, the socket is primarily relevant. For example, if you are running a current Ryzen CPU, you need a cooler that is compatible with the corresponding socket, in this case AM4. Basically, you can take almost any cooler – as always: Inform yourself and look at the product. Some questions arise – do you want RGB? How is the performance? How are the connections? All this should be taken into account. We chose a simple, matte CPU cooler, the XPX Clear Satin.
When it comes to GPUs, things get minimally more complex. “I’m using an RTX 3080, I want to water-cool it” would be a legitimate statement, but more info is needed. Not every graphics card uses the same layout of the PCB, i.e. the GPU’s motherboard – the cooler has to be adapted to this, of course. Either search directly for your GPU + water cooler, or look to see if the graphics card uses the reference PCB if applicable. In our build, it was a Founders Edition GPU – with its special layout, the selection of coolers is very limited here, but you will still find something. We would especially like to point out the GPU offer from Alphacool: Should you not find a GPU cooler for your GPU in the store, so Alphacool offers to create it for you. In addition, many stores have a GPU cooler finder, which simplifies the search for you. Just give it a try!
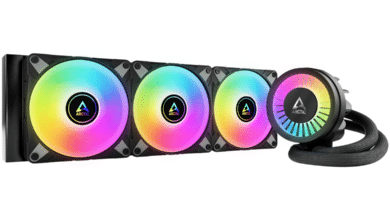
Radiator – Which one? How many? Questions about questions
Let’s get to the radiator or ideally the radiators. Basically, the more the better. As a rule of thumb: per 100W TDP of your cooled components (usually CPU and GPU) a 120 radiator, as a lower limit. Below that, it doesn’t make sense in most cases.
If you want your build to be primarily volume oriented, simply take as many radiators as your case can accommodate. In most cases this is stated in the manual of your case. But note – the more radiators, the more complicated it gets in most cases – unless your case is very large.
But help – there are so many different radiators! Which one should I choose?
Radiators have a few characteristics. The most noticeable is the length. In most cases, it’s either a multiple of 120 or of 140 – the most common fan sizes. So you’ll find 240 radiators that can accommodate 2 fans, but also 360s, 280s, etc.
Furthermore, it is important to consider the thickness of the radiator – the “standard dimension”, which most AiO water coolers also take, is 30 mm. Basically, the more volume, the more cooling capacity. But be careful – the thicker the radiator, the more the airflow is restricted and the case compatibility decreases. If you use radiator beyond 60 mm thickness, you can definitely think about equipping the radiators with fans from both sides.
As another feature, there is the flow direction. In most cases, the inlet and outlet of the radiator are on the same side – so your ports are close together. Alternatively, if you’ve already planned your layout for the PC, there are “X-Flow” radiators – with these, the water flow is different, with the inlet and outlet on opposite sides.
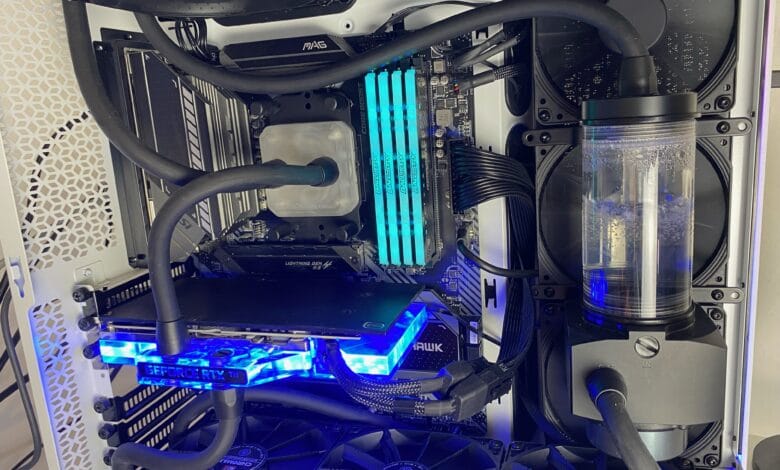
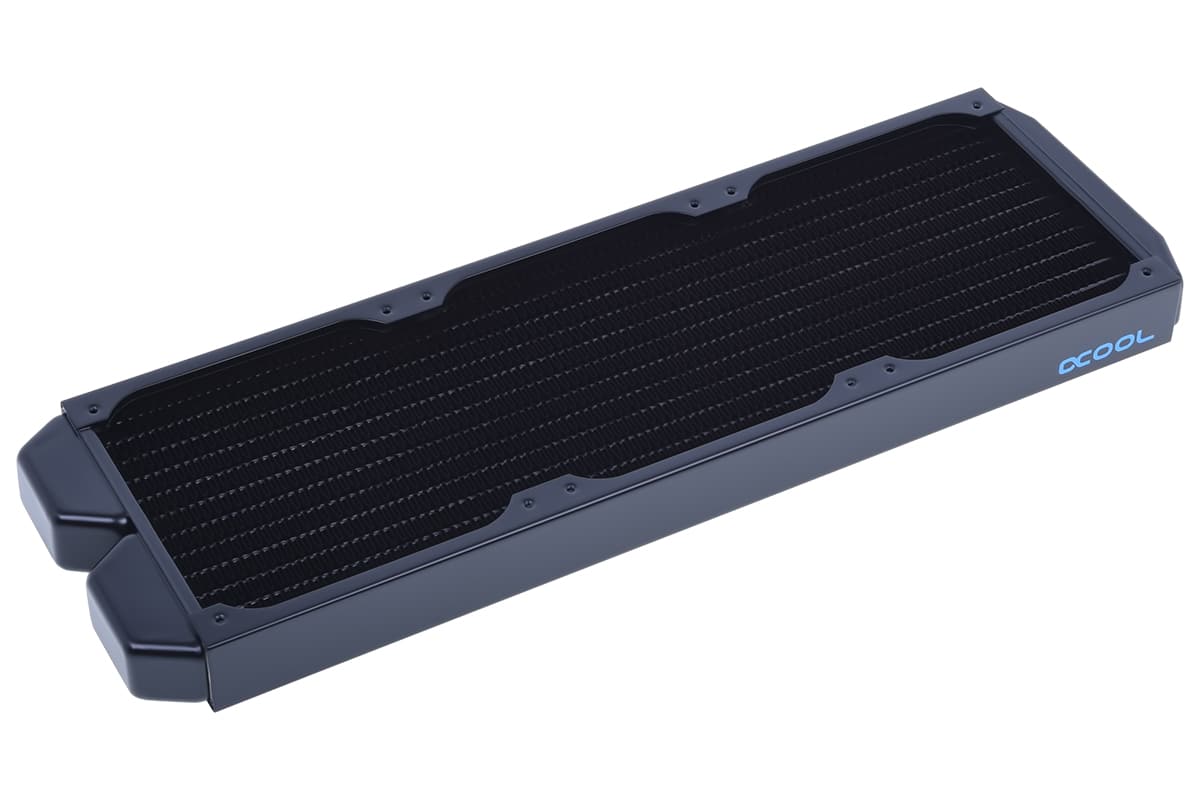
With the MetallicGear Neo Qube we have a relatively small case planned for our triple radiator setup, so we go with the “thin” radiators, in the classic design. We could hardly have accommodated more. In our build, we use the NexXxoS ST30.
Hoses and fittings
As briefly touched upon above, we now come to hoses. With the different types of hoses (or tubes), it’s primarily the look that matters. There are different dimensions – just take a look around online to see if you prefer visually thinner or thicker hoses.
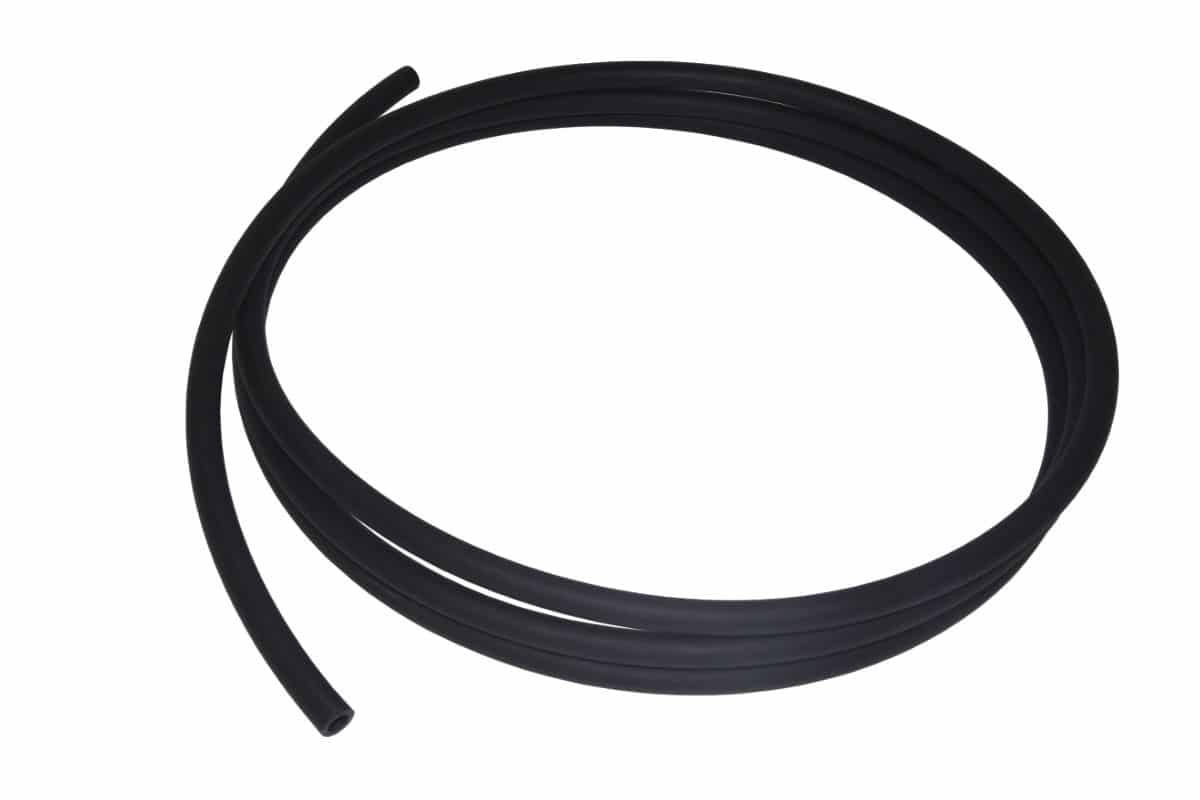
Alphacool has introduced a new material to the market in the form of TPV hoses. This is thicker and more durable than the tried-and-true PVC hoses – which is why we used it.
For the fittings, make sure that you take the same dimensions. For example, if you take a hose with 16 mm outer thickness and 10 mm inner diameter (often titled 16/10), your fittings must also be designed for this. This is usually described quite obviously. The TPV fittings even have this in their name – HF Fitting TPV.
Also, it’s important to plan your hose routing from the start. In addition to the normal fittings, there are adapter pieces to give you 90° angles – hoses kink quickly on tight turns, reducing flow – this is obviously not ideal.
Fittings we basically understood, but how do we determine how many we need? That’s simple, too. Basically, each of your components needs two fittings – an inlet and an outlet. This is the only way to create a circuit. For example, in our build: CPU (2) + GPU (2) + 3x Radiator (3×2) + Pump (2) = 12.
Since the case is quite small, we planned three more angle pieces.
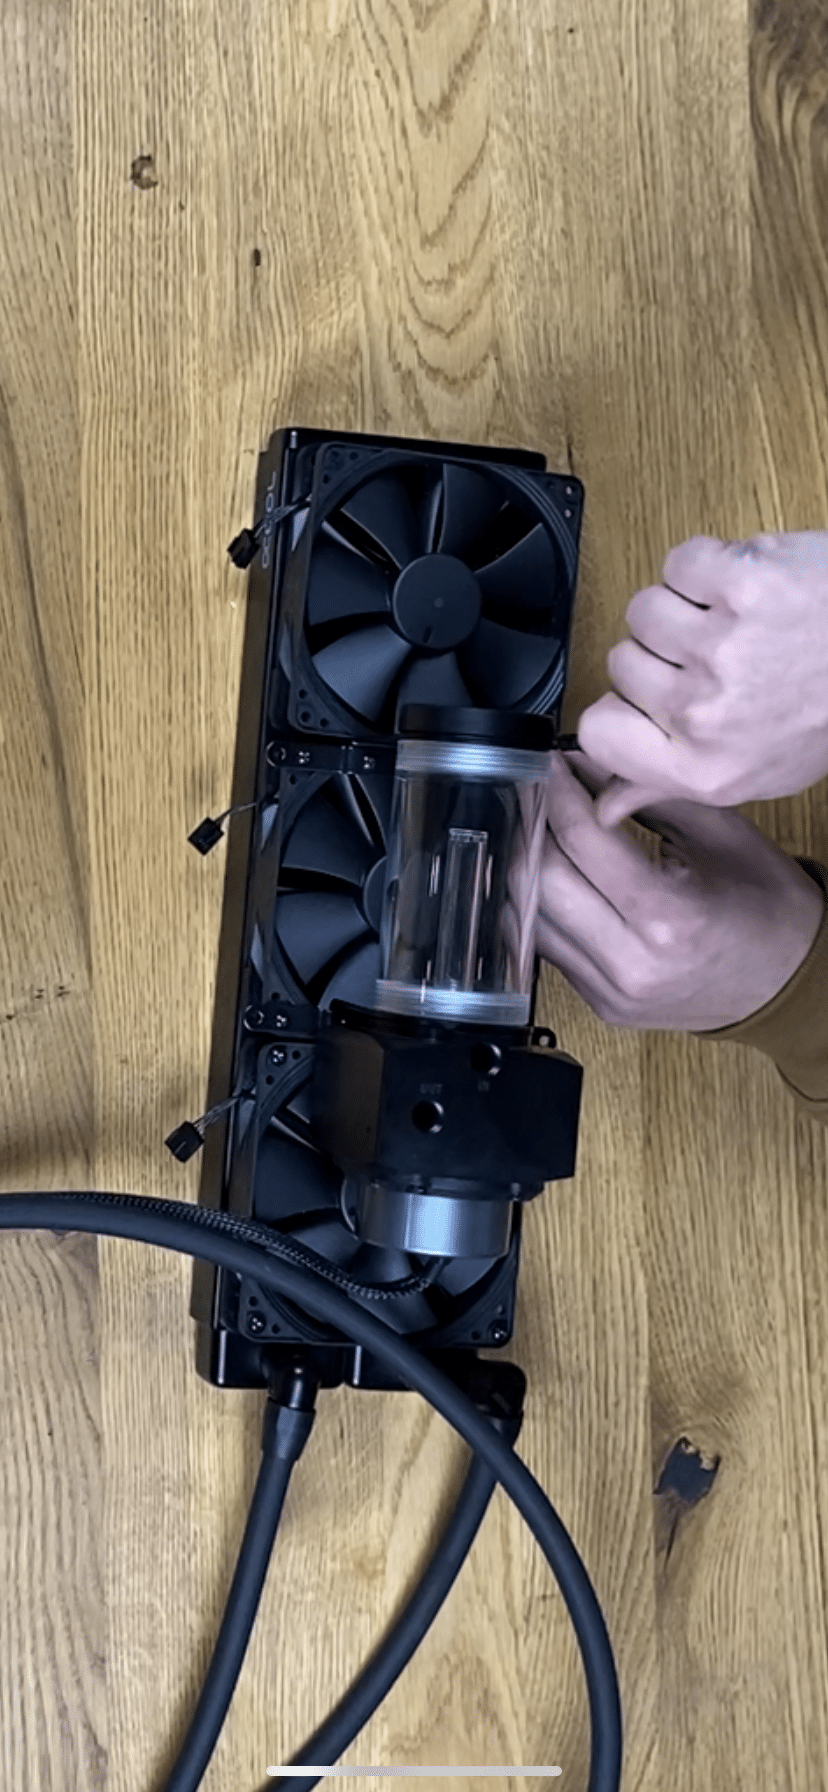
The pump and the expansion tank
The market of pumps is limited in most cases to the D5 and the DDC pump. In almost all branded products you will find these two pumps. For a long time, the DDC was the top dog, but in online reviews, the D5 is gaining preference because it is quieter and runs cooler.
The pumps are not allowed to “run dry”-they can only be run underwater. That’s why almost all watercoolers use an expansion tank to collect water. You often see this placed directly on top of the pumps – the simplest option in most cases. A good example would be the D5 ice bucket – here you directly get everything that is needed.
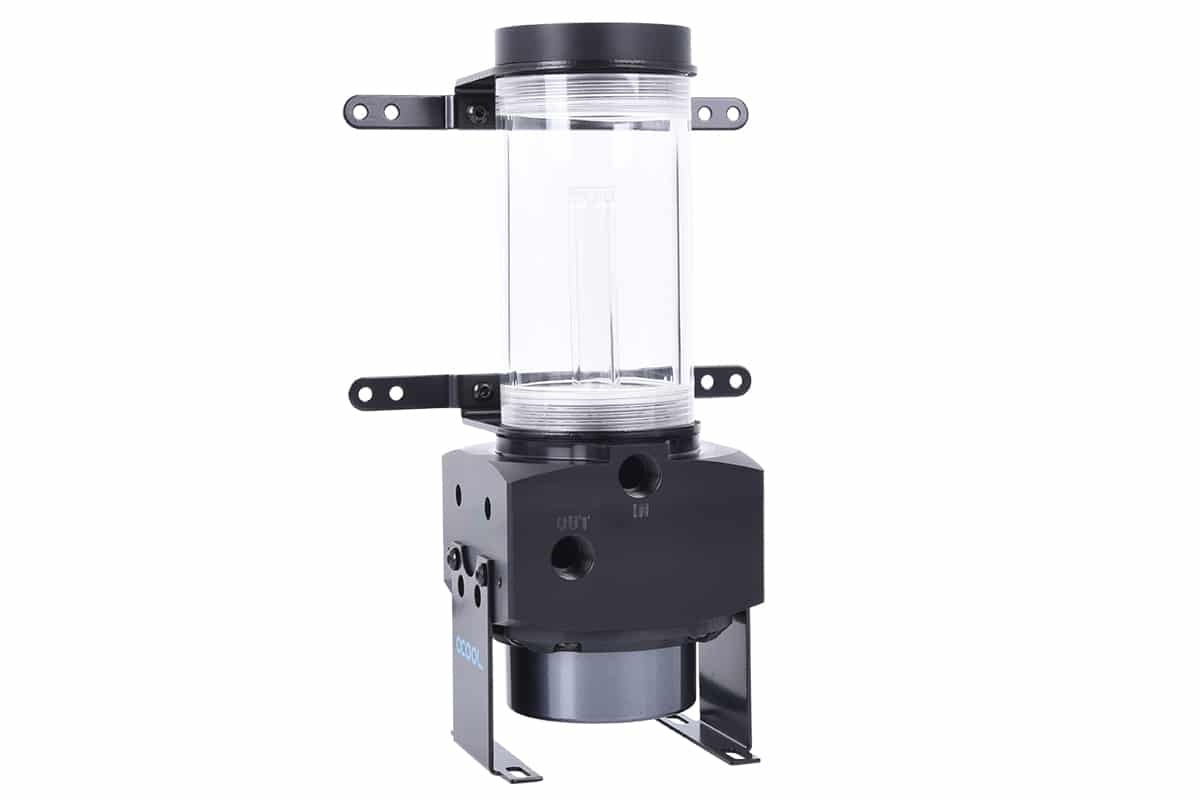
Of course you can also buy the components separately, but you have to make sure that they fit together and provide the appropriate mounting.
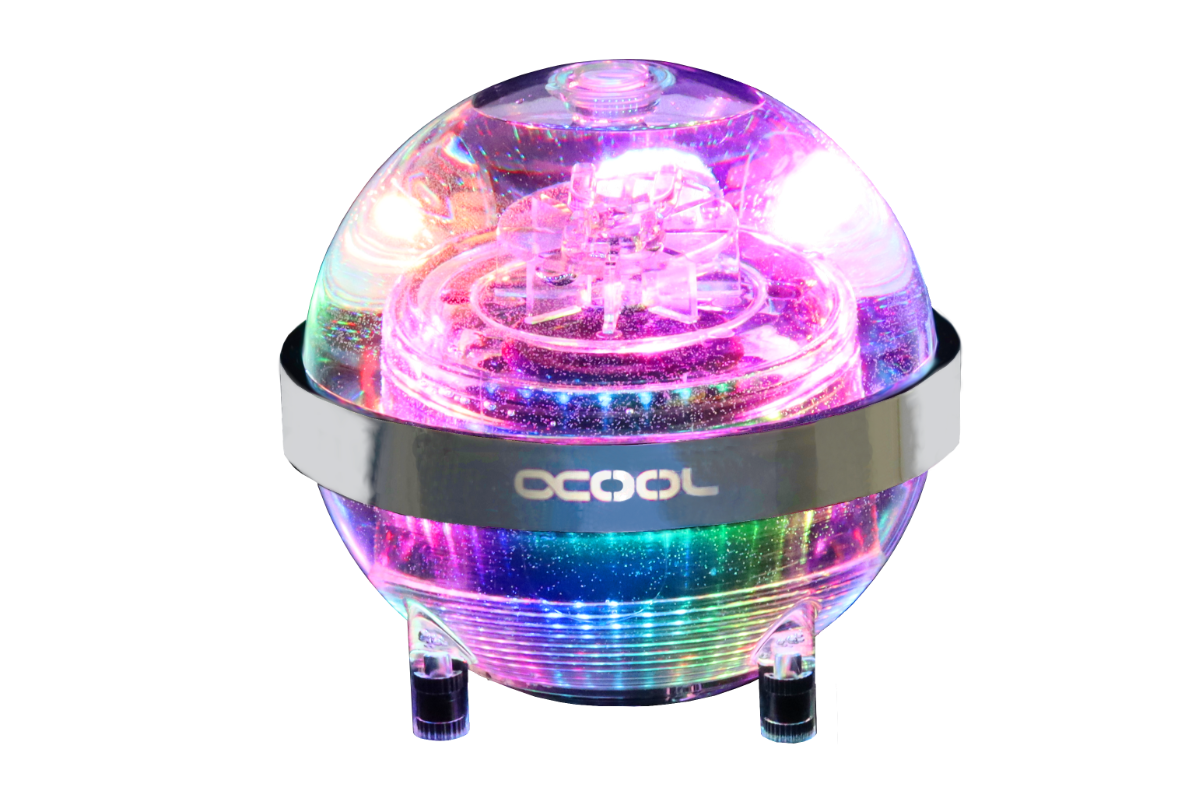
Optics also play a big role again with the expansion tank. Would you like to be more extravagant on the road, so look around with pleasure, for example, the ice ball offers a completely different design:.
The fans – The heat must be removed!
The fans should not be neglected either. Here there are “only” two important points: The size (140 fans do not fit on a 240 radiator!) and the static pressure. To bring air properly through the radiator, then the fan needs static pressure. The larger manufacturers specify this in most cases.
Noctua has a proven track record with coolers and fans – their products are praised again and again in the trade press for their performance – since we’re aiming for a silent build, we’ll use the NF-A12.
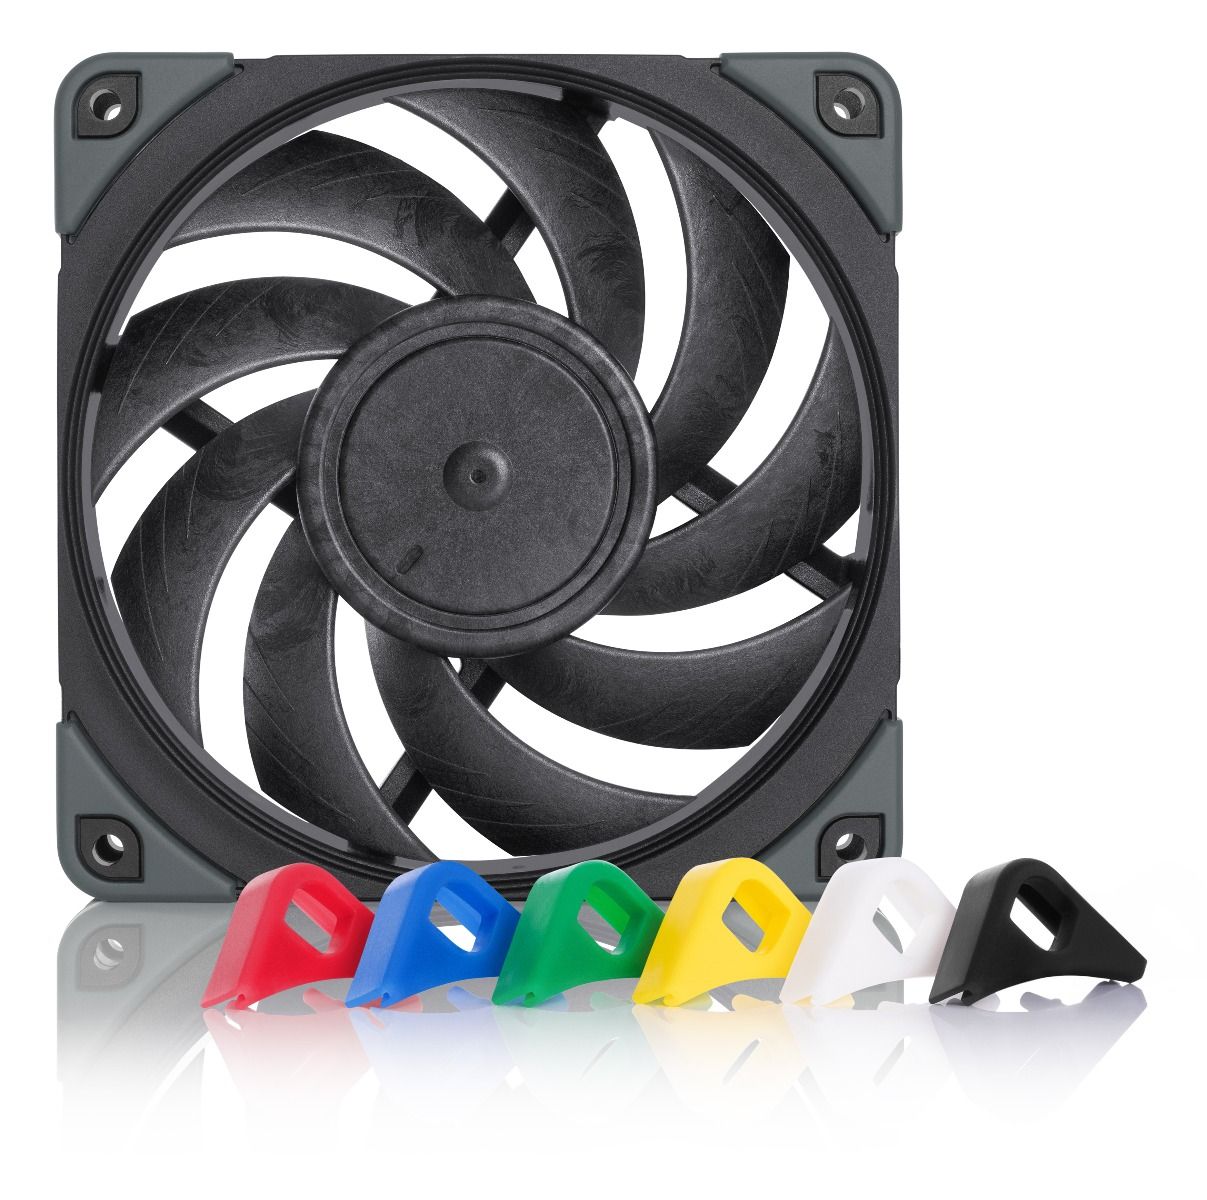
As with so many things – once again optics play a role. The market is huge – there is no general recommendation.
Cooling liquid – Is normal water enough?
Another point to consider is the liquid in the circuit. Yes – it is called water cooling, but pure water is not necessarily the most recommended fluid for your cooler. In English, it is also often referred to as a “liquid cooler”, which means liquid cooler – rightly so.
Coolers often get additives that ensure less microorganisms in the water – so lime and corrosion is avoided or at least reduced. Alphacool’s liquid also has reduced surface tension, which makes it easier to remove air bubbles and lubricates the pump through normal use, increasing its lifespan.
If you want to test your loop or don’t have any coolant (or water additive) at home, you can also use distilled water temporarily. We would not recommend it as a permanent solution.
Colored fluids are also nice with transparent hoses/tubes – however, these tend (especially pastel fluids) to contaminate the radiators. We go for colored hoses and clear coolant. The Apex ECO has the has the appropriate additives to stop microbiological processes and also fits our requirements in other ways. Add to cart!
Custom water cooling gimmicks! What’s out there, what suits me, what makes sense?
There are some gimmicks that don’t necessarily need to be on your shopping list, yet are helpful or interesting.
Drain Tap
You want to maintain your loop without much effort? Worry about how you’re going to get the fluid out of your loop! If possible, at the lowest point of the loop, you want to create a way to drain the fluid. An easy way is to install a ball valve and open it when needed. Nearly every manufacturer offers a wide range of products, so see what and where it’s ideally located for you.
Flow sensor, temperature sensor
Do you like statistics? Do you simply want to be able to assess your loop more accurately and optimize it through measurements if necessary? With various sensors you have the opportunity to do so. There are sensors that show you the active flow in liters per minute and sensors to show the active water temperature. With these, you can take a closer look at where you can find potential for optimization in your loop.
There are also different qualities or approaches for the sensors. For example, a flow sensor can measure analog, in which it gives you the RPM of a wheel and you can calculate the active flow – alternatively, there are of course also complete solutions that provide you with the result processed with the help of a controller. There are many possibilities – but for the average user it is usually enough to keep an eye on the current CPU or GPU temperature. Nevertheless – those who enjoy it can get their money’s worth here.
M.2 SSD and RAM cooler
More cooling = more better? Actually, not really at the current time – M.2 SSDs and RAM don’t need water cooling in almost any scenario, and rarely benefit from it either. Still, if you want to water-cool everything possible, you can add more components to your loop, for example. For example, with this RGB RAM kit:
RGB addons for HardTubes or coolers
RGB RGB – for some, there can’t be enough. Special addons for pumps, coolers, but also tubes can bring you even more lighting in your case. Controllable via the old familiar solutions, it can be visually appealing. But as always: Tastes are different and it remains pure preference. (But you know – More RGB = More FPS! So let’s go folks, stock up on colorful LEDs!)
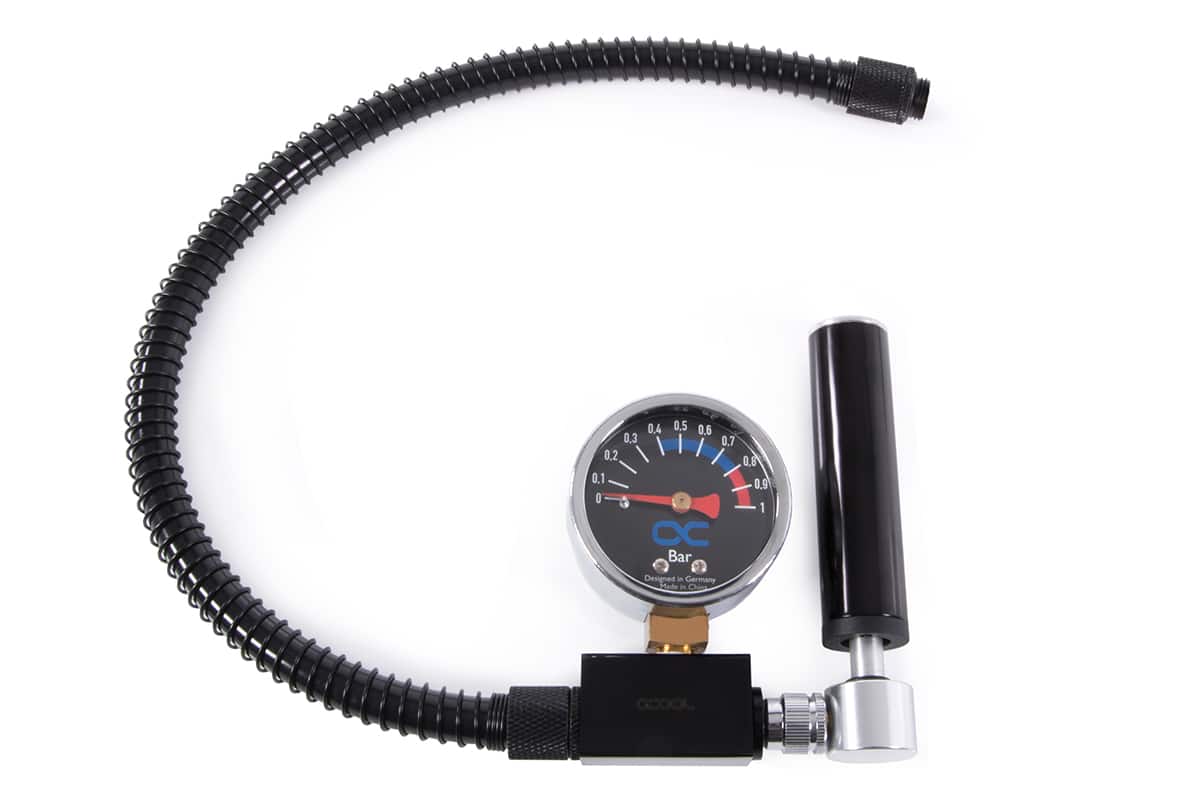
Tools – Leak Tester, Tube Cutter, Hard Tube Kit
Let’s get to the final and probably most useful item – optimized tools. There are some things that are not necessarily needed to build your loop – yet they will make your life much easier.
A leak tester, for example, is a pump that you connect to a free port – and thus pressurize your unfilled loop – if the pressure remains steadily the same, you know that it is tight. But be careful, pay attention to the manufacturer’s specifications to find out how much pressure your components can withstand. Most leak testers have a scale printed on them, you can use that as a guide – alternatively 0.5-0.6 bar has proven effective.
Hose cutters and whole hard-tube kits make it easier to get around hose or tube work. These make for cleaner cuts and, in the case of tubing, easier bends. It saves stress and doesn’t cost the earth – in addition, you should never skimp on tools. These are probably THE “gimmicks” we would most strongly encourage you to use.

Custom Water Cooling – The Assembly
You’ve got your components together and you’re already excited? Well, let’s do it! With good planning, the assembly is not particularly complicated, don’t worry. We assume at this point that you have already assembled a “normal” PC. We’ll start at the point where the CPU and RAM are on the mainboard, and the mainboard and power supply are already installed in the case.
Assembling the basic components
Some of your components may come in parts. For example, you may need to connect your pump and expansion tank. This is usually simple and is described in any case in a manual with reputable manufacturers. In our case, the combination comes directly pre-assembled.
Another point is the graphics card. This is the “most difficult” part – depending on the graphics card. We used a Founders Edition of the current Nvidia range, this is a special case because especially many screws are hidden and/or hard to reach. If you use a partner card from ASUS, MSI, Gigabyte etc., you will find screws on the back in most cases. You can use these to remove the heatsink from the graphics card. Most likely, there is already a video about the disassembly of your graphics card on the net – watch it to become aware of any pitfalls.

If you have disassembled the graphics card, you have to clean the rest of the thermal paste. We recommend using isopropyl to remove the residue without damaging it. Take your time and don’t rush, it would be a pity if you damage components of the graphics card.
The assembly of the graphics card is usually documented as well – via video and/or instructions. Basically it’s always similar – mount thermal pads at the defined places (voltage converter, RAM components etc.), apply thermal paste (the chip is bigger than a CPU, cover everything as thinly as possible!), screw the water block. Voila!
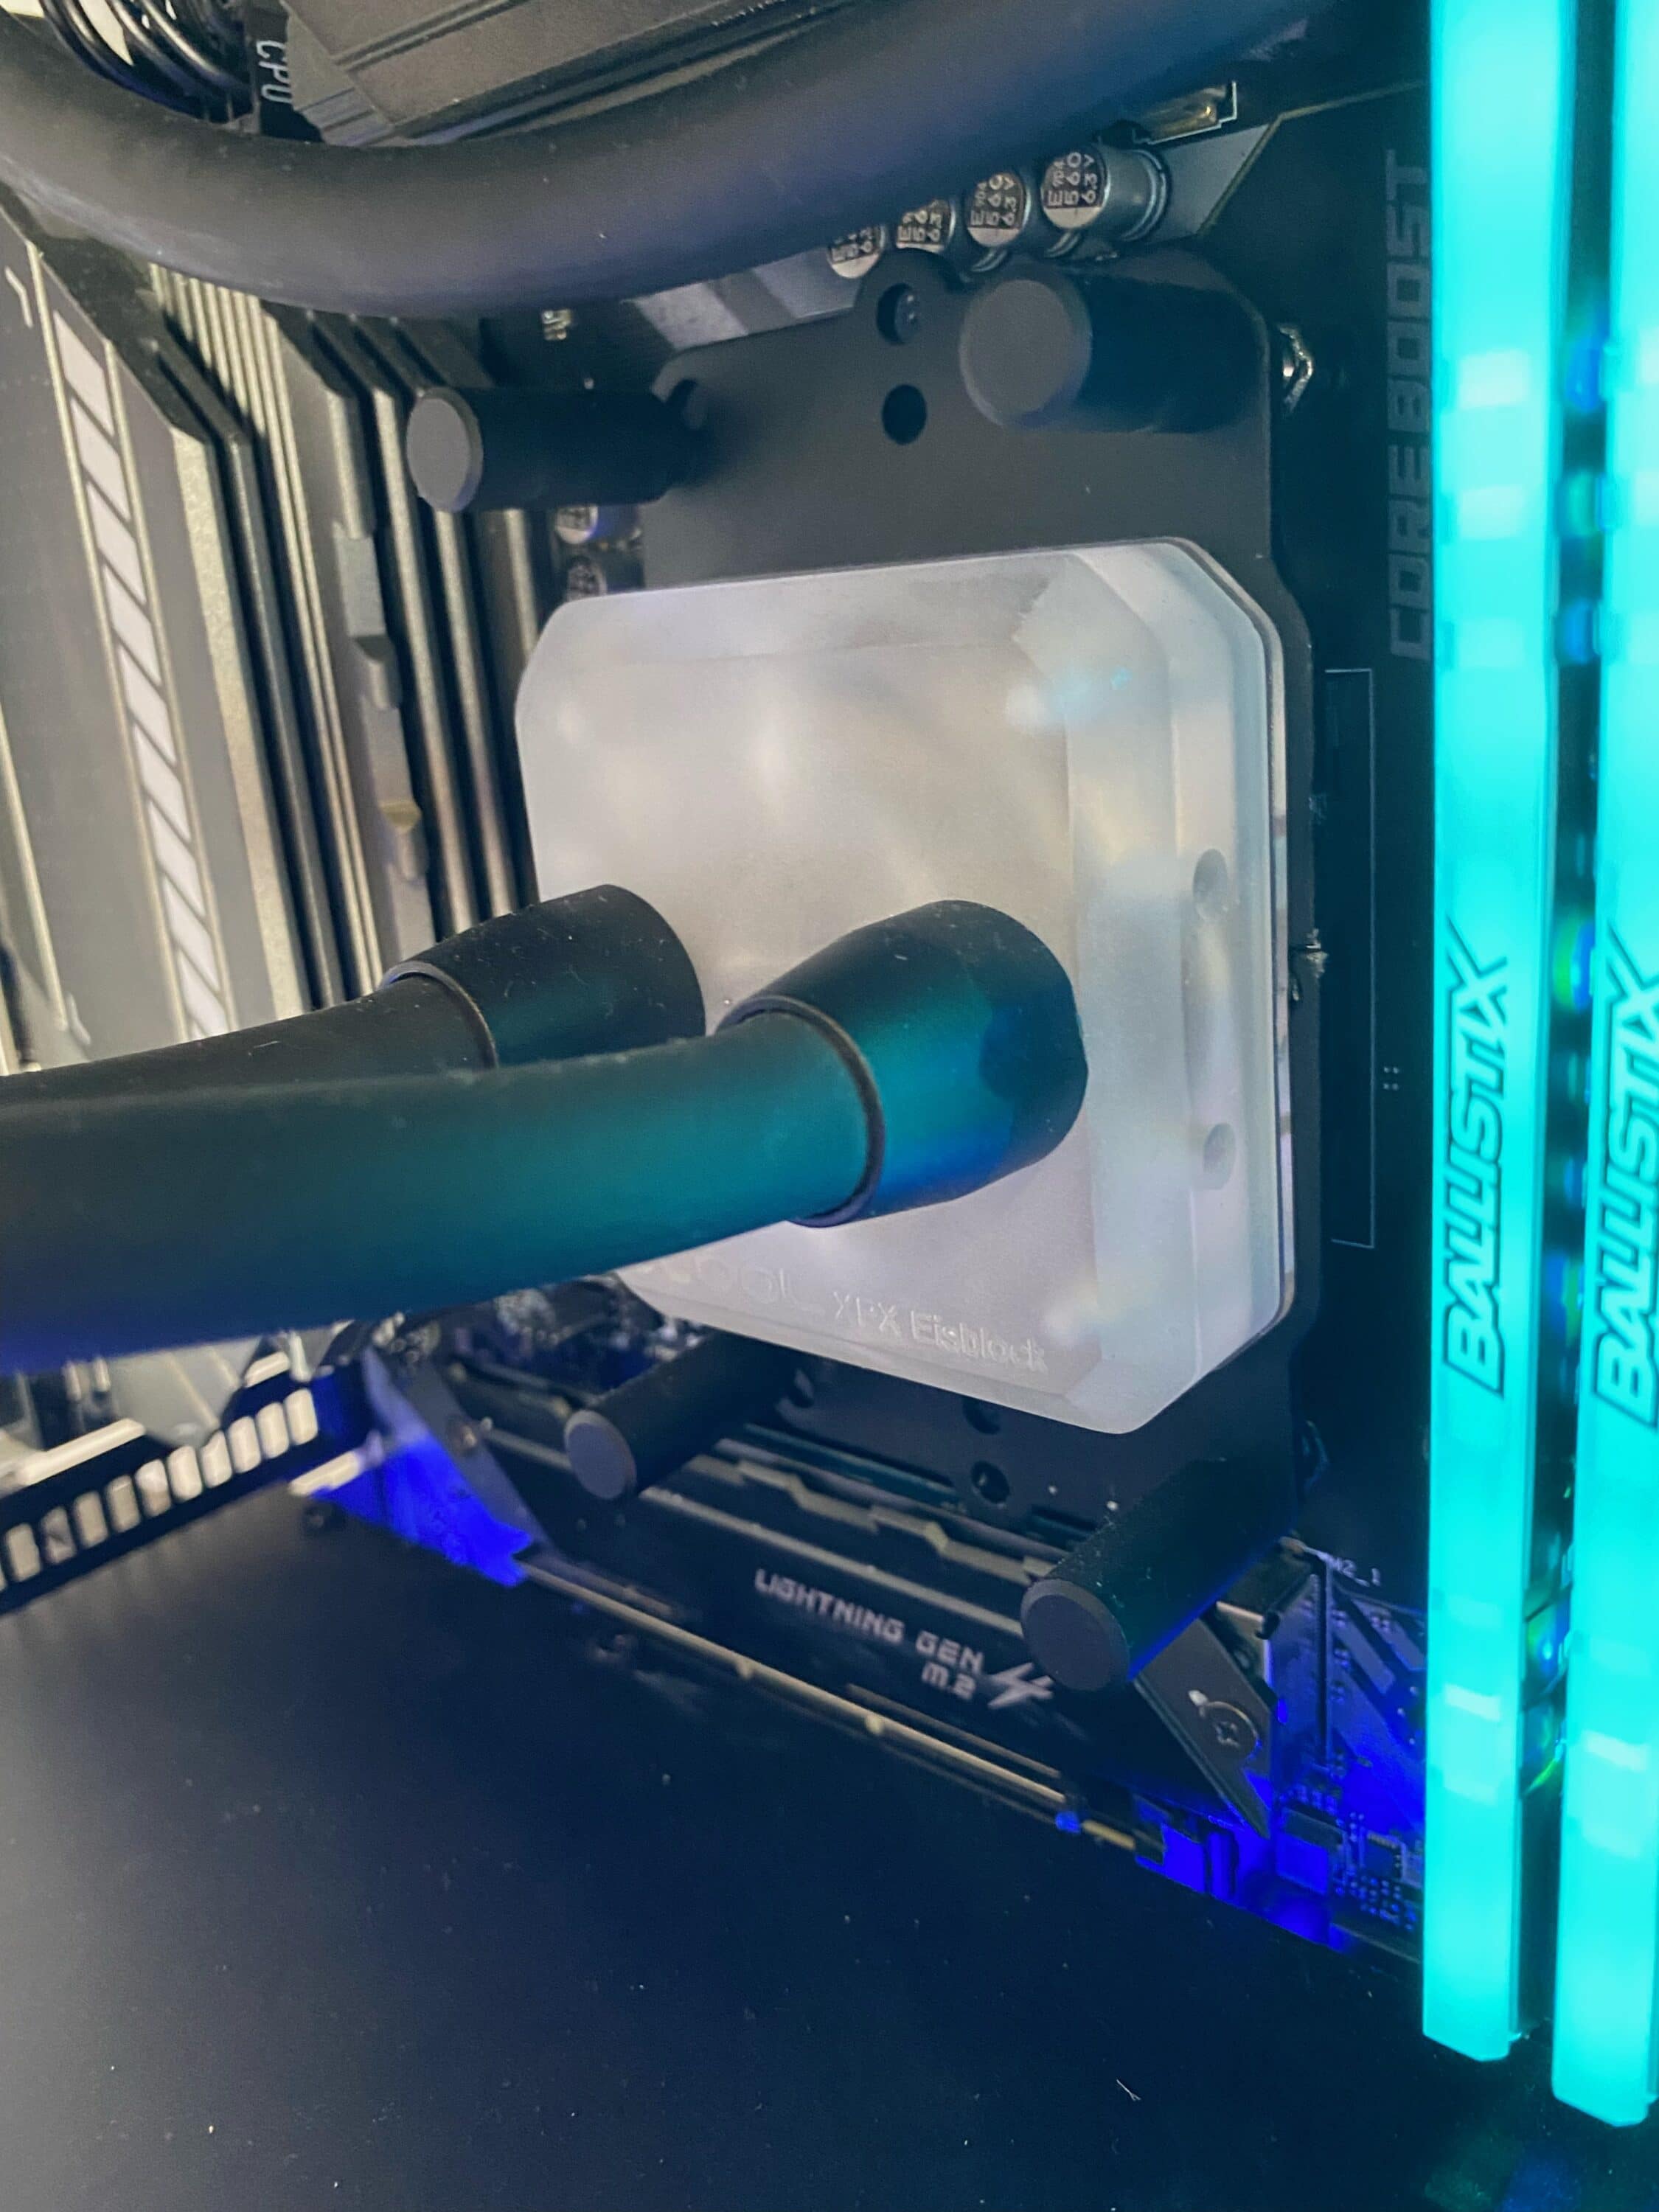
Mounting a CPU water cooler is little to no different than mounting any other cooler. The cooler is usually screwed and fixed with a backplate – again: If in doubt, simply consult the instructions. If you have already assembled a PC, this step should not cause you any problems.
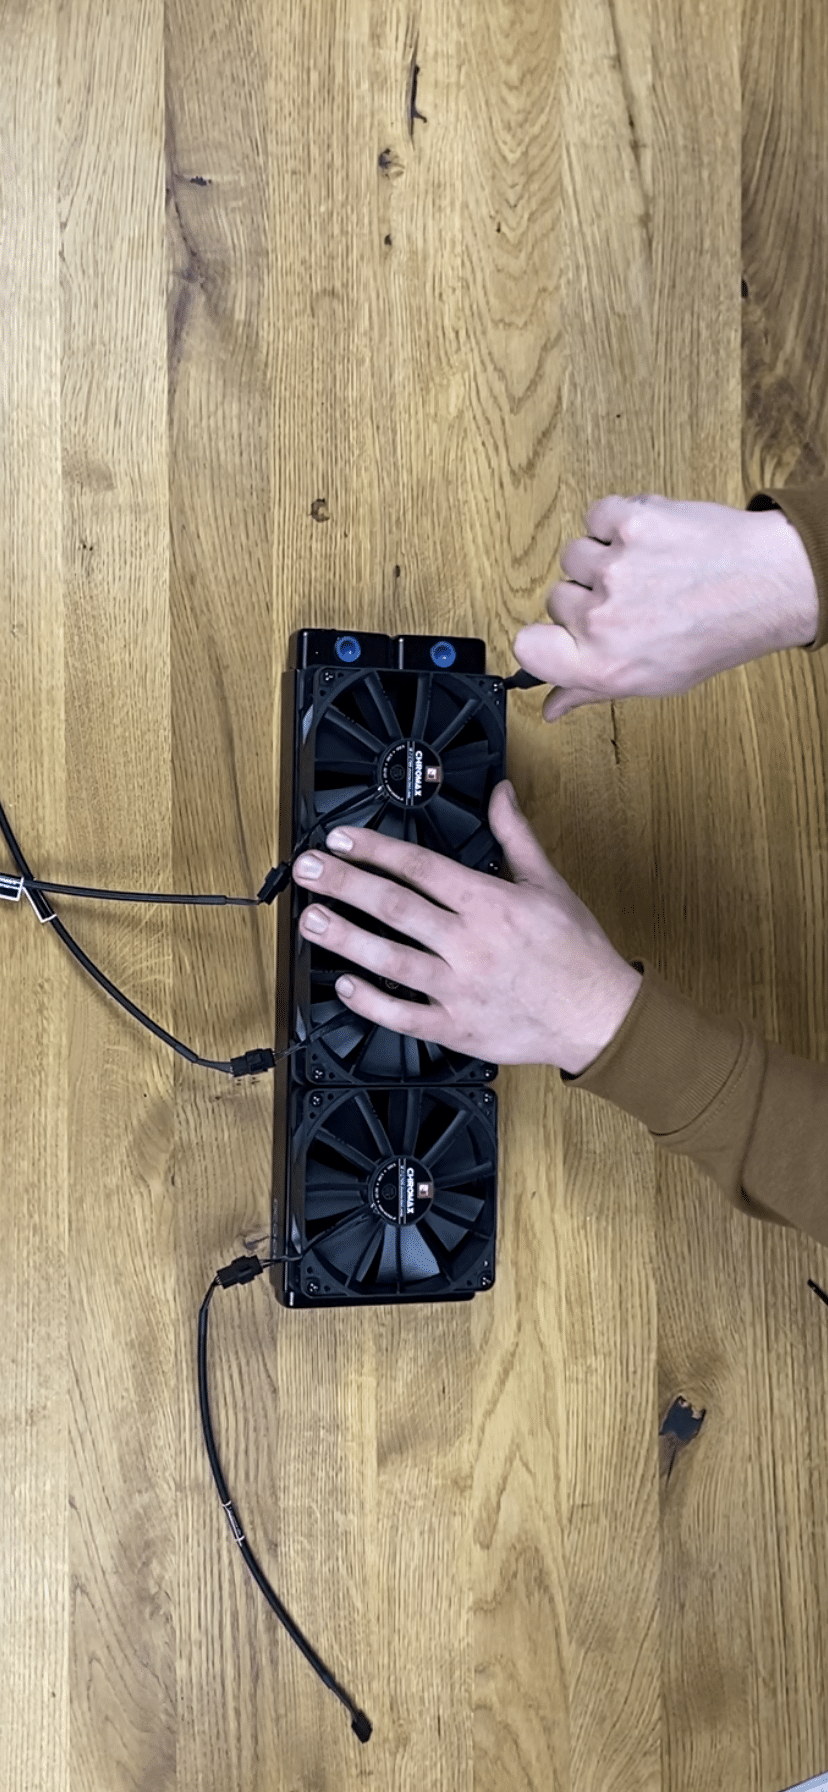
To save you some work later, you can already screw the fans to your radiators. Pay attention directly to the alignment of the fans and the cables – as so often mentioned, planning is everything. Also – check your screw length. Alphacool, for example, includes different screw lengths for different purposes – such as to screw fans to the radiators, but also to screw radiator including fan directly into the case. Do you want to fix your pump to a radiator? Now would be a good time for that as well.
As the last step of preparation, you can already screw your fittings on the components – the “back” part. Some corners in the case are quite hard to reach later – this makes it much easier.
Get the components into the case!
As with building a PC, there are many options for the order in which you proceed. We suggest preparing the PC so that the mainboard including CPU, cooler and RAM are already mounted. It also makes sense to do the case wiring and power supply in advance.
Then we install the radiators. Check carefully if your planning works out: Are your fittings accessible? Is the hose routing possible, or are very sharp bends required? If everything fits, you screw them into the computer.
If you look into your computer, you will notice that hardly anything is missing. Graphics card and possibly pump – start with the pump to take advantage of the space. We have fixed the pump to the rear radiator, so this is already done. Alternatively, look for your free space and screw the pump. A few screws and the next step is done.
Mount the graphics card – Well, take your graphics card, put back the PCIe fixation hook and insert it.

Last but not least, the hoses are still missing. Also here the procedure is very simple. Measure roughly how long your hose should be (rather a bit longer – you can always shorten!). A little waste will not be left out), cut it with your hose cutter, scissors, or similar and connect your circuit. But be careful, do not forget your fixing screws of the fittings!
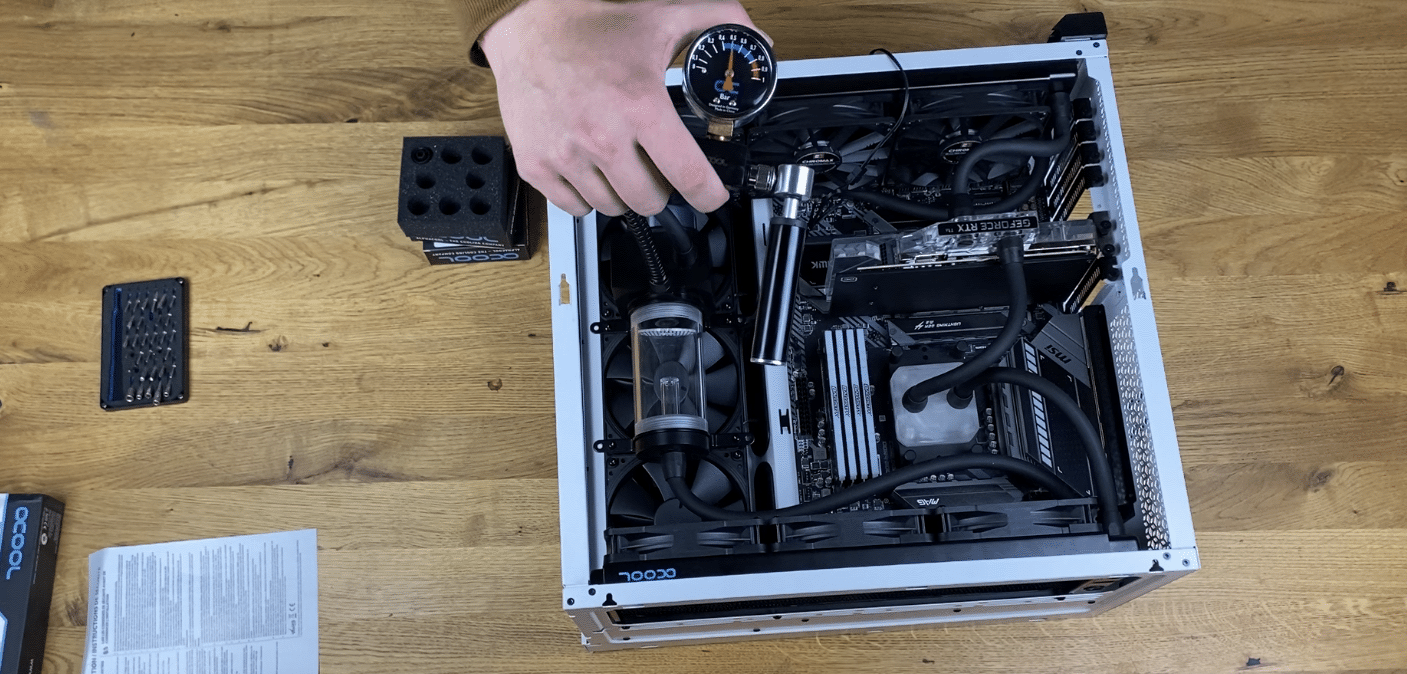
Testing the circuit
Now that you have everything assembled, it’s time to test everything. We use here for the tester from Alphacool, this is definitely the safest way.

This pressurizes the circuit with a pump. You connect this to one of your free ports and pump up to a reasonable pressure – we end up with about 0.3-0.4 bar. Now let the pressure stay on for a while and see if the pressure drops. If the pressure stays constant, you can assume that everything is tight.
If you don’t have such a device and still want to test it, it makes sense to power ONLY the circuit for the time being. For this you can either get a suitable adapter for the 24-pin connector of the power supply, or bridge the required ports yourself. For normal 24-pin plugs, these are ports 16 and 18.
Also line your PC with some cloths, e.g. kitchen roll. This way you can see possible leaks much better and get to the bottom of the cause. If you are sure that everything is properly connected, tight and dry, you can finally turn on your PC.
Final observations – final adjustments
If everything is now running, your components are cool and everything seems tight, you can purge your circuit of air.
Gradually, air will be displaced into the expansion tank by just running. To speed up the process, you can gently tilt your PC back and forth – stubborn air bubbles should also find their way into the expansion tank this way. Once this process is complete, the water level in the expansion tank should not change any further. Pay attention to this – if the water level still drops after some time, you may have a small leak in your circuit – this is where you need to look again for the cause.
The last step is to adjust your fan curves. We are a fan of keeping the fans running constantly, especially with a large amount of radiator area. For example, test with Prime95 and Furmark – or other synthetic load tools – how slowly you can run the fans and pump so that your temperatures are still within human limits.
Conclusion
Building a water cooling system is always a unique project. Everything is very individual, this guide is of course only a guide. If you are interested, it brings a lot of fun – although at a rather high price.
It’s also striking how quiet a PC can be. If the GPU doesn’t rev up and the temperatures stay within limits, it’s already a joy when the PC remains inaudible.
We think it’s a project that’s worthwhile – if you’re up for it! Feel free to leave us comments and – if you have any – questions, we’ll be happy to answer them!