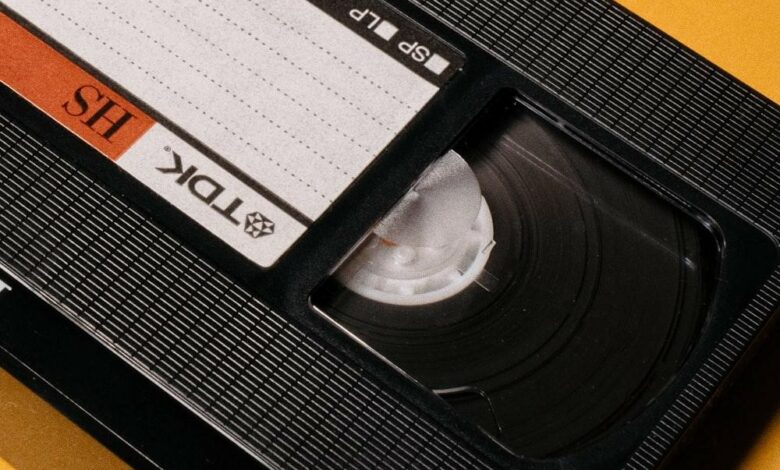
Time waits for no one, and technology comes as no exception. Once upon a time, you may have safeguarded cherished family memories by recording them onto videotape. However, those days are long gone as videotape has become completely obsolete. If you’re like many others, you likely have a stash of VHS tapes gathering dust in a cabinet but haven’t owned a VCR to play them on for over a decade.
While it is possible to convert VHS to digital, it is crucial not to postpone this task for too long. Eventually, the contents of your old tapes will vanish forever as the video quality deteriorates by approximately 20% every 10-25 years. So if you wish to preserve your family VHS tapes as digital video files on your PC’s or laptop’s hard drive, you can accomplish that with ease with the right tools at hand. So let’s dig deeper into the topic of how to convert VHS to digital.
Why to Digitilize Old Formats?
The primary reason to transfer these old analog tapes and reels into a digital format is to ensure that they are not stuck in an outdated medium. However, there are some other good reasons to convert VHS to digital:
- Preservation — By digitizing your personal films, you can prevent them from deteriorating as time passes;
- Restoration — Software programs can automatically fix faded or damaged home movies. Color can be revived and different parts of a video can be seamlessly combined;
- Easy replication — The digital versions can be effortlessly copied with a simple click, allowing you to create extra backups or share them with your family members;
- Smart categorization — By using keywords and tags, you can effectively categorize and search through new files on a computer, online cloud platform, smartphone, or tablet;
- Social media sharing — You have the option to upload your digitized memories to social media sites like Facebook or use them to create a new movie to enjoy with your loved ones;
- Creative family history — Preserving your family events is not only for your own enjoyment but also for the pleasure of future generations. Once your movies are stored on a computer, online cloud platform, or disc, they can be viewed long after you have passed away.
How to Digitize VHS Tapes: Mail-in Services
If you’re short on time or want to entrust this task to professionals, there are many mail-in services, such as LegacyBox, that can digitize your VHS tapes for you. Prices and delivery methods may vary depending on the firm you pick; some will return DVDs, while others will save your media to a flash drive or as files that can be retrieved from the cloud. But it can be an option if you do not have the time or resources to digitalize VHS tapes yourself.
How to Digitize VHS Tapes by Yourself
To convert VHS to digital, you’ll need these things:
- A computer running video capture software
- A video capture device such as a TV tuner card
- A video capture card, or an external USB video capture device
- A VHS player like a VCR.
Converting VHS to digital is simple. To convert VHS to digital you need to:
- Attach your VHS converter to your computer
- Then connect your VHS to digital converter to your VCR
- Download the dedicated software solution and follow the instructions below
Step 1: Connect the Video Capture Equipment
For USB video cassette converters, just connect the converter to a spare USB port; if you wish to convert a cassette to digital employing a TV tuner or frame grabber card, open your computer and insert the device in a free expansion slot.
Step 2: Connect Your VCR
The process for VHS-to-PC converters is similar. To convert your VCR to digital, you will need to utilize an RCA cable or an S-Video cable. The former communicates both audio and video, while the latter just transmits video. So you’ll still need RCA connectors for the right and left stereo audio tracks. To connect RCA connectors to a PC’s sound card, such as a Windows 10 PC, use a cable with RCA plugs on one end and an audio cable of 3.5mm on the other. That should connect directly to your PC sound card’s Line port, with the RCA connectors going into your VCR’s Line Out.
Step 3: Insert Your VHS Tape
Finally, turn on your computer and wait for the notice indicating Windows has discovered your gear. Now, insert the first VCR tape you wish to digitize and focus your attention on your VHS capture program.
If you already own VHS-to-PC software, that’s excellent. If not, we recommend the Movavi VHS Converter or Elgato Video Capture for this purpose. Both of them are easy to use yet provide excellent results.
Step 4: Install the Software
Download the software, launch the installer, and then follow the on-screen instructions. Now open the app and choose “Record Video.” This allows you to record video from any source, including VCR tapes, cameras, webcams, and other devices.
Step 5: Set Your VHS Capture Options
Now, you should specify the hardware to employ in your video capture program. In most circumstances, while converting VHS to PC, the software will discover the correct devices automatically; however, if it does not, you may do it manually:
- Video capture device — Your TV tuner, capture card, or USB capture device;
- Audio capture device — There is a high chance that your PC’s sound card, unless you’re obtaining your audio from another source;
- Save files to — This is the folder in which you wish to store your recorded films.
Step 6: Start the VHS Conversion
It’s time to save the video to your computer. Don’t worry, it’s not as difficult as it sounds. Simply click the “Start Capture” button and then hit play on your VCR. When you wish to stop, just click “Stop Capture.” Congratulations! You have converted your first videocassette to digital. It will be saved automatically in the folder you choose. You can then edit the video and adjust it to your needs with the dedicated programs if necessary.
Choose Your Best Method to Transfer VHS to Digital
With the correct technology and software, it’s simple to scan old VHS videotapes, edit, store, and share them with others. Regardless of the quality of the video recording, VHS is not a high-res format; its resolution isn’t as excellent as 720p HD, much alone Full HD or 4K. That means you don’t have to spend a lot on a strong video capture device capable of handling enormously high-resolution video: the quality you obtain will always be as good as what’s on the original VHS tape (though dedicated tools may help you make it clearer).


